The Commerce module allows you to automate and transform table data (such as Excel tables) associated with a specific marketplace, product, and business partner, and pass this data using streams from the Vendor to Distributor accounts on the CloudBlue Connect platform.
The Commerce module allows you to create billing streams that are used to quickly and easily initiate the billing flow in your supply chain. Such streams are also used to organize your incoming billing batches and configure associated products, marketplaces, and attributes for your billing flow.
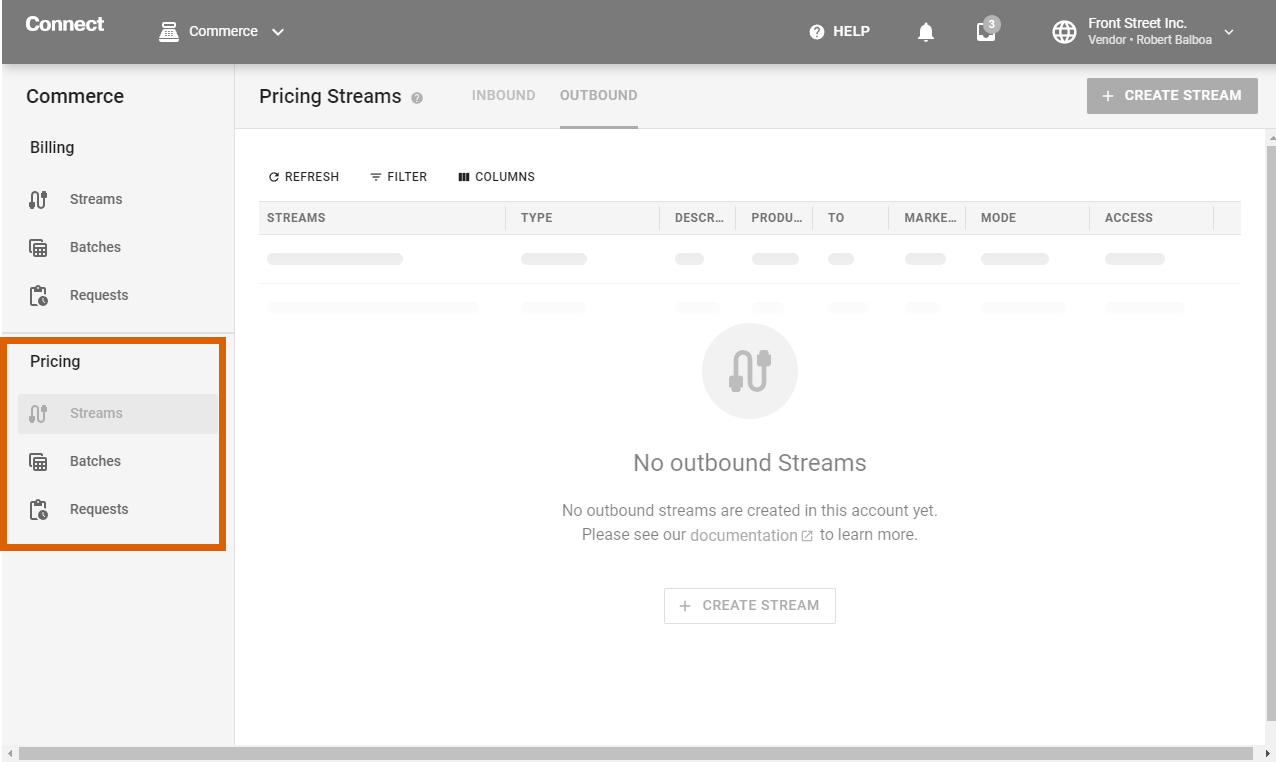
Streams created and configured by your organization are available on the Outbound tab while streams generated by your business partners can be found on the Inbound tab. Note that inbound streams are not available for Vendor accounts as all data streams generally start with Vendor operations.
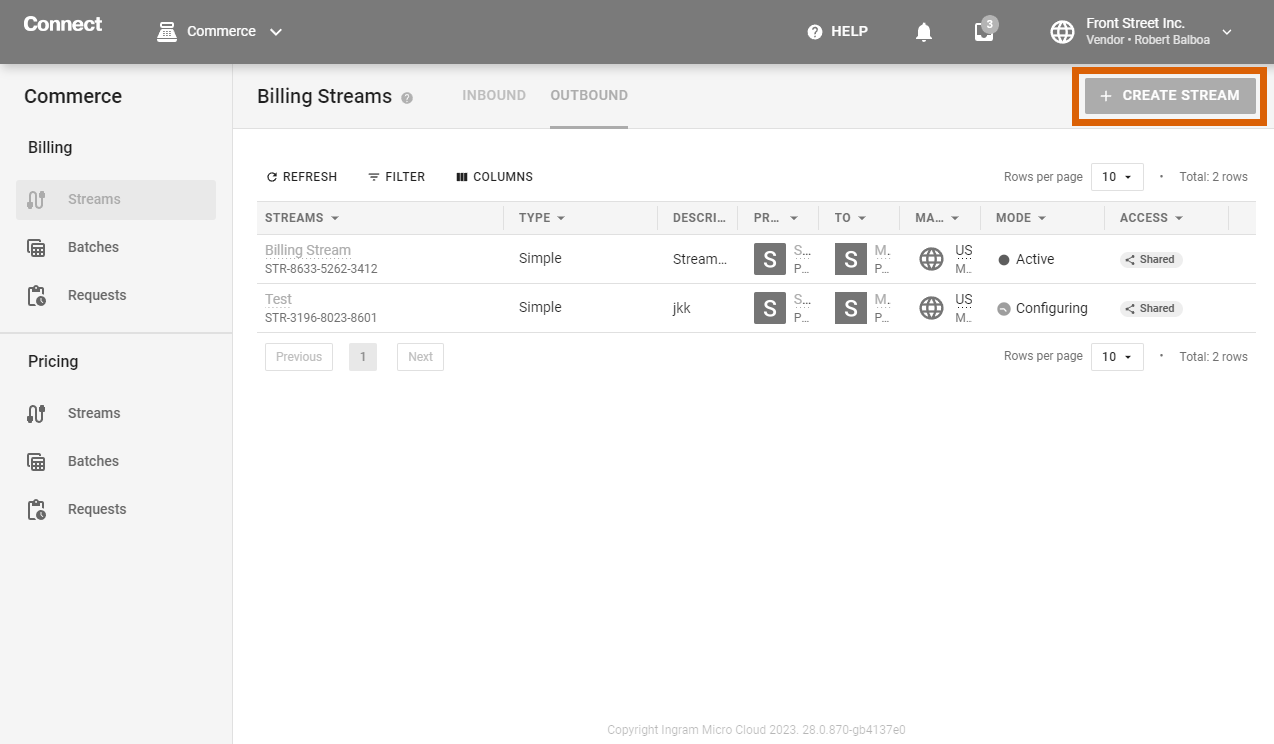
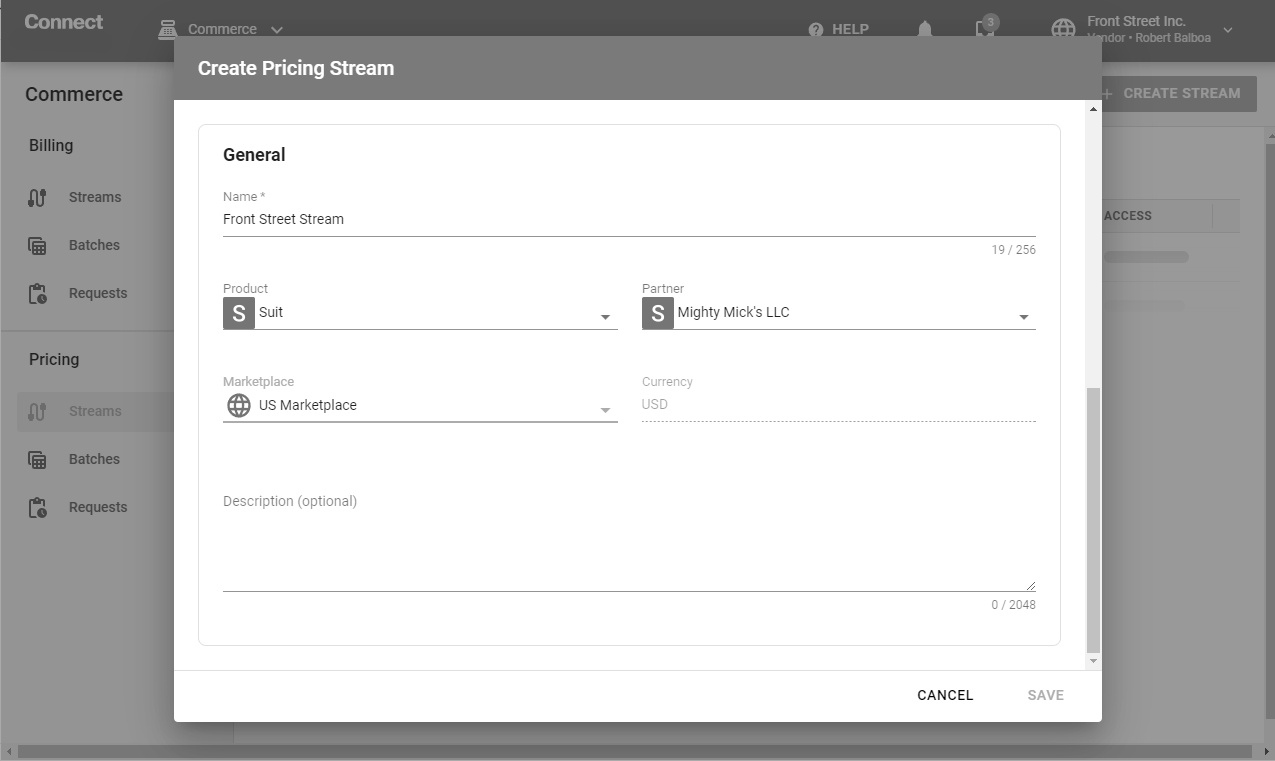
Access the Outbound tab to start creating a new stream object. Specifically, click the Create Stream button at the top-right corner and use the following form:
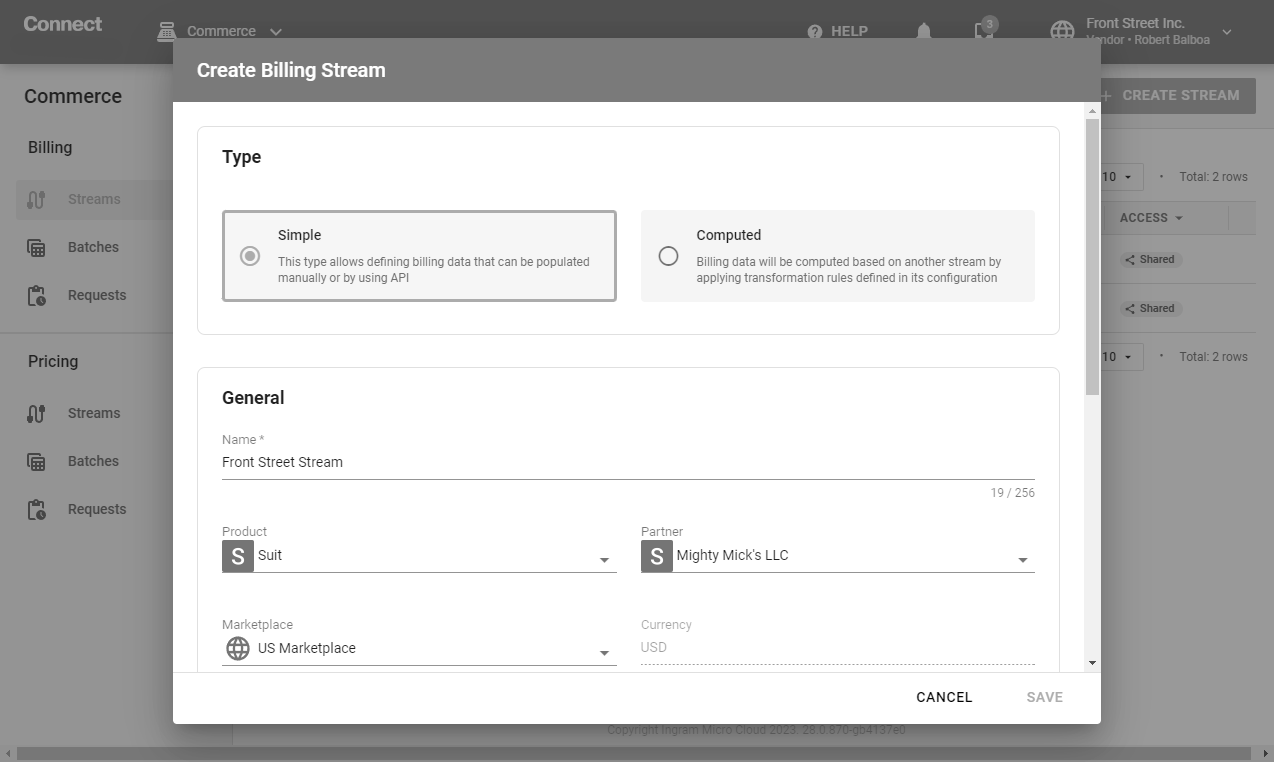
Once all required fields are filled out, click Create to successfully finalize your stream creation. Therefore, your stream will be available within the Outbound tab and will allow creating billing batches associated with this stream. The system also allows accessing details of your available stream objects as described below.
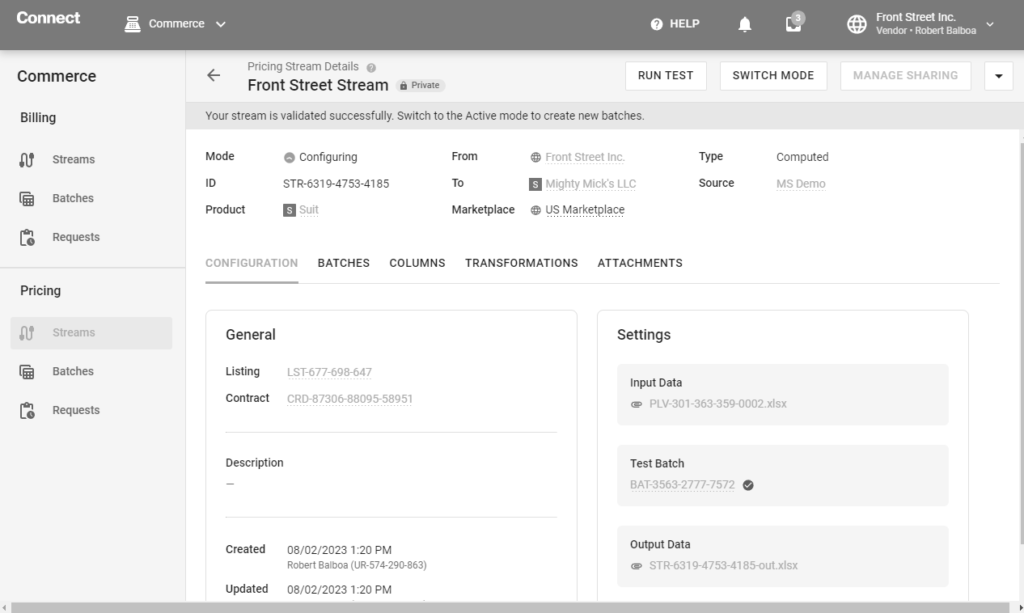
Click on a stream object name from inbound or outbound list to access the Stream Details screen.
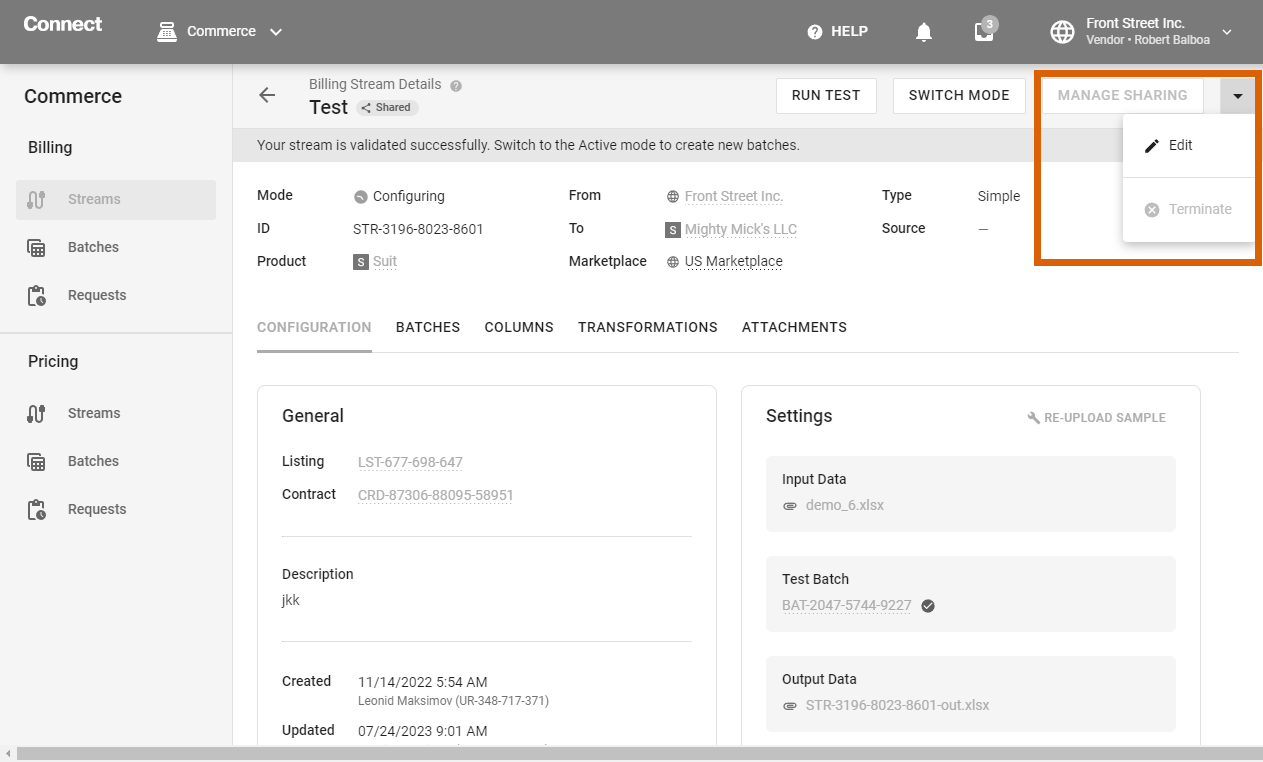
This screen provides various information on your selected stream, such as its type, identifier, associated marketplace, currency, and more. It also displays status of your stream that can change if an input file is uploaded, error occurs, etc.
Use the additional menu (▼ at the top-right corner of the screen) to edit your stream name, description or batch publishing settings or terminate your billing stream.
Access more information and various operations with your stream by using the following tabs and buttons:
The Configuration tab is used to upload/re-upload your input file and review general insights information on your selected stream.
The General widget showcases your batch publishing configuration, stream description, upload and creation date.
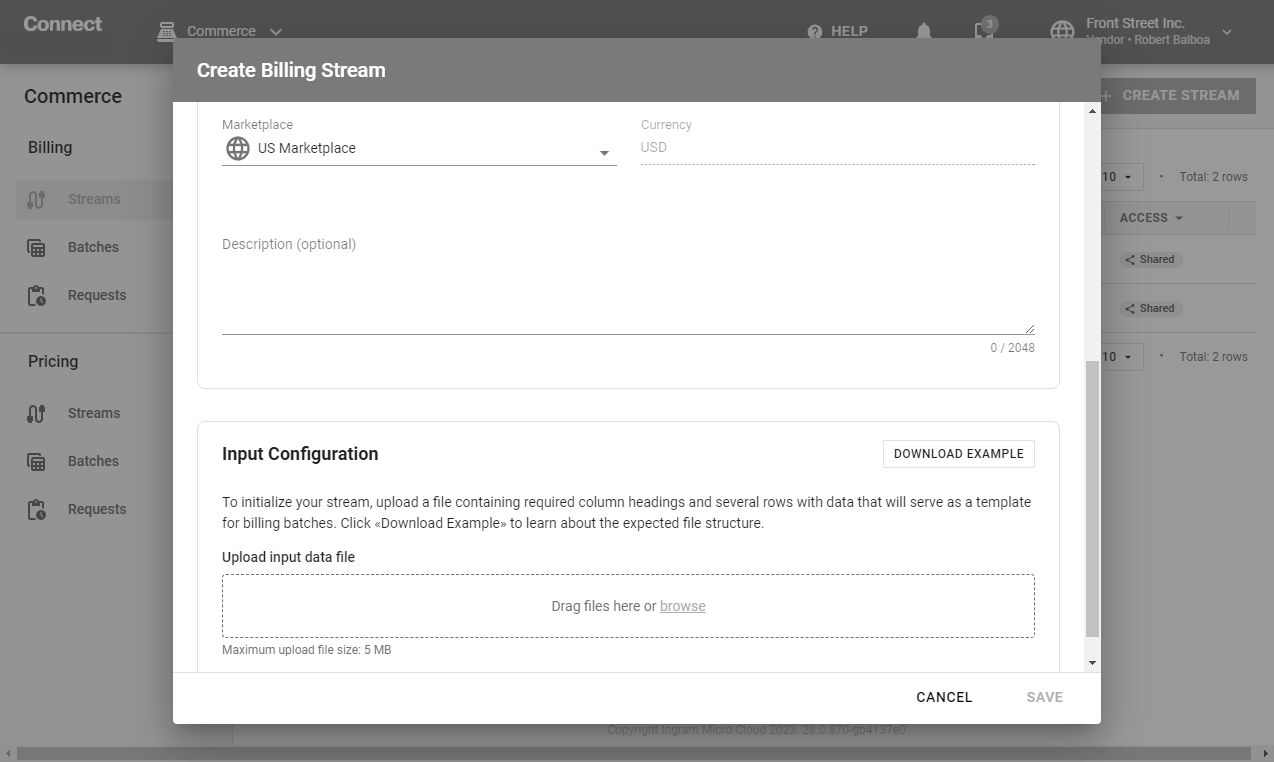
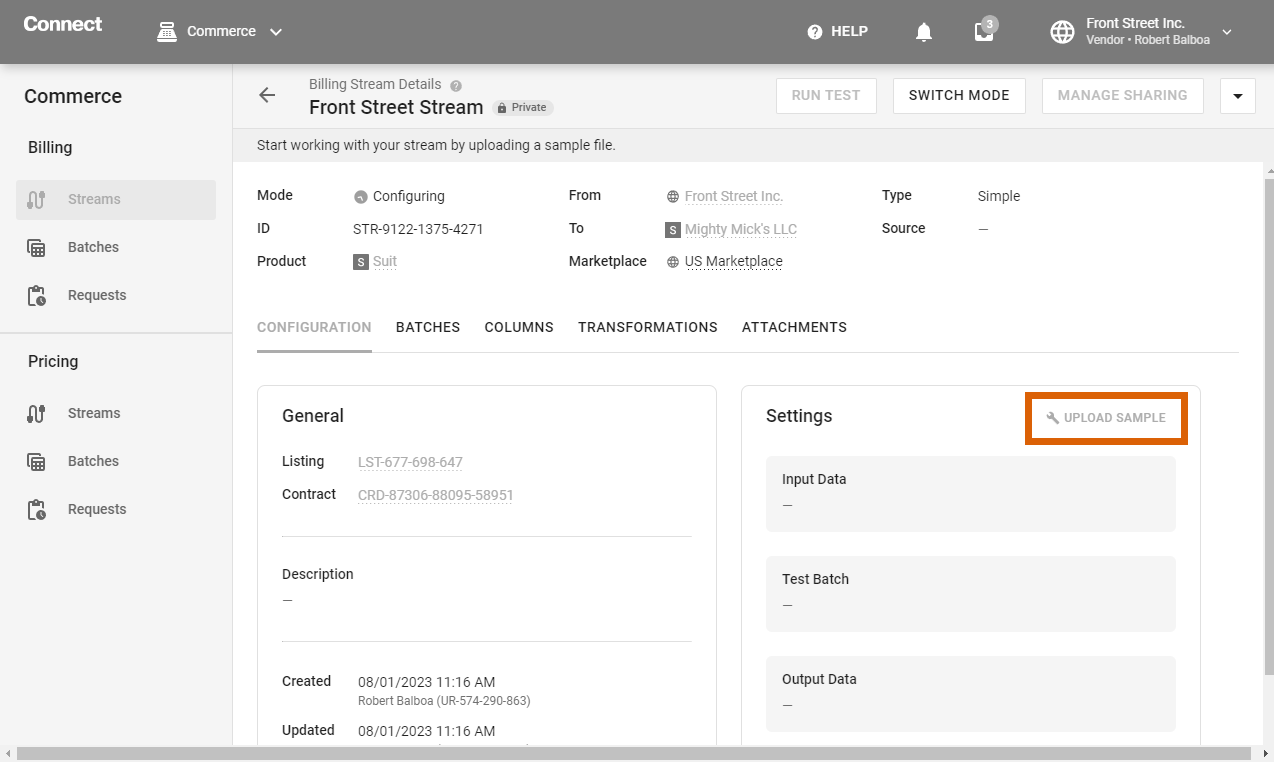
This Settings widget is used to manage your input data for your selected stream. In case an input file is not uploaded to Connect, use the Upload Sample button to provide your input spreadsheet file:

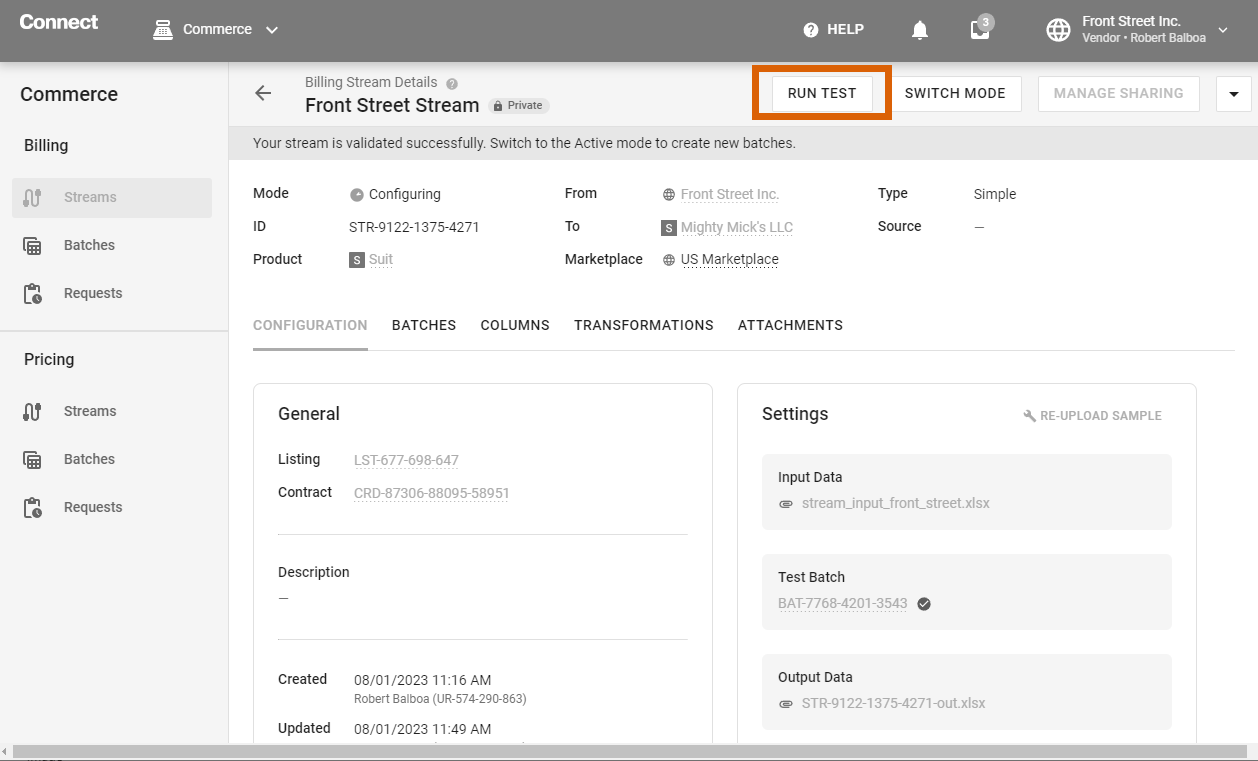
The Settings widget allows you to reupload the input file for your simple stream and modify your stream’s output by using the Re–upload Sample button.
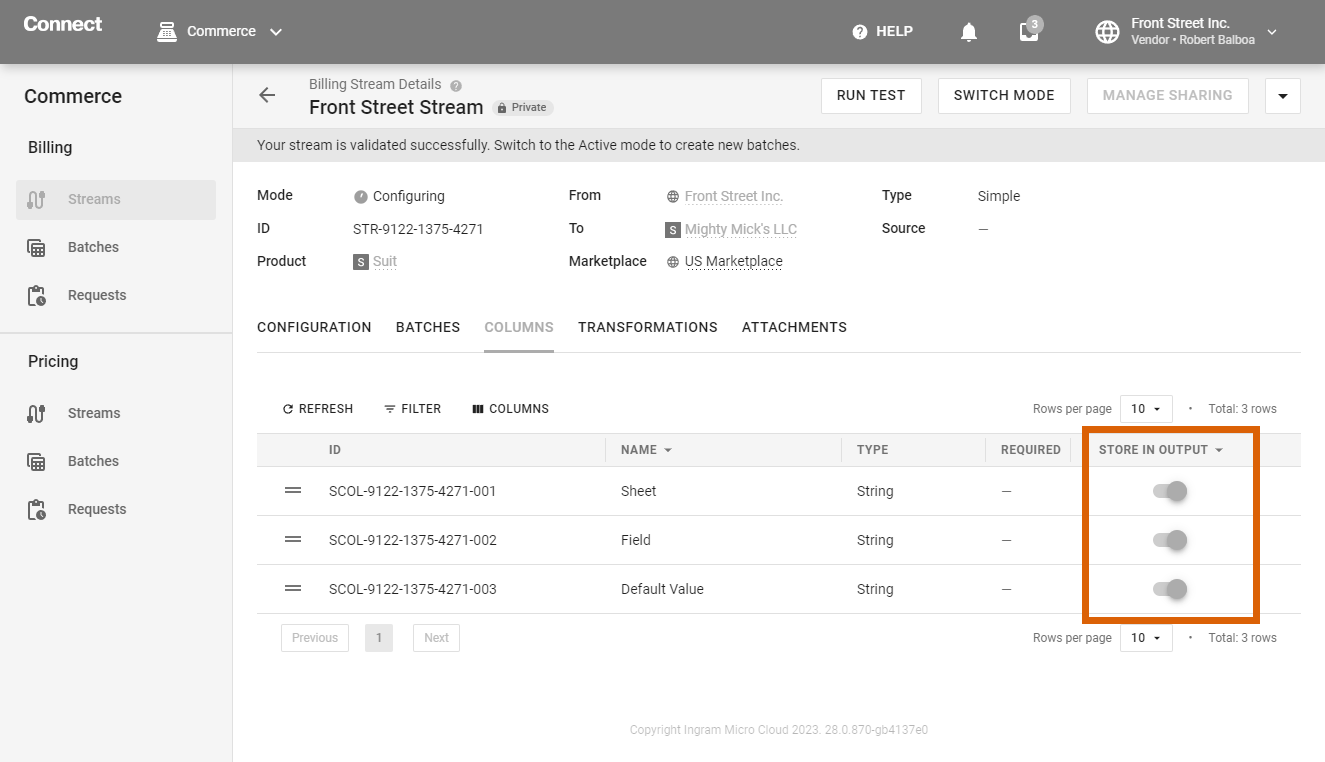
The Columns tab allows accessing all data columns that are uploaded to your selected stream. This tab provides a data grid that displays detailed information on each column, such as origin, type, name, description, and more.
The provided data grid allows including or excluding your defined columns. Included columns represent selectors that define output for computed streams. Such selectors can be managed by using their corresponding toggle switch in the UI:
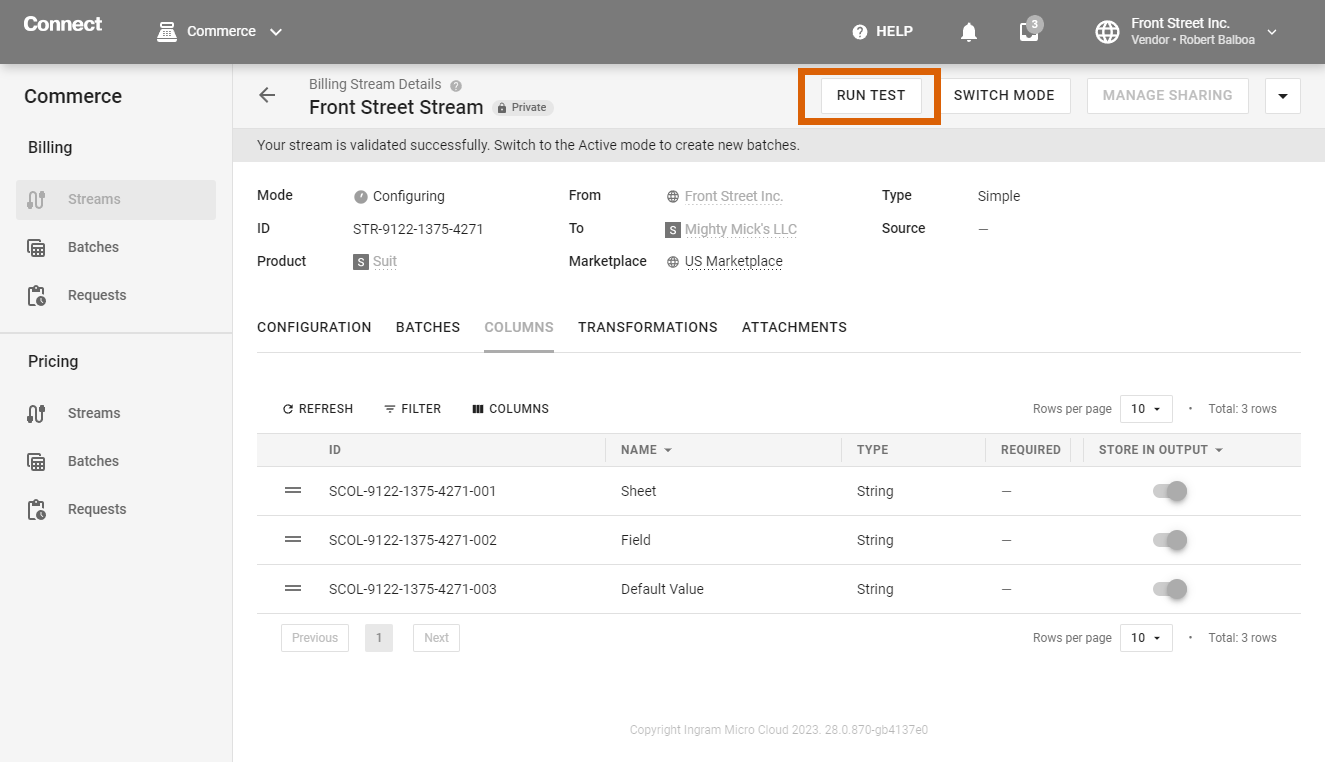
In case your selectors are changed, ensure to validate your stream by using the Run test button at the top-right corner of the screen.
Note that only columns that are stored in the output can be used as selectors. For more information on selectors and billing stream specifications, refer to the Key Concepts & Terminology article.
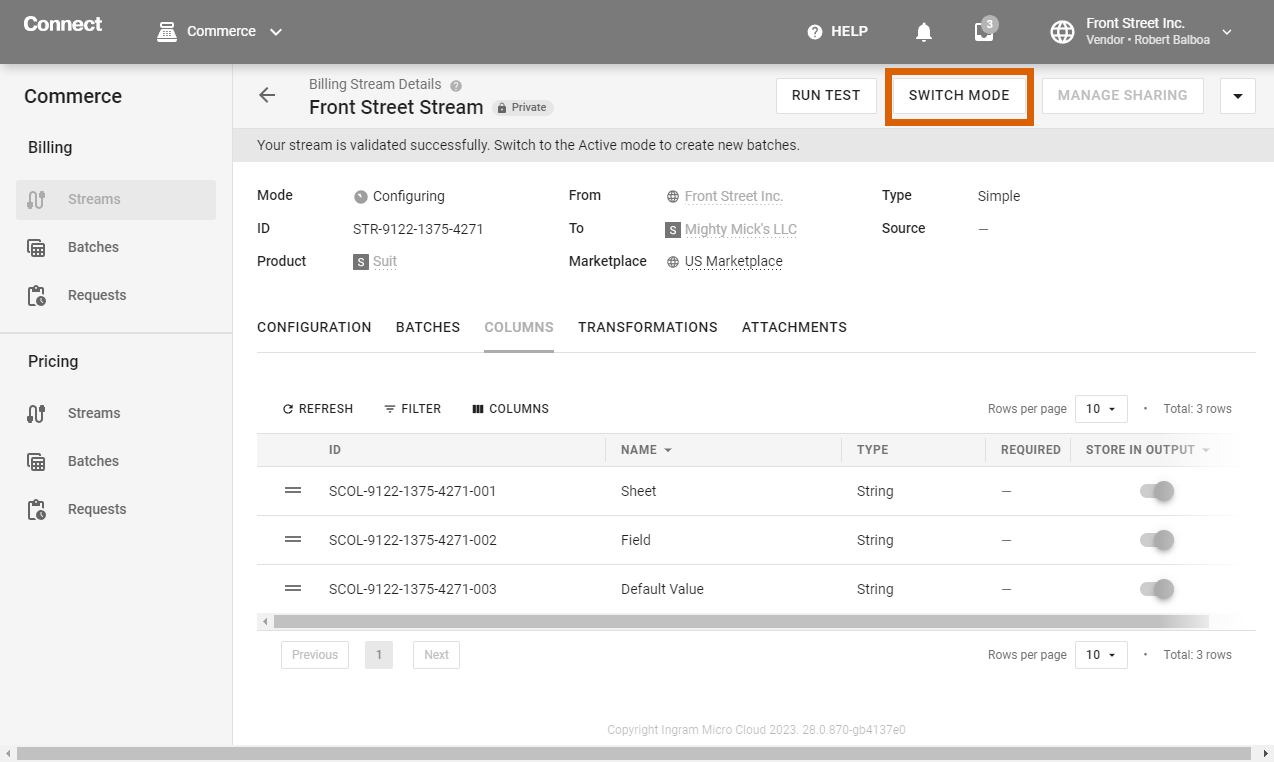
Once your stream configuration is finished and corresponding settings are validated, your stream can be activated by using the Switch Mode button at the top-right corner of the screen.
Consequently, the system allows selecting one of the following modes for your stream:
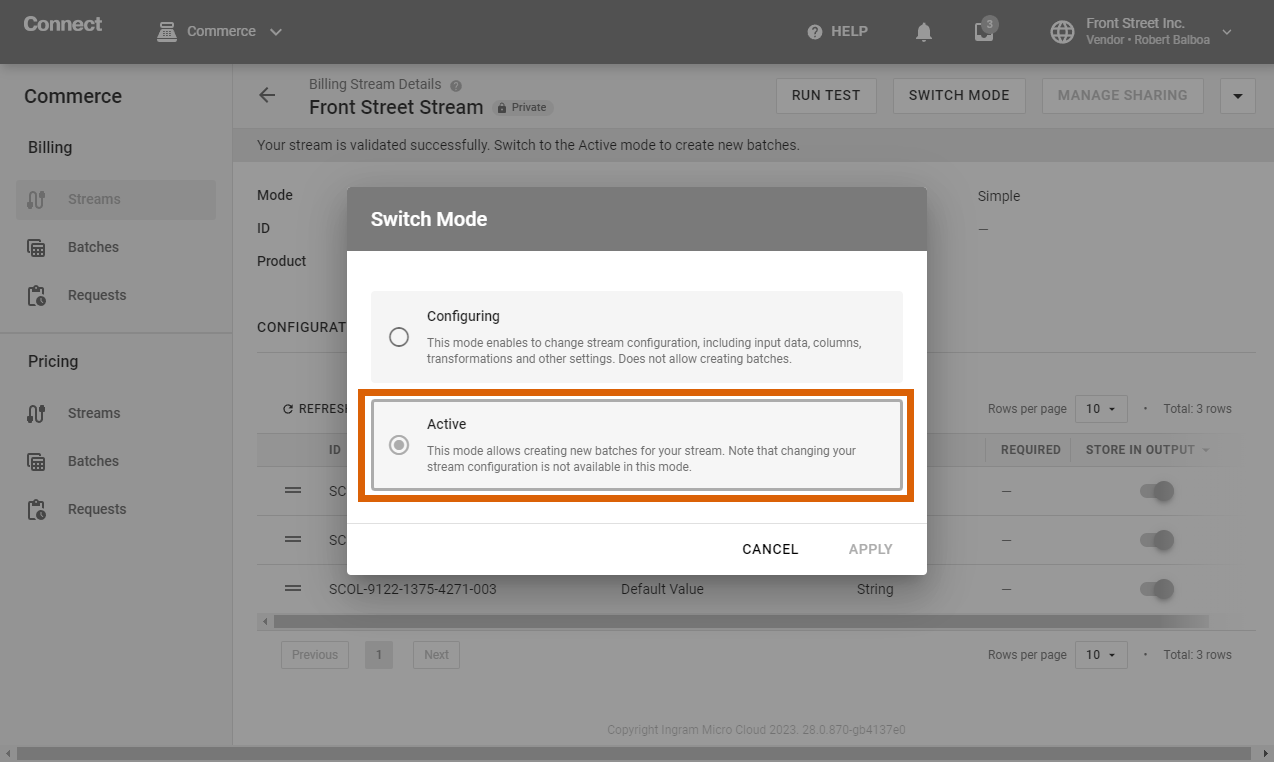
Confirm your mode selection by clicking the Apply button.
This Batches tab provides a data grid for all billing batches that are associated with your selected stream. Along with the batch identifier, description, and status the data grid also includes various insights, such as total price, total cost, and a number of subscriptions that are interconnected with each batch.
Once your stream is switched to the Active mode, create a new billing batch for your selected stream by clicking the Create button within the Batches tab:
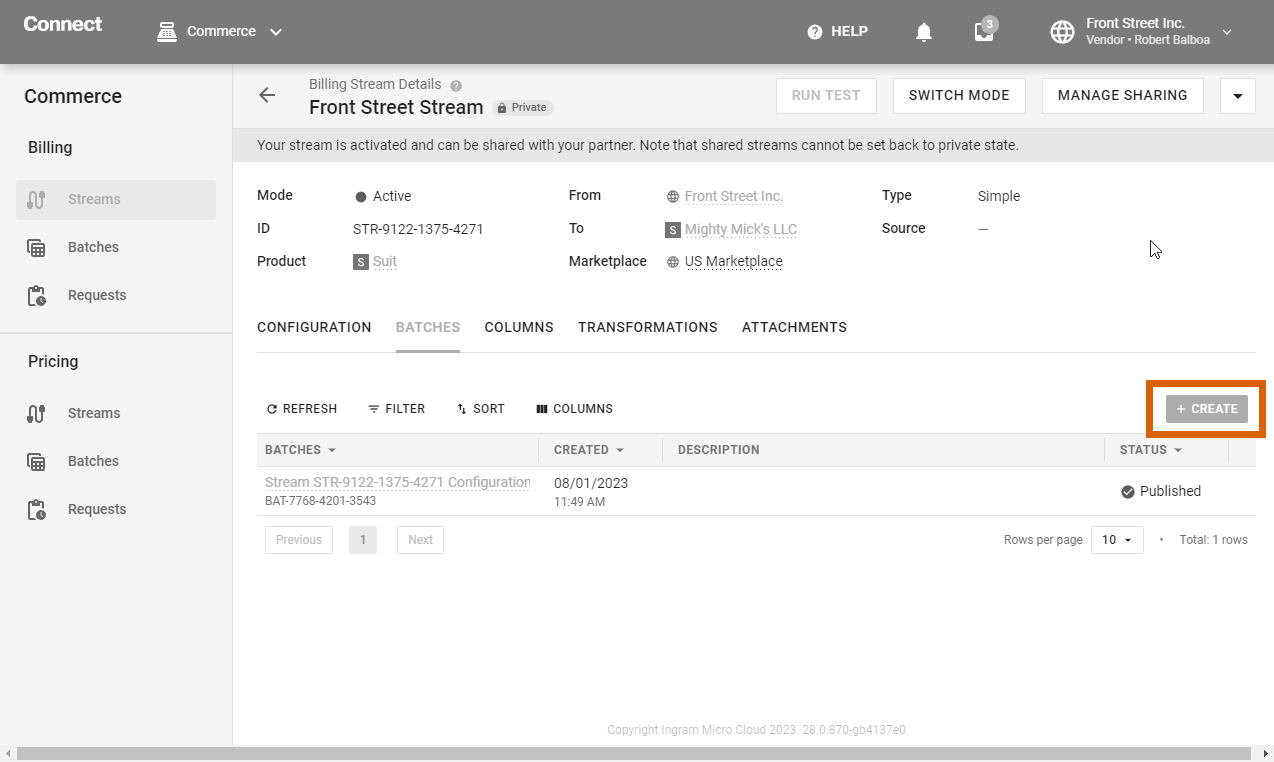
This functionality redirects to the batch creation form that is described under corresponding heading on this page.
Your stream remains in the Private state and cannot be shared until it is switched to the Active mode. Once your stream is switched to this mode, use the Manage Sharing button at the top-right corner of the screen to access the following options:
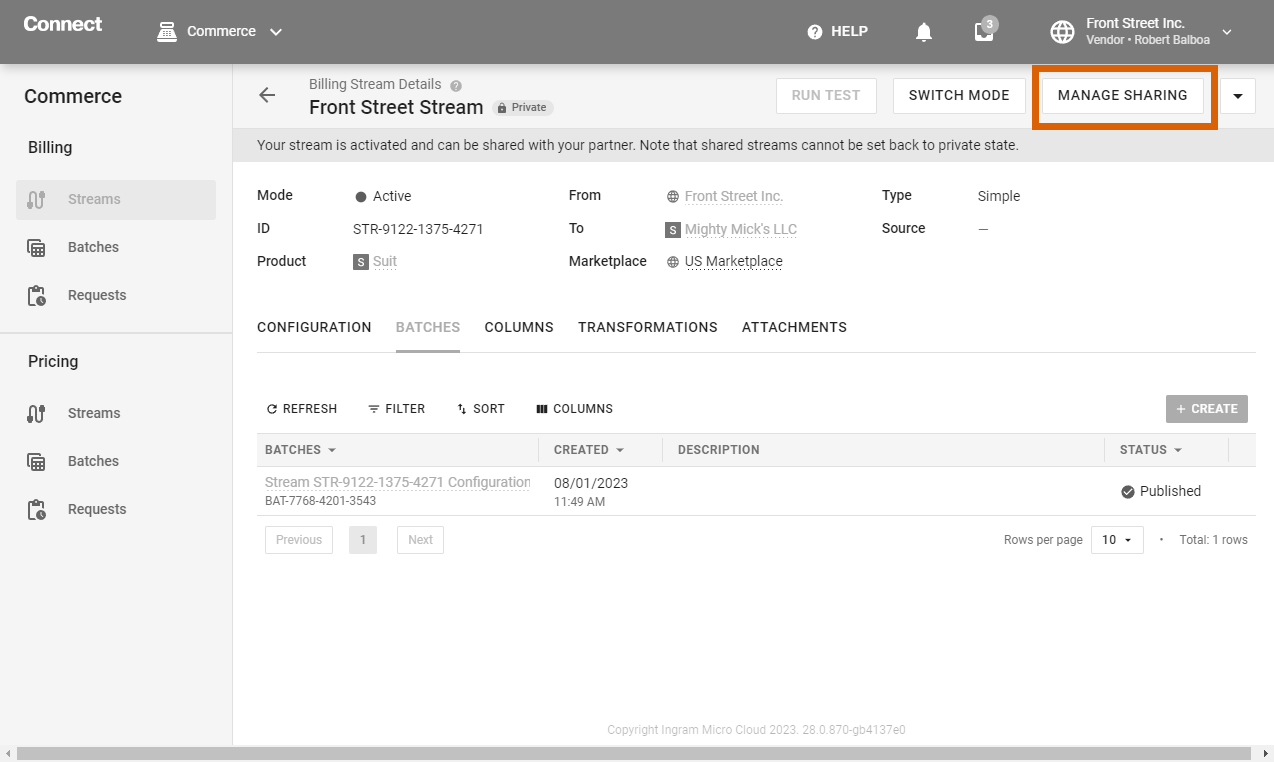
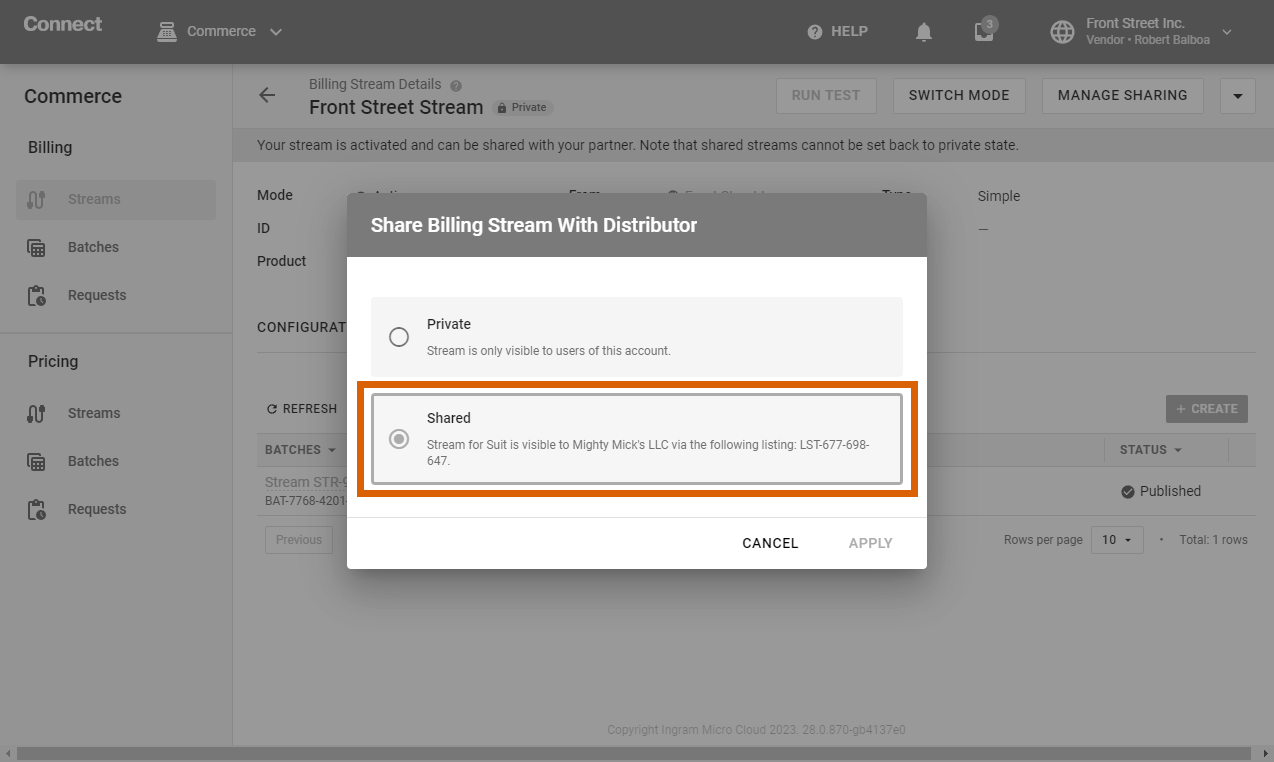
Confirm your mode selection by clicking the Apply button. Therefore, your stream will be shared with your specified business partner.
Billing batches are created and managed via the corresponding Batches section. Billing batches that are created by your organization are available within the Outbound tab. Distributors and Resellers can access incoming batches by using the Inbound tab.
Note that the Inbound tab is not available for Vendors since such accounts typically do not receive any billing batches from their business partners.
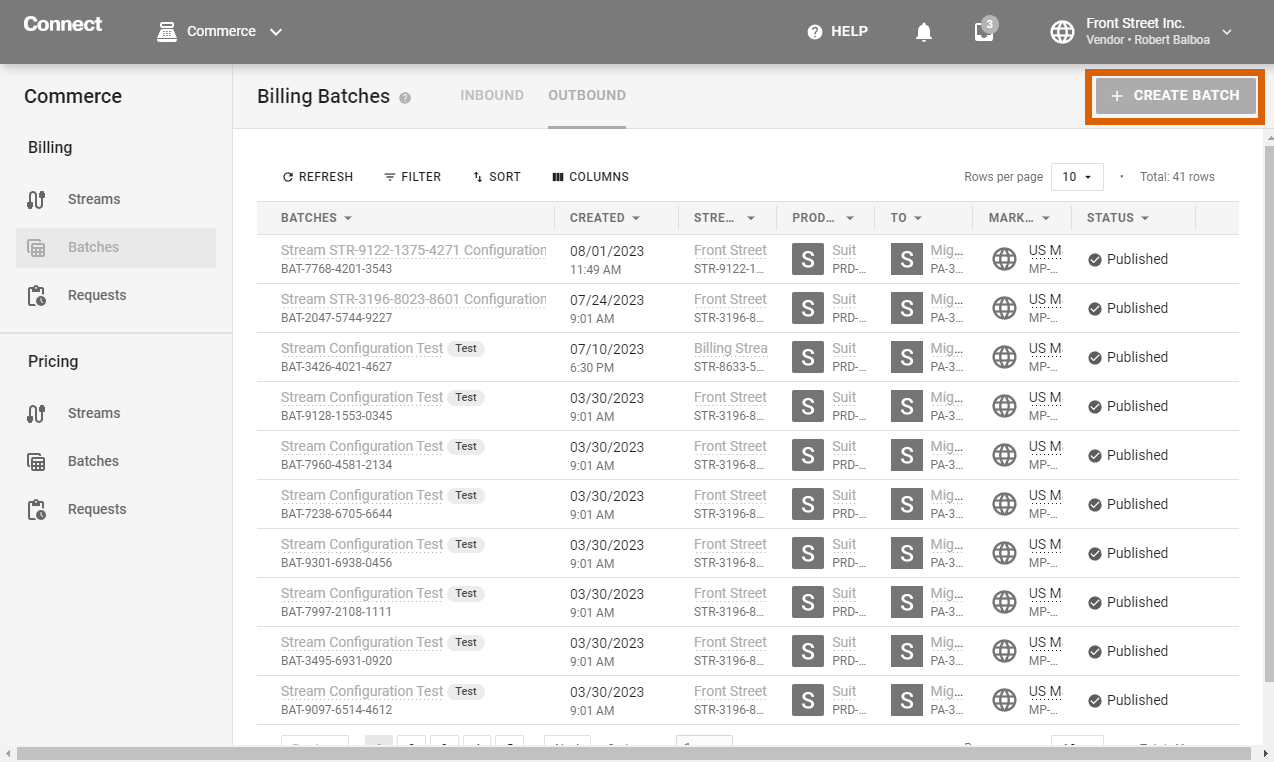
The system allows creating new billing batches by using the Outbound tab. Make sure to have at least one billing stream in the Active mode before starting to work with its associated batches. Note that creating billing batches is available for Simple streams only.
Create a new billing batch via the Create Batch button at the top-right corner. Consequently, use the following form to configure your new batch:
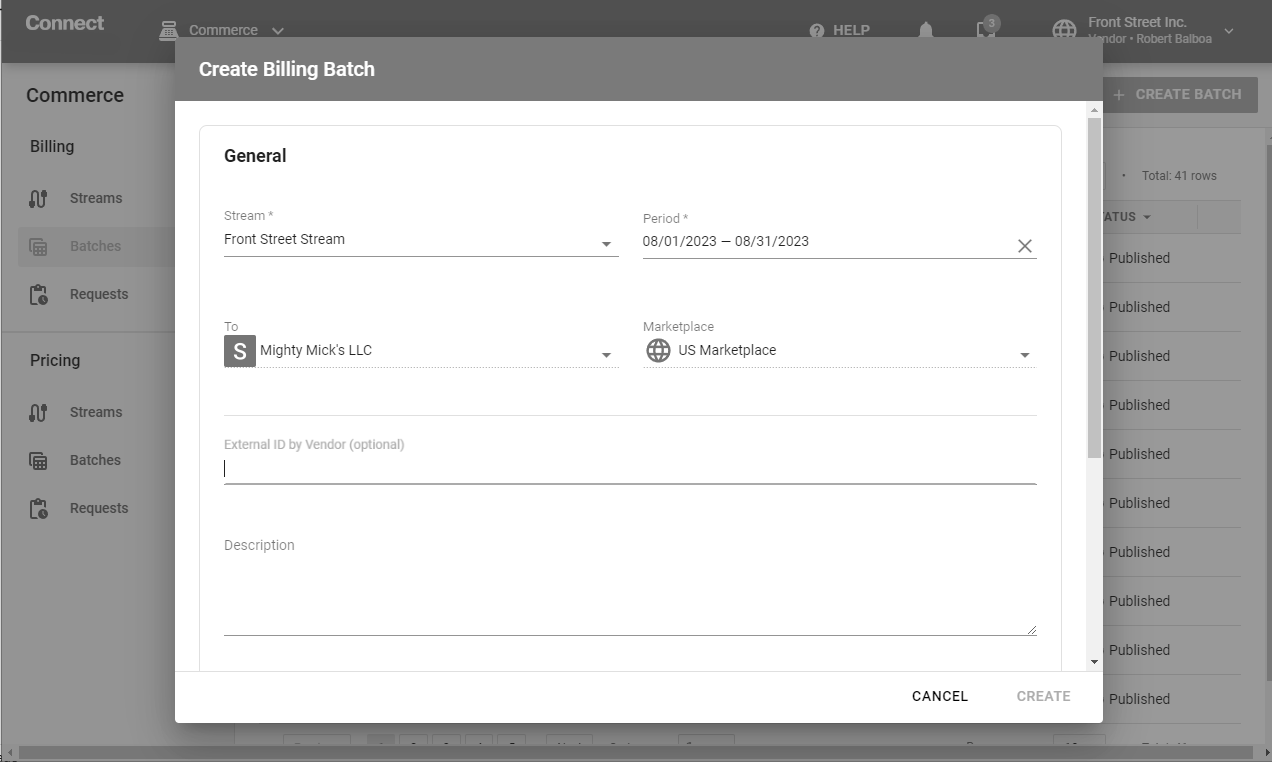
When the provided form is filled out, click Create to finalize your billing batch creation. Note that your billing batch will be automatically shared with your specified business partner in case the automatic batch publishing option is selected for your stream.
Your created billing batch can also be reviewed and edited by using the Billing Batch Details screen and published manually as described below.
Access the Batch Details screen by clicking on any available batch object from the Inbound or Outbound batches list.
This screen is used to publish your batch by sending it to your business partner and access detailed information on your selected batch, such as its status, identifier, associated marketplace, interconnected stream, and other insights.
Batch details also allows accessing additional information and performing more operations with your batch object by using the following tabs:
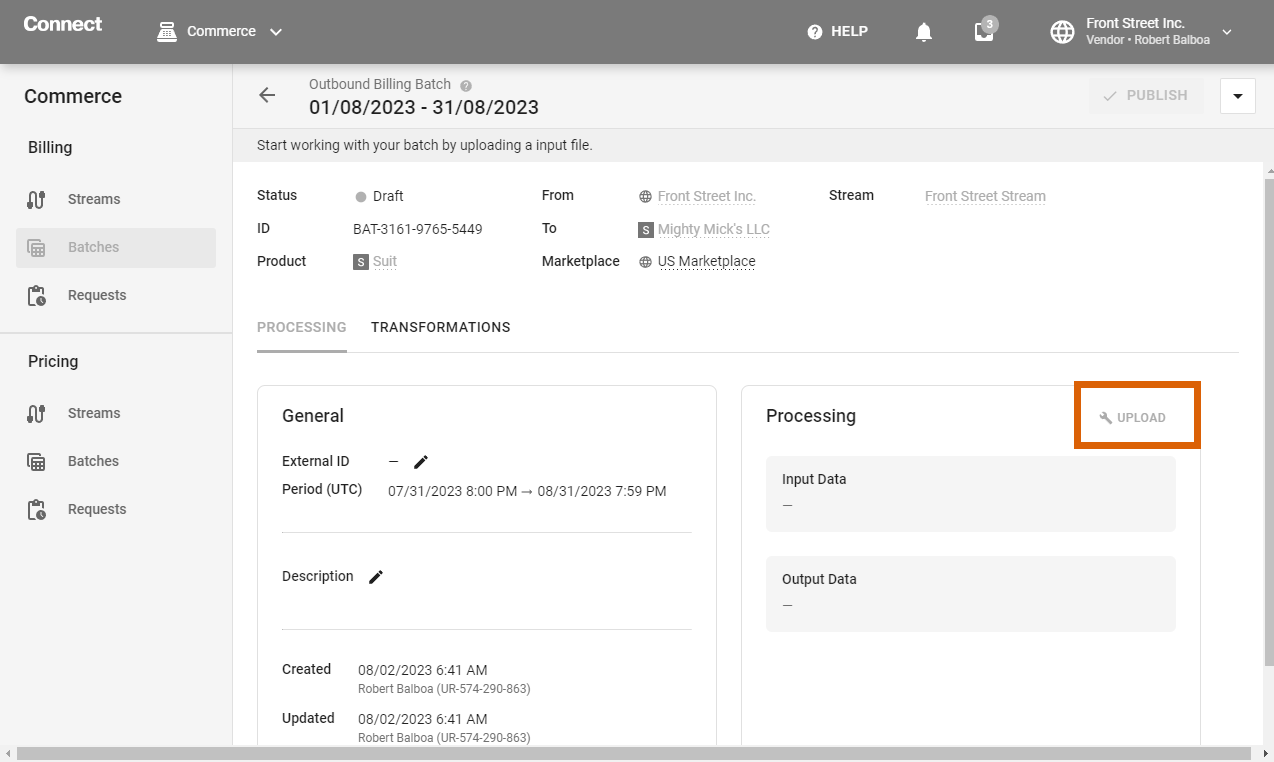
The Processing tab is used to upload/re-upload input data and to access general information on your selected billing batch.
The General widget is used to review your batch description and external identifier. It is also used to edit it such information for your created billing batches.
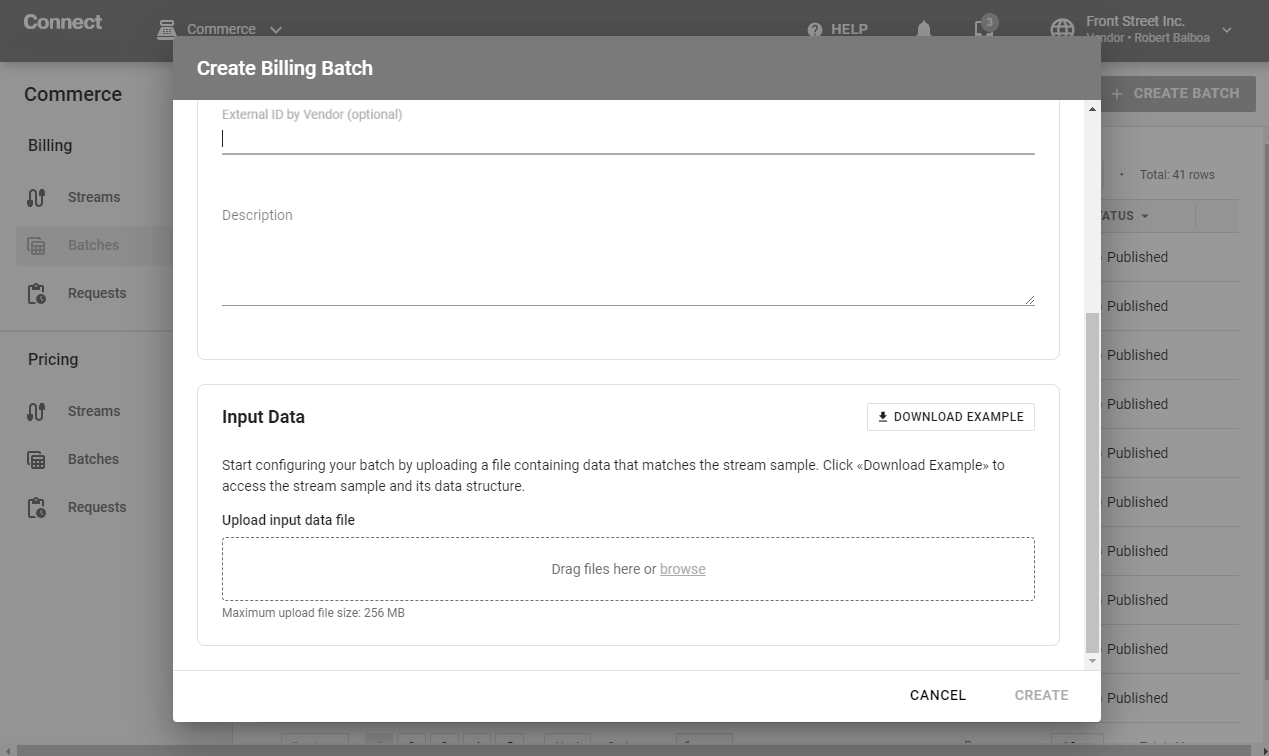
The Processing widget allows accessing input and output data for your selected billing batch. In case your input file is not uploaded to Connect, click the Upload button to provide your input spreadsheet file:
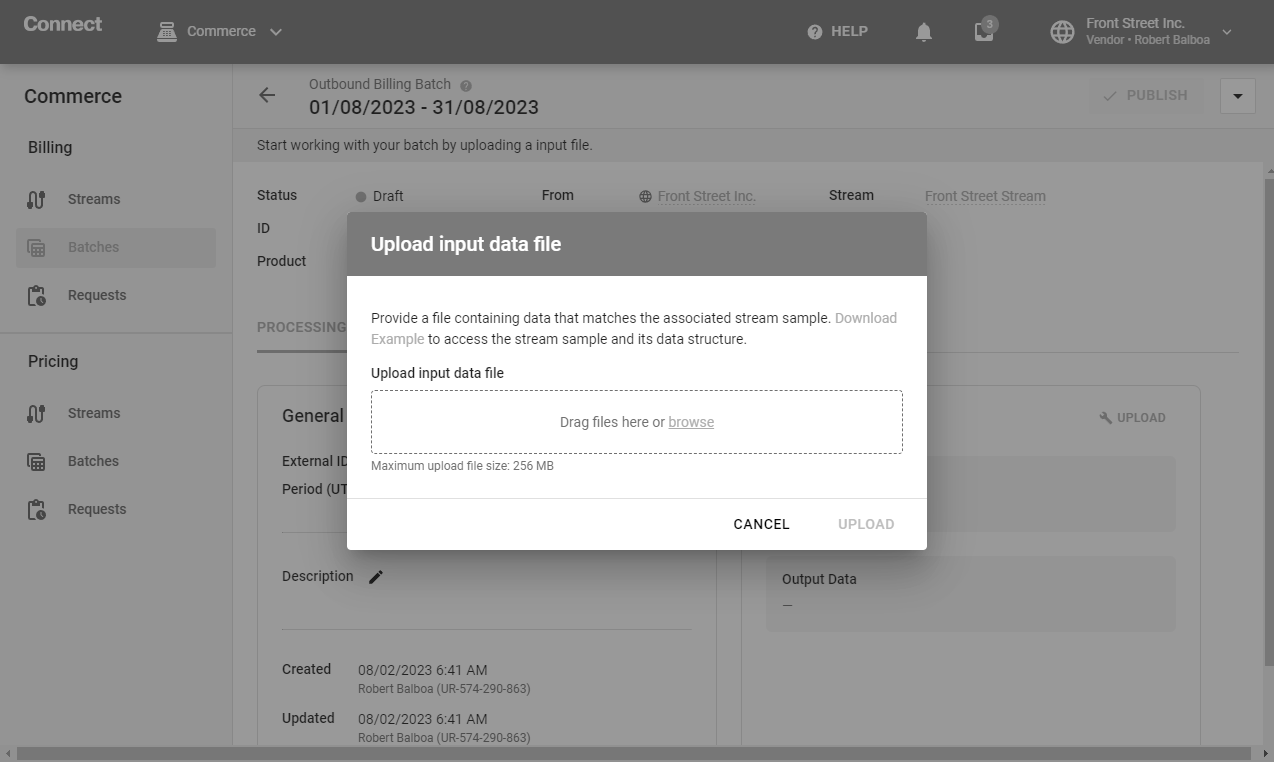
The system also allows downloading an example file to learn about the expected file structure. Note that the example file also inherits the structure of the input data of its associated billing stream.
In case it is required change or update your input file use the Re-Upload button from the Settings widget.
The system allows publishing your defined billing batches in case its associated stream is assigned to the Active mode.
Share your billing information with your specified business partner by clicking the Publish button at the top-right corner of the screen:
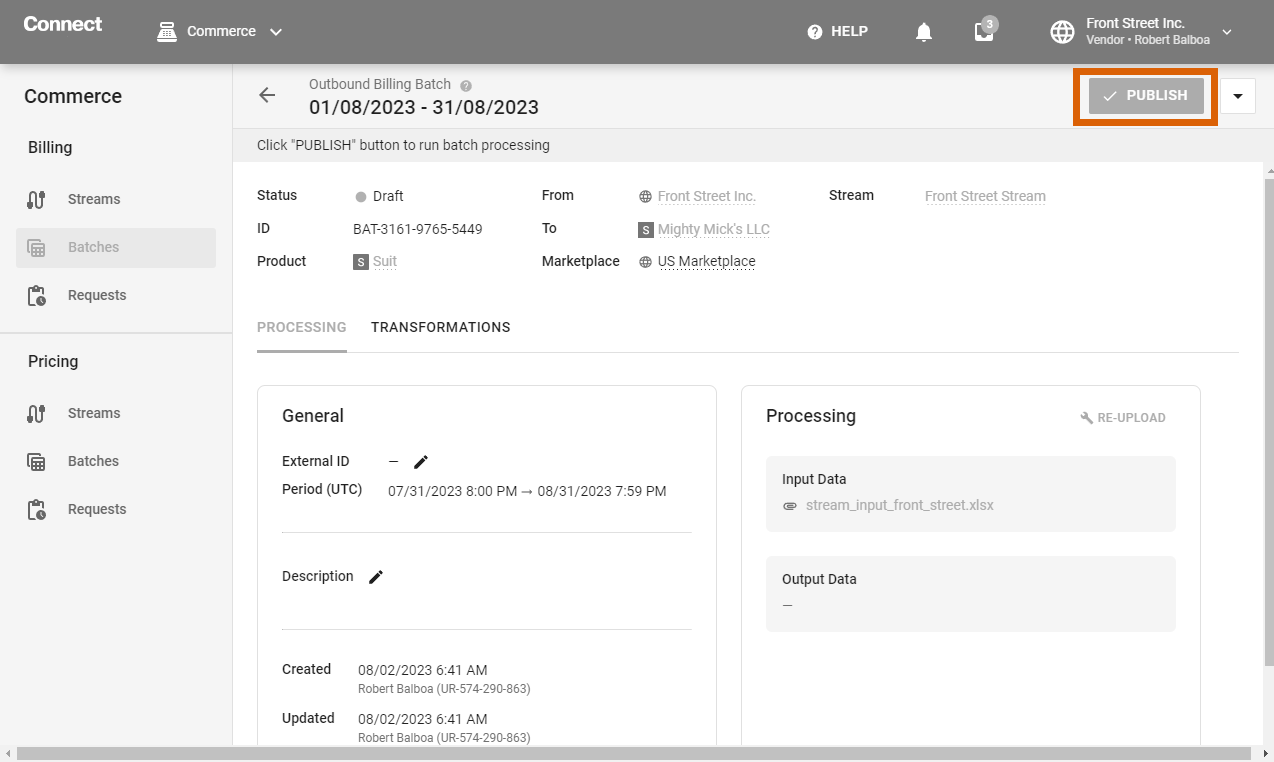
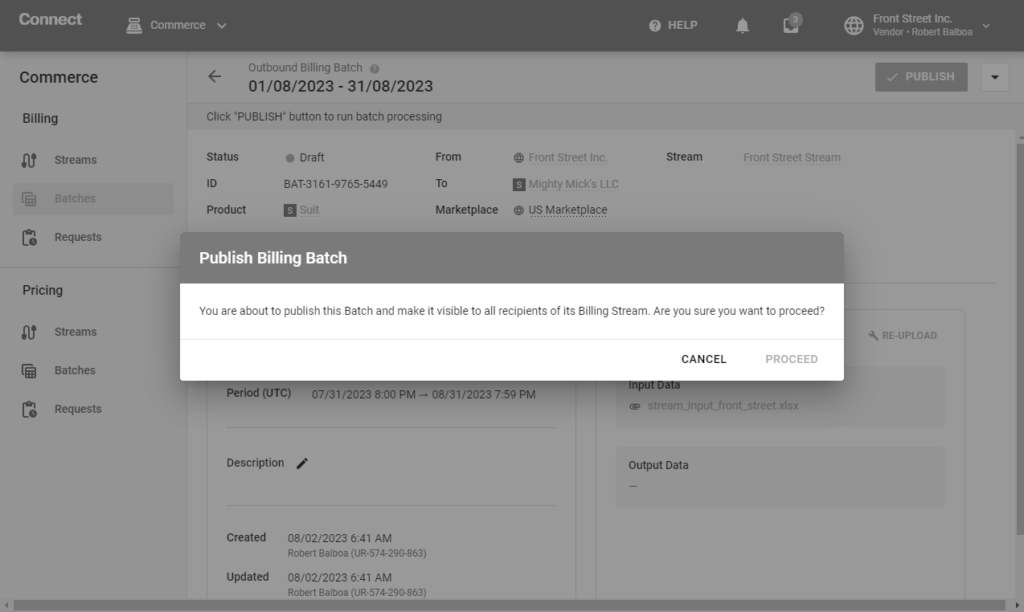
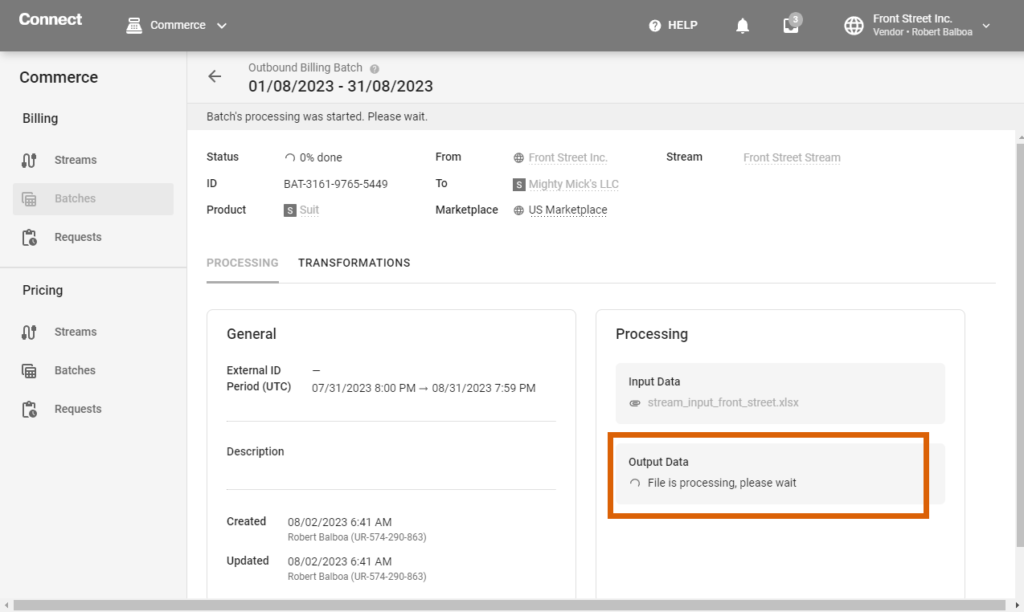
As a result, the system will start processing your published batch. Once your billing batch is assigned to the Ready status, your business partner will receive your billing information. Review your output file by using the Processing tab of the Billing Details screen.
The Commerce module also allows you to create Pricing streams using price lists from the Pricing module as a source for Computed streams in the Pricing section:
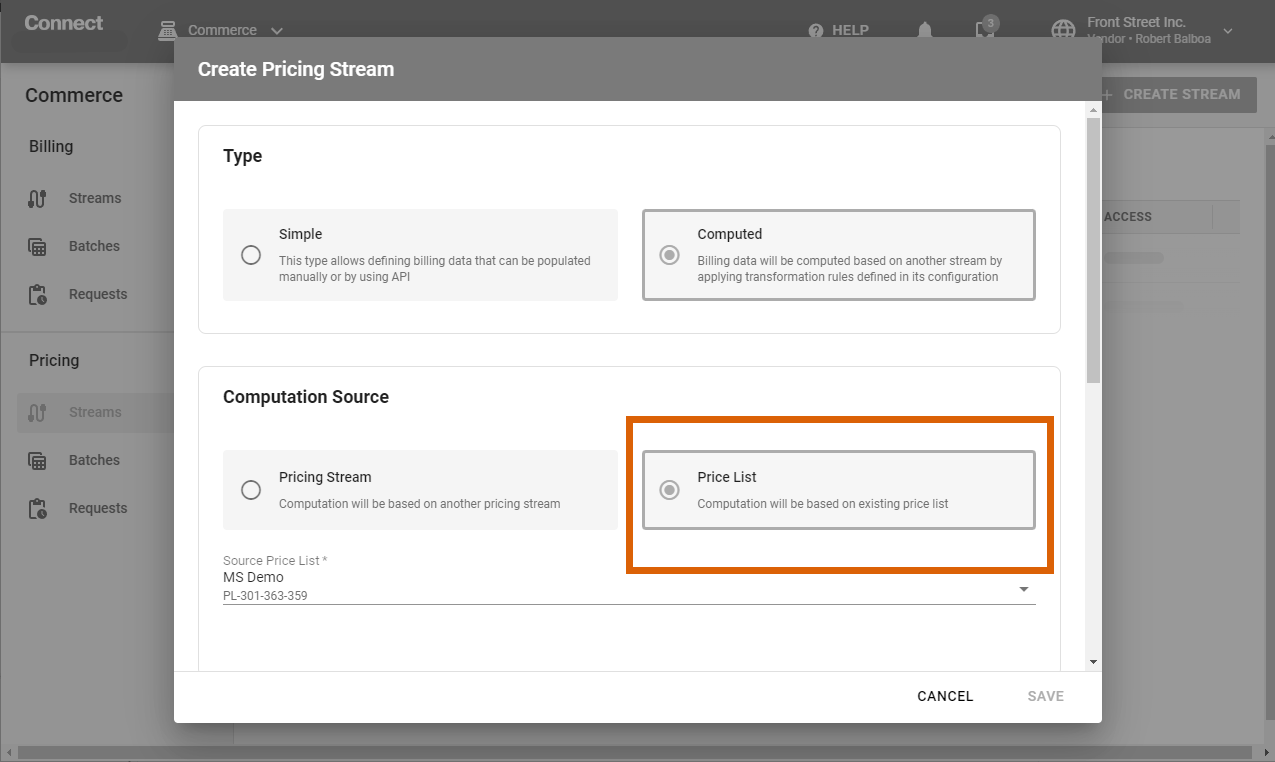
If a new version of the price list becomes available in the Pricing module and has the Active status, the batch will be processed automatically.
You can scale your billing operations by configuring as many streams as required, including one stream per each Marketplace, and these streams can be processed simultaneously.