The following tutorial help Distributors to get necessary skills in performing general operations on the CloudBlue Connect® platform. This tutorial may also be increasingly useful for Vendors and Resellers to get better understanding of required operations and available activities on the platform.
Before you get started with the tutorial, it is recommended to familiarize yourself with the Getting Started article first. This article introduces and describes the key concepts and business flows of the CloudBlue Connect® platform.
In addition, refer to the Portals Interface article to get familiar with the provided graphical user interface.
The Distributor Tutorial contains instructions that showcases how to perform general operations from the Distributor Portal. Follow the provided guidelines to collaborate with Vendors and Resellers via the Connect platform:
The following tutorial also introduces Mighty Mick’s LLC distribution company that works with Front Street Inc vendor organization and Champions Corp resellers. Mighty Mick’s LLC just started to work with the Connect platform. Therefore, this company should register a hub and a marketplace first.
Before starting collaborating with Vendors or Resellers, Distributors are required to define their commerce system on the Connect platform. A commerce system should be represented via a registered hub and a configured marketplace. In general, commerce systems are integrated to the Connect platform automatically. However, Connect users can create a hub and marketplace by using the Connect interface as described below.
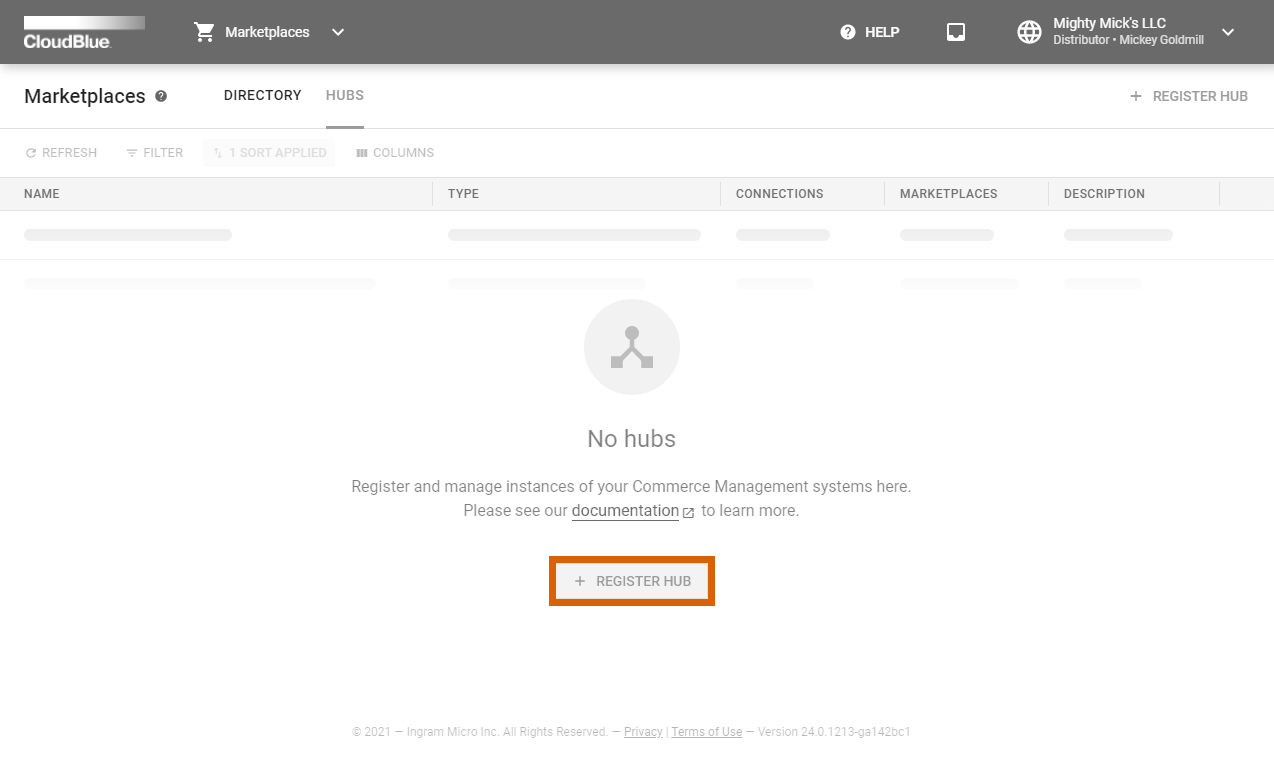
Hubs represent real commerce systems integrated with the Connect platform. Distributors can register several hubs differentiated by geographical regions or any other criterion. The following steps showcase how to register a hub on the CloudBlue Connect® for API integration with a Distributor’s system.
Access the Hubs section of the Marketplace module. Thereafter, click the Register Hub button to start registering your hub manually.
Fill out the following hub properties form:

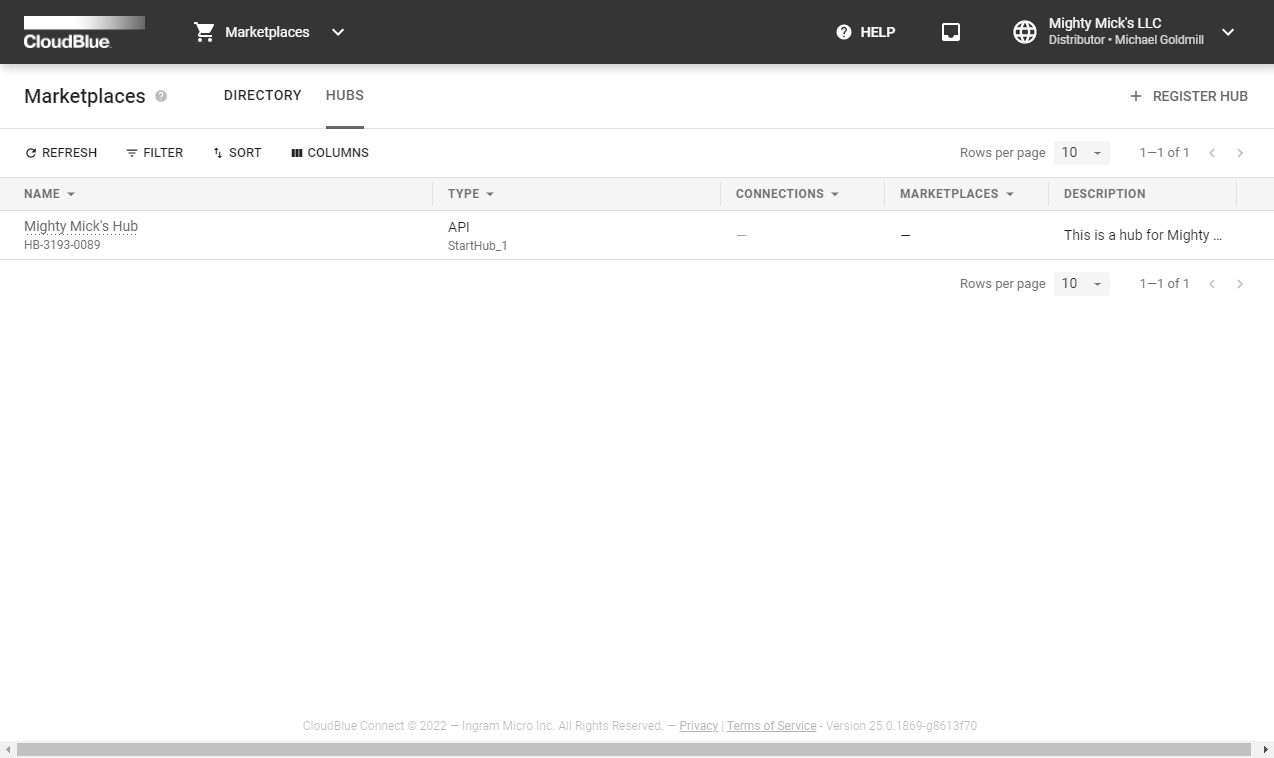
Click Register to finalize your manual hub creation on the Connect platform.
Therefore, your registered hub will be available from the provided hub list. Note, however, that this new hub is not bound to any marketplace yet.
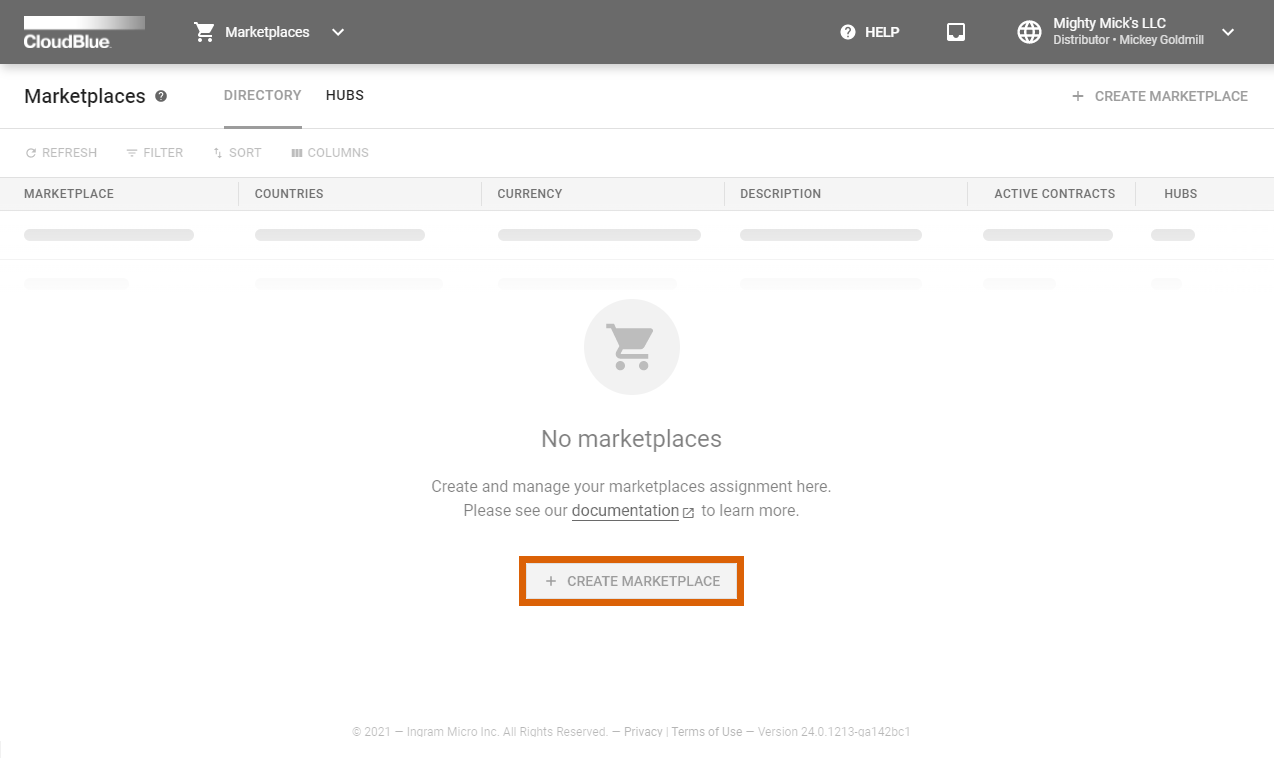
Marketplaces represent available go-to-market channels that are used by Distributors to express different logical concepts, such as regions, industries, sizing, and so on. Note that marketplaces are configured via a marketplace creation wizard from the Marketplace module.
Access the Marketplaces module and click the Create Marketplace button to launch the aforementioned wizard.
Thereafter, follow the wizard steps to successfully create your marketplace and bind it with your previously registered hub.
Specify your general marketplace properties:
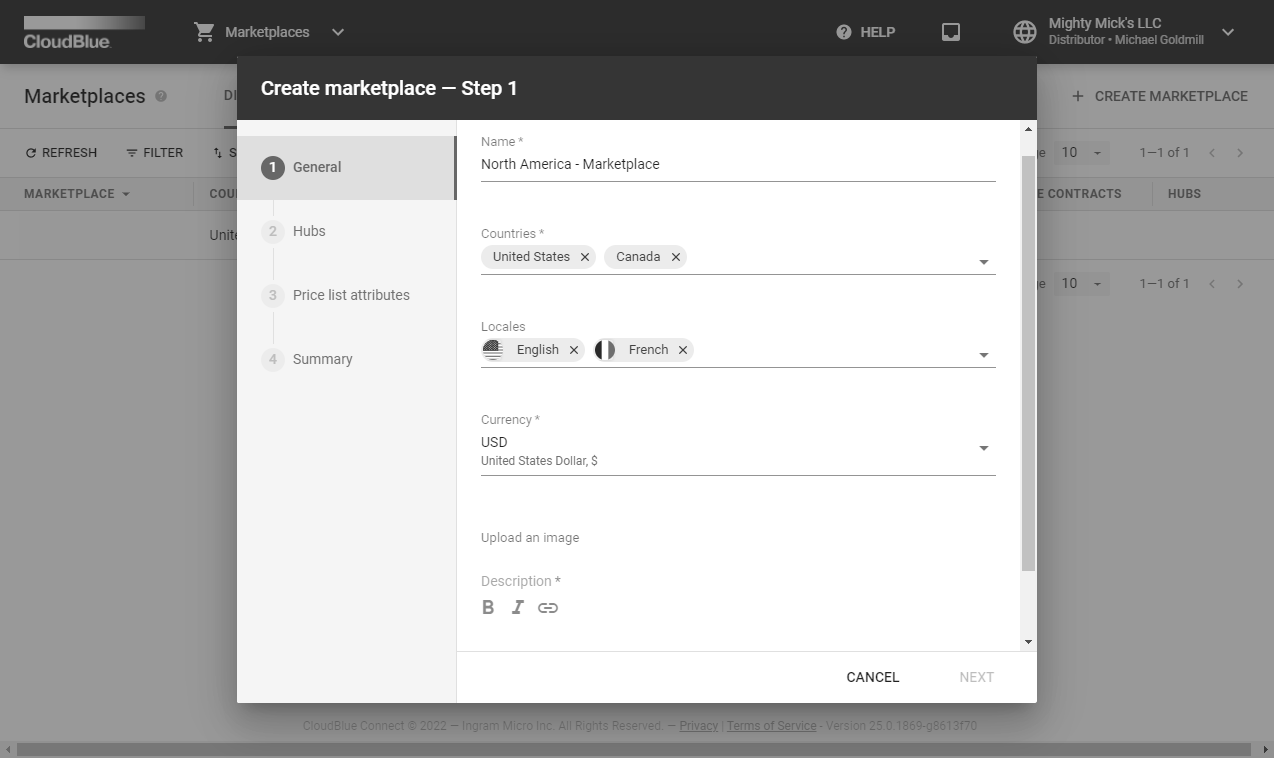
In this scenario, “United States” is selected in the Countries field and “USD” is selected in the Currency field.
Click Next to continue.
Fill out the following Hubs form:

Click the Next button to continue.
Specify the price list attributes as follows:

In this scenario, the Suggested Retail Price attribute will be selected.
Click Create to finalize your marketplace creation.
As a result, the system provides the following summary:
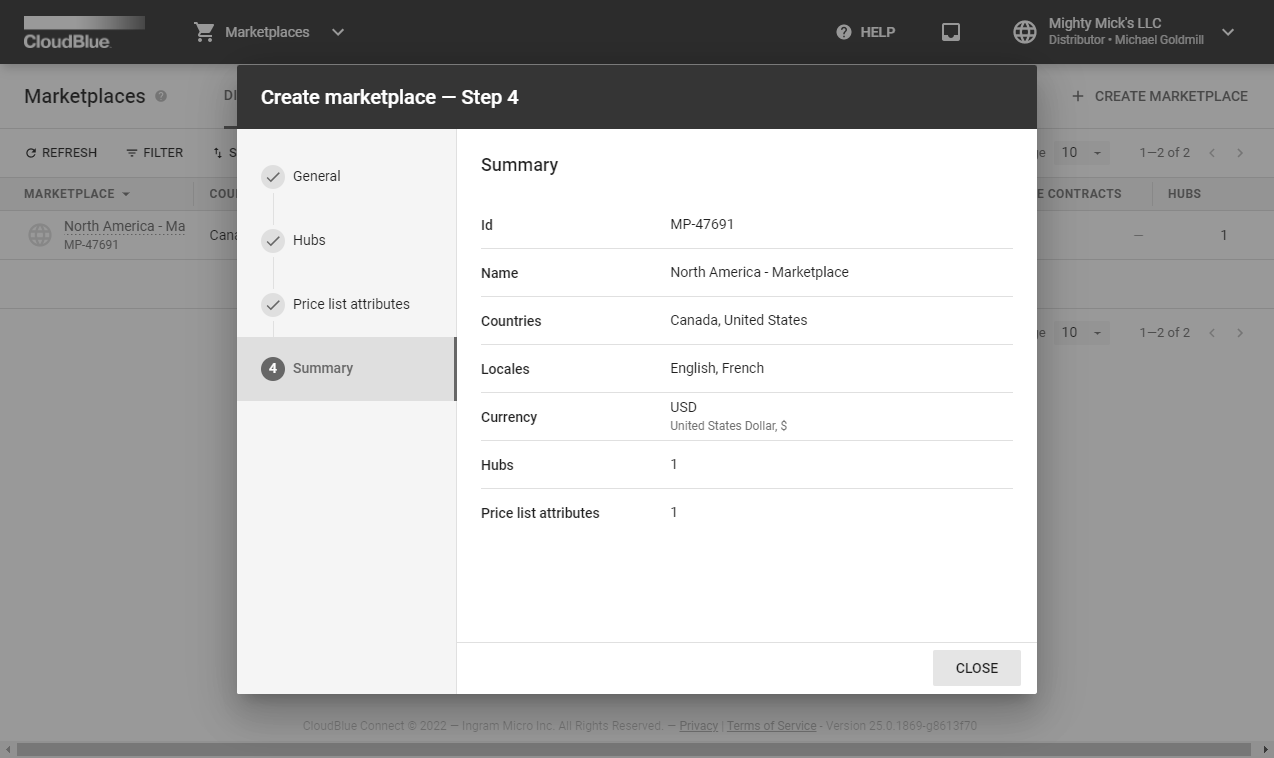

Review the summary and click the Close button. Note that created marketplace will also be available from the marketplaces list. Therefore, Distributors can create required partner accounts to start working with Vendors and Resellers.
By completing the initialization tutorial, the Distributor’s environment allows creating required agreements and contracts as well as partners accounts. Access Inviting Partners to Connect to proceed with the Distributor Tutorial.
In case more information on marketplaces or hubs is required, please refer to the Marketplace module or Hubs documentation.