Service Level Management (SLM) represents an ongoing process to maintain high-quality in-service provisioning. The provided service level options allow changing and managing the automatic transition of your selected Connect objects from one Service Level Objective (SLO) zone to another. Therefore, the CloudBlue Connect® platform makes sure that your business objects are processed in a timely manner and consequently ensures that the performance of your organization meets all needs of your business partners.
The following describes the graphical user interface of the SML settings and showcases how to work with the provided configuration wizards.
The Connect platform automatically assigns objects to other SLO zones according to the provided time period configuration. Adjust the automatic SLO zones transitions for your selected objects on Connect by clicking the Edit button:
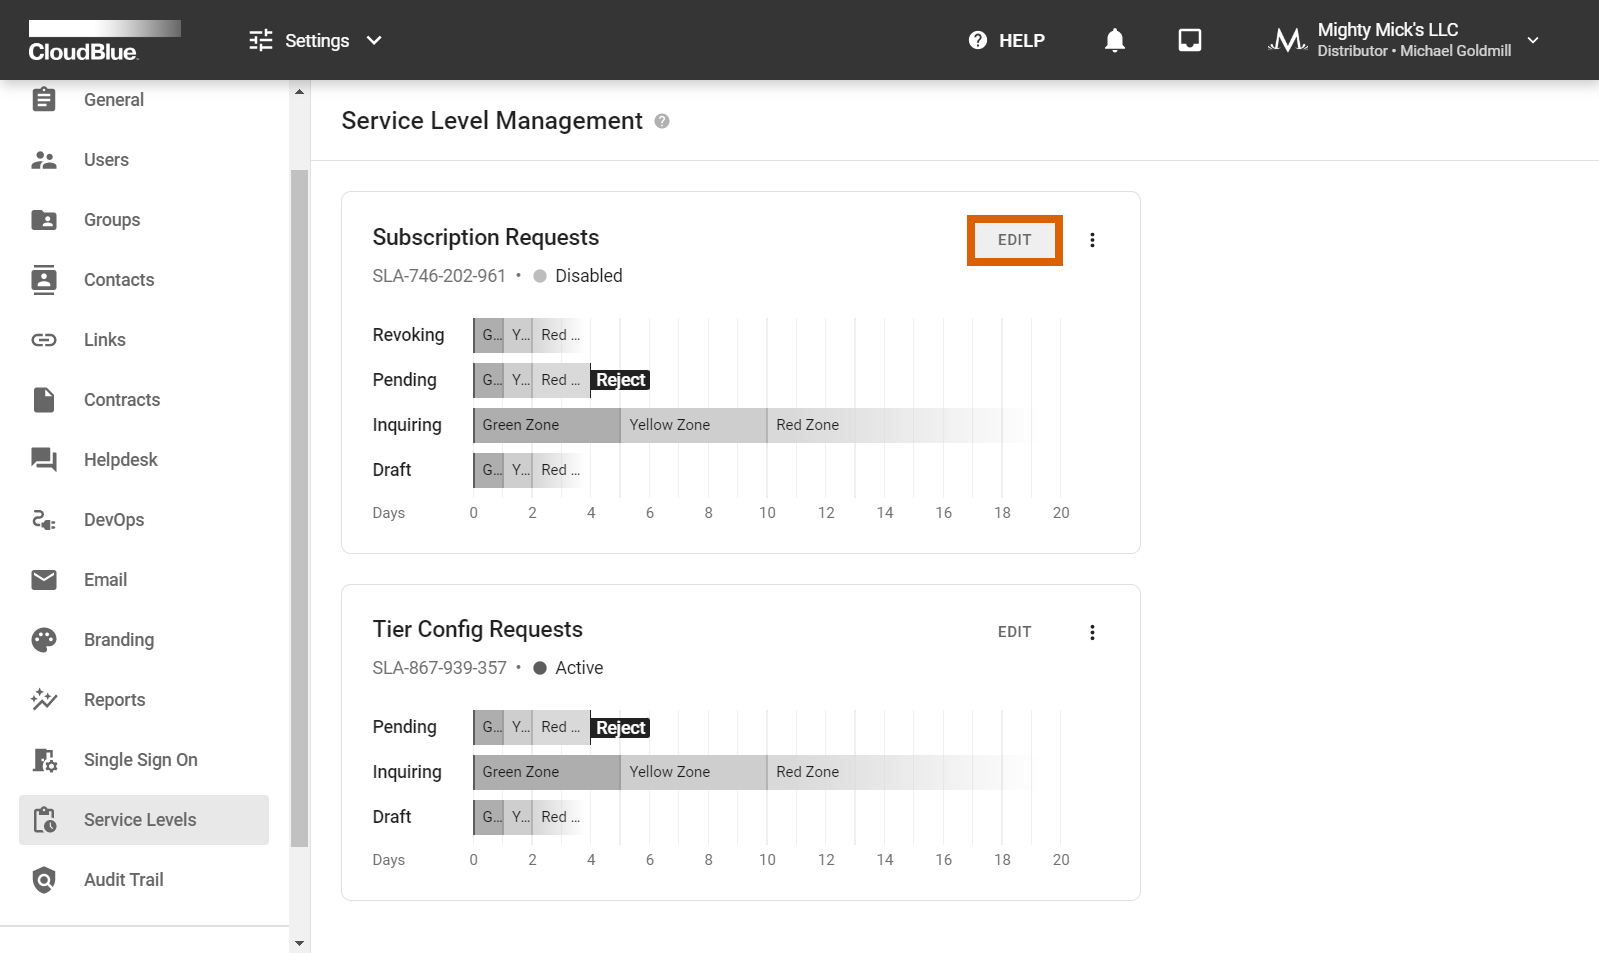


Use the following wizard to specify time period for the SLO zone transitions. Thus, for instance, in case subscription request objects are selected, select the number of days for each zone transition. Make sure to configure transitions for all available request statuses by switching the wizard tabs. Note that pending requests can also be automatically rejected by the system in case the corresponding option is enabled in this wizard.
Once your configuration is finalized successfully, click the Save button to save your provided settings. The system also requires to activate the SLM functionality as described below.
Switch on the SLM functionality on the Connect platform via an additional menu that is opened by clicking on the vertical ellipsis (⋮) icon. Thereafter, use the Enable option to activate the SLM functionality for your selected objects:
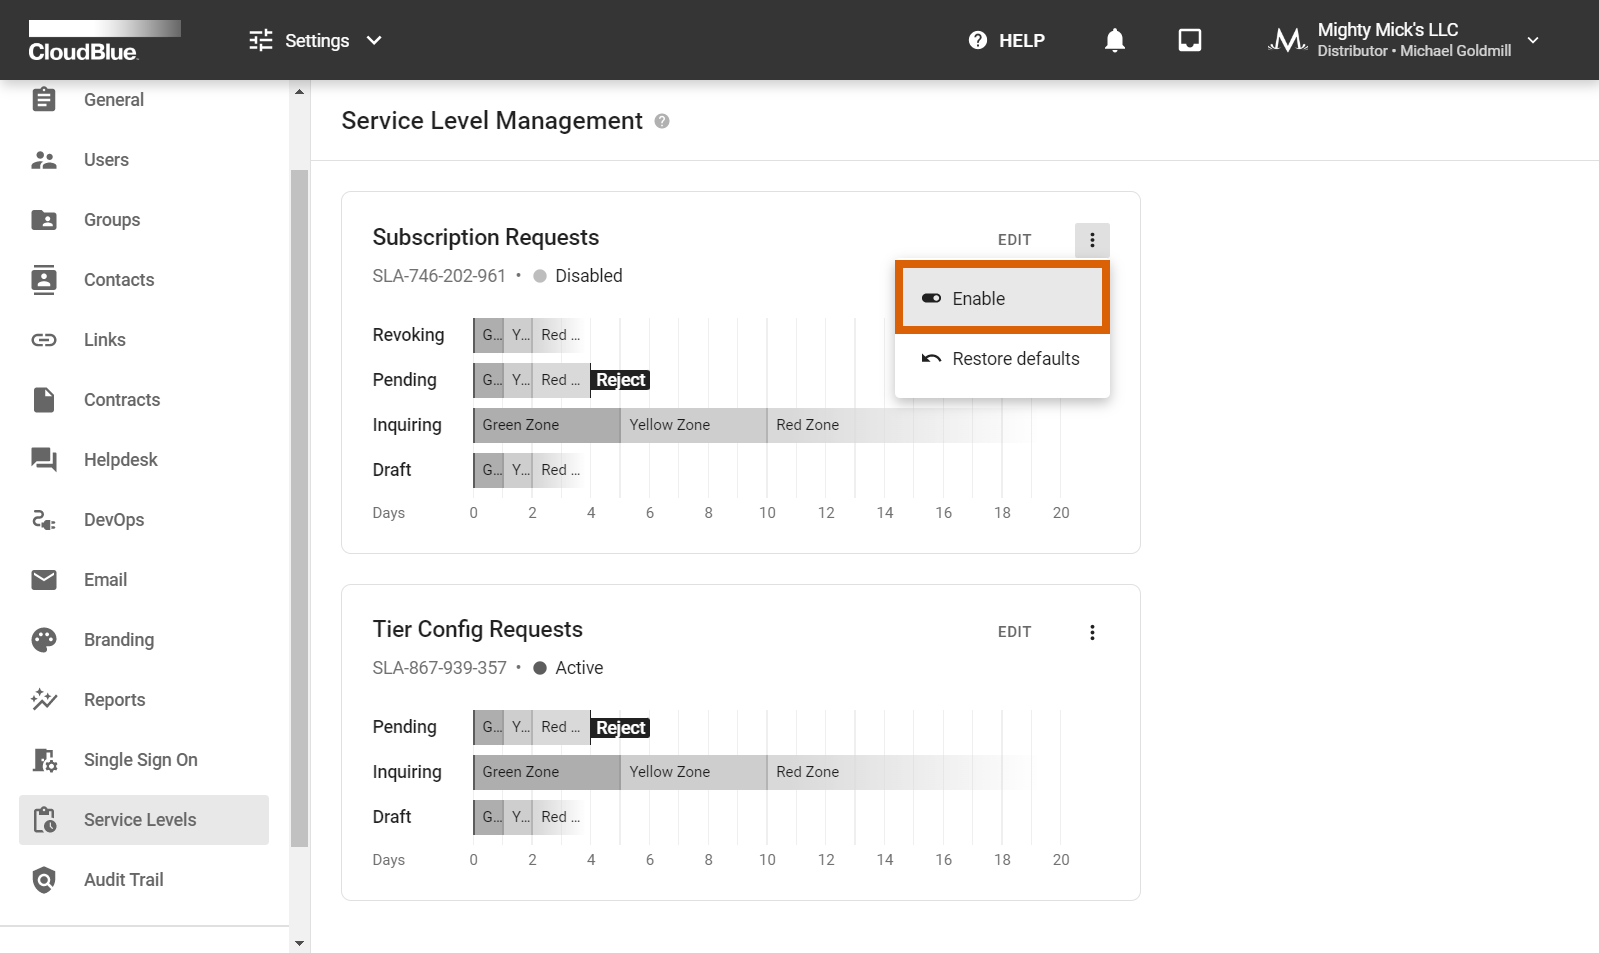
Once the SLM functionality is enabled, the system will assign SLO zones to your newly generated objects. Note that your previously generated objects (before the SLM functionality is activated) will not be assigned to SLO zones.
The aforementioned additional menu also allows you to disable the SLM functionality for your objects or restore default values for automatic SLO zone transitions.
In case more information on Service Level Management is required, please refer to the SLM documentation on the Connect Community portal.