This menu is used to add and configure links for your and your partner’s Home screen. It also allows specifying links that will be displayed when your partners create new helpdesk cases. Creating such links can be increasingly helpful to provide a quick access to your product website and perform any other action by using Get and Post methods.
The system allows selecting different scopes for each link and also provides a number of customization options. Learn how to add and configure a new link by following the instructions below:
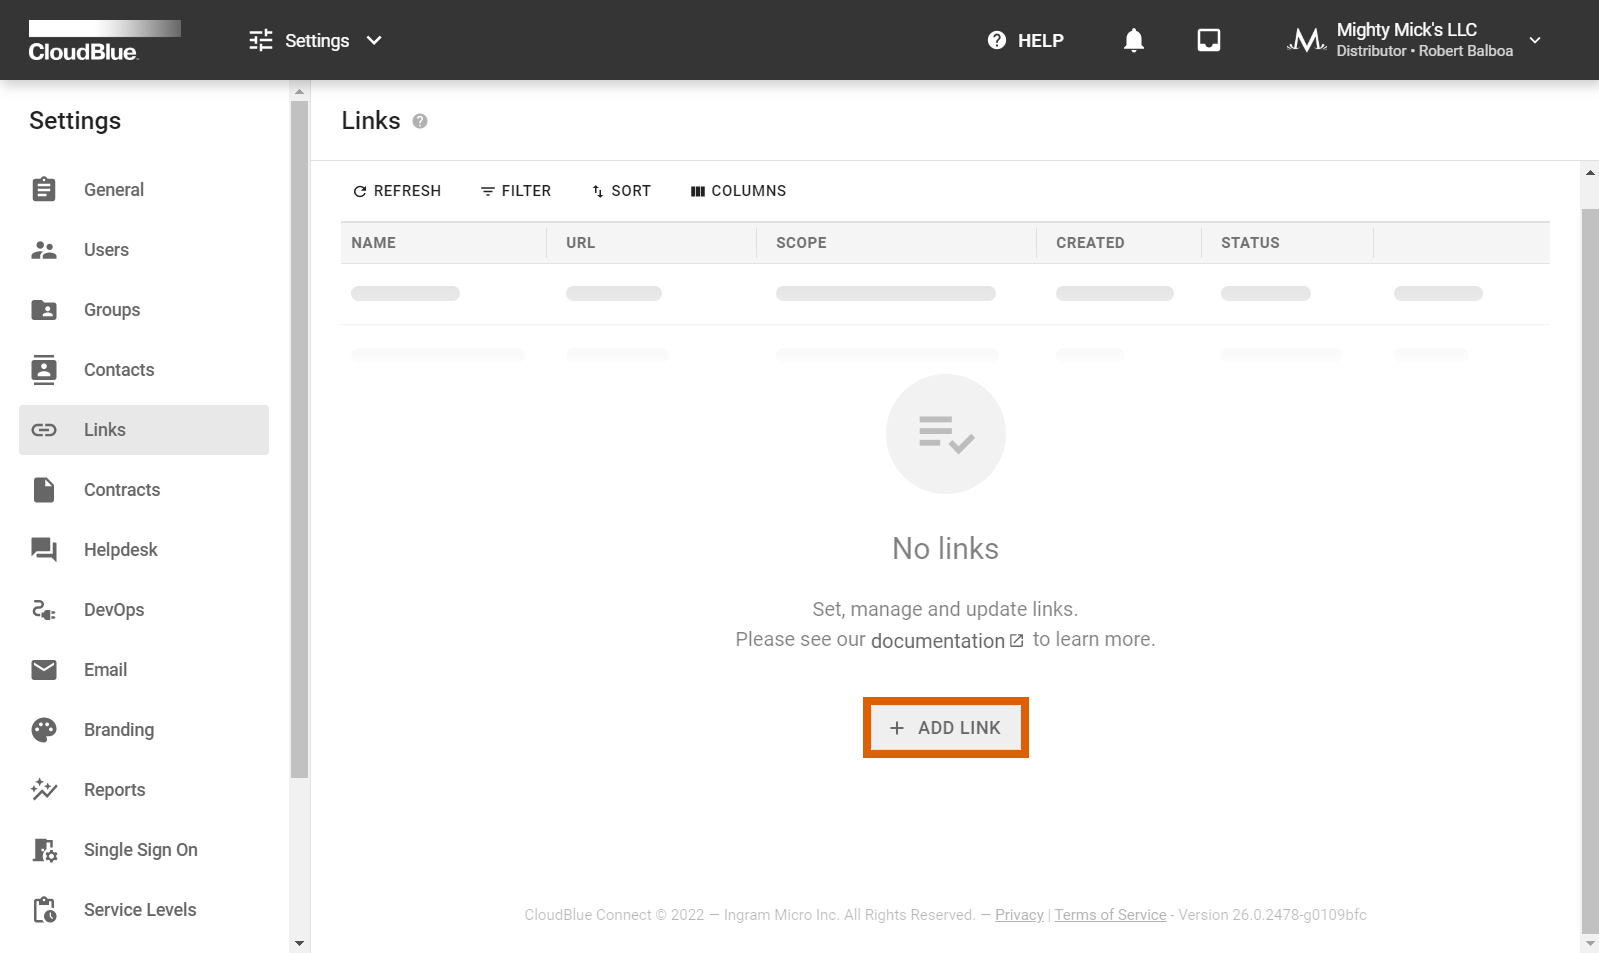
Click the Add Link button to launch a link creation wizard.
Follow the wizard steps to successfully configure a new link.
The wizard prompts you to specify the following General link properties:
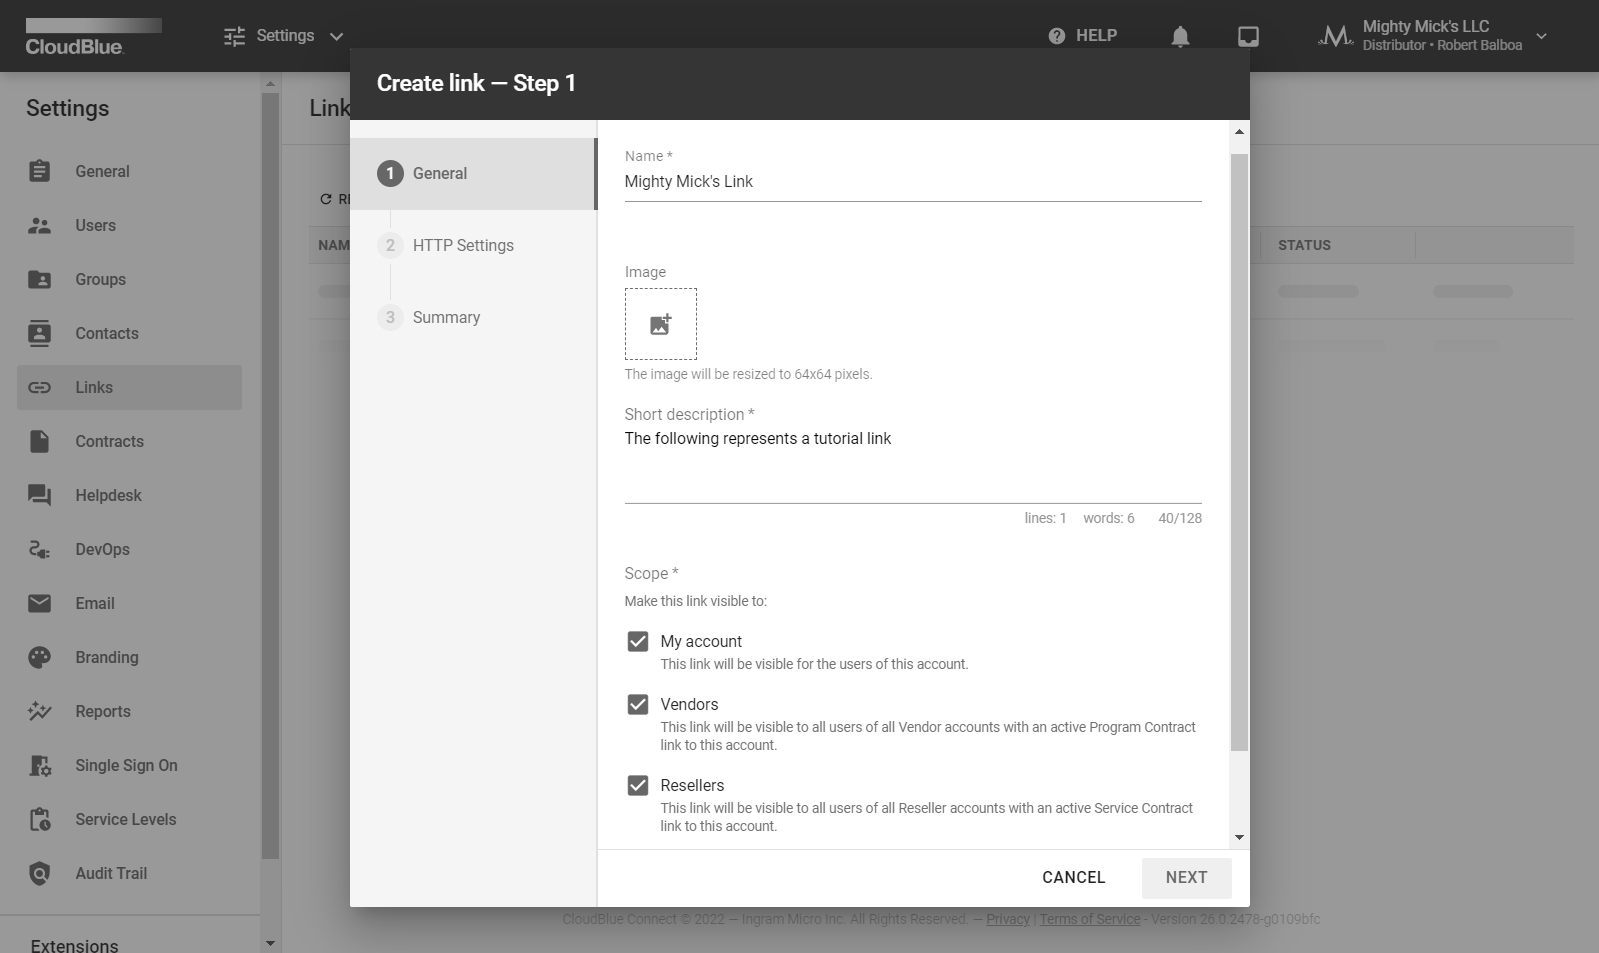
Click Next to continue.
Fill out the following HTTP settings form:
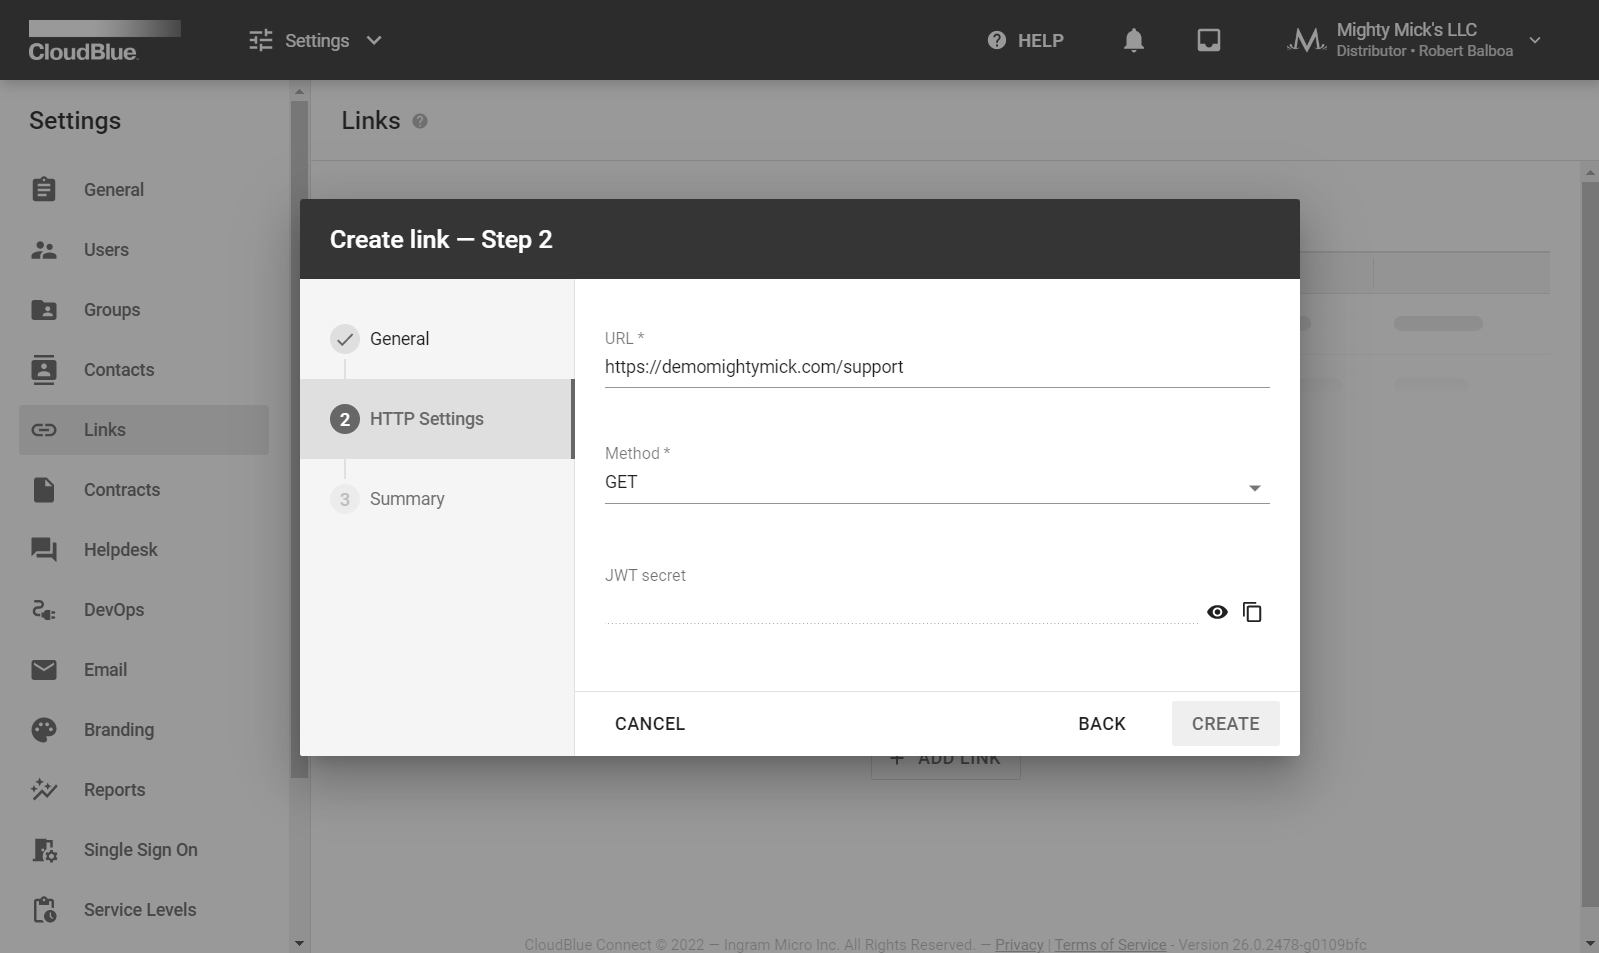
Click the Create button to finalize your link configuration.
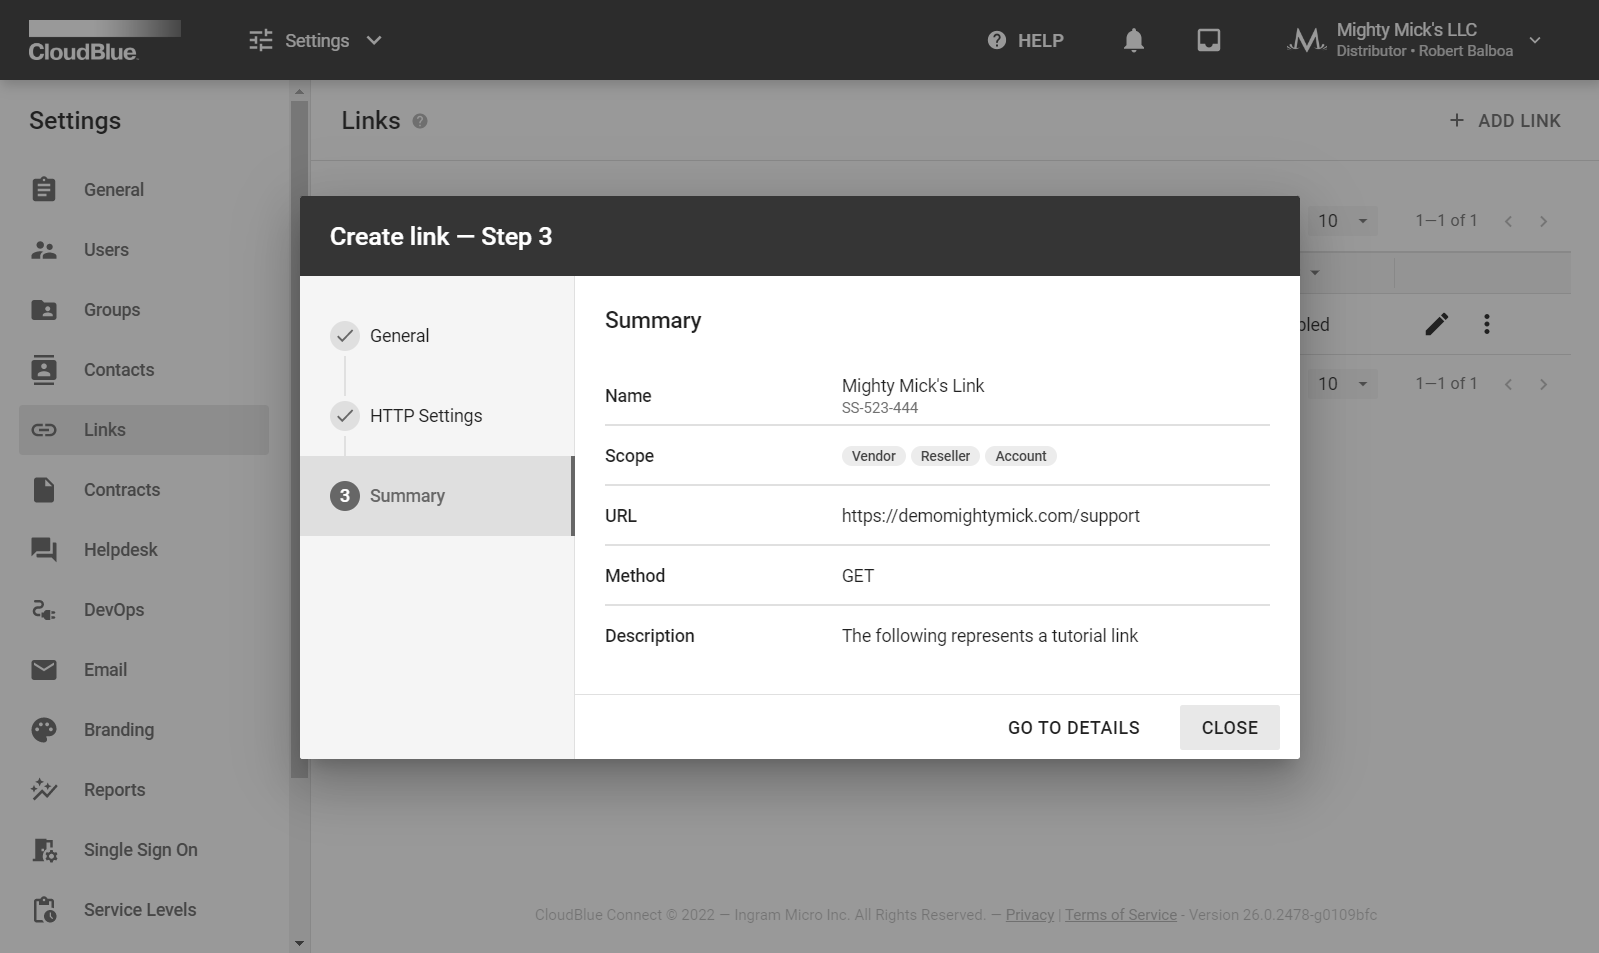
Review your created link summary. Click Go to Details to access your link details screen. Otherwise, click Close to close the summary.
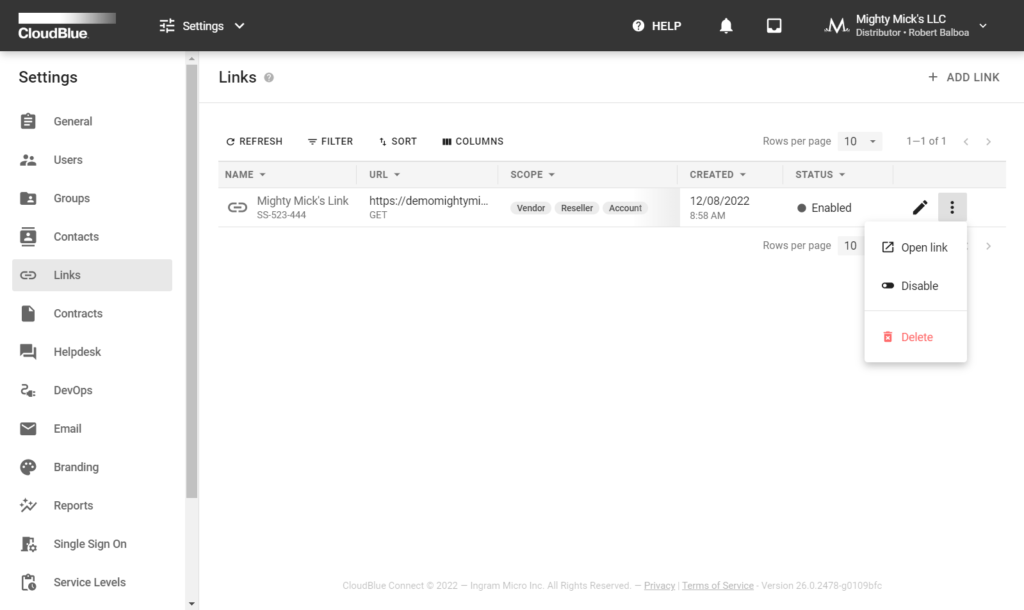
Once your link is added and activated, it will be available within the corresponding data grid. The system allows editing your link by using the provided edit icon. Click on the vertical ellipsis (⋮) button to open, disable or delete your link.
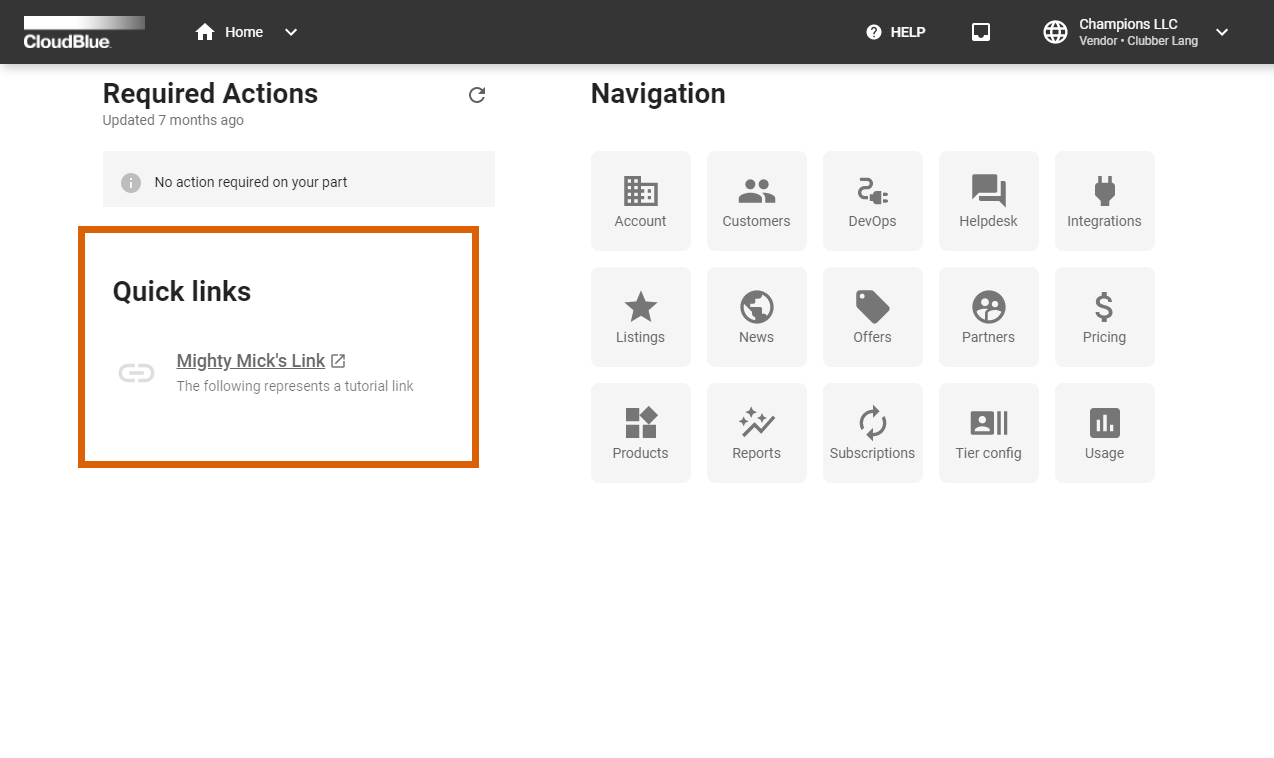
As a result, the system will display your configured URL for the quick link access. Depending on your selected scopes, your created link will be available on the Connect Home screen for your account users or your selected business partners:
In case the Helpdesk scope is selected and the Federated (External) Helpdesk mode is enabled, the system showcases your link alongside the provided instructions within the New Case creation wizard:
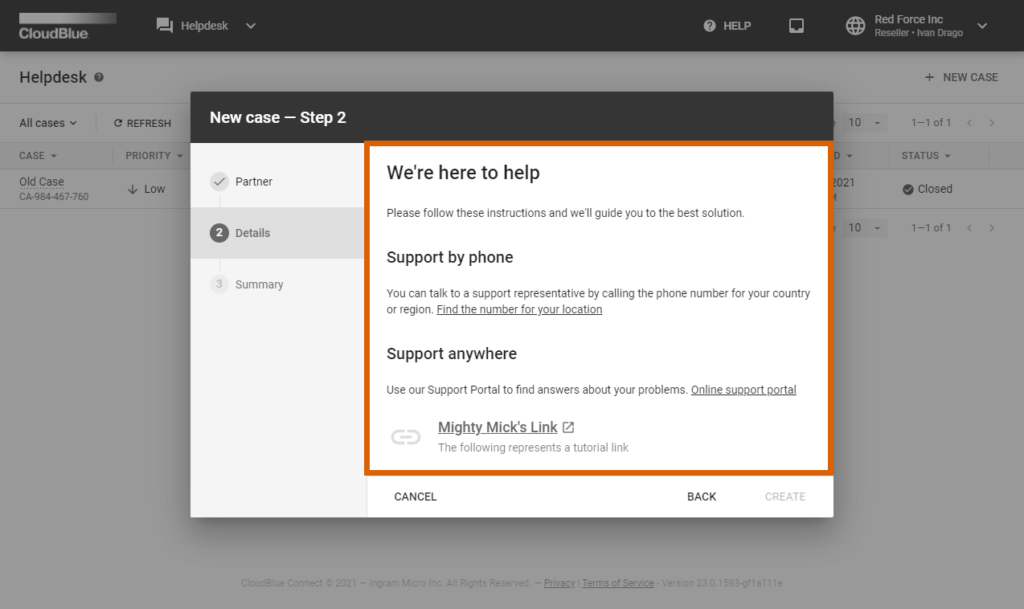
Therefore, your business partners can use the provided link to contact your support or access any other required resource to address their issues or requests.