The following article provides instructions on how to bootstrap and deploy your DevOps extension project. This article showcases required CloudBlue Connect® Command Line Interface (CLI) commands and demonstrates how to successfully configure your extension. Furthermore, the following outlines all tools and programs that are required to start working with your extension project.
Core EaaS Solution
Make sure to check out the Core EaaS repository that provides essential building blocks for developing your extensions. Its documentation also showcases how to work with different extension types and provides examples how to create various applications for Connect. Access this documentation by using the following link: connect-eaas-core.readthedocs.io
Requirements
In order to bootstrap a new extension project, make sure to install the following tools and programs first:
Poetry Deploy the Poetry package manager and get familiar with its documentation.
Connect CLI Connect CLI is an essential tool that allows you to bootstrap, test, and validate your extension project.
Python (3.8, 3.9 or 3.10) is installed
A CloudBlue Connect® vendor account is created
Getting Started
It is required to prepare your account and define a new extension object on Connect before starting to work with your extension. Specifically, it is required to define a new extension object and access required environment identifier via the DevOps module. Furthermore, use the following instructions to learn how to add your Connect account via the CLI tool.
Prepare Your Vendor Account
First, it is required to generate an API token and add your vendor account via the CLI tool.
Create a new token by using the Connect interface:
Navigate to Integrations and choose Tokens
Click the Create Token button
Provide the name, description, and an optional external ID for your token
Click Next and choose Custom Integration from the extension list
Select the required permissions for your token, at least the DevOps option should be selected
On the Summary screen, click Go to details to access your token details
Click the copy icon to copy your token, open your terminal and run:
ccli account add "<your copied token>"
Create an Extension in DevOps
Access the DevOps module to define your extension object on the CloudBlue Connect® platform:
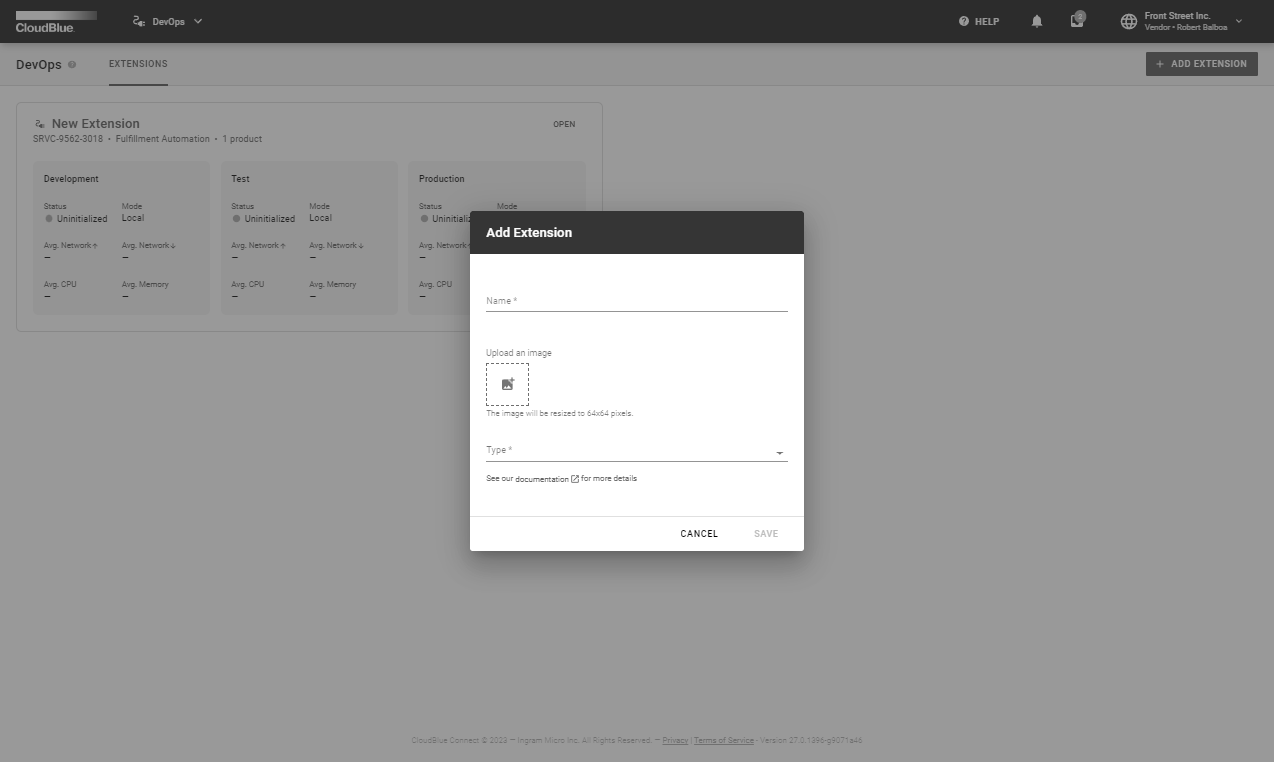
Click the Add Extension button to start creating a new extension object
Provide your extension name, choose at least one product, and click Create
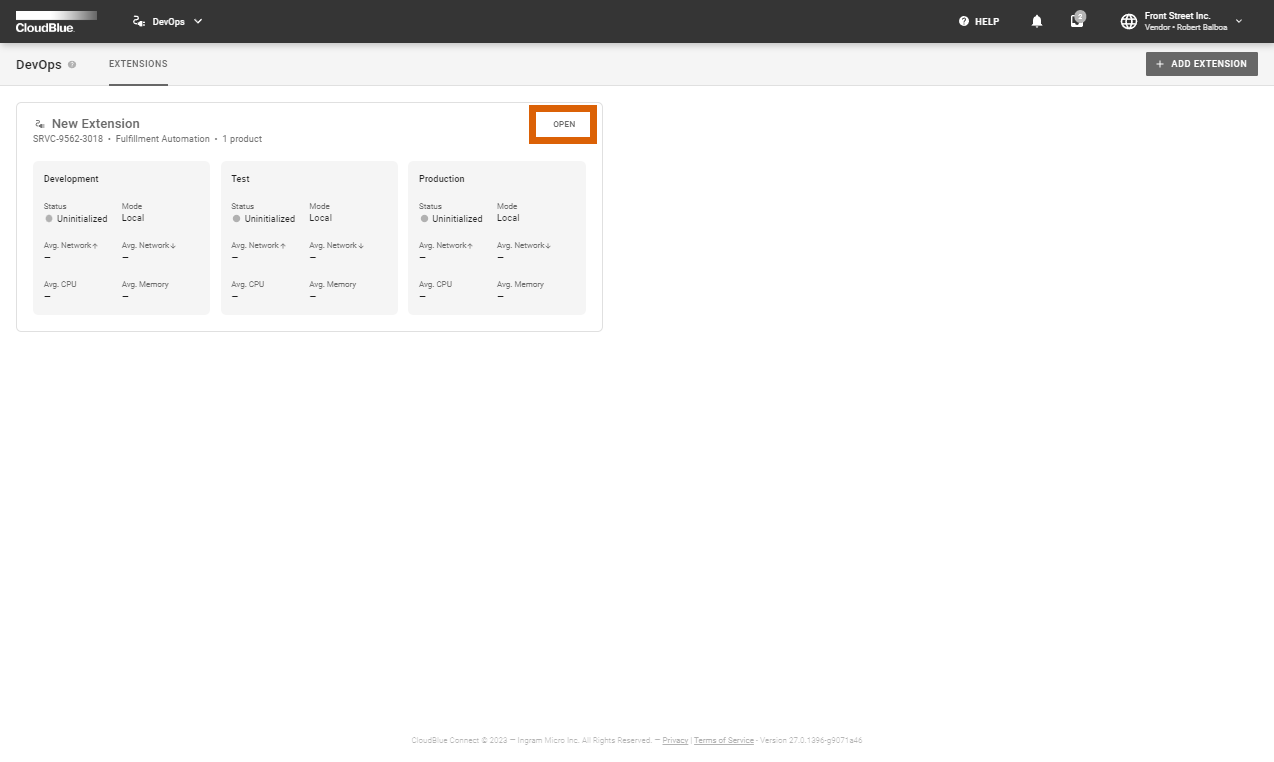
Click the Open button to access the details page of your extension
Locate the Local Access widget and click on the copy button to copy your environment ID
Bootstrap Your Extension
Once your required account is activated and your extension object is created on the Connect platform, you can bootstrap your extension project. Use the following Connect CLI command to start your project configuration:
ccli project extension bootstrap
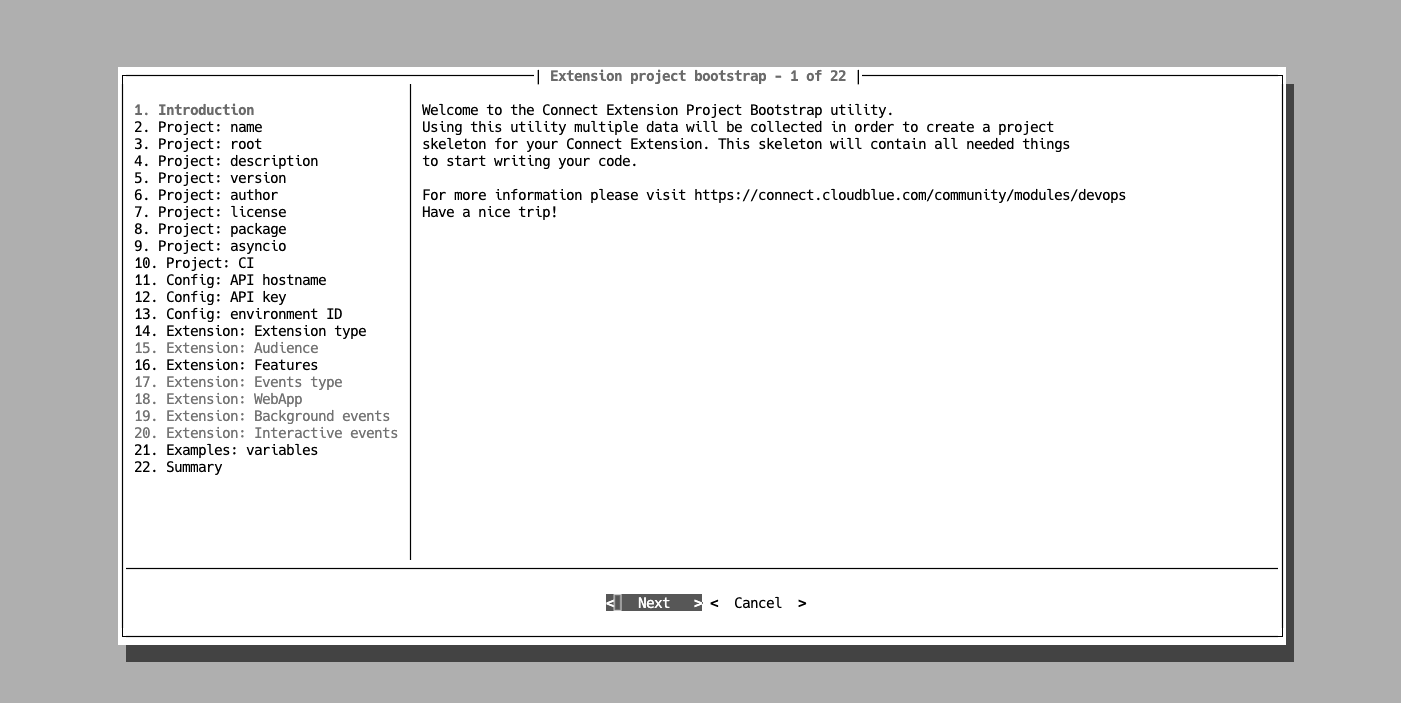
Therefore, the CLI tool will prompt to configure your extension project. Get familiar with the provided introduction and click Next to continue.
The wizard provides the welcome screen and the following options to configure your extension:
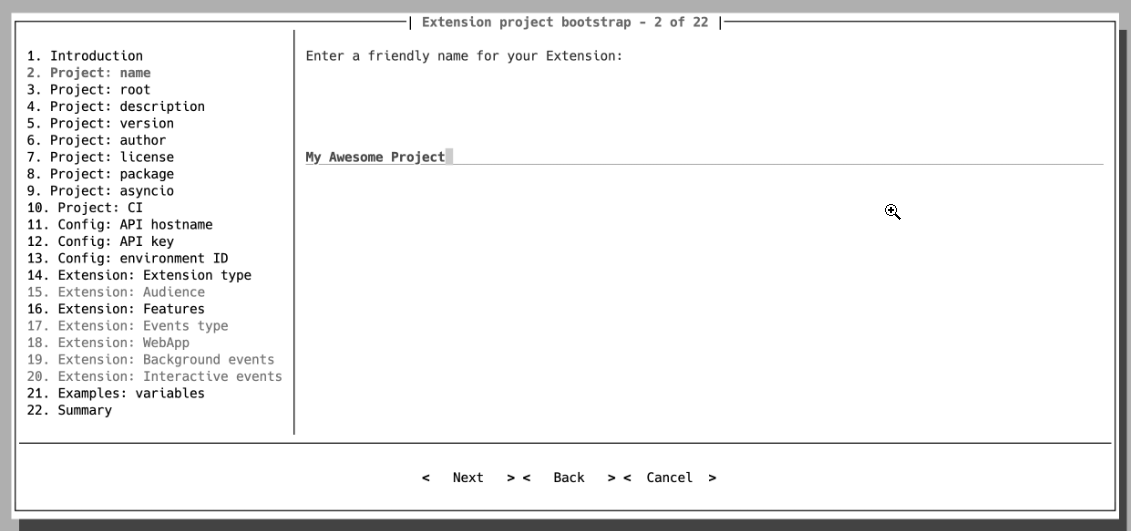
Project name: The extension name will be used for packaging metadata.
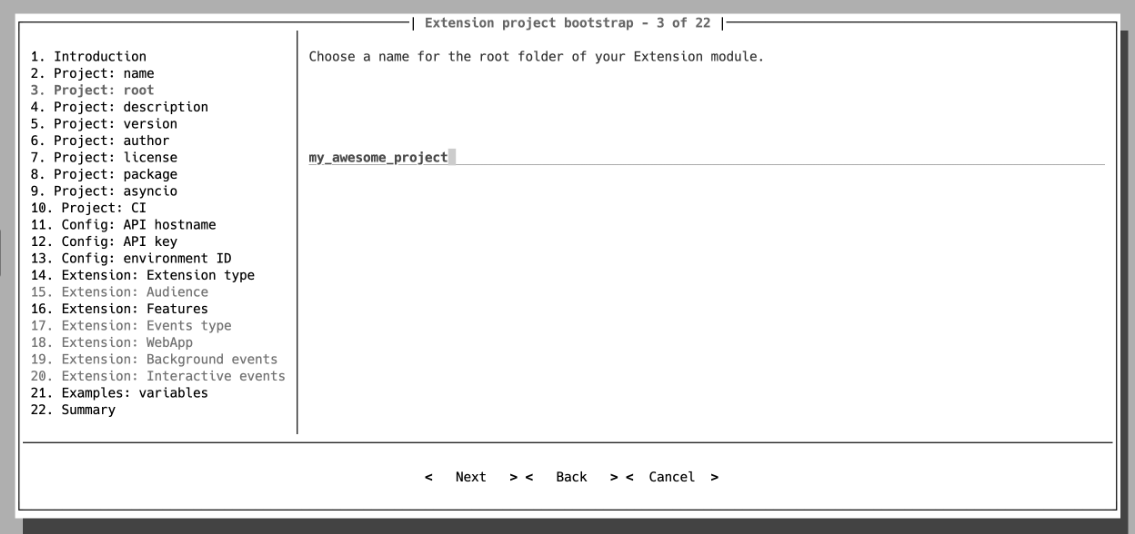
Project root: The root folder with all the required files will be created after you finish running the wizard.
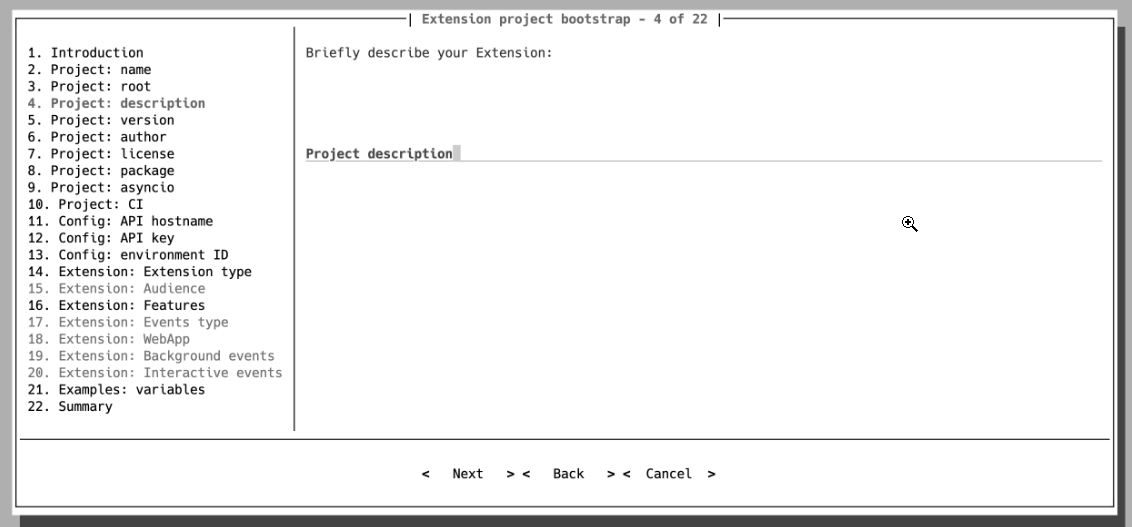
Project description: The description will be used to generate a readme file and for packaging metadata.
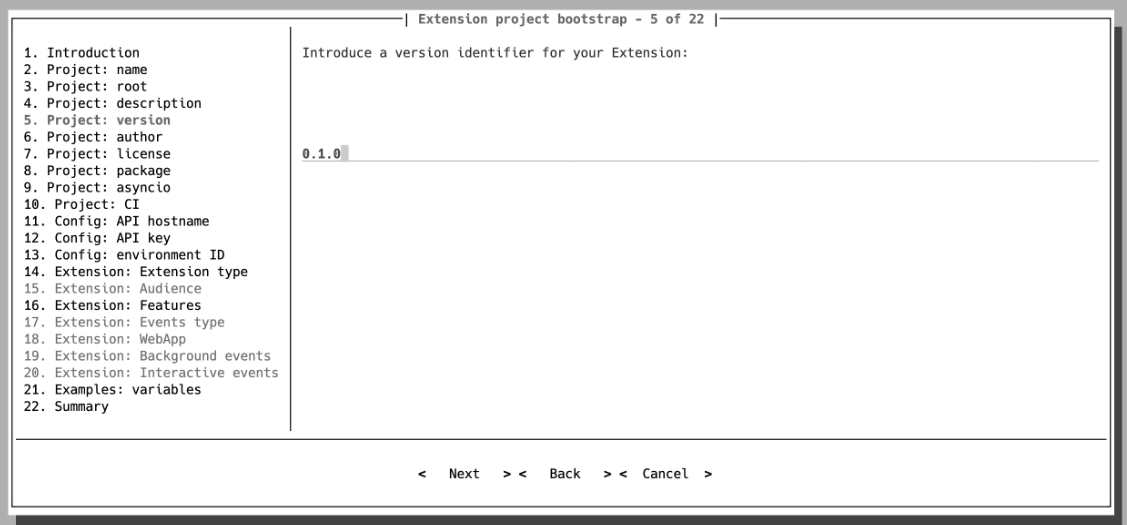
Project version: This initial version will be used for packaging metadata.
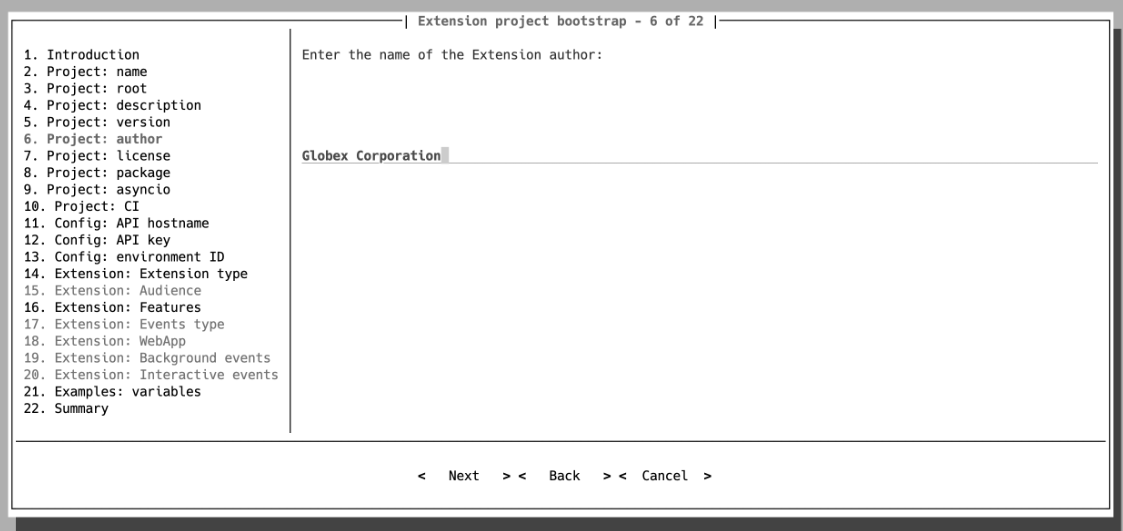
Project author: The author name will be used for packaging metadata and to add a copyright header in each generated file.
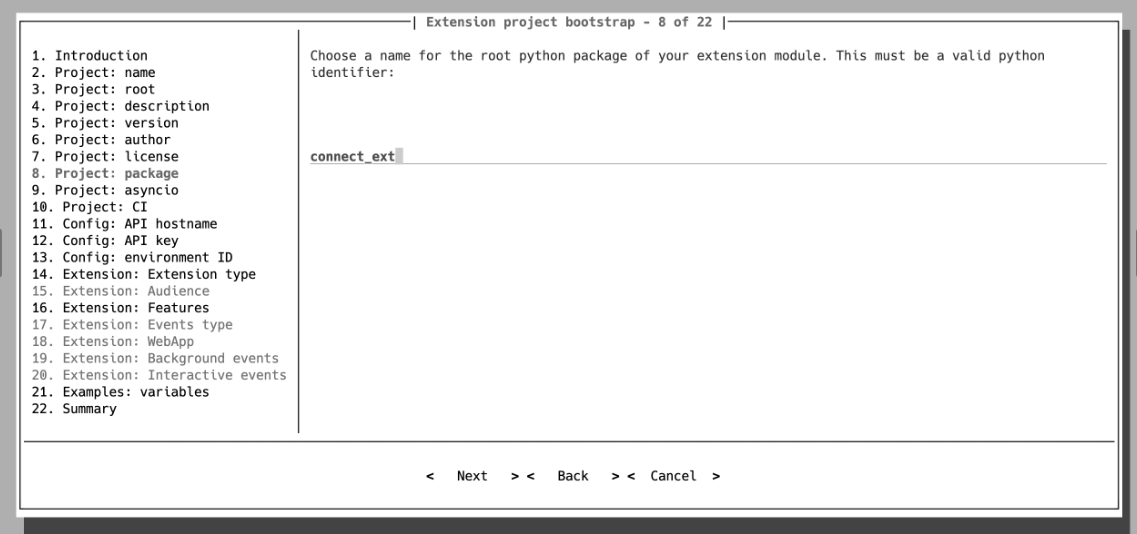
Project package: Select a package name for your extension. It must be a valid python identifier (e.g., connect_ext).
Project asyncio: Enable or disable the asynchronous library for your project. Note that it is possible to use only either asynchronous library or synchronous library. Your project will not be deployed in case it uses both libraries.
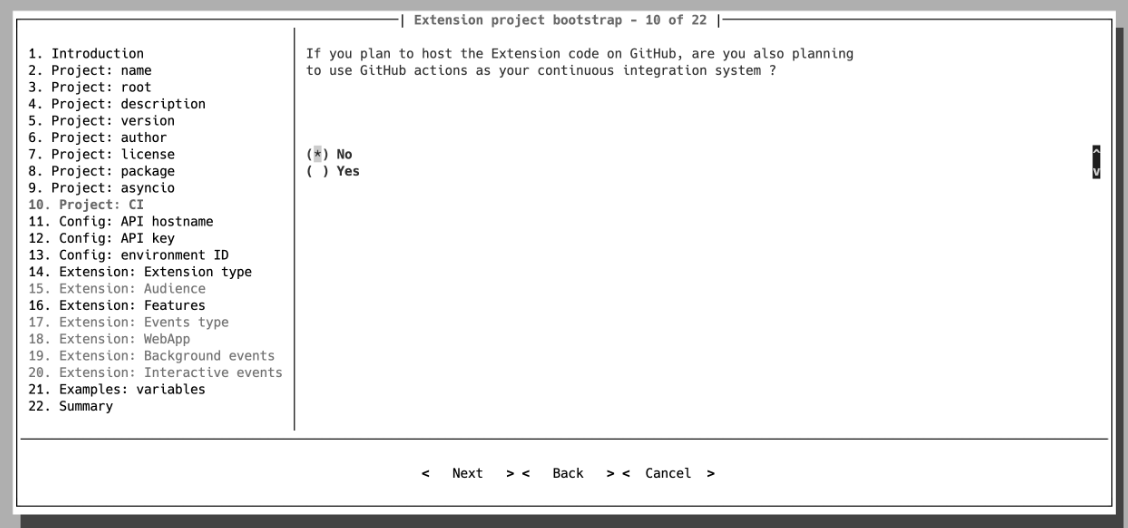
Project CI: Enable or disable GitHub actions for your extension project.
Proceed with your extension project configuration as described below.
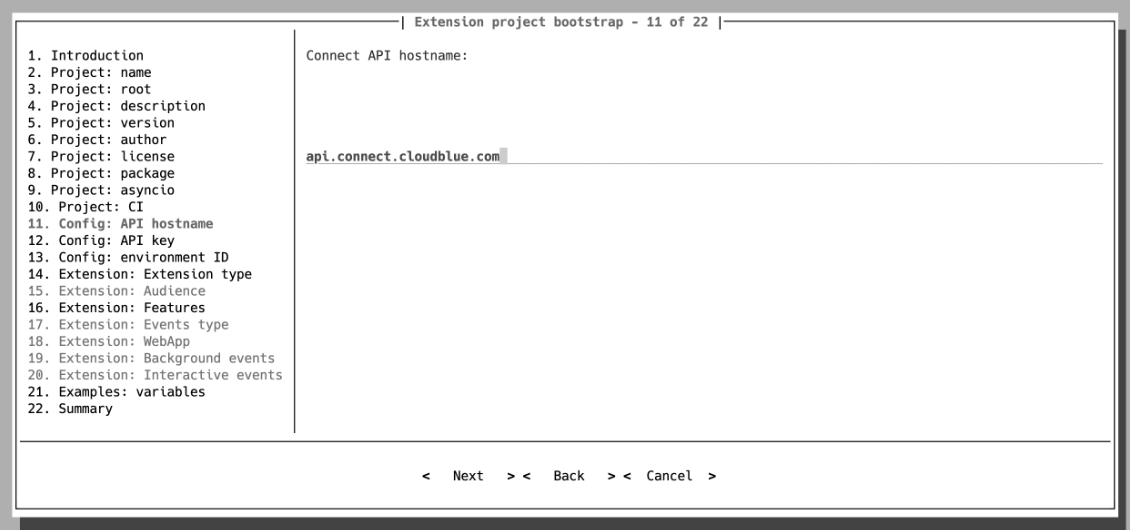
ConfigAPI hostname: The wizard will propose to use the hostname of the Connect production environment by default.
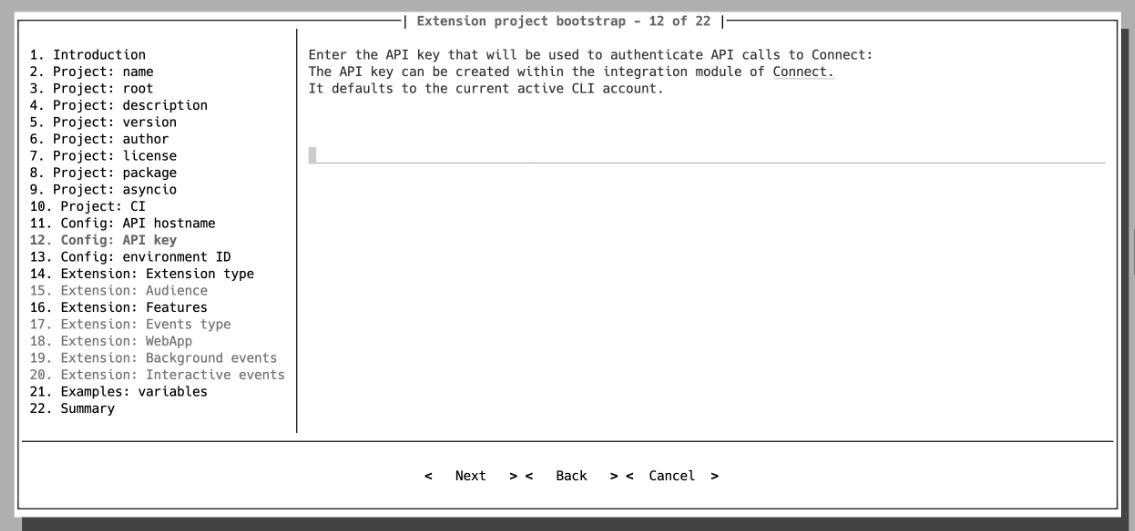
ConfigAPI key: The wizard will suggest using the same Api Key that is configured for your vendor account.
ConfigEnvironment ID: Use your copied environment ID value from the Local Access widget of the details screen.
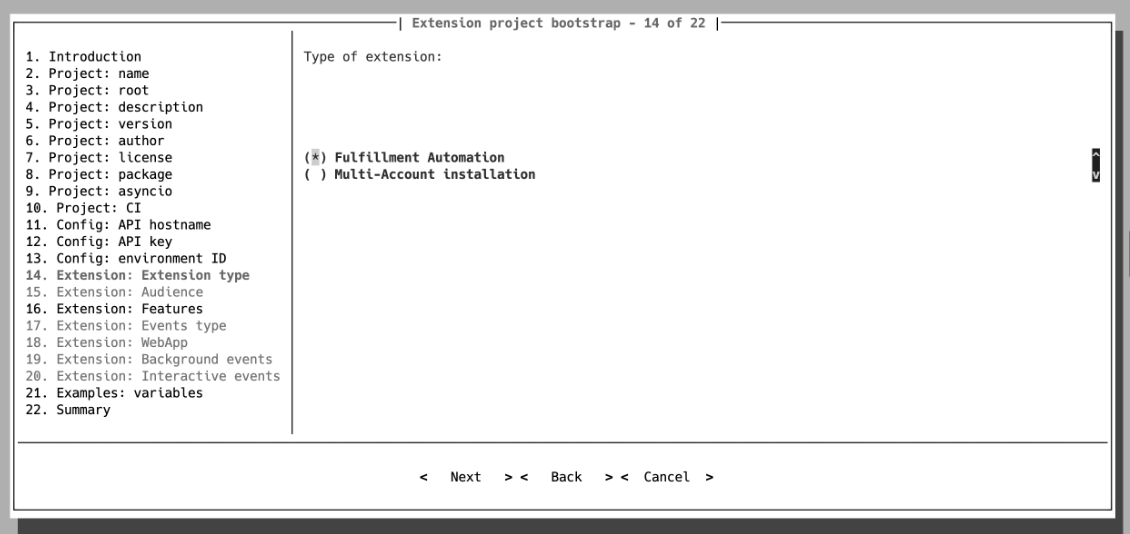
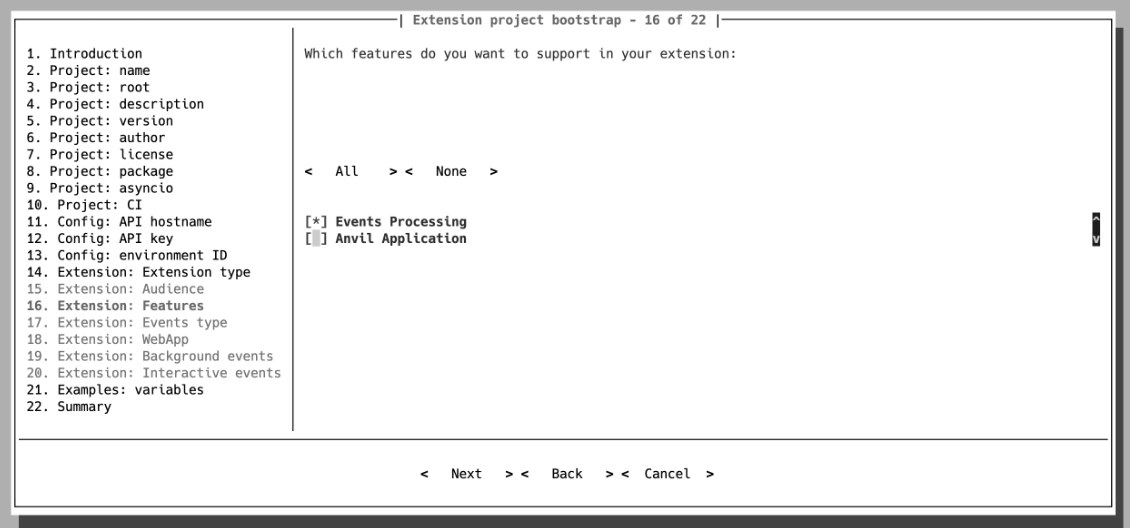
Extension Features: Choose Events Processing to generate an Events Application class.
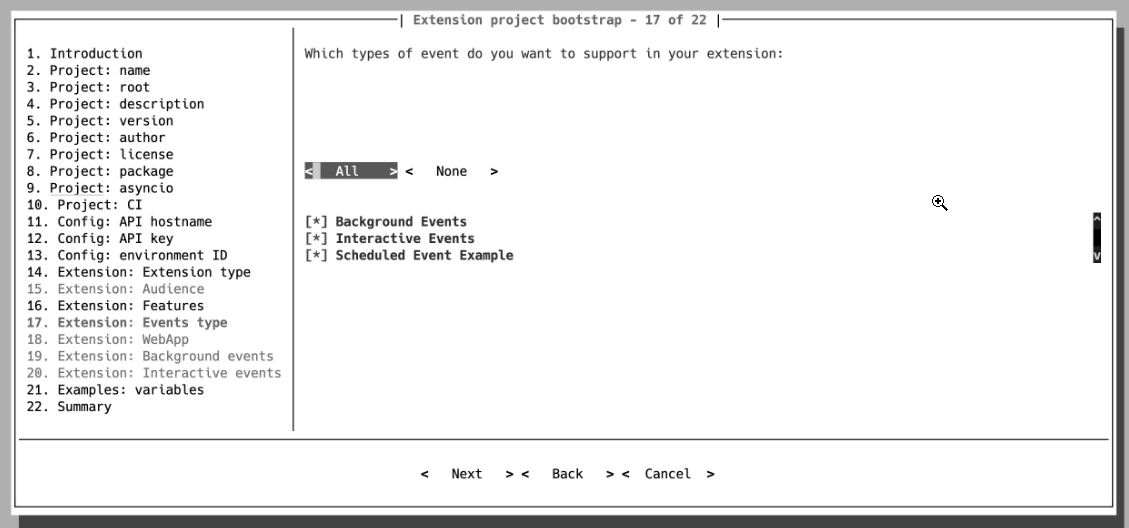
Event categories: Select categories of events you want to handle.
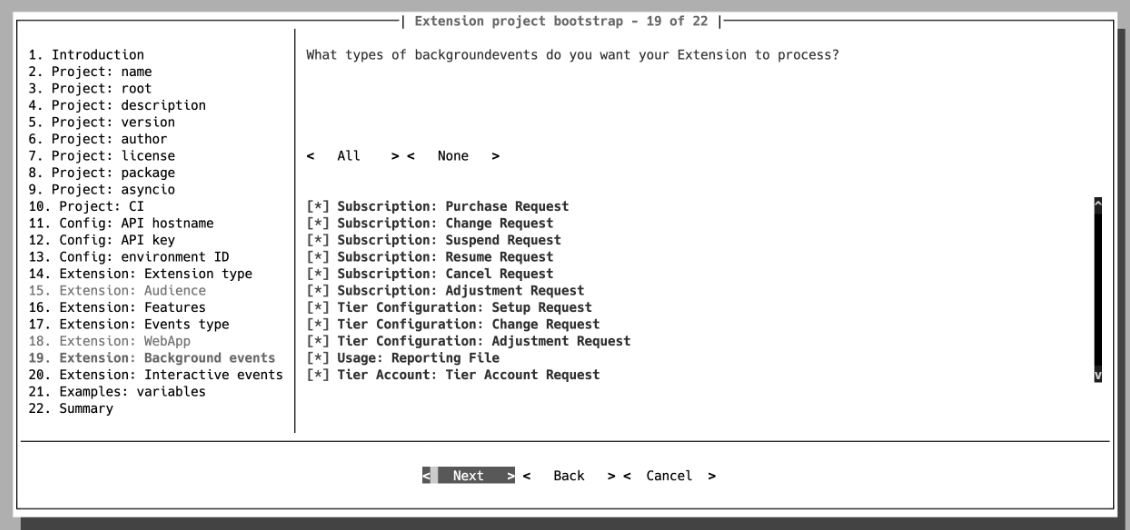
Background events: Choose the required background events.
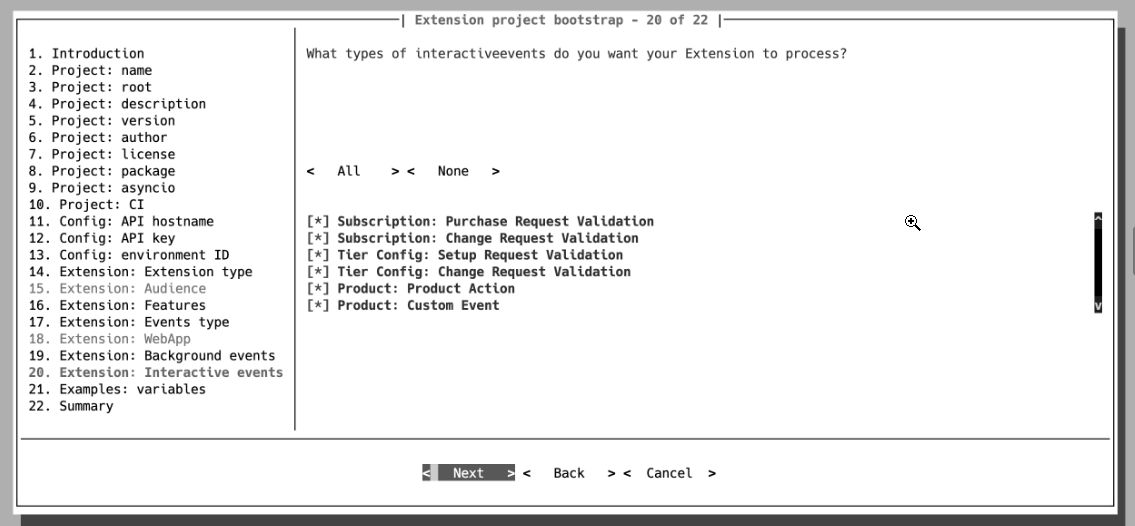
Interactive events: Choose interactive events you are interested in.
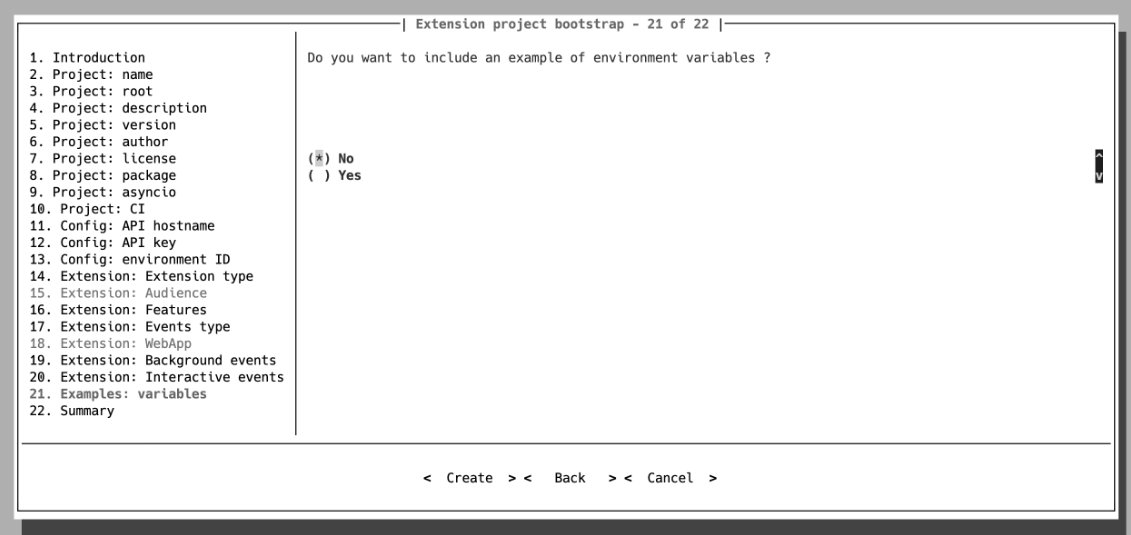
Environment variables: If your extension should use environment variables, choose yes to generate example environment variables.
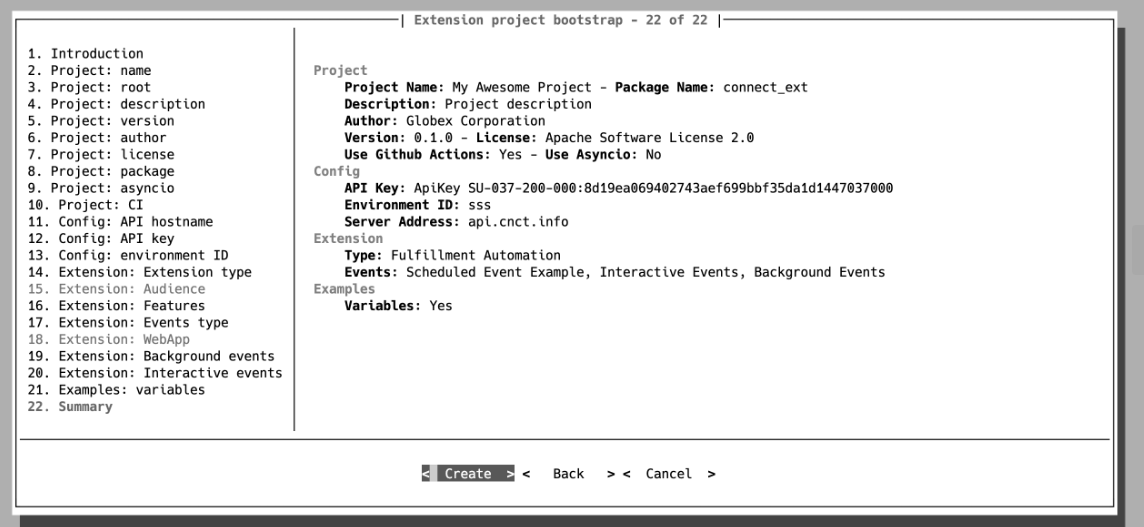
Summary: Select Create and press Enter to generate your extension project.
Run your extension locally
In order to run your extension locally, it is required to build a docker image for your extension.
Go to the generated project folder and run:
$ docker compose build
Then use the following command to execute your extension:
$ docker compose up <your_extension_slug>_dev
Now go to your extension details page in the Connect UI DevOps module and click the refresh button to see your extension up and running.
Advice
If you still use extensions built based on SDK version 1, it is highly recommended that you migrate your data to an SDK2-based extension according to the instructions of this migration guide.