The following describes user interface and general operations with the Customers module on the CloudBlue Connect® platform. The general operations include creating a new tier account, editing account data, accepting tier requests, and more.
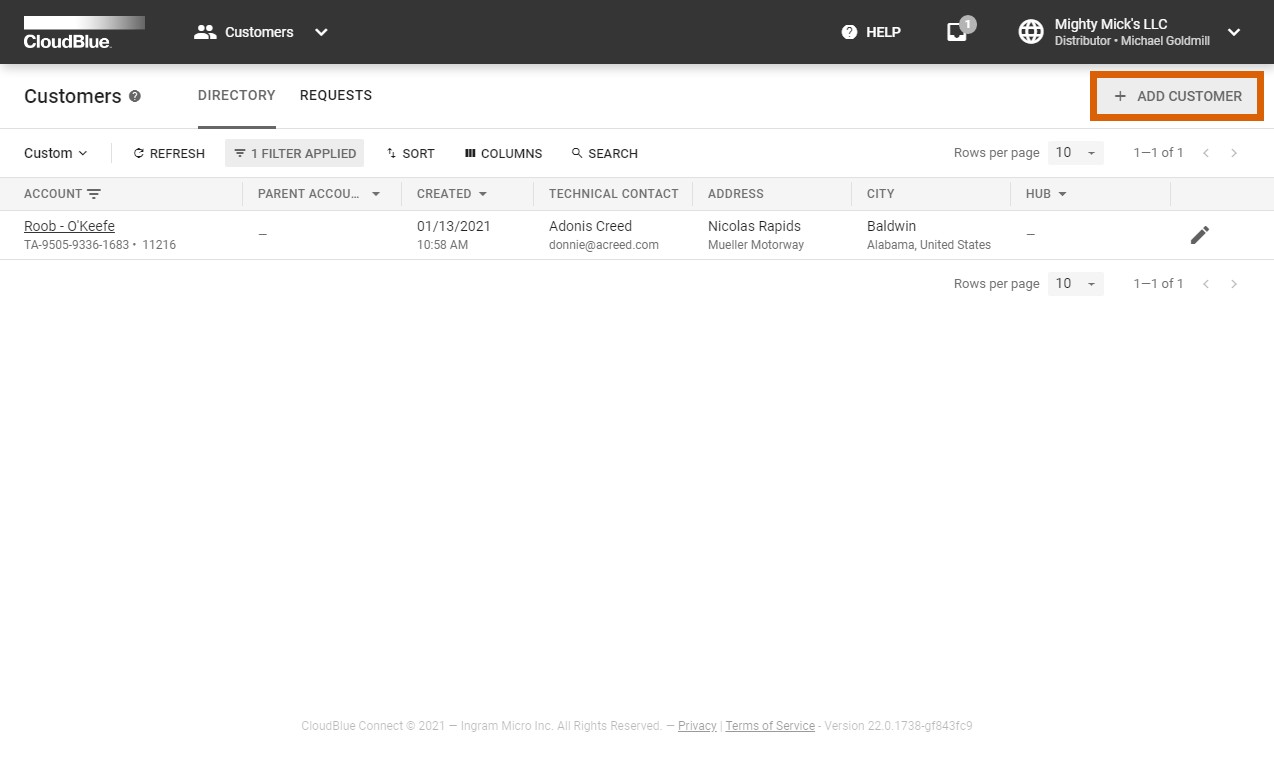
Proceed to Customers module and click the Add Customer button from the Directory tab to launch a Tier Account Creation wizard.
Follow the wizard steps to successfully create a new customer or reseller account.
Select a customer or reseller account type.
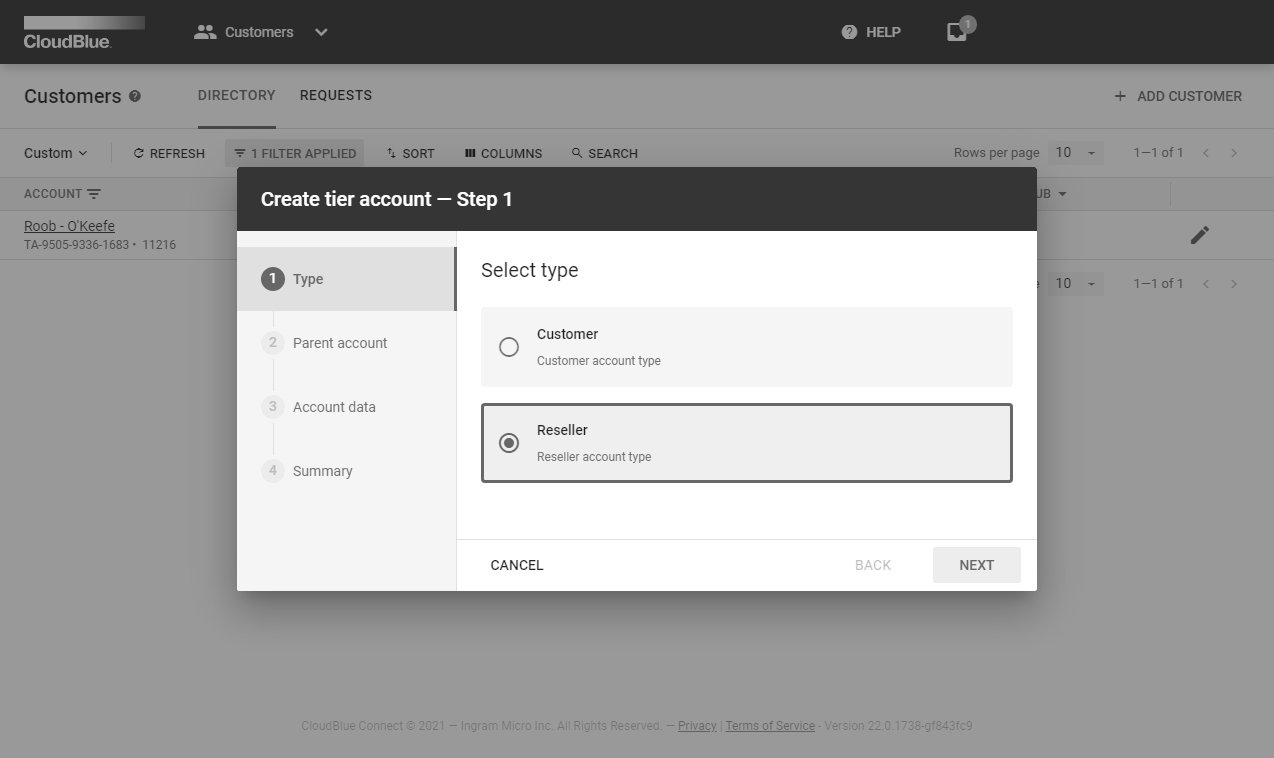
Click the Next button to continue.
Specify a parent account for your new account. Note that only a reseller account can be selected as a parent account.
In case reseller account type is selected, you can select None to create a direct reseller.
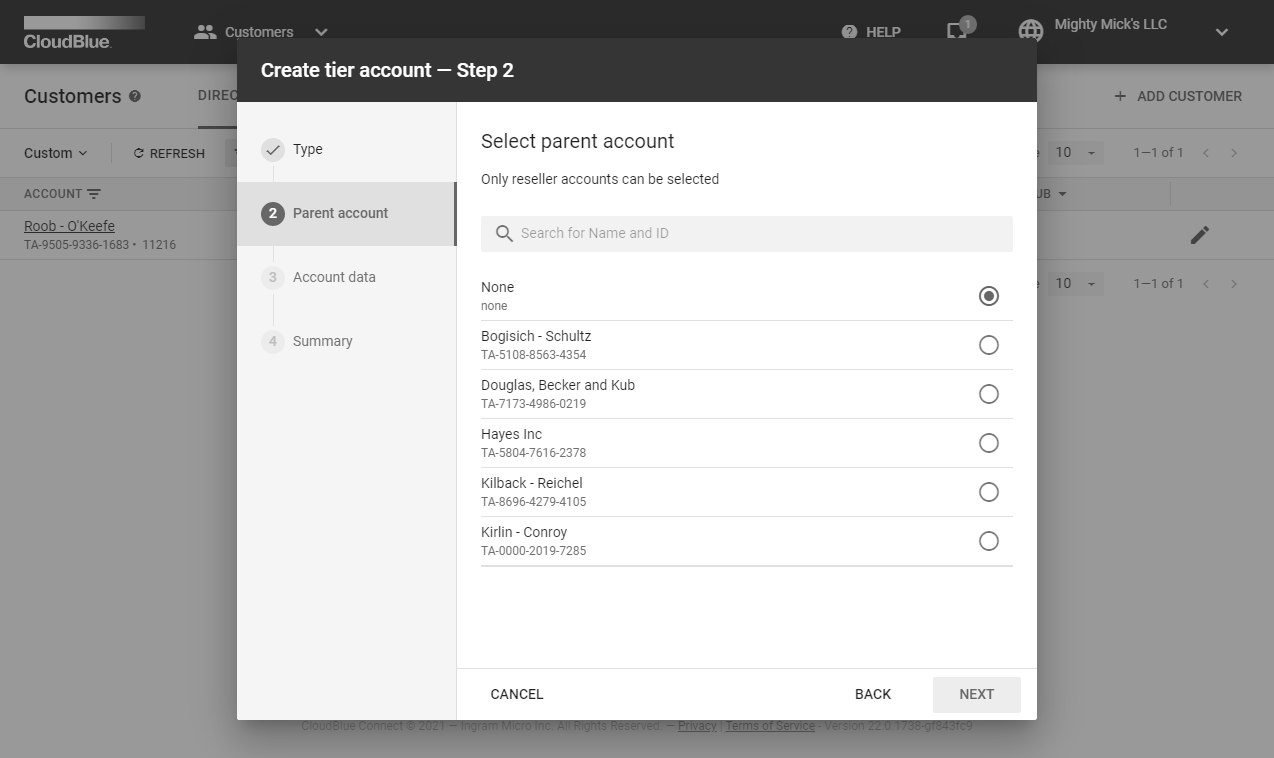
Once a required option is selected, click the Next button to continue.
Fill out the following account data form:
Note that you can also fill out all fields with random data by clicking the Randomize button.
Click the Clear button to clear out all provided fields.
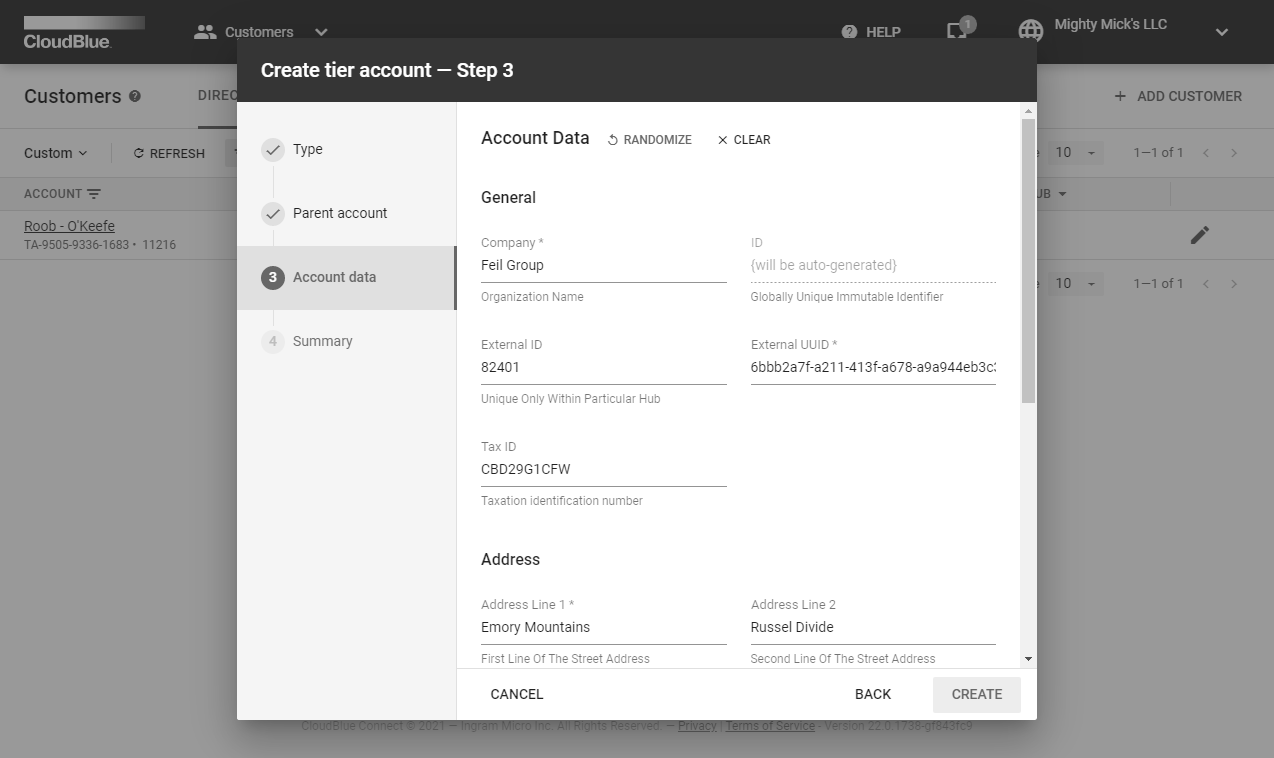
Click the Create button to finalize your tier account creation.
As a result, the system provides a summary once your tier account is successfully created.
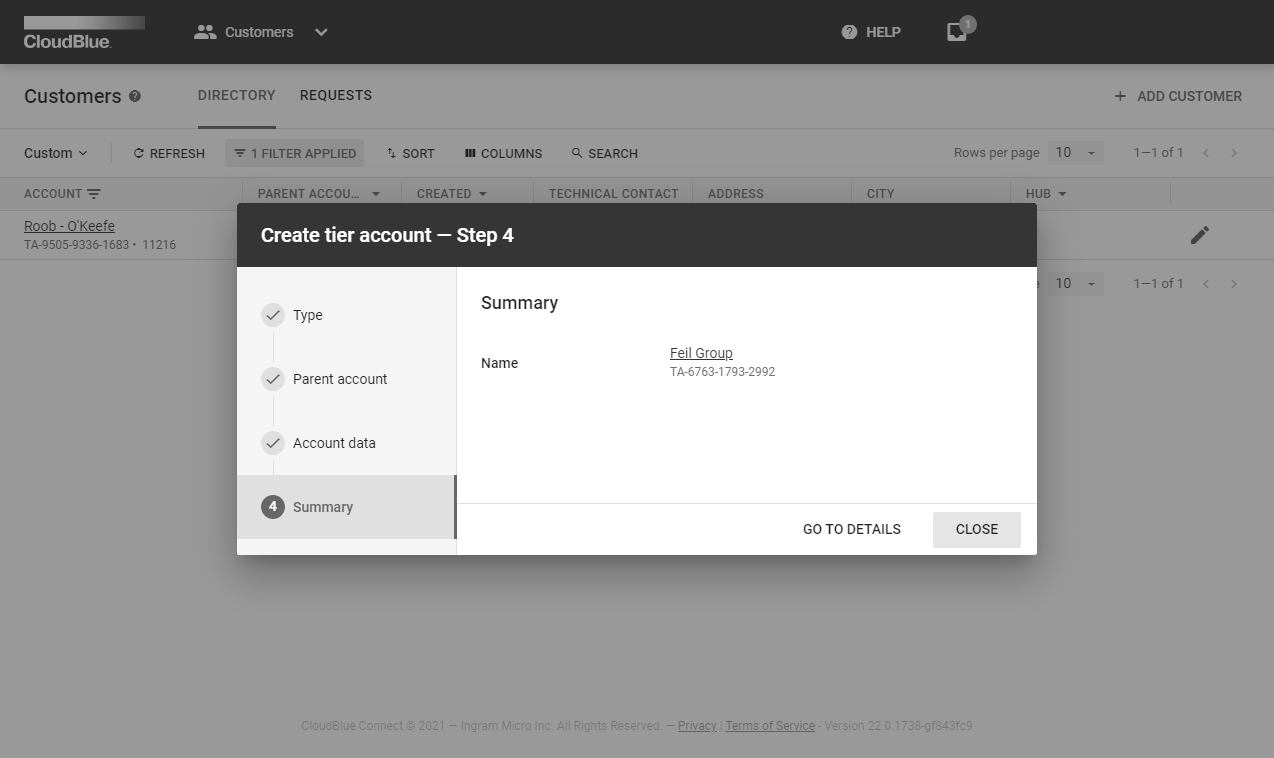
Click Go to Details to access your created account details screen. Click the Close button to close the summary.
Click on a tier account name from the Directory tab to access the Tier Account Details screen.
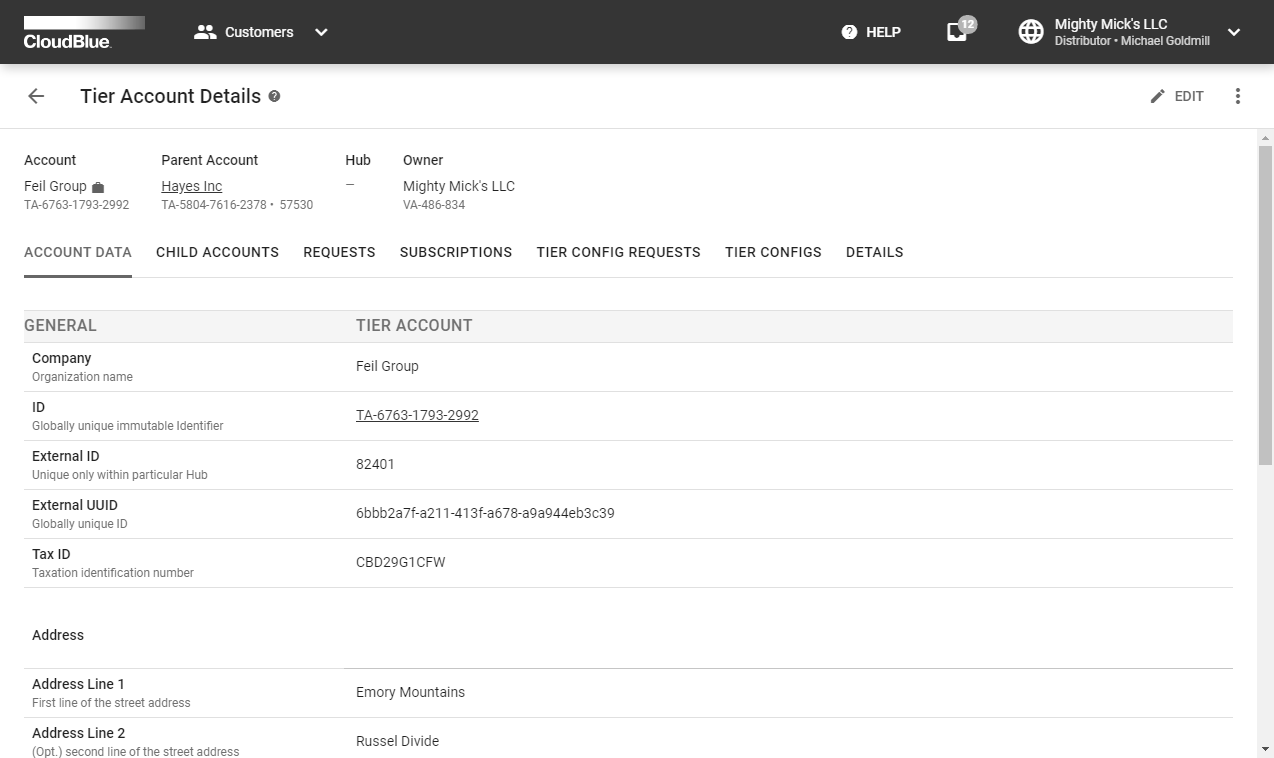
Use the Tier Account Details screen to edit or delete your tier accounts. This screen also allows reviewing account, parent account, hub, and owner information.
Furthermore, this screen provides various data within the following tabs:
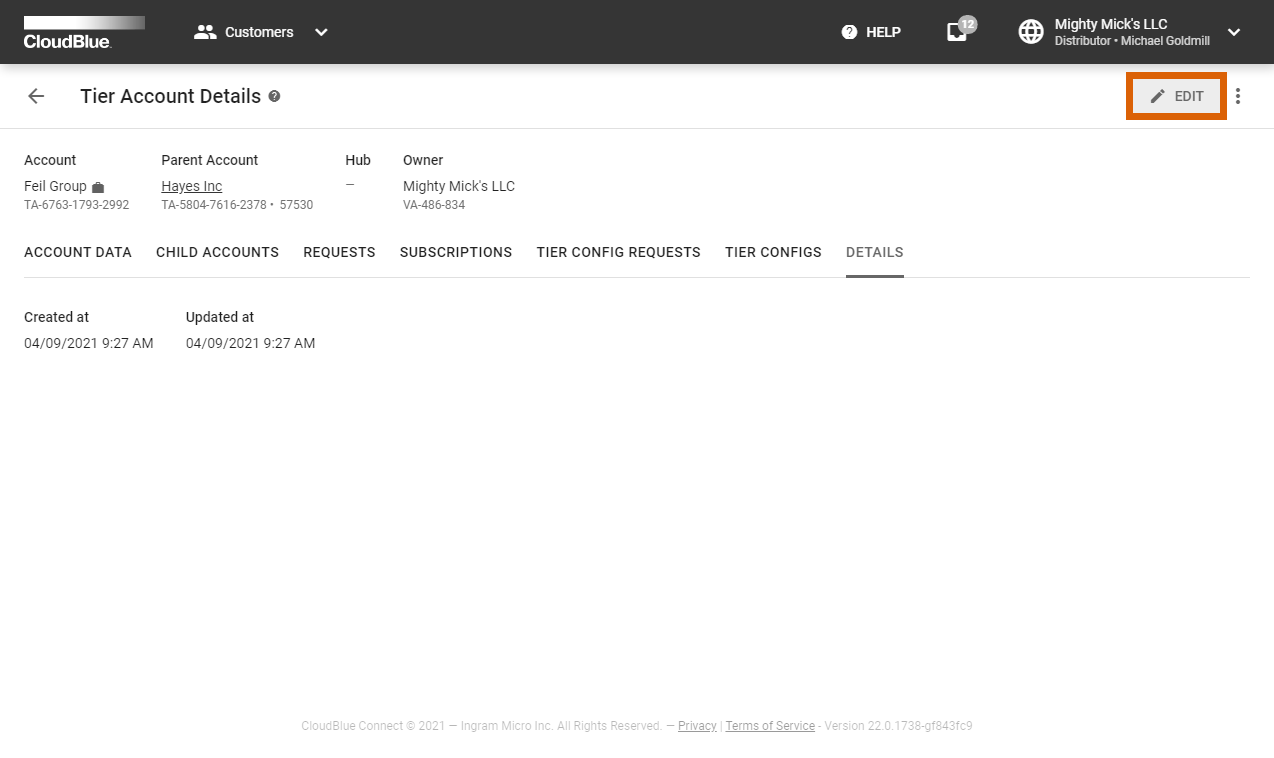
Vendors and Providers can edit tier accounts to update specified account information. In case any account data is edited, the system generates a tier account request that can be approved or ignored by Vendors via Tier Account Details screen. Edit your tier account data by following the steps below.
2. Update your tier account information within the Account data form.
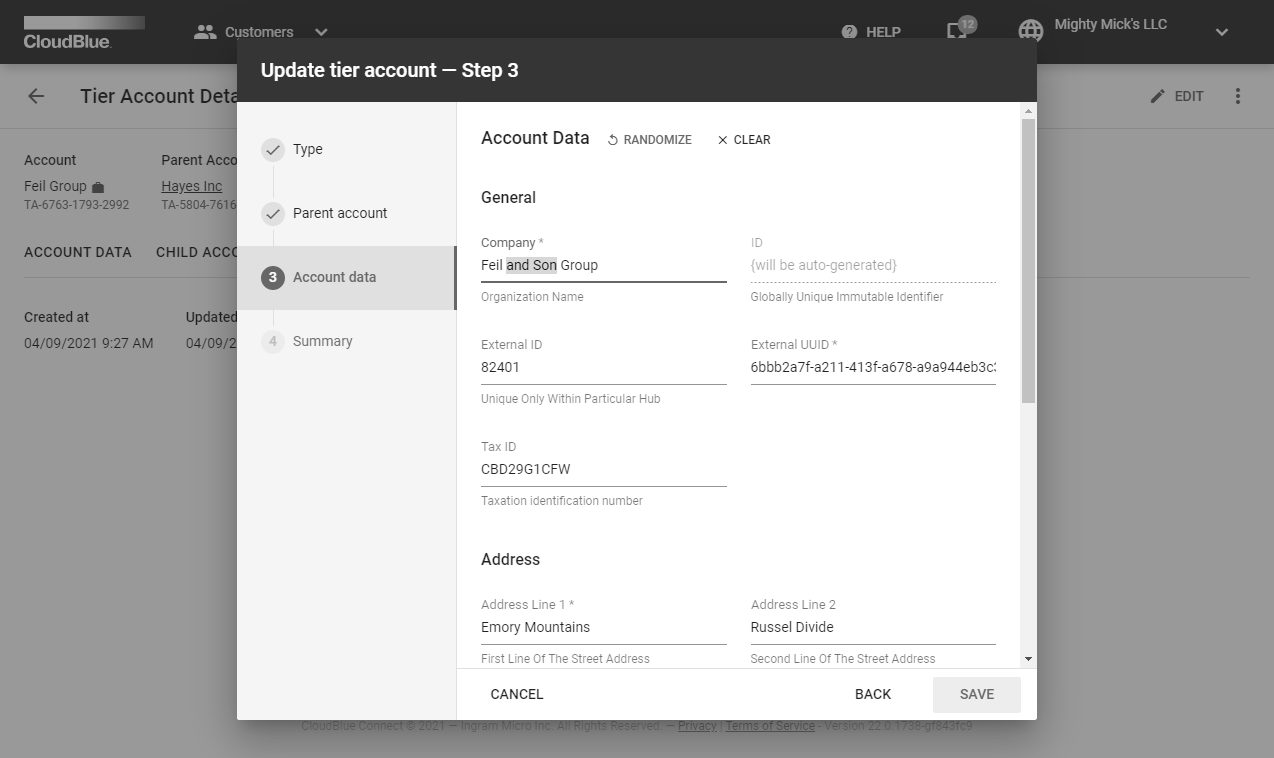
Click the Save button to edit your tier account and generate a tier account request.
Note that this tier account is successfully updated once your tier account request is approved.
Vendors and Providers can remove a tier account by accessing the Tier Account Details screen. Note that deleted tier account data cannot be restored. The following steps showcase how to delete a tier account on the Connect platform.
1. Open the vertical ellipsis (⋮) menu and click the Delete button.

2. Confirm your decision by clicking Delete in the pop-up window.
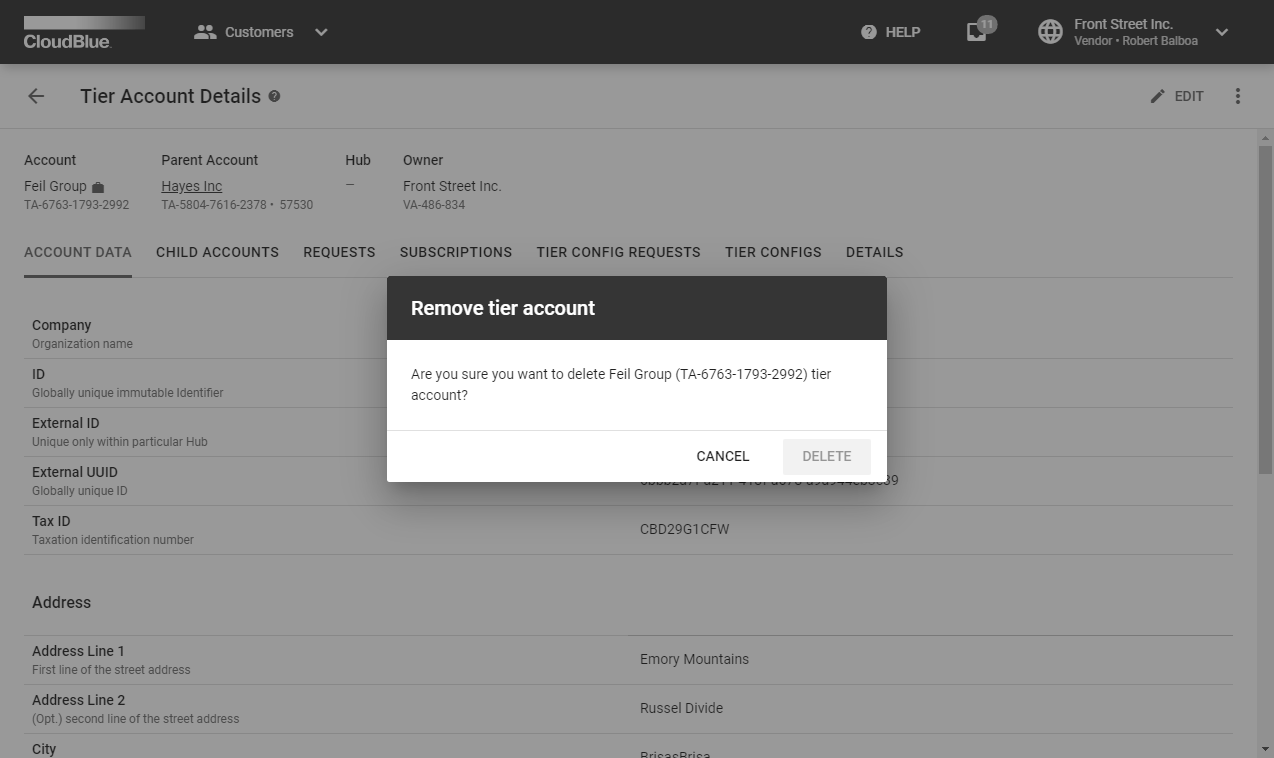
As a result, your tier account will be successfully removed.
Click on a tier account request ID from the Requests tab to access the request details screen.
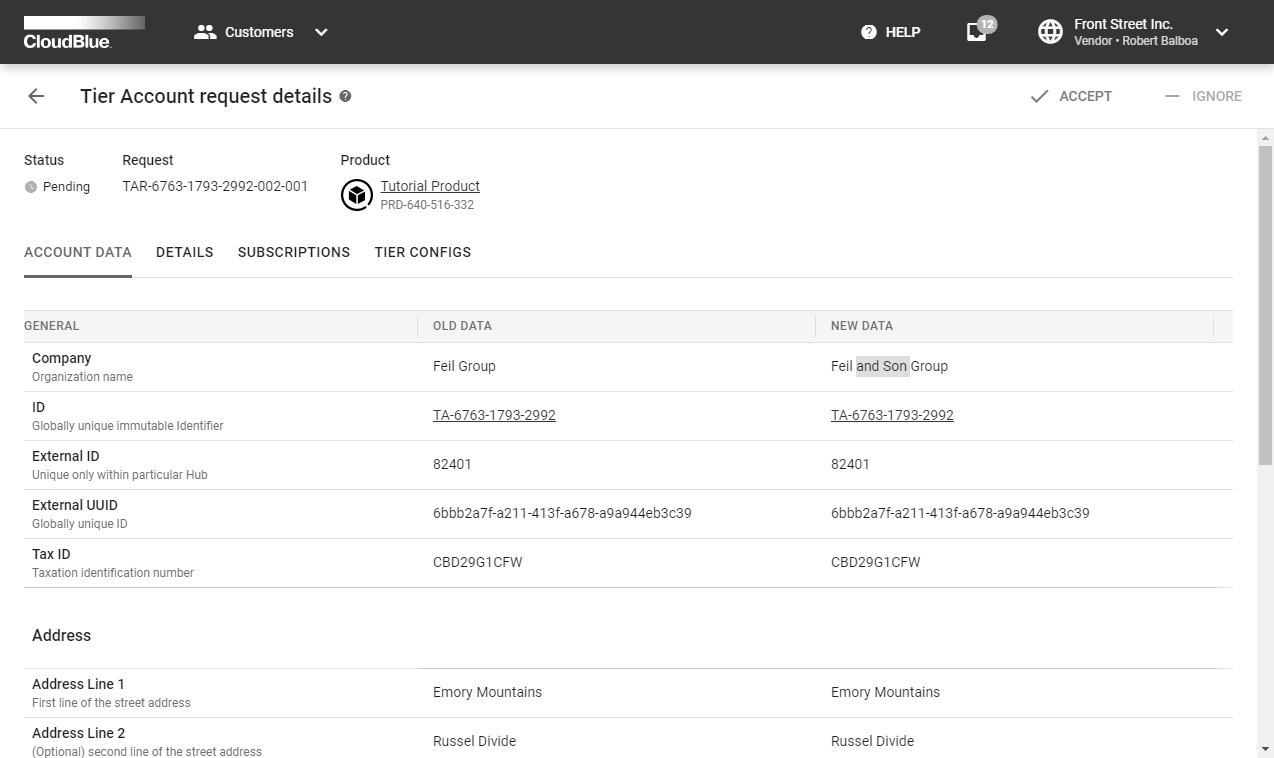
Use the Account Data tab from the Tier Account Request Details screen to review the required tier account changes and updates.
The Details tab displays an associated Hub and external ID of your request.
Access subscriptions that are interconnected with this tier account request via the Subscriptions tab.
Use the Tier Configuration tab to view and access associated tier configurations.
Furthermore, Vendors can accept required account changes or ignore them by accessing the Tier Account Request Details screen.
Once a request to change or update a tier account is created, Vendors can accept this request via Tier Account Request Details.
Follow the steps below to successfully accept a tier account request.
1. Click the Accept button from the Tier Account Request Details screen after reviewing required changes or updates.
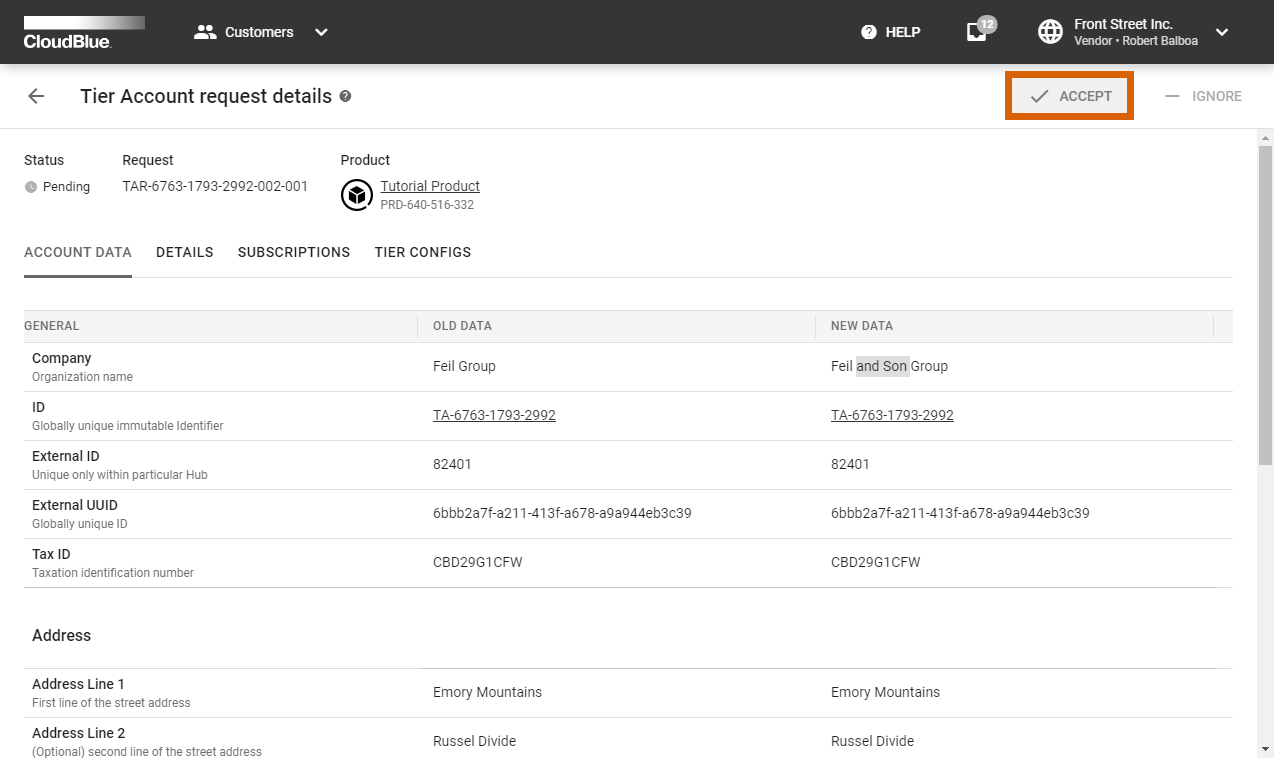
2. Confirm your decision by clicking OK in the following pop-up window.

Therefore, this request will be accepted and its interconnected tier account will be successfully updated.
In case of an error, Vendors can assign the Ignored state to a tier account request. Note that ignoring updates and changes to a tier account will not revert or discard changes. However, ignoring these request can be especially useful to indicate errors and consolidate relevant tier account data. The following steps showcase how to ignore a tier account request.
1. Click the Ignore button from the Tier Account Request Details screen.

2. Specify your reject reason within the following form.
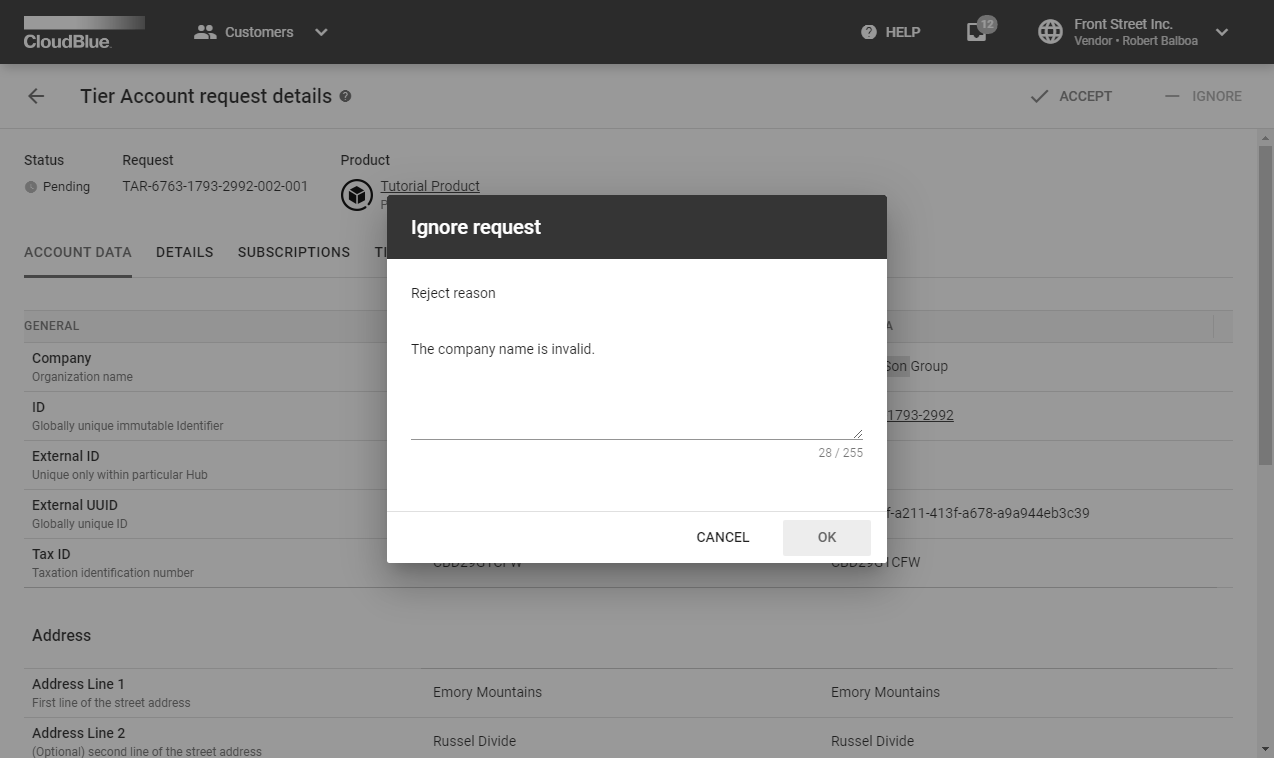
Thereafter, click OK to submit your message.
As a result, your tier account request will be switched to the Ignored state.