The Reports Management module, as the name implies, is used to implement the reporting functionality on the CloudBlue Connect® platform. The provided reporting capabilities allows organizations to acquire business intelligence in a timely manner. Insights into various business operations always provide an upper hand for making right decisions.
Before starting to work with the Reports module and its comprehensive features, it is recommended to get familiar with the reports overview, the report schedules concept, and the provided workflows.
Reports represent objects that include data that is exported from the system. Such reports can be especially useful to extract required data and import it to external systems for further processing, such as billing and reconciliation operations.

Reports can be created via the Directory tab of Reports module. By using the provided report templates, the system generates a System report object. Such reports contain predefined report parameters that are selected via the aforementioned templates and that include corresponding export data.
Additionally, it is possible to export any data from the platform via Connect Reports SDK. Therefore, by following the provided instructions, Connect users can provide their git repositories and use custom templates to generate reports. Custom templates may contain any of your specified parameters and consequently allows creating specific reports that are required for your business scenario.
Once a report object is generated, the system starts processing your report file. In case the report processing is successful, the system provides a report file in your specified format (JSON, CSV, or XLSX) and displays Ready in the report status. Thereafter, the system allows you to successfully download the report file.
The CloudBlue Connect® platform also allows creating report schedule objects and customize schedule triggers. Therefore, the system will systematically generate report files based on your selected template and trigger configurations. Reports can be automatically created daily, weekly, or monthly.
The system enables Connect users to edit provided trigger configuration as well as report parameters after the schedule object is created. In addition, users can manually trigger their report schedule and generate required report files immediately.
Note that the system also enables you to disable or enable your created report schedules.
The following illustrates and describes the report object workflow on the Connect platform.
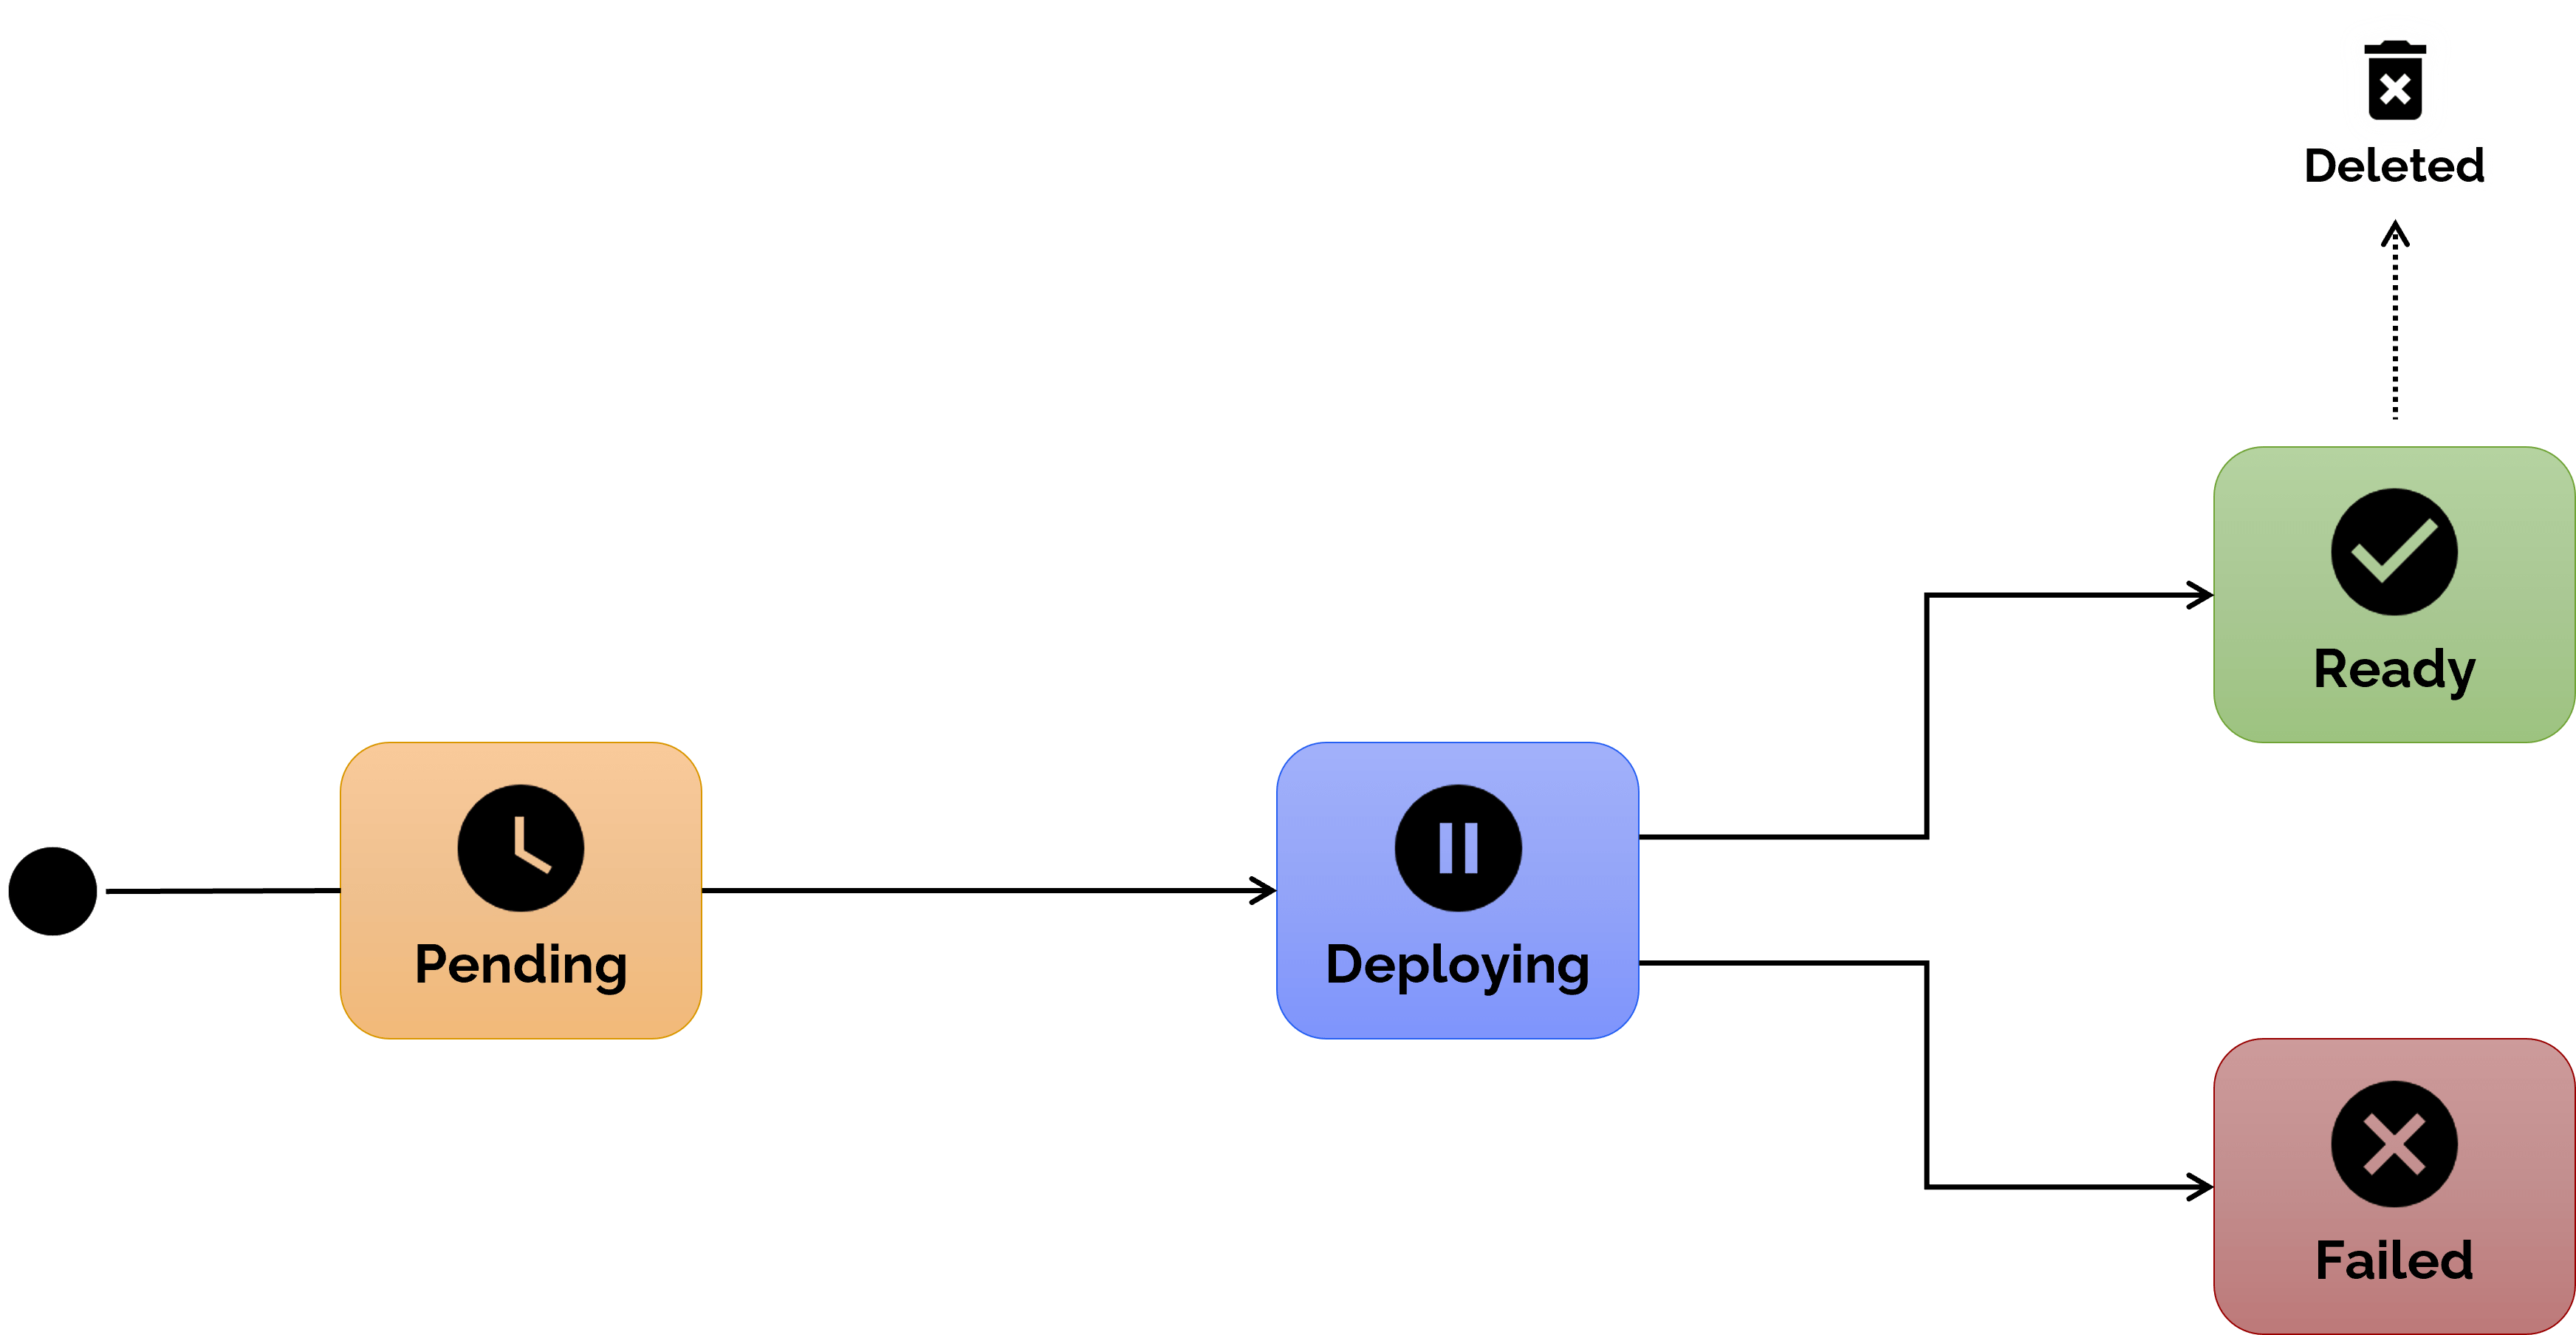
Pending: Once a new report object is successfully generated, the system assigns the Pending state to your report. This status is generally assigned right after the creation of the report object. After a few moments, the system will transfer the object to the next state.
Deploying: This status indicates that a new report is being deployed on the Connect platform. From this particular state, the system decides if a report file is generated successfully. Thereafter, in case the report creation is successful, the system assigns the Ready status to this report. Otherwise, the report creation is failed and the system assigns the corresponding status to it.
Ready: This status is displayed in case the report creation process was successfully completed. Therefore, your report file is ready and it is available to download. Note that reports in this state can be removed if necessary.
Failed: This state indicates that the report creation process is failed due to an error. Therefore, this report will not be available for download. Note that Failed status represents a terminal state, meaning no further actions with this report are available. Thus, it is required to create and configure a new report on Connect.
Access the following articles to learn more about the graphical user interface, available operations and API of the Reports module on the Connect platform: