The following provides instructions on how to generate and configure report files. Furthermore, the following guidelines showcase how to schedule your report creation and how to download generated report files.
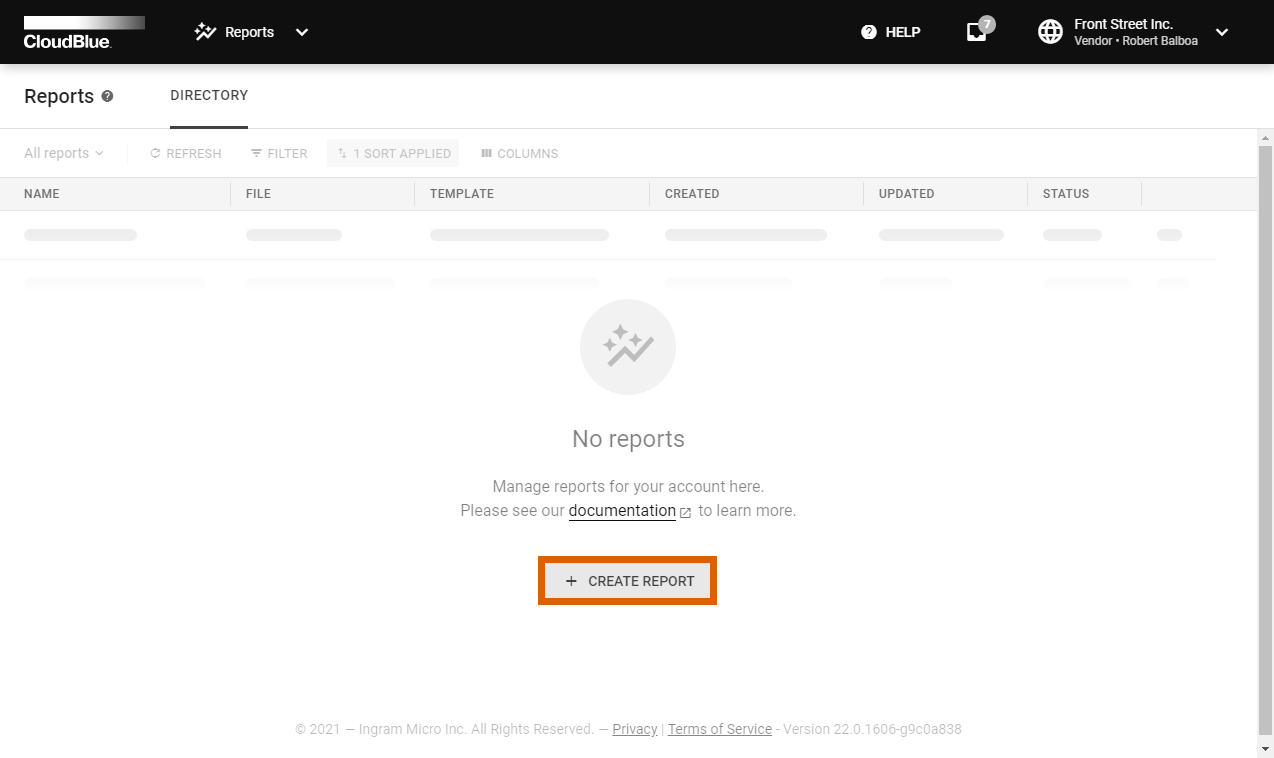
The Directory tab of the Reports module is used to generate reports only once. The CloudBlue Connect® platform provides a wizard that facilitates and streamlines the report creation procedure. This wizard provides a set of default system templates as well as your custom templates configured via the Reports SDK.
Click the Create Report button to launch the report creation wizard.
Follow the wizard instructions to successfully create a report on the Connect platform.
Choose your template from the list. The provided templates represent predefined report formats that allow exporting data from one or multiple Connect modules.
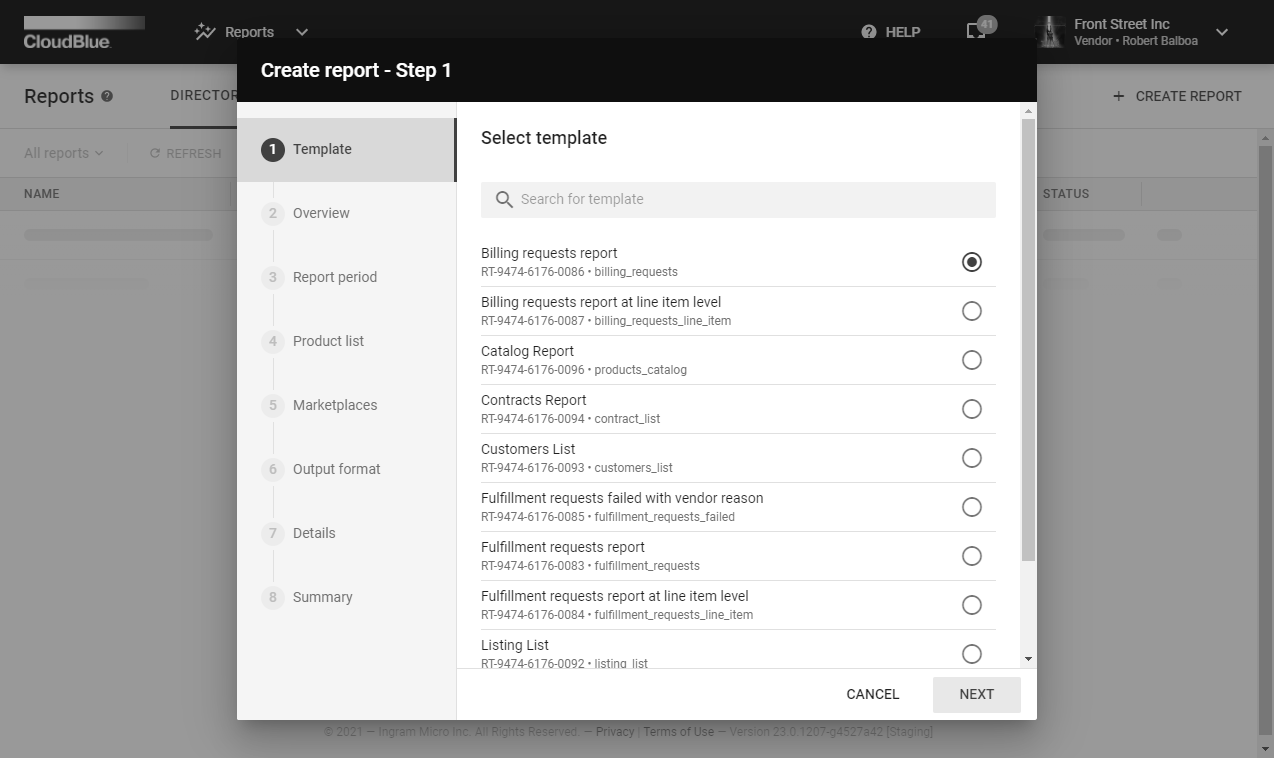
Click the Next button to continue.
The wizard displays different overviews depending on your selected template.

Review the provided description and click Next to continue.
The wizard provides different parameter steps for your selected report template. In general, it requires selecting report period, choosing a product, and specifying marketplaces or statuses. The following example showcases the Billing Request Report configuration.
Select a report period by clicking on the provided field.
Choose the start date from the calendar by clicking on it. Thereafter, specify the end date by clicking on the calendar once again.
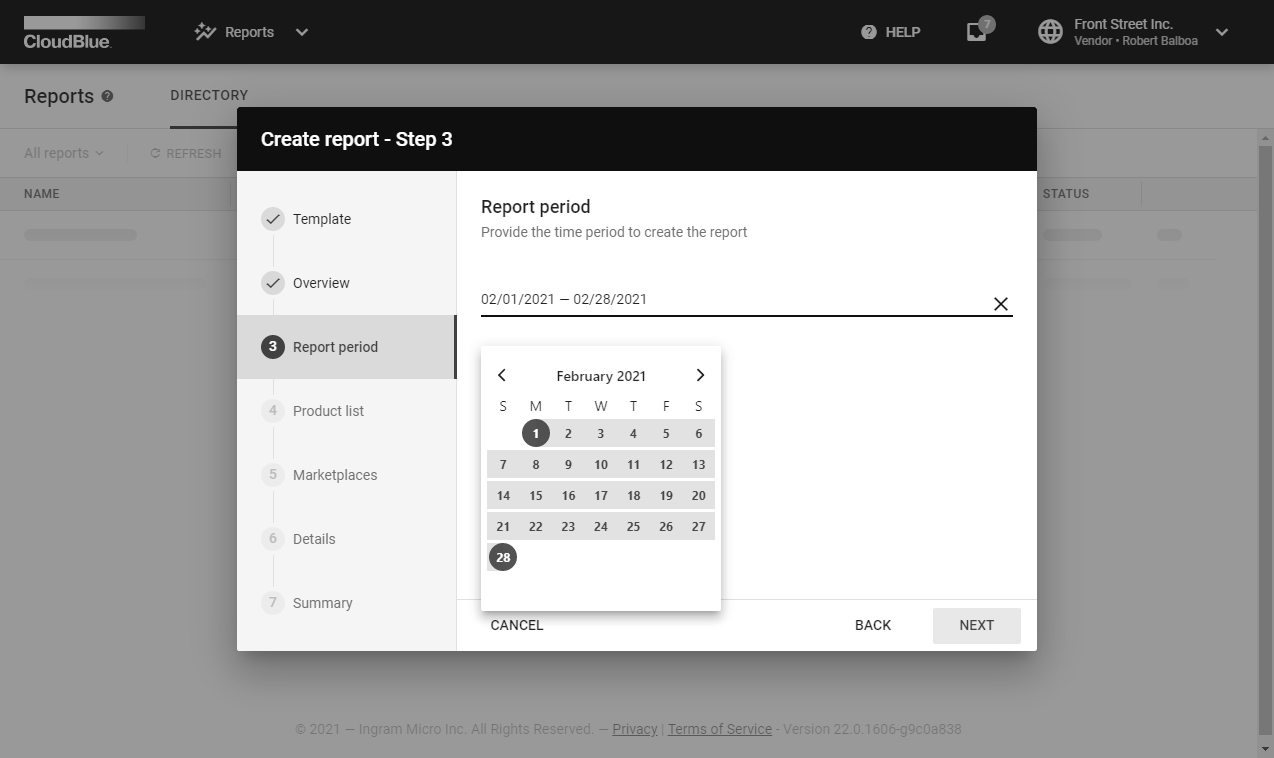
Make sure that selected period is correct and click Next to continue.
Specify a product from the following product list.
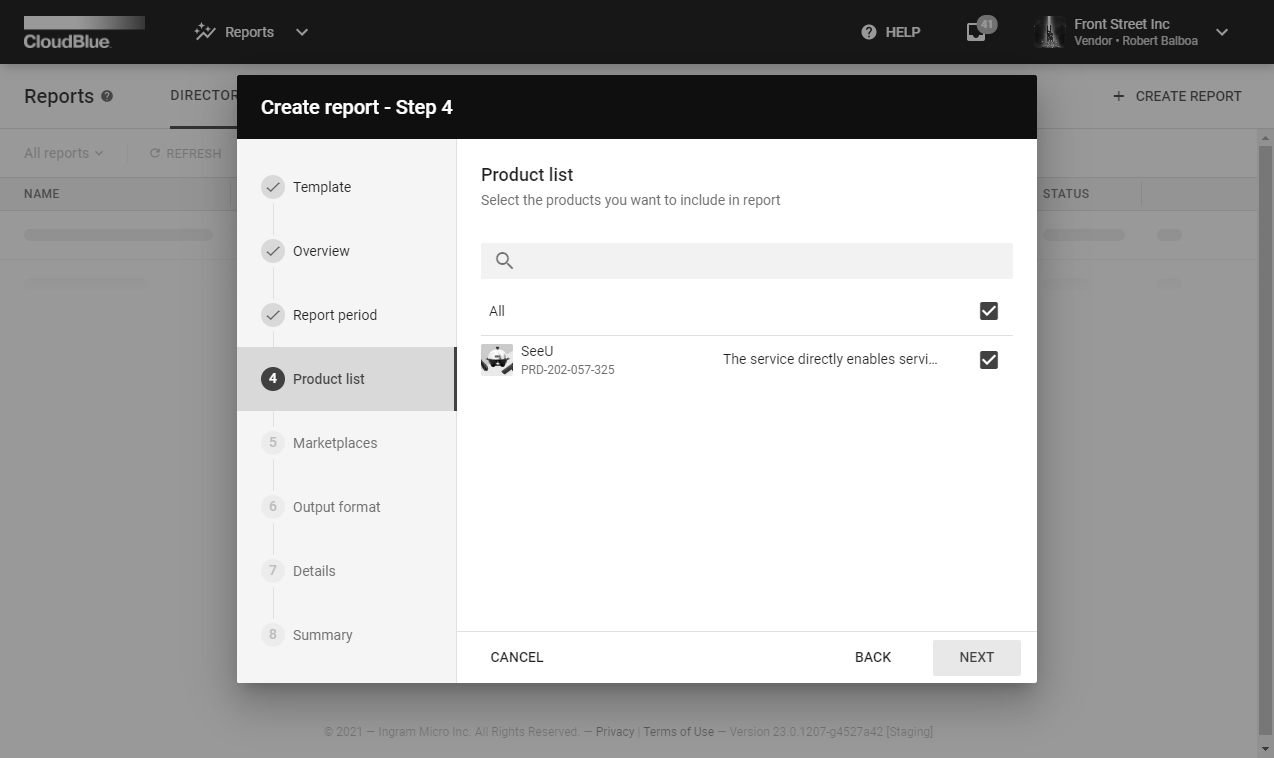
In case you want to select all available products, check the All checkbox.
Select a marketplace from the following list.
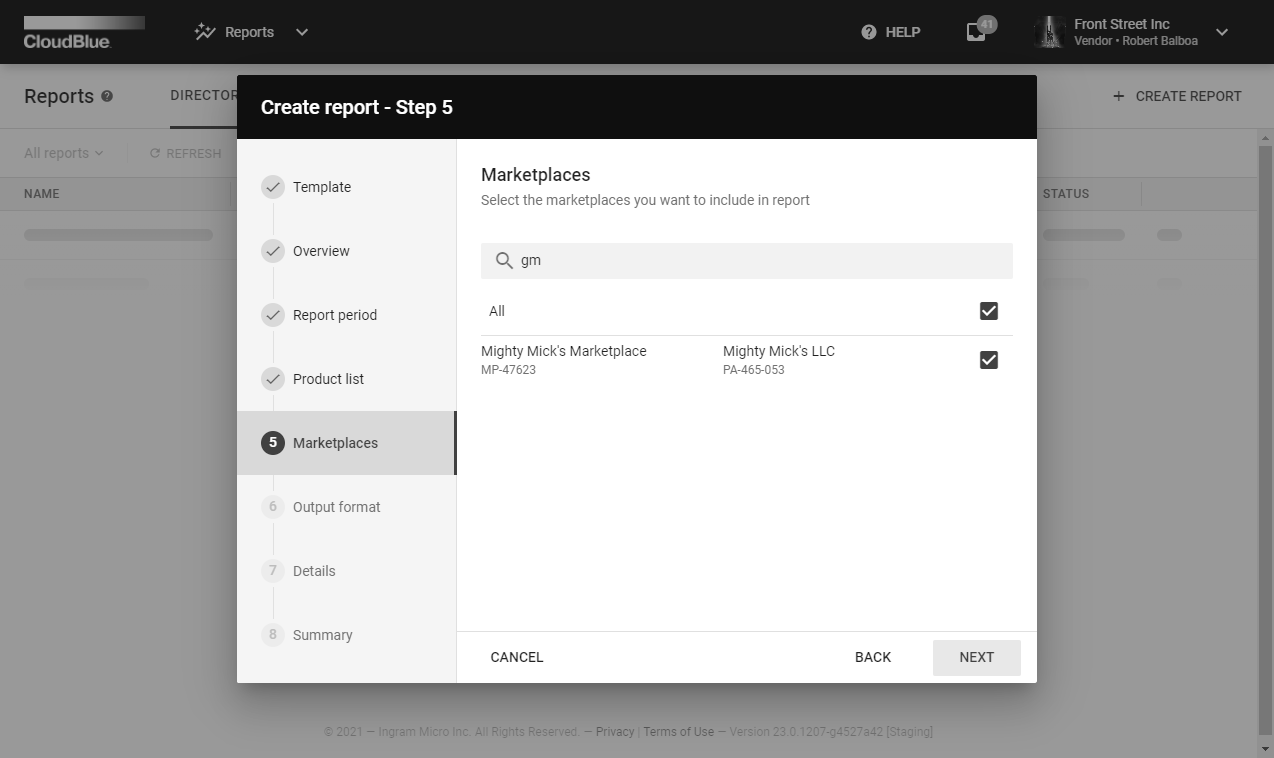
If you want to select all available marketplaces, check the corresponding checkbox.
Select XLSX, JSON or CSV as your report file output format. Note that system doesn’t allow changing your output format once your report file is created.
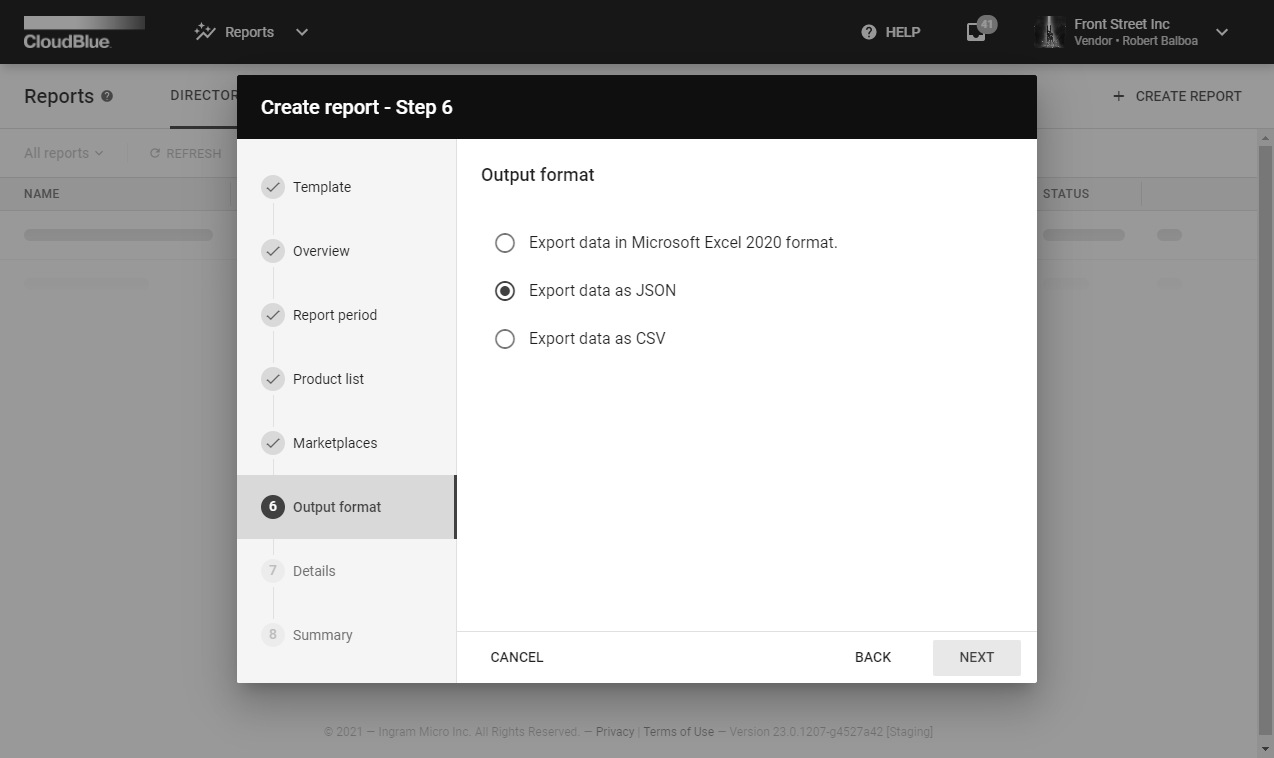
Click Next to continue.
Specify the following report details:

Click Create to finalize your export request creation.
Once your report object is created, the system provides a summary.
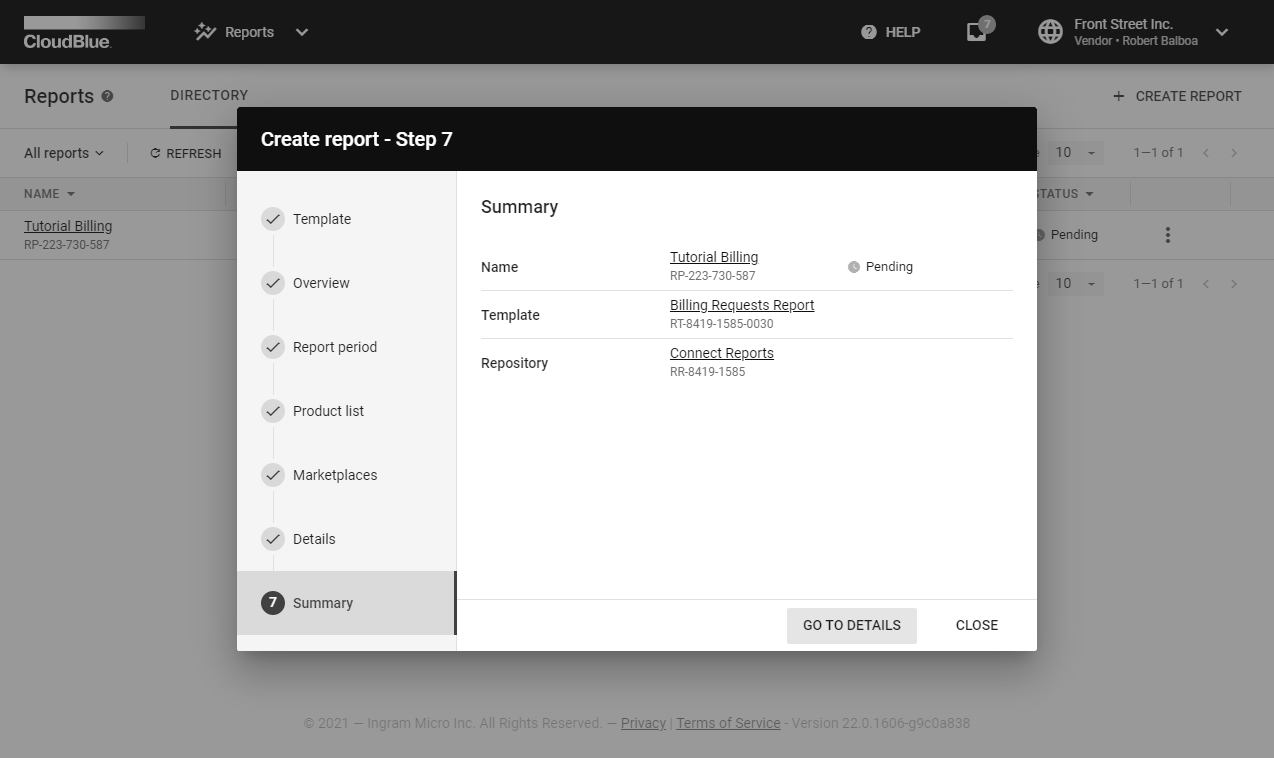
Review the summary and click Go to Details to access the Report details screen. Otherwise, click Close and return to the Reports module.
Click on the report name from the Directory tab of the Reports module to access the Report details screen.
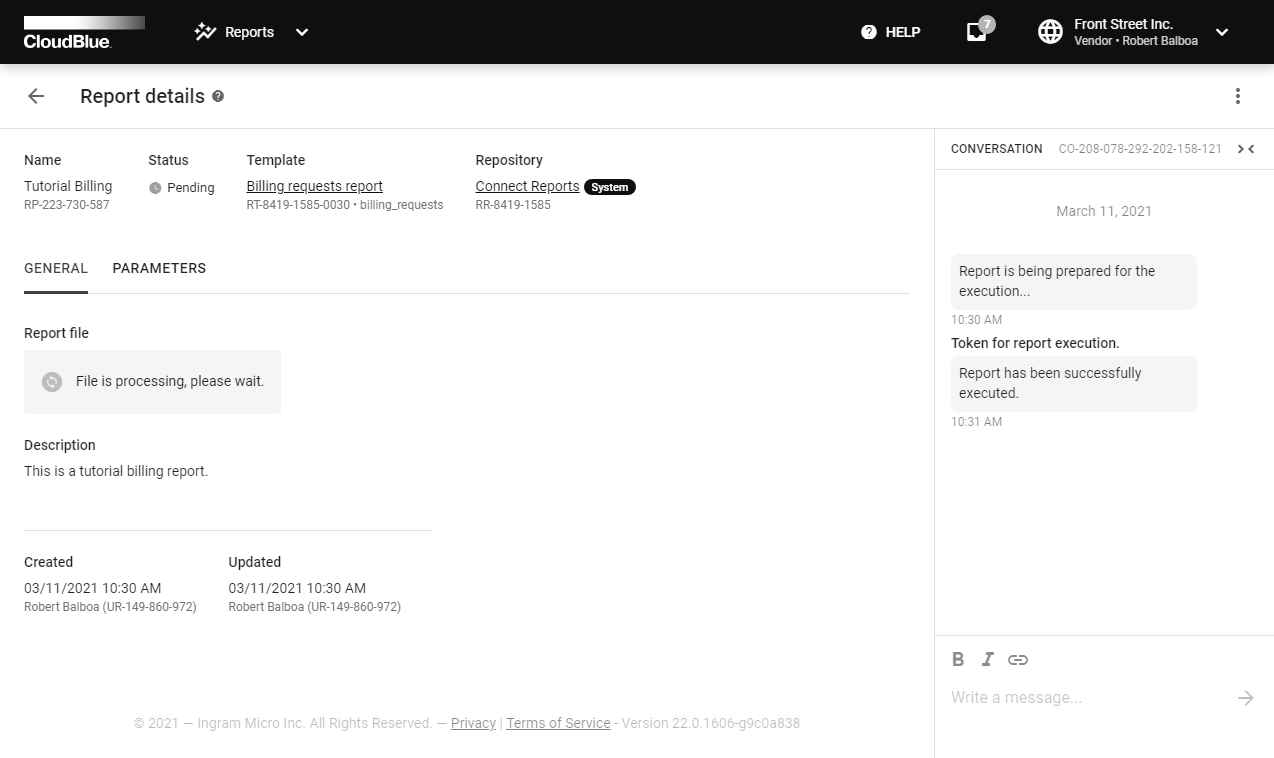
The Report details screen contains your report object data. Namely, provided Name, specified Description, selected Template, associated Dates, report Status, file Repository and report type (System or Custom).
Furthermore, you can use the Conversation field to leave a message for your account users or to examine the system messages.
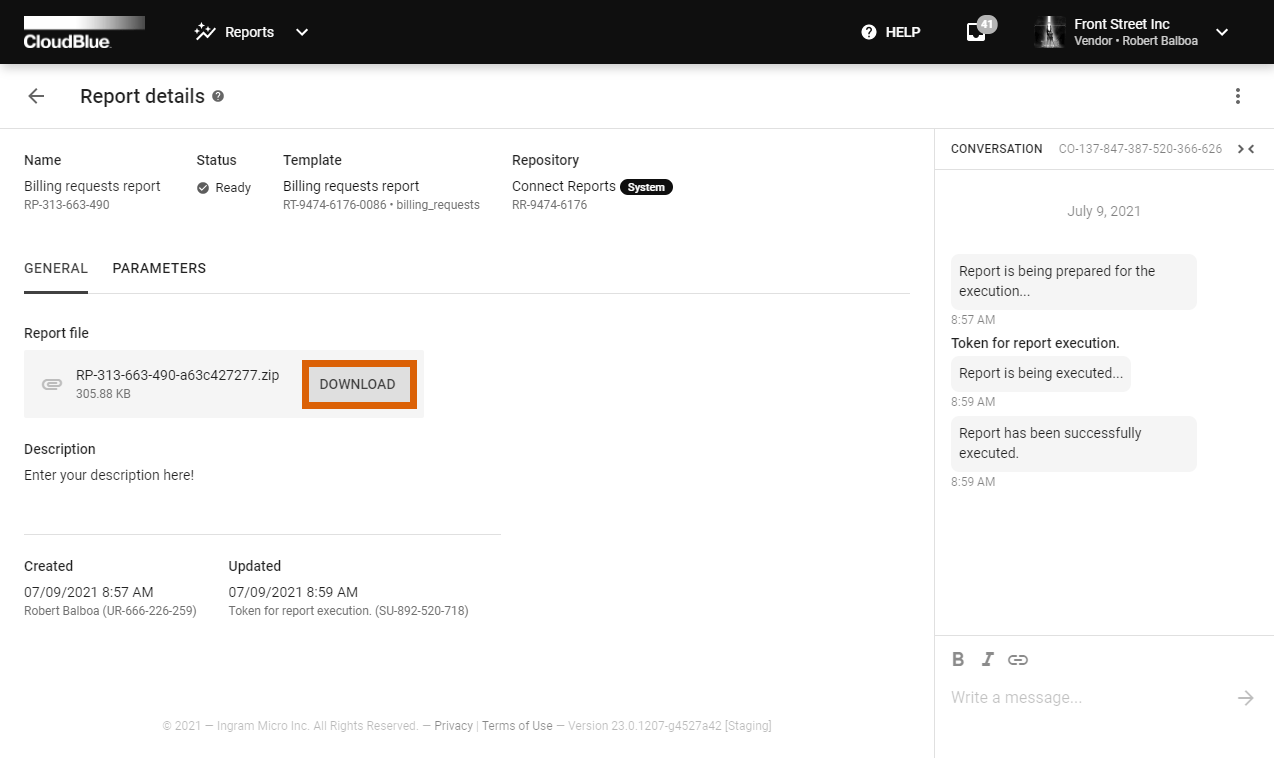
Once the system will successfully process a report file, it will be available for download under Report file.
Click on the Parameters tab to access your specified parameters.
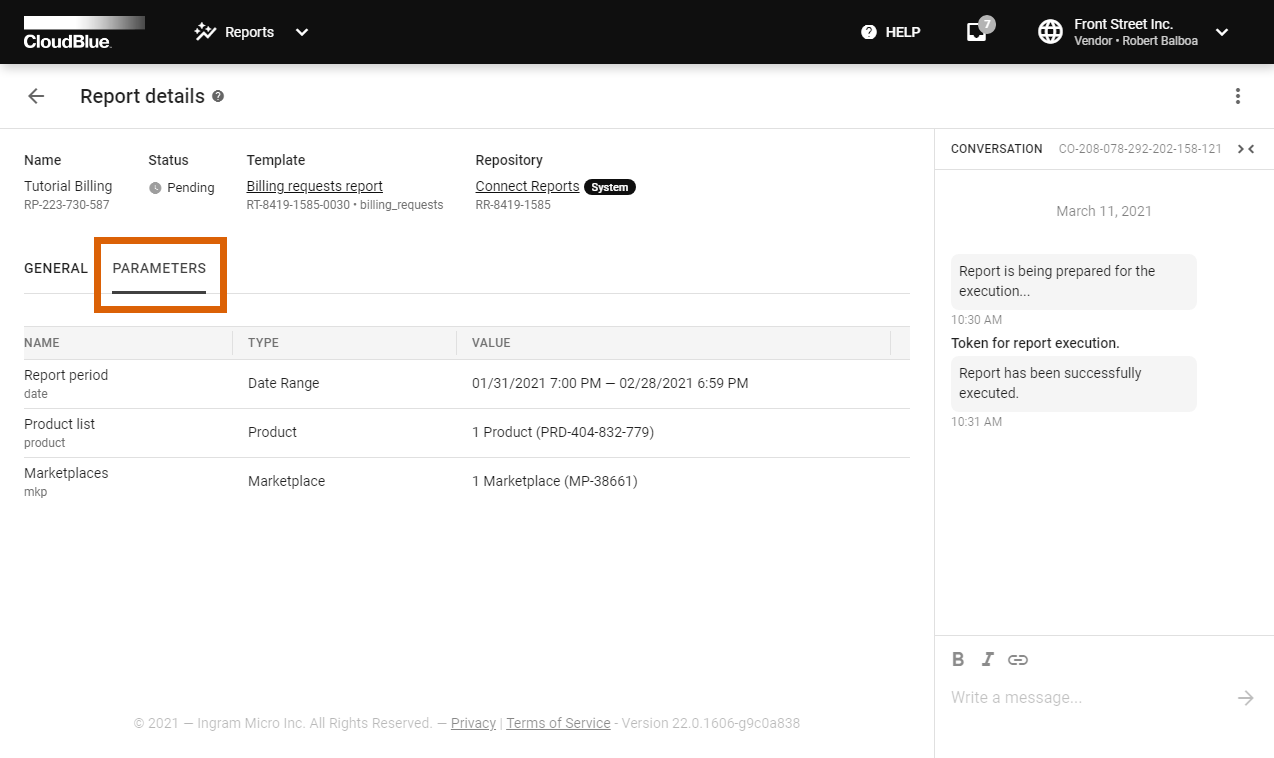
Note that provided parameters vary depending on the selected report template.
Download your report file from the Report details screen.
Make sure that your report status displays “Ready”. Thereafter, click the Download button to successfully download your report file.
Once your report file is downloaded successfully, you can delete the report object by clicking on the vertical ellipsis icon and selecting the Delete option. Note, however, that your deleted report objects cannot be restored.
The CloudBlue Connect® platform can systematically generate required reports on your scheduled time via the Schedules tab. The system allows creating schedule objects by using a wizard that provides various trigger configurations and includes the same set of available templates and report parameters as presented within the report creation creation wizard.
Access the Schedules tab and click the Create Schedule to launch the schedule creation wizard.

Follow the wizard steps to successfully configure your scheduled reports creation.
Specify your schedule trigger configurations as follows:
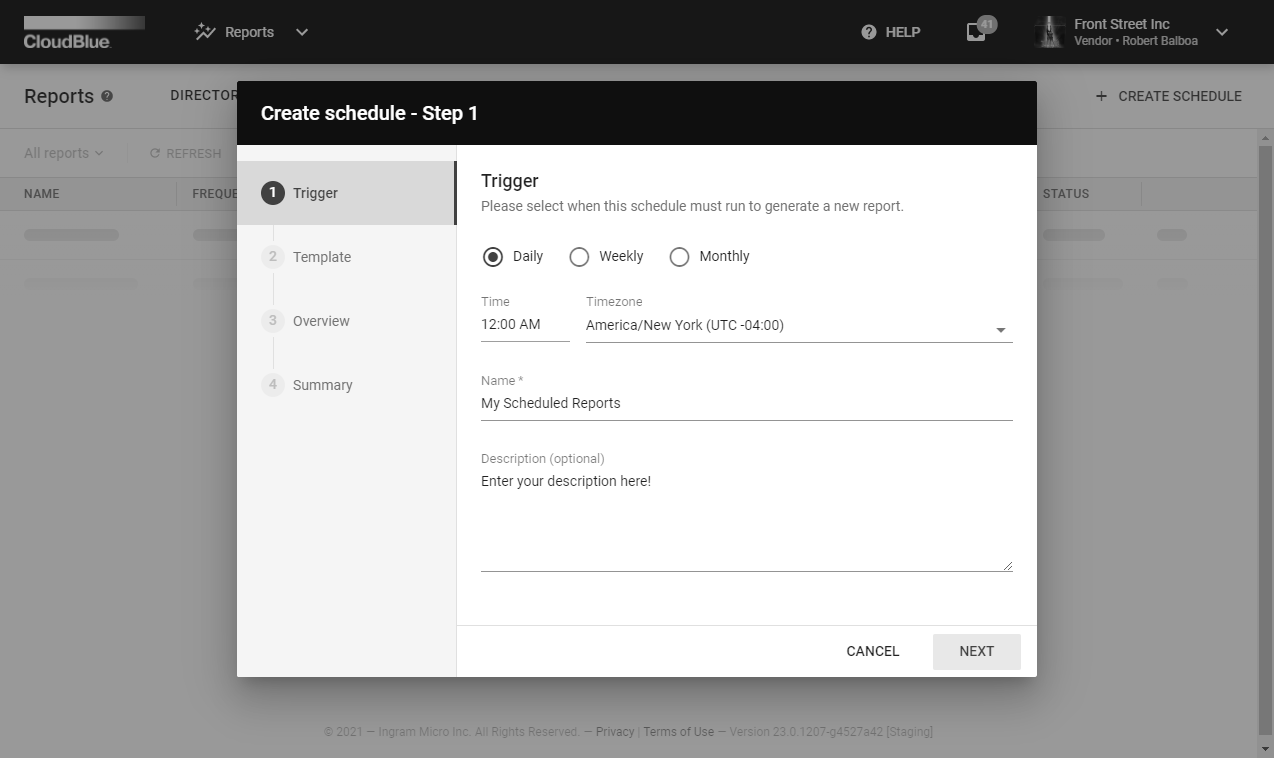
Click Next to continue.
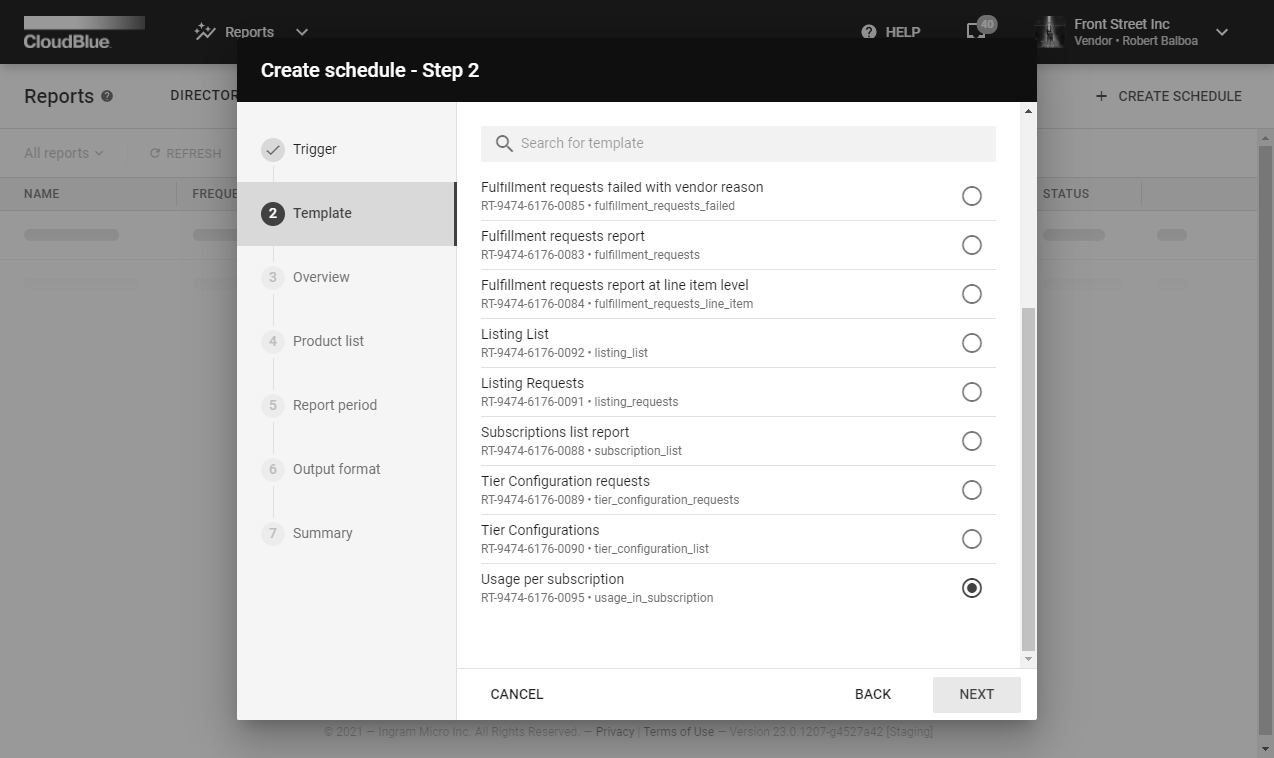
Choose your template from the list. Note that the following steps vary depending on your selected template.
Get familiar with the template overview and continue with report parameters configuration.
Select a product list in case the system prompts to specify such parameter.
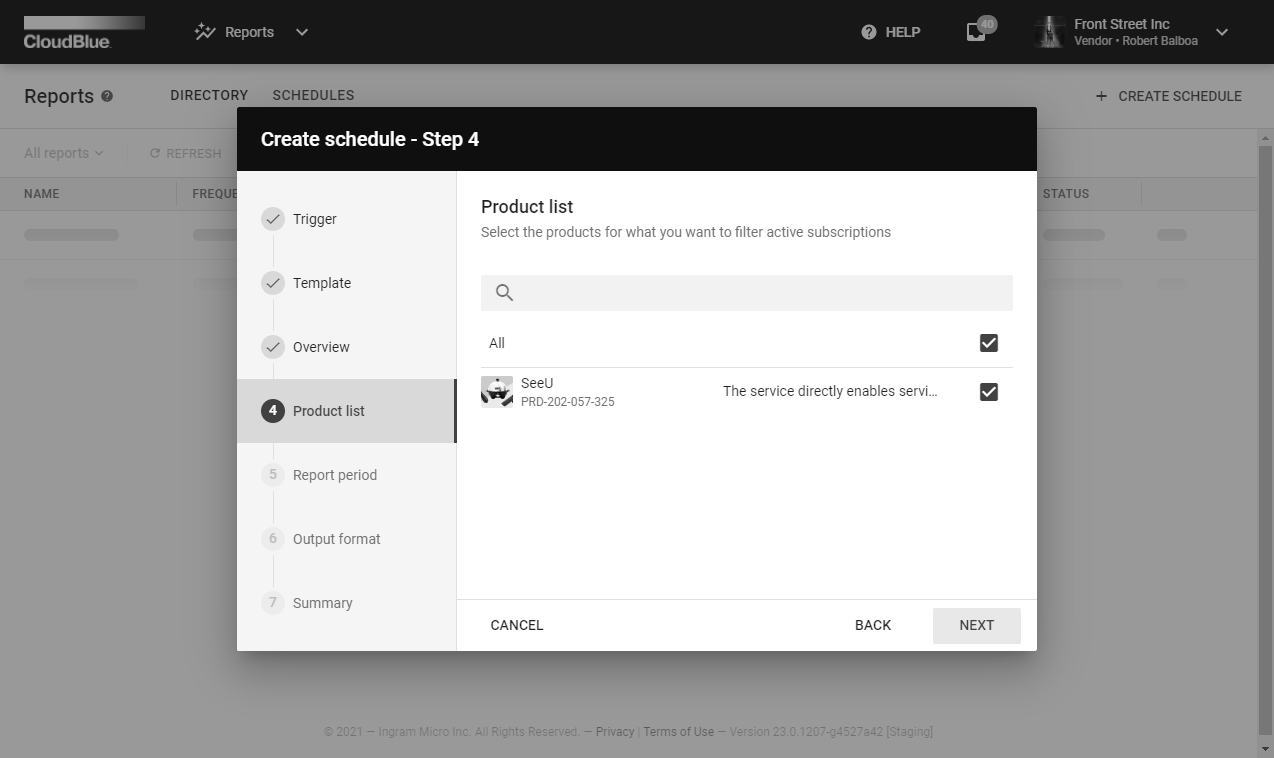
Note that you can select several products or select all of your products by checking the corresponding checkbox.
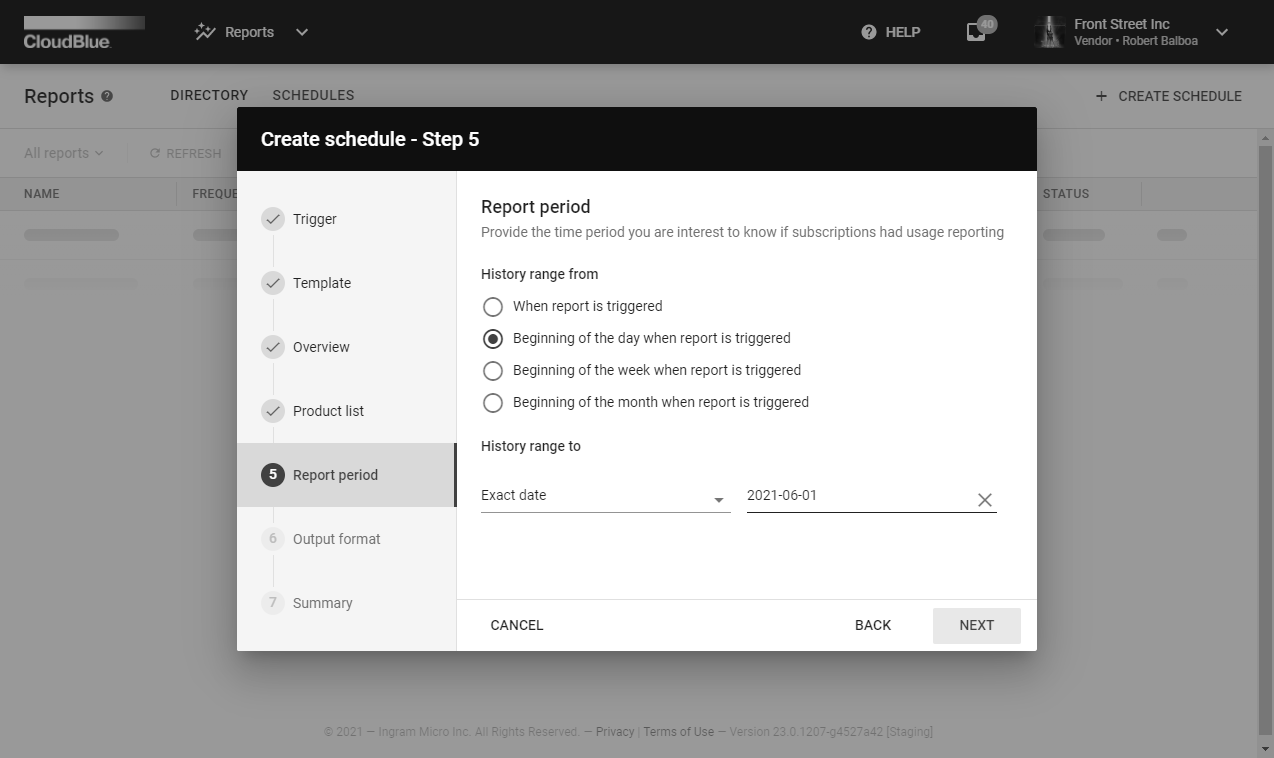
Fill out the report period form as follows:
Select XLSX, JSON or CSV as your report file output format.
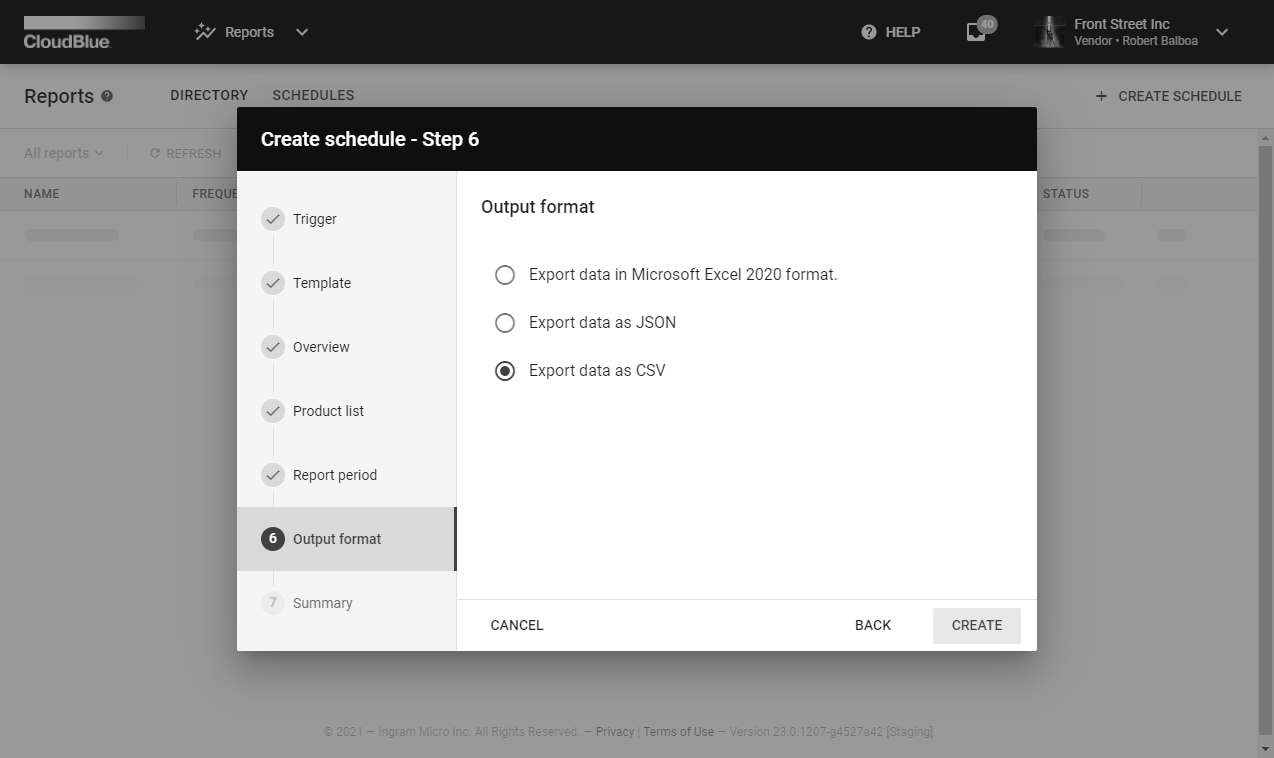
In this case, system allow changing your output format from the Schedule Details screen.
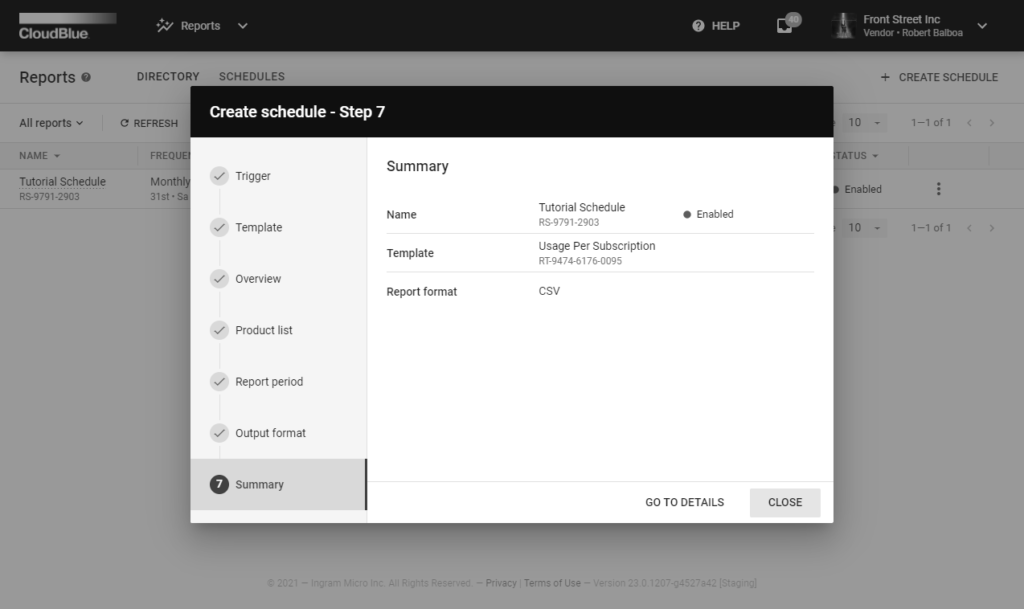
Once your reports schedule is successfully configured, the system provides your created schedule summary as the final step.
By default your report schedule is enabled. Turn the schedule off and on by clicking the vertical ellipsis (⋮) icon and using Disable/Enable options from the provided interface.
Click on the schedule name from the Schedules tab to access the Schedule Details screen.


This screen displays your selected template, output format, schedule status (enabled or disabled), specified schedule, description, update and creation date and more.
The Schedule Details screen also allows changing your parameters and trigger options by clicking the Edit button at the top-right corner of the screen. Review the provided report parameter values by accessing the Parameters tab.
Click the Trigger Now button to generate a report file immediately. Access and download your report files by using the Reports tab of the Schedule Details screen.
Note that your generated reports will also be available via the Directory tab of the Reports module.