The CloudBlue Connect® platform allows defining webhooks for fast and reliable communication with web applications and external systems. Webhooks represent HTTP callbacks that are triggered by your selected event on the platform. Specifically, such callbacks can be triggered once your request queue is changed, in case your inquiring or draft requests need validation, and more.
Webhooks facilitate and streamline the communication between the Connect platform and any application that can accept HTTP requests. Consequently, this simplifies various processes that can be drastically important for your business.
Video Tutorial
In this video, you will learn how to use webhooks to trigger your product processing.
Processing Methods
Manual Processing
In general, some workflows within the Connect platform cannot be completed until a Connect user performs certain actions. Typically, one of those accounts should pay attention to a pending object and process it. For example, Distributors or their systems generate a new fulfillment request that should be manually processed by Vendors. Therefore, Vendors are required to locate a pending fulfillment request and either approve or reject it to activate a subscription.
In some business cases, it is necessary to process subscriptions as fast as possible and the manual processing may prove ineffective. Consequently, the automatic processing is the best solution for such cases.
Automatic Processing
An external processing system can interact with the CloudBlue Connect® platform via the following methods:
Polling: It is possible to create a scheduled process that periodically polls a certain queue within the Connect platform. For example, once a fulfillment request queue changes, the scheduled process triggers external processing system.
Webhook: The Connect platform enables users to create a webhook for certain callbacks. For instance, a webhook can watch for the fulfillment queue of a particular product and trigger the specified callbacks on queue changes.
The webhook method avoids additional polling and consequently uses system resources more efficiently.
Operations
A webhook calls an external handler using HTTP GET or POST requests. Such requests should contains an Authorization header with the Bearer attribute. The attribute value should contain a JWT (JSON Web Token) that is signed by a secret string. Note that your POST request should also contains a body.
Webhooks vs. Webhook Handlers
A Webhook represents an object in Connect that triggers an external Webhook Handler through that handler’s API. A Webhook Handler is an external custom tool that processes pending objects (e.g., fulfillment requests) in Connect via the Connect API. It exposes an endpoint URL that the webhook calls to trigger the handler.
After receiving an API call from the webhook, the handler performs the following typical operations:
Validates the received JWT by calculating the HS256 signature and compares it with the signature inside the JWT. For this operation, the handler uses a shared JWT secret string that the webhook uses for signing the JWT.
Filters objects within the Connect platform and analyzes whether they should be processed. For example, the handler can use the following method to get all pending requests of a product specified by its ID:
GET /requests?status=pending&product_id={PRD-ID}
Performs required processing operations and updates the processed objects within Connect.
Webhook Creation
Prerequisites
Before crating a webhook on the Connect platform, ensure that the following conditions are met:
A product that you want to process is properly configured.
An external handler that your webhook must trigger is created.
The API call parameters are configured. This includes:
Specified endpoint URL.
An HTTP method, either GET or POST.
Creation Wizard
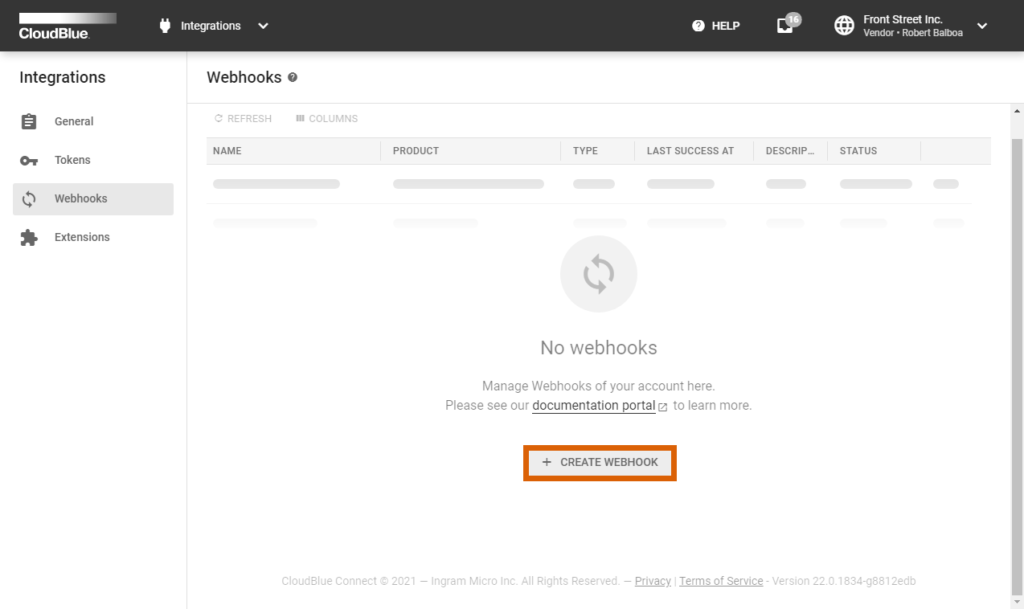
Proceed to the Webhooks section of the Integrations module on the Connect platform:
Click the Create Webhook button to launch a webhook creation wizard.
Follow the wizard steps to successfully configure your webhook.
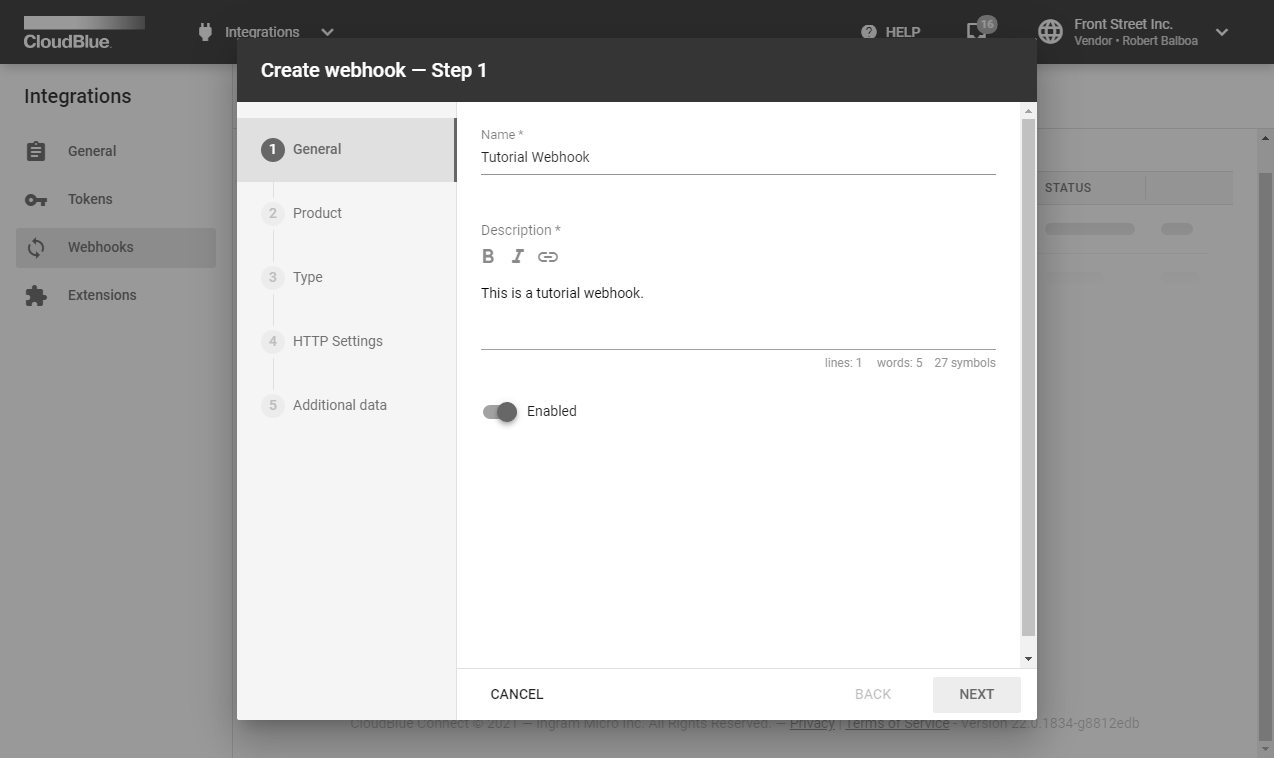
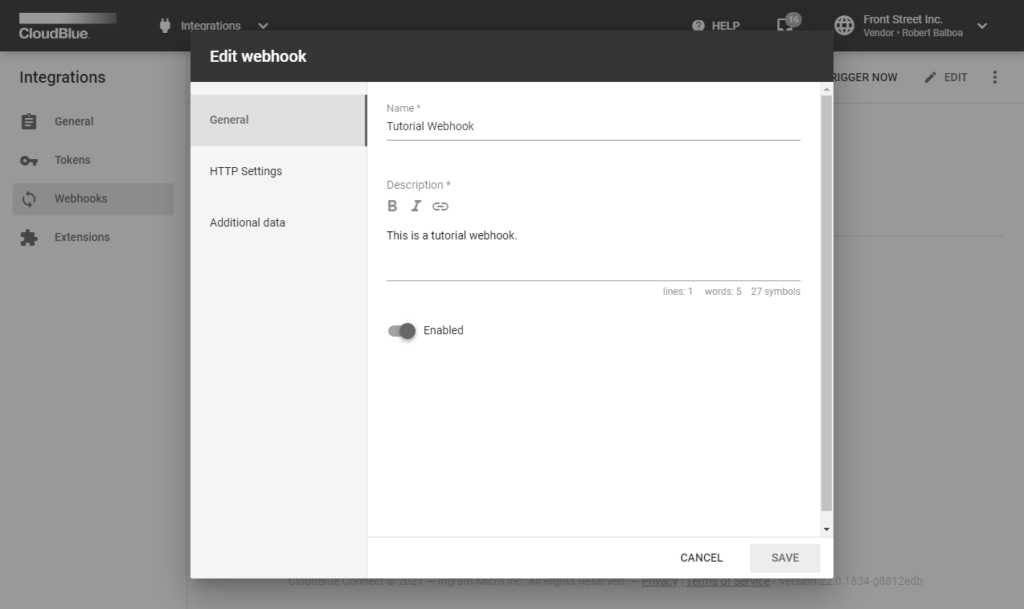
1. General
Specify the following general webhook attributes:
Name: Enter a name for your webhook.
Description: Provide a description for your webhook.
Enabled: Use this switch to disable or enable your created webhook.
Note
In case you are not sure about all webhook parameters, keep the switch disabled. You can turn your webhook on after clarifying all required parameters.
Click Next to continue.
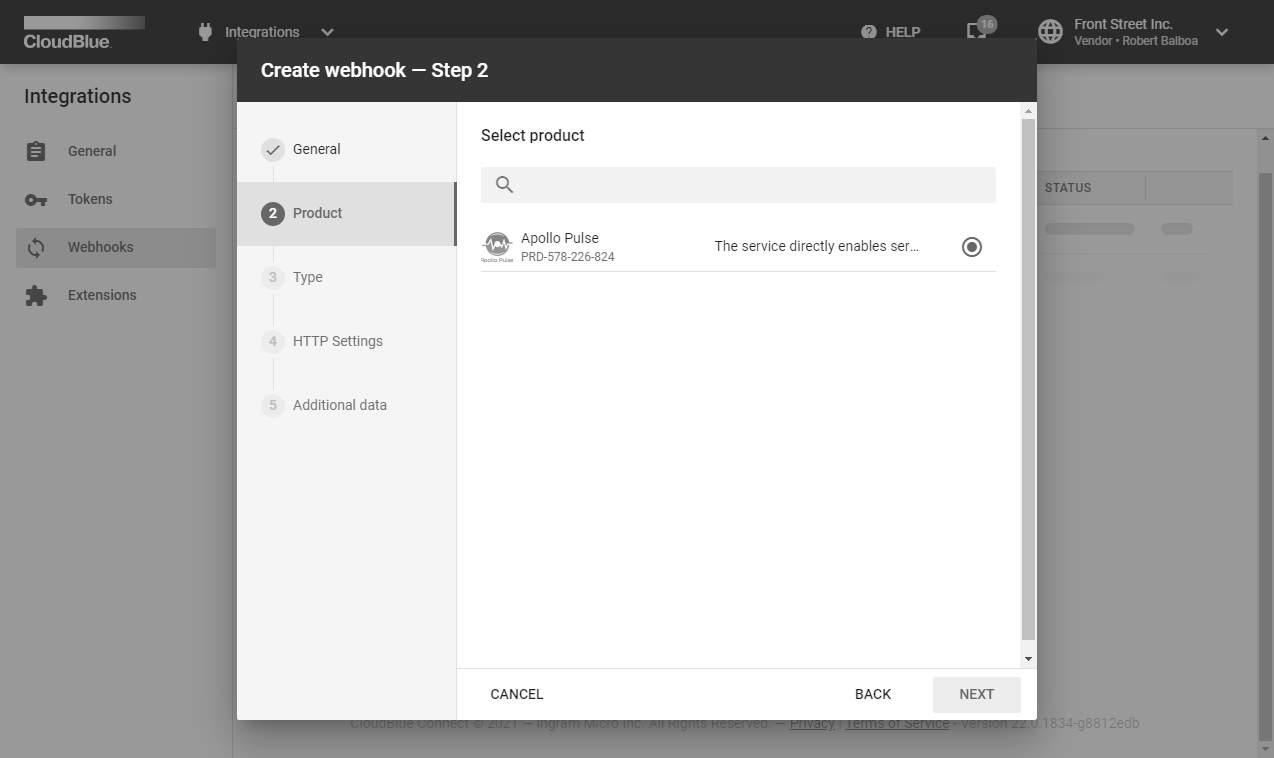
2. Product
Select a product that your webhook should work with. Note that it is possible to select only one product per a webhook.
Click the Next button to continue.
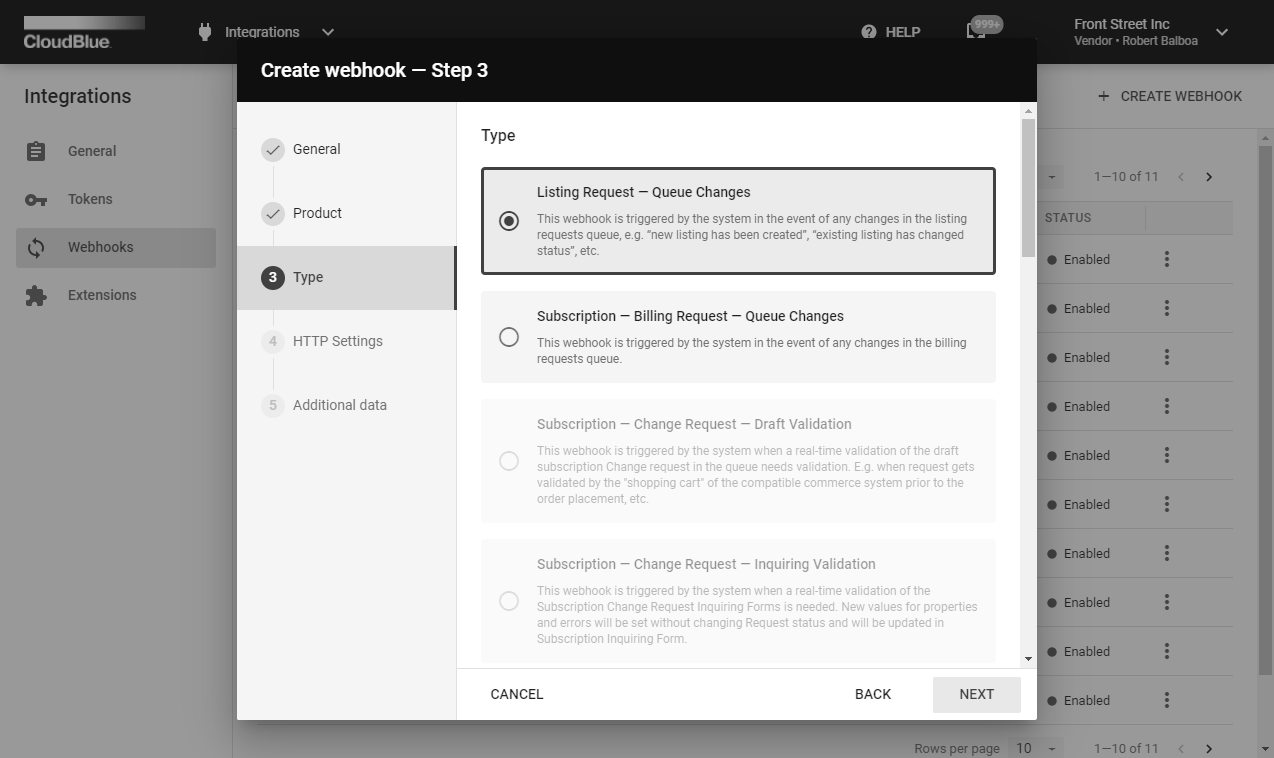
3. Type
Select your webhook from the following list:
Listing Request: This webhook is triggered by the system in the event of any changes in the listing requests queue, e.g. “new listing has been created”, “existing listing has changed status”, etc.
Subscription — Billing Request — Queue Changes: This webhook is triggered by the system in the event of any changes in the billing requests queue.
Subscription — Change Request — Draft Validation (available for Vendors only; requires Dynamic Validation of the Change Requests capability for your selected product): This webhook is triggered by the system when a real-time validation of the draft subscription Change request in the queue needs validation. For example, it is triggered once a request gets validated by the “shopping cart” of the compatible commerce system prior to the order placement, etc.
Subscription — Change Request — Inquiring Validation (available for Vendors only): This webhook is triggered by the system when a real-time validation of the Subscription Change Request Inquiring forms is needed. New values for properties and errors will be set without changing Request status and will be updated in Subscription Inquiring form.
Subscription — Fulfillment Requests — Queue Changes: This webhook is triggered by the system in the event of any changes in the fulfillment requests queue. For example, “new request has been created”, “existing request has changed status”, etc.
Subscription — Purchase Request — Draft Validation (available for Vendors only): This webhook is triggered by the system when a real-time validation of the draft subscription Purchase request in the queue needs validation. For example, it is triggered when a request gets validated by the “shopping cart” of the compatible commerce system prior to the order placement, etc.
Subscription — Purchase Request — Inquiring Validation (available for Vendors only): This webhook is triggered by the system when a real-time validation of the Subscription Purchase Request Inquiring Forms is required. New values for properties and errors will be set without changing Request status and will be updated in Subscription Inquiring Form.
Tier 1 Config — Setup Request — Draft validation (available for Vendors only): This webhook is triggered by the system when a real-time validation of the draft Tier 1 Configuration Request in the queue needs validation.
Tier 1 Config — Setup Request — Inquiring Validation (available for Vendors only): This webhook is triggered by the system when a real-time validation of the inquiring Tier 1 Configuration Request in the queue needs validation.
Tier 1 Config — Update Request — Draft Validation (available for Vendors only): This webhook is triggered by the system when a real-time validation of the draft Tier 1 Configuration Request in the queue needs validation.
Tier 1 Config — Update Request — Inquiring Validation (available for Vendors only): This webhook is triggered by the system when a real-time validation of the inquiring Tier 1 Configuration Request in the queue needs validation.
Tier 2 Config — Setup Request — Draft validation (available for Vendors only): This webhook is triggered by the system when a real-time validation of the draft Tier 2 Configuration Request in the queue needs validation.
Tier 2 Config — Setup Request — Inquiring Validation (available for Vendors only): This webhook is triggered by the system when a real-time validation of the inquiring Tier 2 Configuration Request in the queue needs validation.
Tier 2 Config — Update Request — Draft Validation (available for Vendors only): This webhook is triggered by the system when a real-time validation of the draft Tier 2 Configuration Request in the queue needs validation.
Tier 2 Config — Update Request — Inquiring Validation (available for Vendors only): This webhook is triggered by the system when a real-time validation of the inquiring Tier 2 Configuration Request in the queue needs validation.
Tier Account Request — Queue Changes: This webhook is triggered by the system in the event of any changes in the tier account requests queue.
Tier Configuration Request — Queue Changes: This webhook is triggered by the system in the event of any changes in the tier config requests queue.
Usage File — Queue Changes: This webhook is triggered by the system in the event of any changes in the usage file queue.
Click Next to continue.
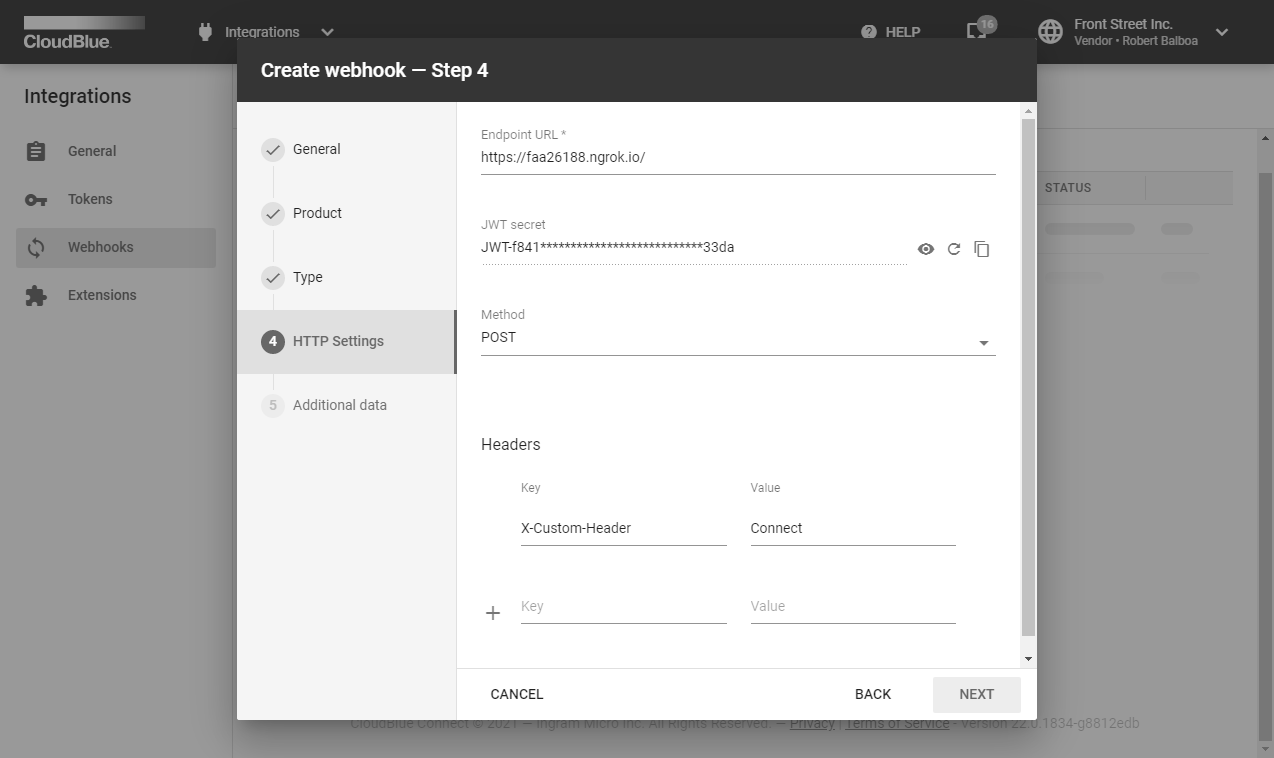
4. HTTP Settings
Configure HTTP parameters that your webhook will use when calling your external handler:
Endpoint URL: This is the endpoint URL where the handler accepts API calls.
JWT secret: A string that your webhook will use to create the JWT HS256 signature. Share this secret with your handler that needs it to validate incoming JWTs.
Method: Select your HTTP method: GET or POST.
Headers: Any standard or custom headers that you need to pass in the API call.
Click Next to continue.
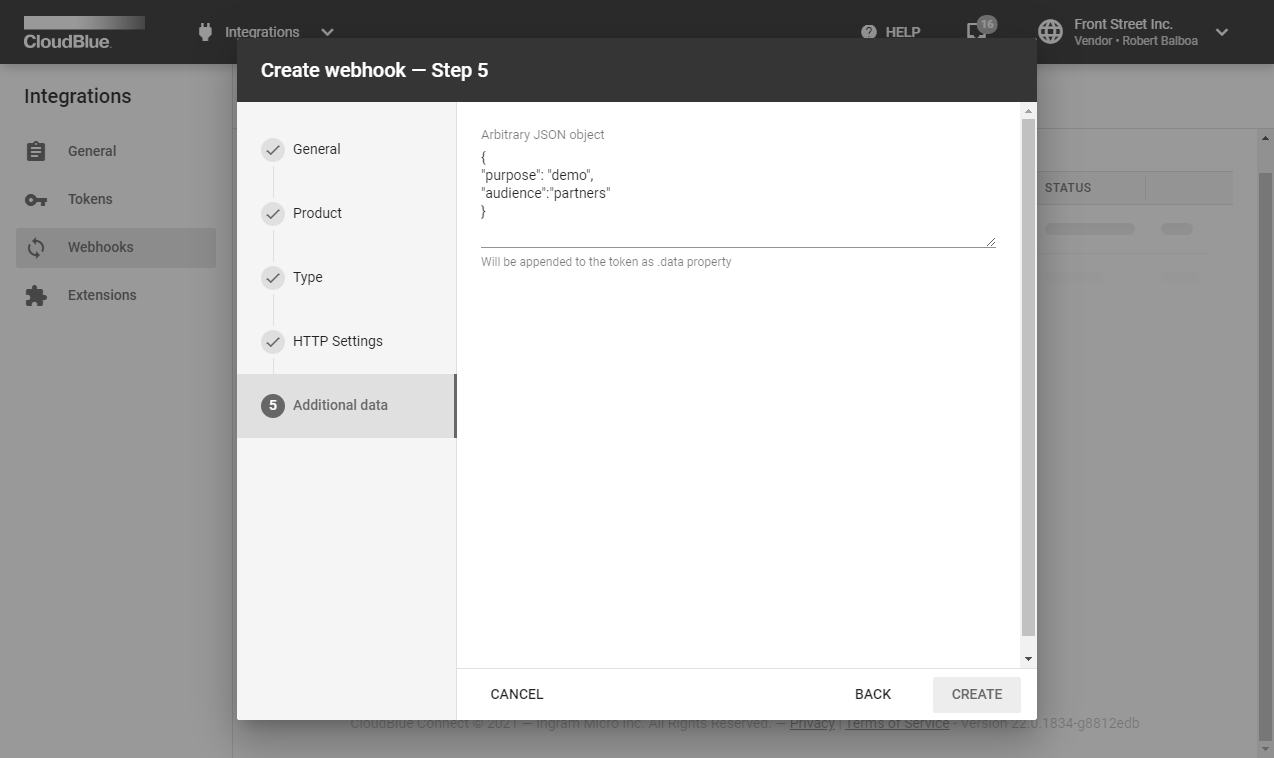
5. Additional data
In case the post method is selected, it is necessary to specify additional data in the JSON format for your external handler.
Click Create to finalize your webhook creation. Therefore, your webhook will be successfully configured.
Testing Webhooks
Test your created webhook by following the guidelines below:
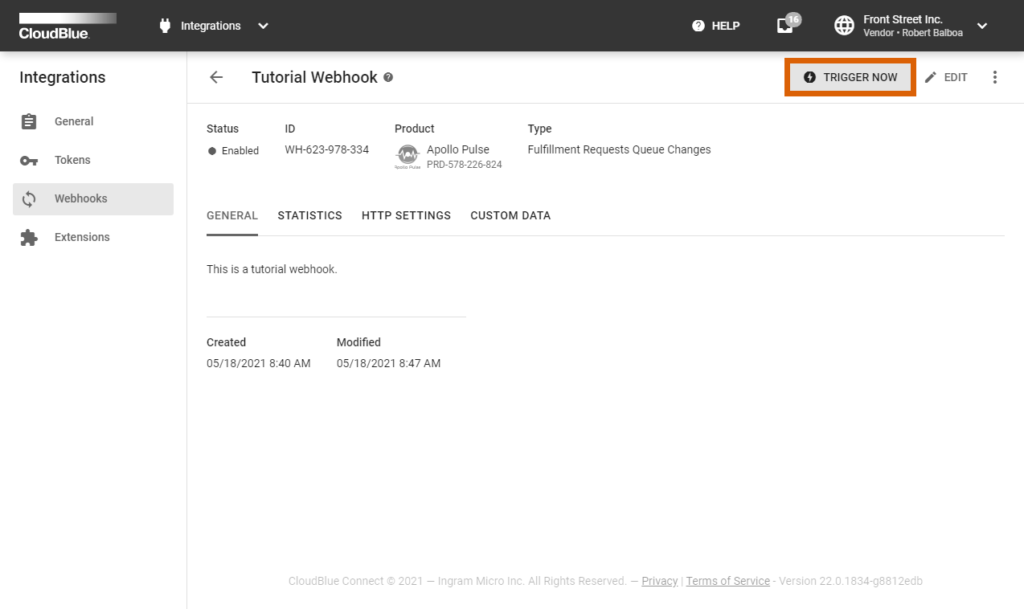
Direct Triggering
Access your webhook details screen by clicking on its name from the Webhooks section.
Click the Trigger Now button and verify the following:
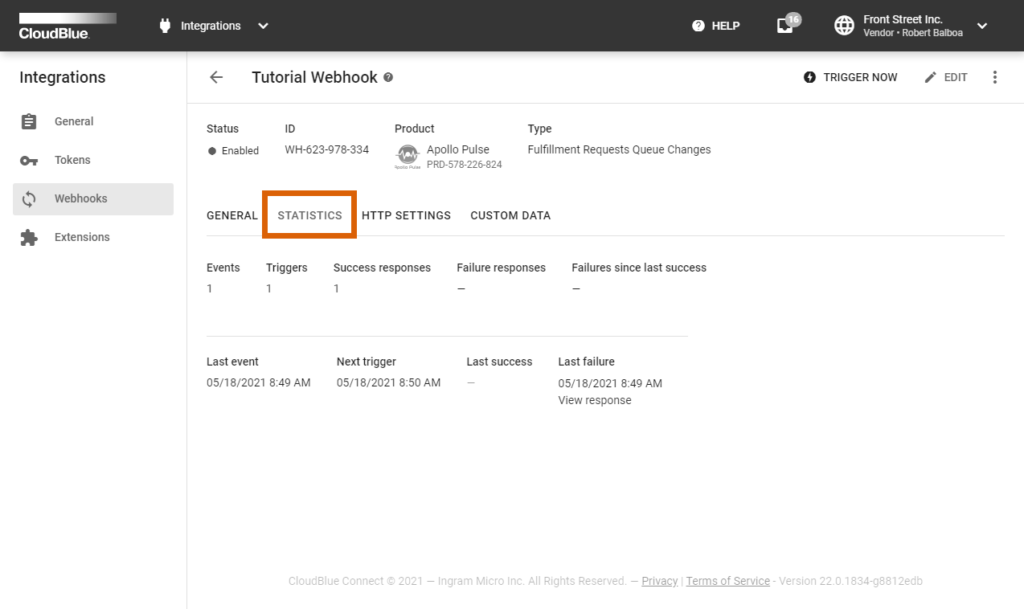
The number of events, triggers, and responses are increased within the Statistics tab.
Your webhook handler received an API request according to your specified webhook configuration.
Creating Requests
It is also possible to test your created webhook by creating test objects on the Connect platform. For example, create a test or preview subscription for a product that features your created webhook. Therefore, your external handler should receive a request as presented below (note that some values are cut for brevity and only one header is displayed):
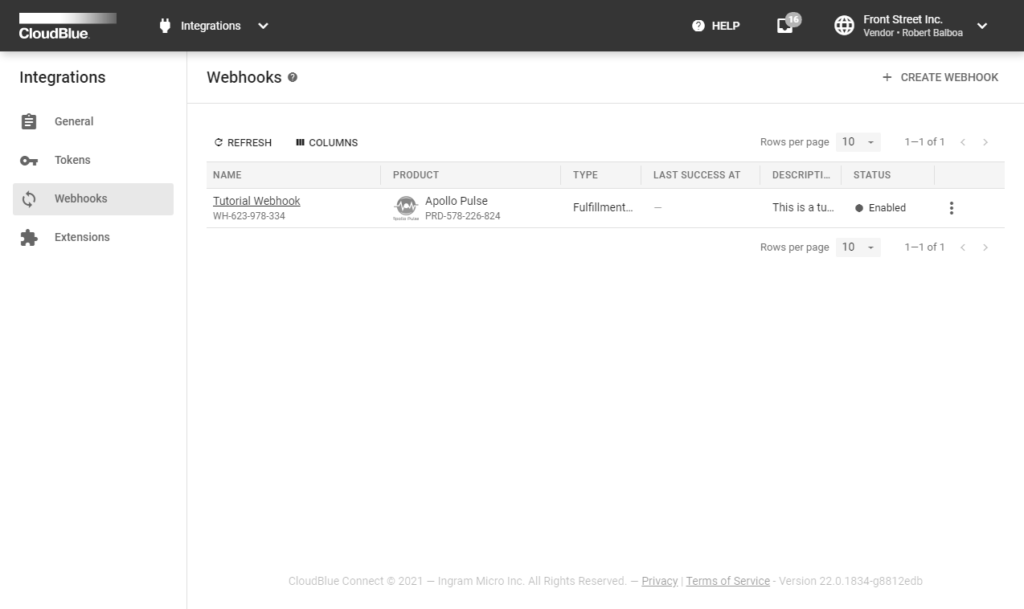
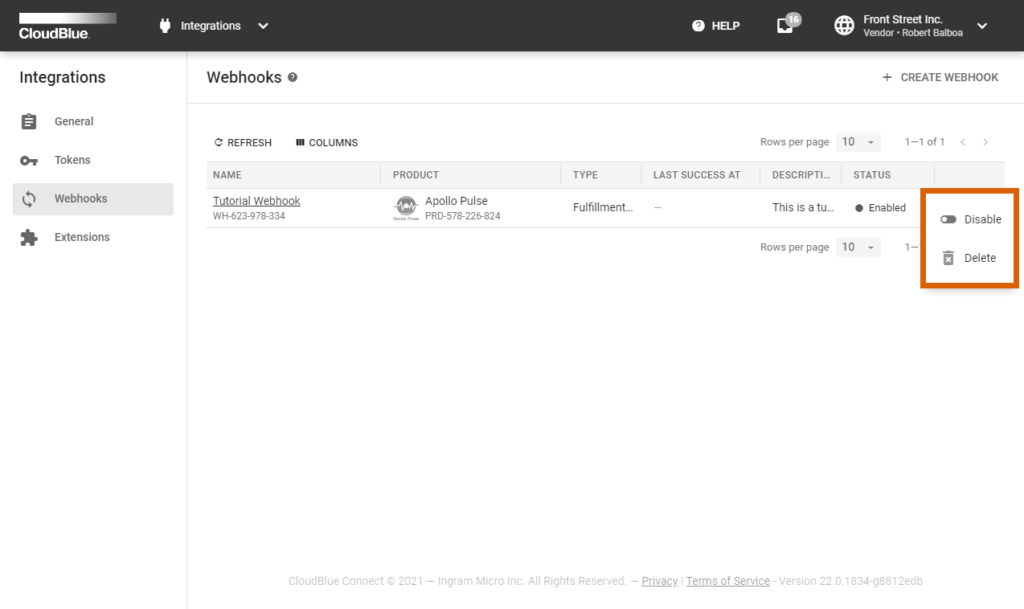
The Webhooks section displays a list of your defined webhooks. Furthermore, this section provides various webhook data, such as your specified webhook name, selected type, creation date, status, and more. Note that you can click on the vertical ellipsis (⋮) button to disable/enable or delete your webhook.
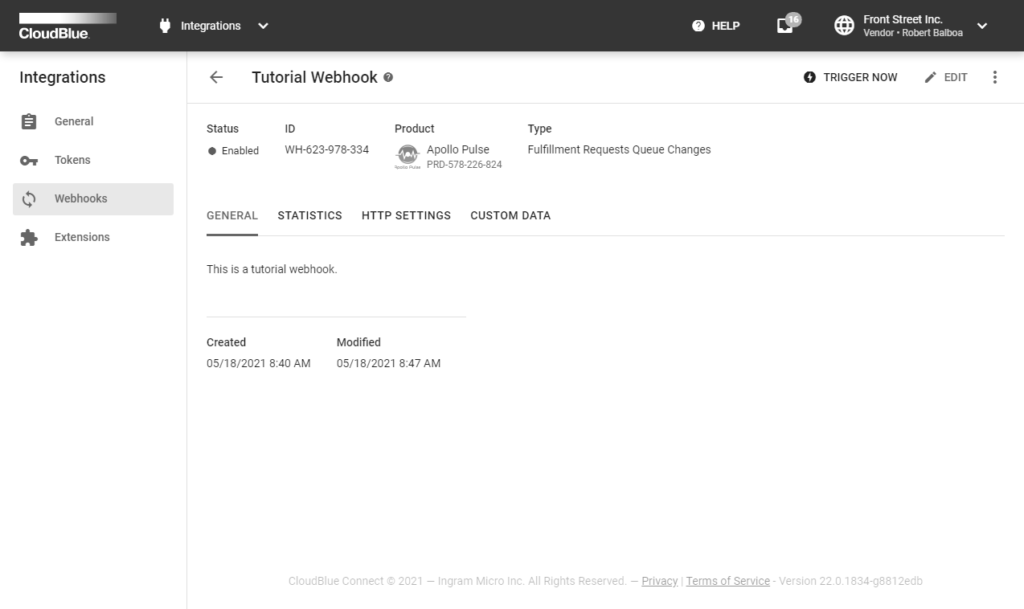
Click on your webhook name to access the Webhook Details screen. In addition to the aforementioned webhook data, this screen allows performing various operations and provides various data within the following sections:
General Operations and Properties
The webhook details screen provides the following general operations and properties:
The Trigger Now button that allows testing the webhook as described in Direct Triggering.
The Edit is a button enables you to change General attributes, HTTP Settings and Additional Data.
Click on the vertical ellipsis (⋮) button to disable/enable or delete your webhook.
Status displays the current webhook status: You can change it through the disable operation in the menu – item #3 in the above image.
Product is the product that your webhook works with.
Type displays the type of change requests that the webhook watches for. You cannot change it.
Created is the date and time of the webhook creation.
Modified is the date and time when the webhook was last updated.
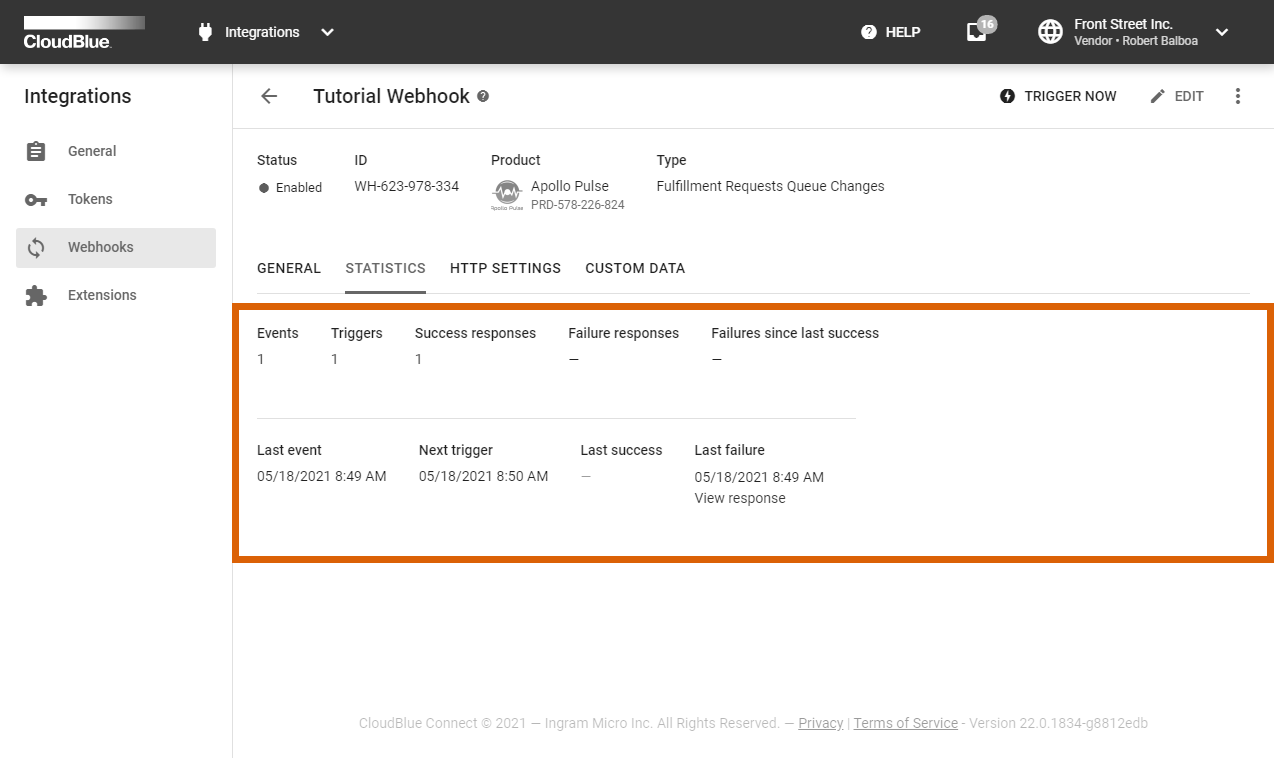
Statistics
The Statistics tab provides the following information and parameters:
Events: Number of events that triggered the webhook. For example, this can represent number of fulfillment request that triggered your webhook.
Triggers: Total number of attempts to trigger the webhook, including those that are repeated when a response is not returned during the 10 min time-out period.
Success responses: Number of successful responses.
Failure responses: Number of responses about failed processing.
Failures since last success: Number of failed responses returned after the last successful response.
Last event: Date and time of the last event.
Next trigger: Date and time when the webhook will be triggered again. This is used if the last response was unsuccessful, that is, the return code was different from 2xx.
Last success: Date and time of the last successful response. This field also contains a link to that response. On clicking the link, you will get a pop-up window with details of the last successful response.
Last failure: Date and time of the last failed response. This field also contains a link to that response. On clicking the link, you will get a pop-up window with details of the last failed response.
Some of the aforementioned parameters reflect statistics on failures. In case your webhook handler does not respond during 5 min (an approximate value) or the response code is different from 2xx, the system triggers the webhook again until the response is successful. Alternatively, the system triggers the webhook again until the number of requests exceeds a certain limit, after which Connect considers that the webhook is out of order. The interval between consequent requests is not less than 5 min and it increases with each request.
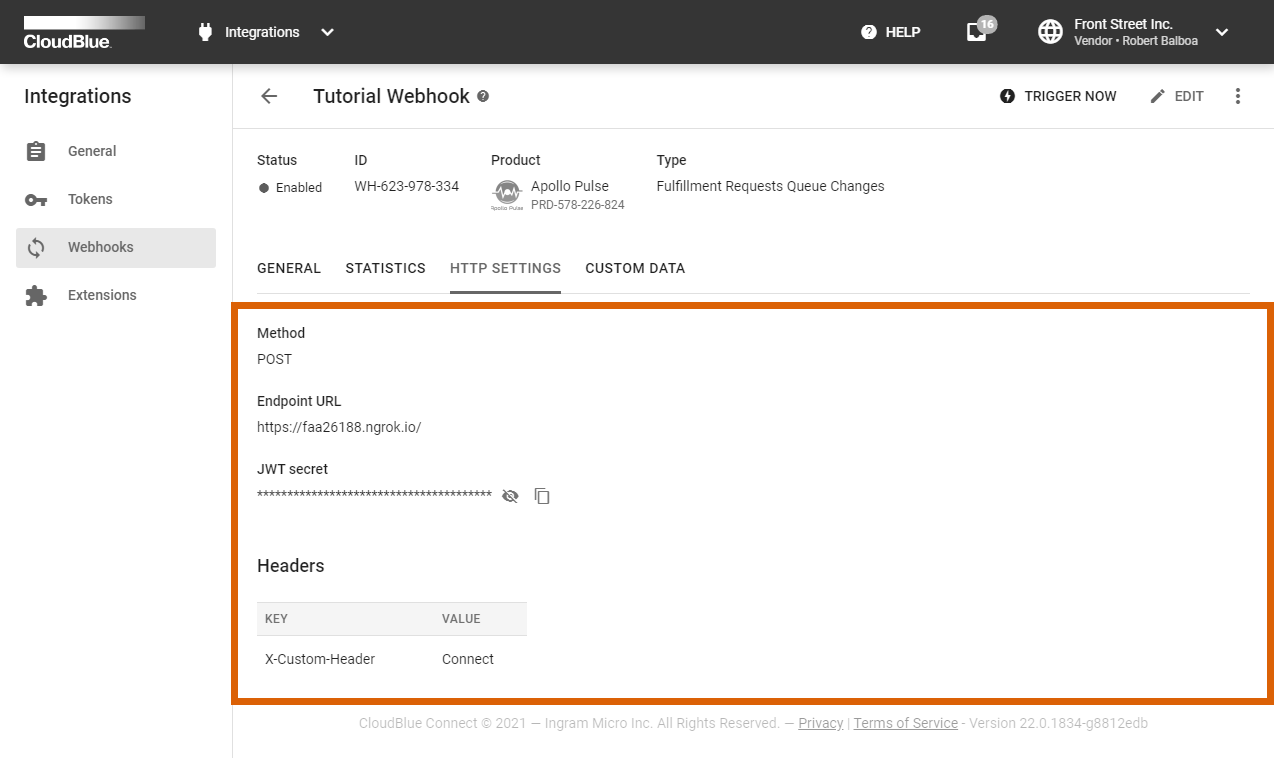
HTTP Settings
Review your HTTP settings via the corresponding tab:
Method: the HTTP method (GET or POST) in the API call.
Endpoint URL: the endpoint URL of the API call. .
JWT secret: a secret string used to sign the JWT sent in the Authorization header as the bearer argument. You can perform the following operations with it:
View the full value by clicking the eye icon next to the hidden string.
Copy the secret value to the clipboard using the copy button next to the string.
Generate a new value by clicking the aforementioned Edit button
Headers: optional custom headers that you can add to the API call.
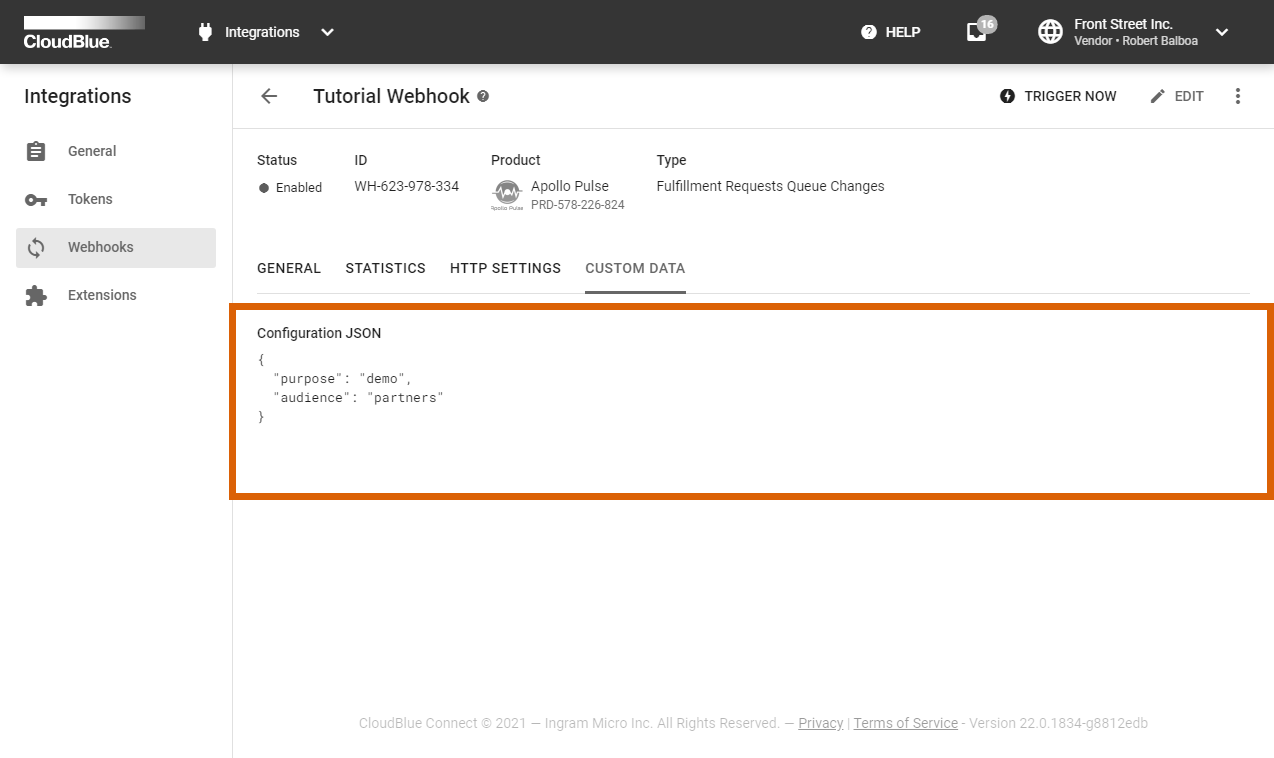
Custom Data
In case the POST method is used, you can review added data within the Custom Data tab:
Note that you can also edit the custom data by clicking the Edit button.