The following provides instructions on how to generate a new token on the CloudBlue Connect® platform, describes available operations within the Tokens section of the Integrations module and showcases how to use your generated token.
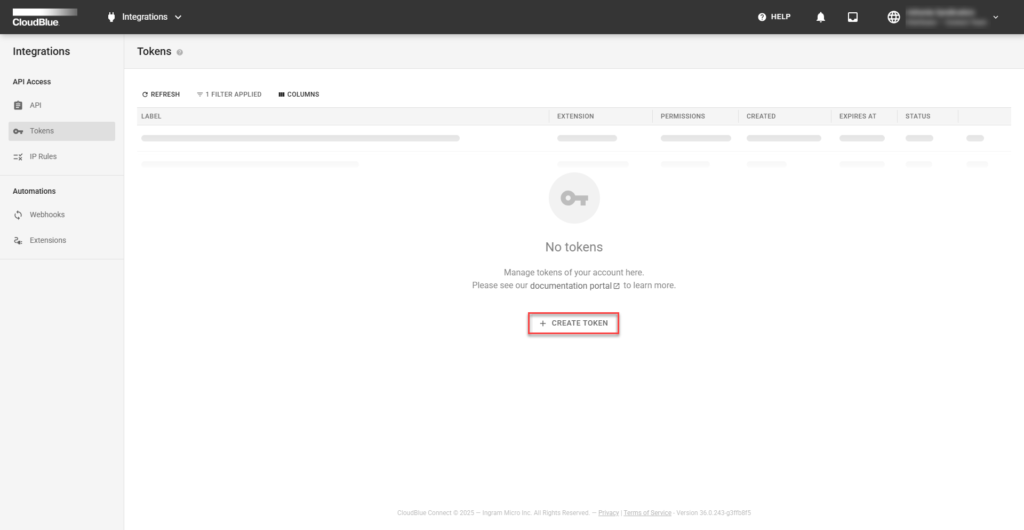
Navigate to the Tokens section from the Integrations module on the Connect platform.
Click the Create Token button to launch a token creation wizard.
Follow the wizard steps to successfully configure a new token.
Specify the following general token properties:
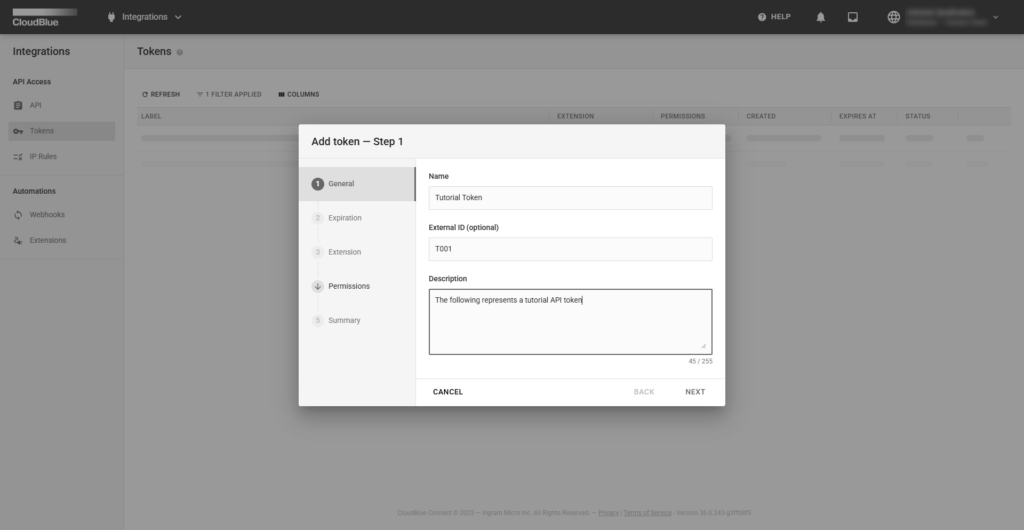
Click Next to continue.
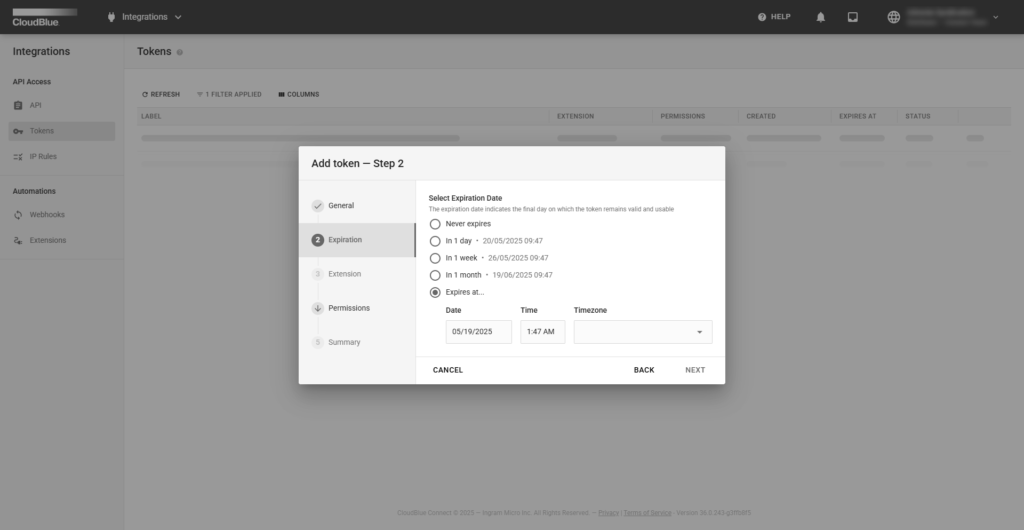
Select an expiration date for your token from the preset list, a custom expiration date, or allow for perpetual validity
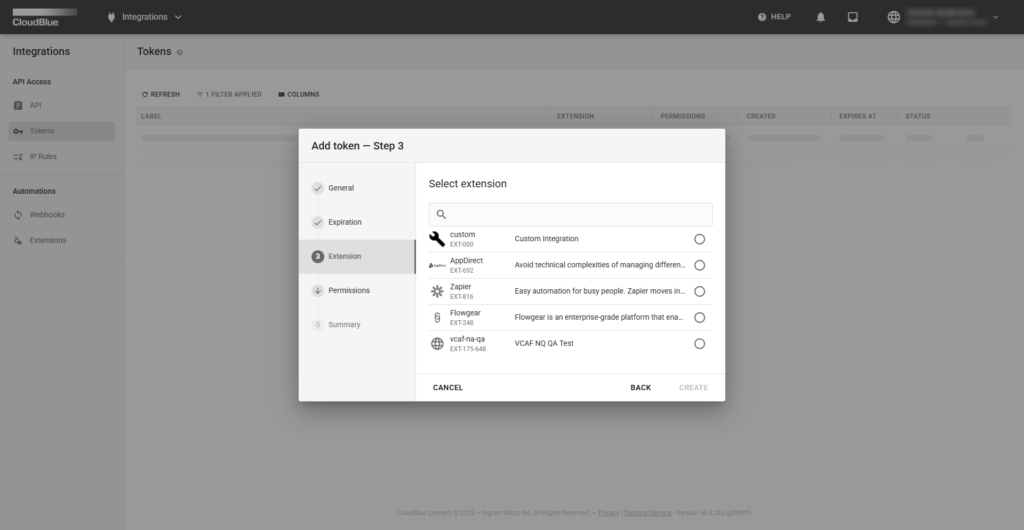
Select an extension for your token from the following list (selection is updated at CloudBlue’s discretion):
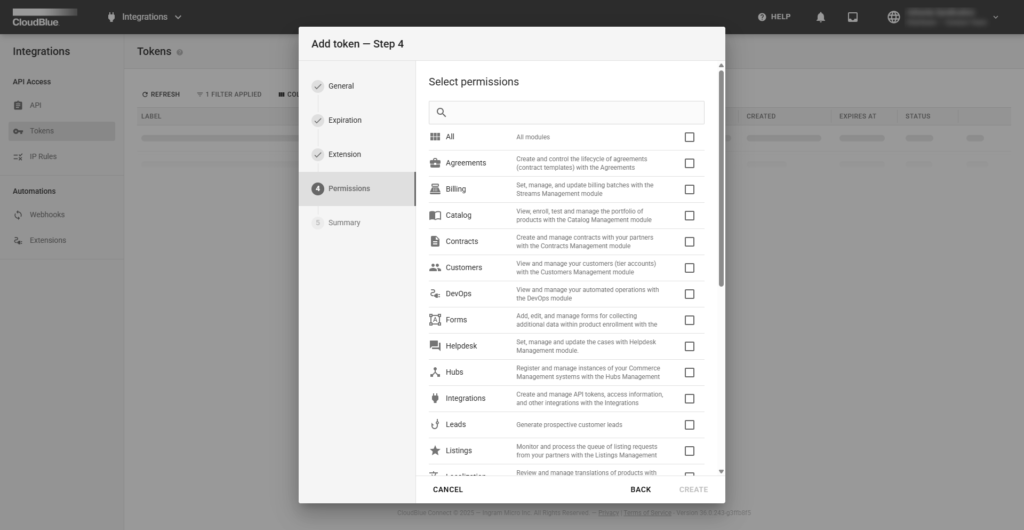
Depending on your token type, the system can ask you to configure permissions for your token. Therefore, the system will allow your token to access only your specified modules on the CloudBlue Connect® platform.
Select required modules for your token by using corresponding checkboxes or check the All Modules checkbox to choose all available modules on Connect.
Click the Create button to finalize your token creation.
As a result, the system provides a summary with your token configurations.

Click the Go to Details button to access the token details screen. Otherwise, click Close to return to the Tokens section.
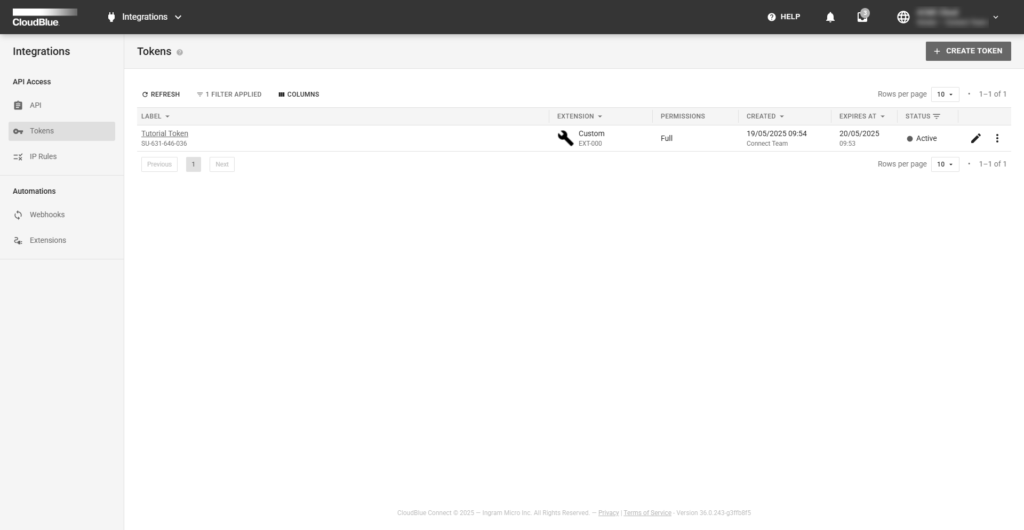
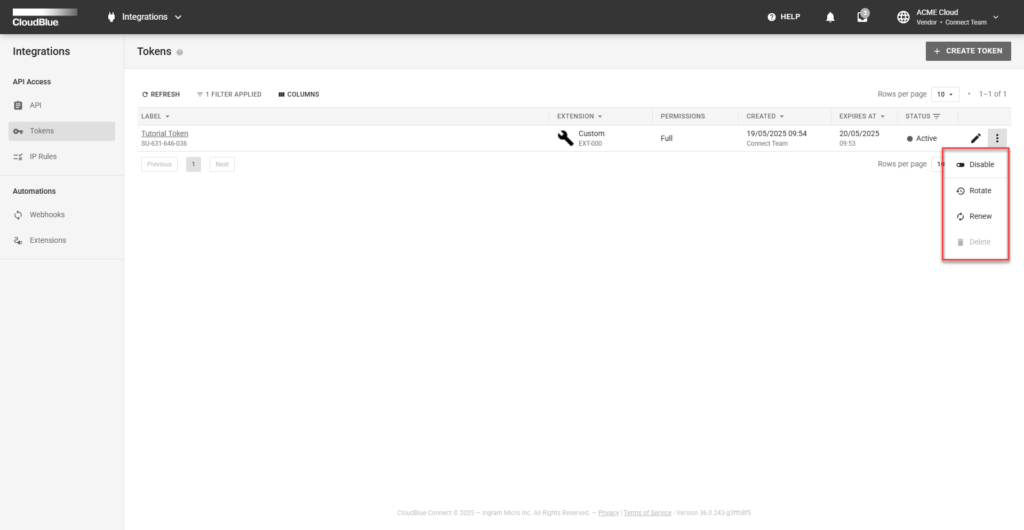
The Tokens section displays a list of your created API tokens. Furthermore, this section provides various token data, such as your specified token name, selected extension, creation date, status, and more. Note that you can click on the vertical ellipsis (⋮) button to disable/enable or delete your token.
Click on your token name to access the Token Details screen. This screen includes General, Statistics, and Permissions tabs and allows editing your selected token.
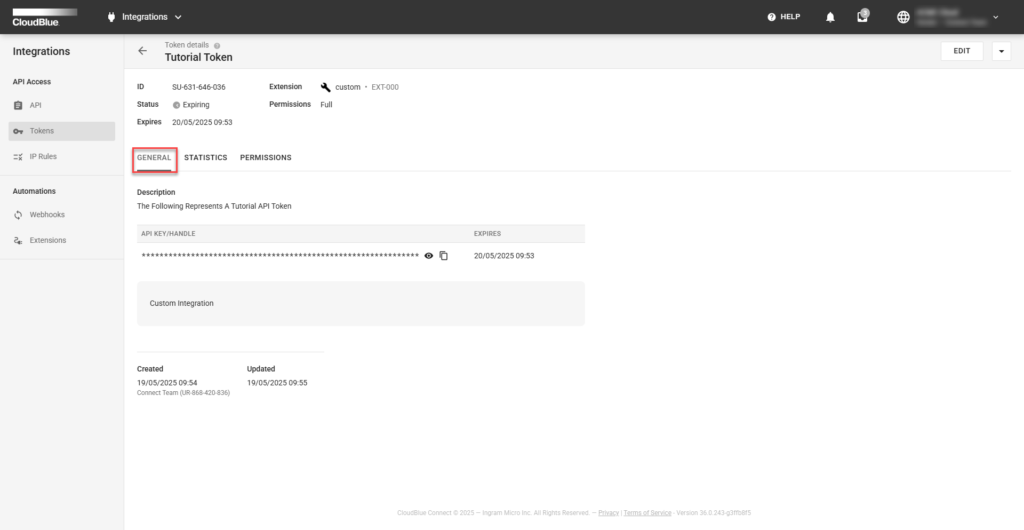
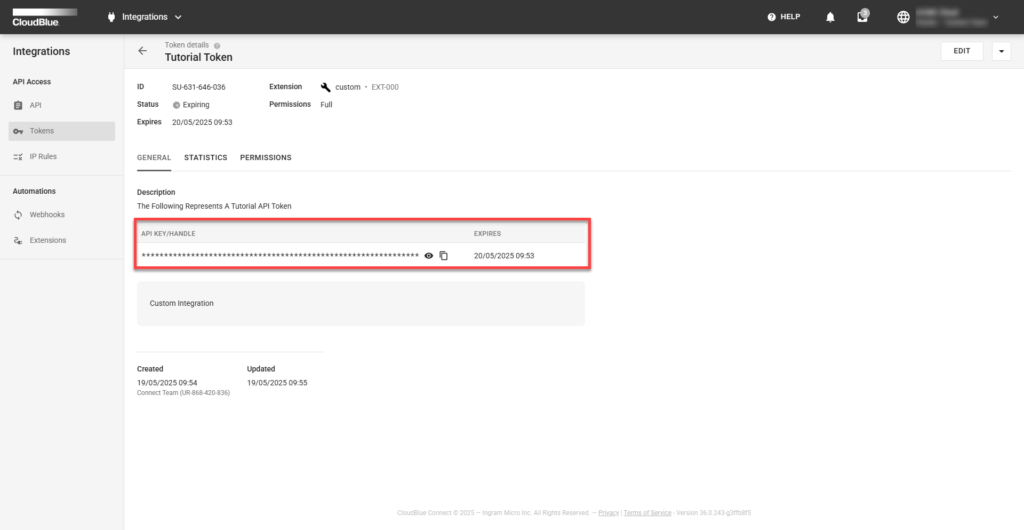
The General tab provides your API Key/Handle that is required for the integration operation, your specified description, extension description, etc. View or copy your API Key/Handle by using corresponding buttons on the user interface.
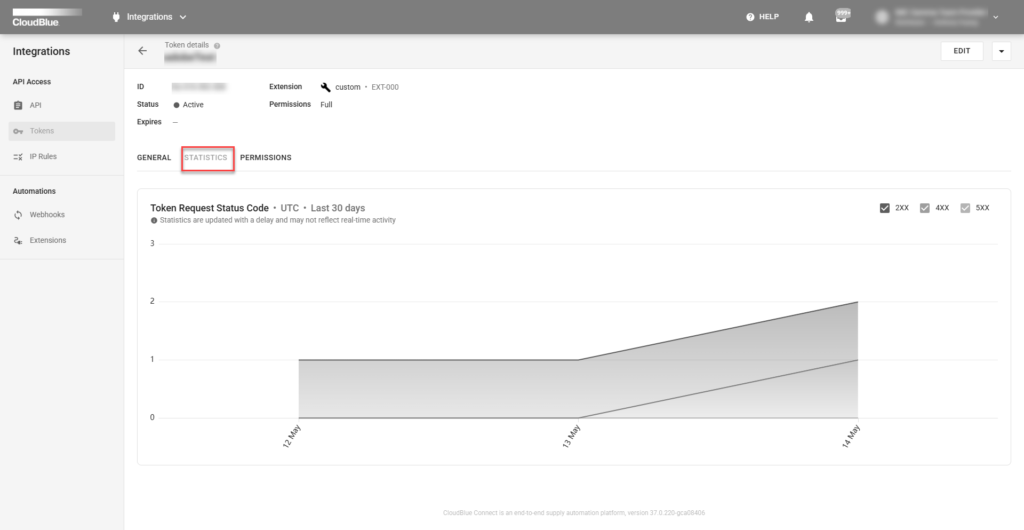
The Statistics tab shows a statistical graph of the responses to the token within the last 30 days. These tokens are categories within the 200, 300, and 400 code responses. The codes can be described as the following:
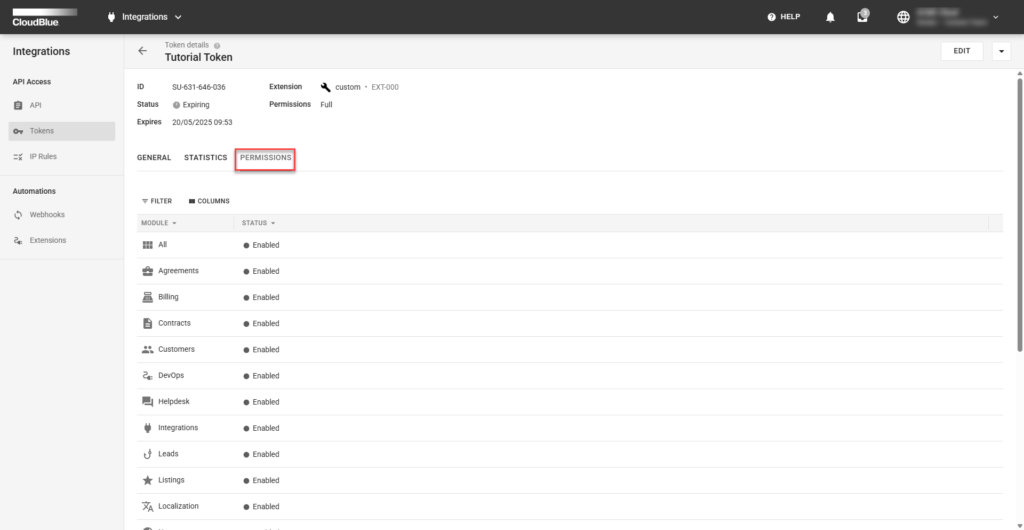
The Permission tab, as the name implies, allows reviewing selected permissions for your token. The Enabled status indicates that the corresponding module is available for your token.
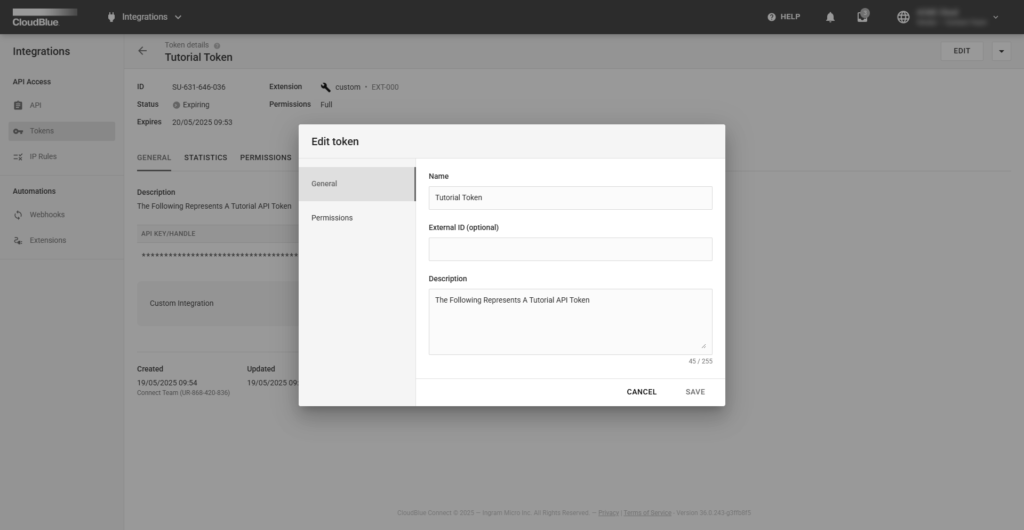
Click the Edit button at the top-right corner of the screen to change your token properties and permissions. Note that you can also click on the vertical ellipsis (⋮) button to disable/enable, rotate, renew (if applicable) or delete your token.
To use a particular API token for Connect API authentication, copy the API Key/Handle value from the Token Details screen and paste it within the HTTP Authorization Header of your API requests.
For example, get your agreements list by using the following request with copied authorization value:
GET /agreements/
Authorization: ApiKey SU-160-984-311:f45bee7e79b10ff6eff67902ccb4f3d46724ceb8
Refer to the REST API documentation to learn more about Connect API.
Furthermore, note that this value is required for integration with available extensions for the CloudBlue Connect® platform. Refer to the Extensions article for more details.