Access the Branding section of the Account module to customize the appearance and other attributes of your associated portals on the CloudBlue Connect platform. Namely, this includes changing interface colors, logotypes, favicons and other portal customization settings. Note that before accessing these settings, it is necessary to set up your branding and specify your domain first.
Branding customization options are available for Distributors only. Business partners that are associated with a specific Distributor account will inherit branding specifications of this account.
The following showcases how to successfully configure your new branding and describes all available portal and domain customization options.
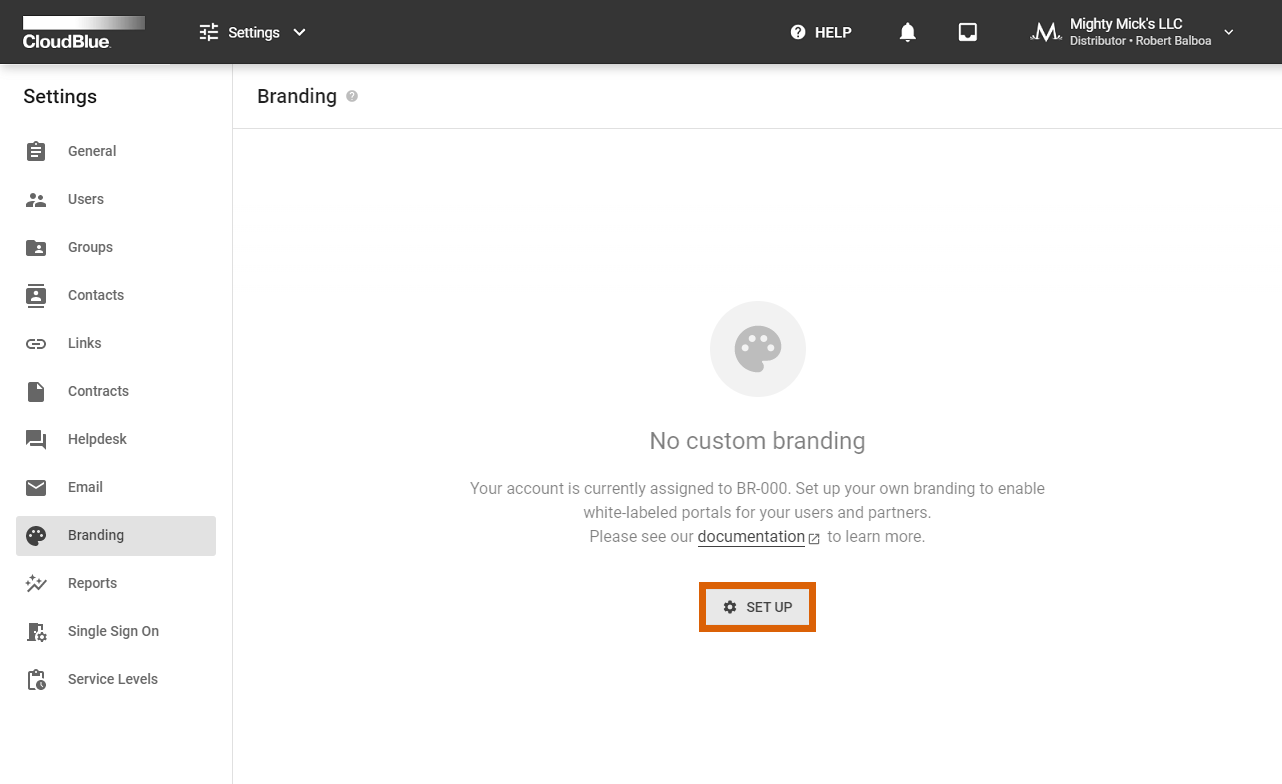
To access the brand customization options, it is required to set up a new brand by specifying your domain. Initiate your brand configuration by clicking on the Set Up button:

Use the following form to specify your built-in domain. Your portals appearance will be inherited from your current brand configuration. Note, however, that the system allows changing brand settings and assign custom domains as described below.
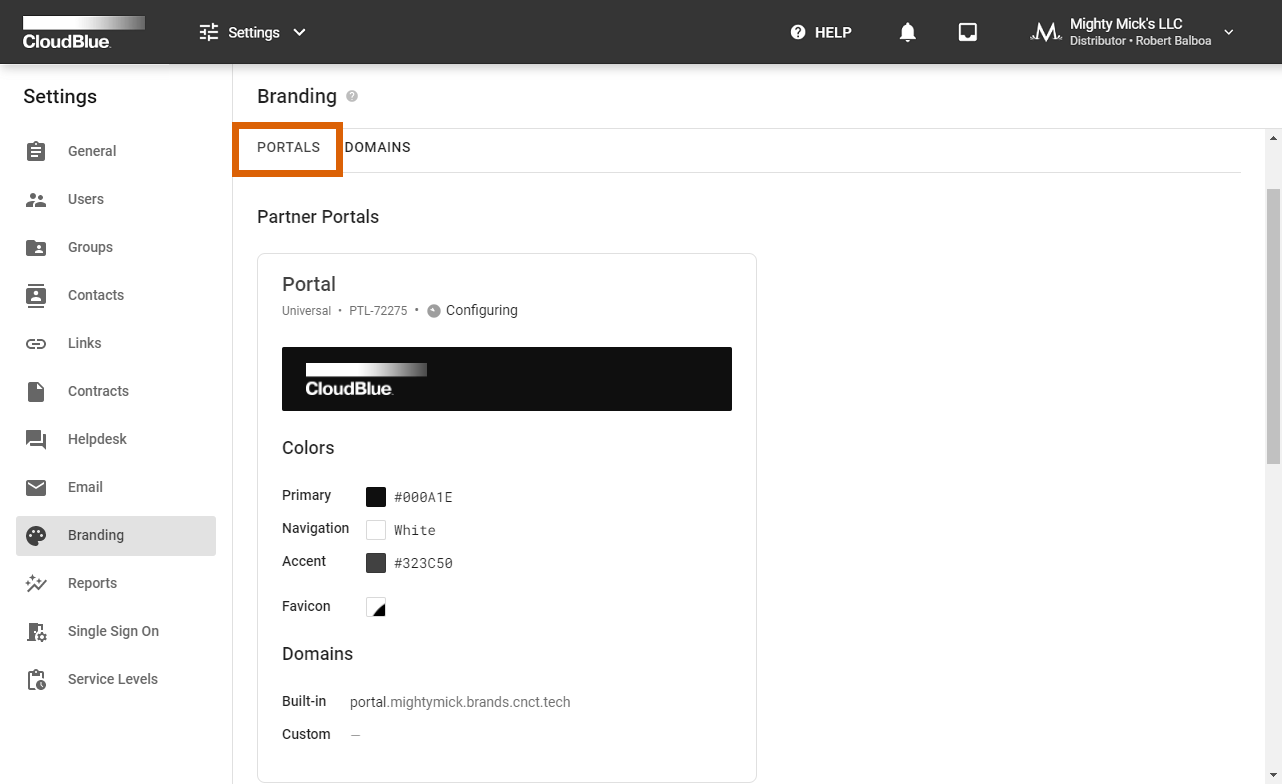
The Portals tab features the visual representation of each available Connect Portal. Namely, this tab showcases the following parameters:

Furthermore, note that the system allows creating new customer portals and select a specific marketplace for your new customer portal by clicking the Add button.
Connect allows customizing your portals by accessing the Portal Details screen.
Click on your portal name to access the Portal Details screen. This screen allows previewing your selected portal by using the corresponding button at the top-right corner of the screen. This Portal Details screen can also be used to update your portal title and domain name as follows:
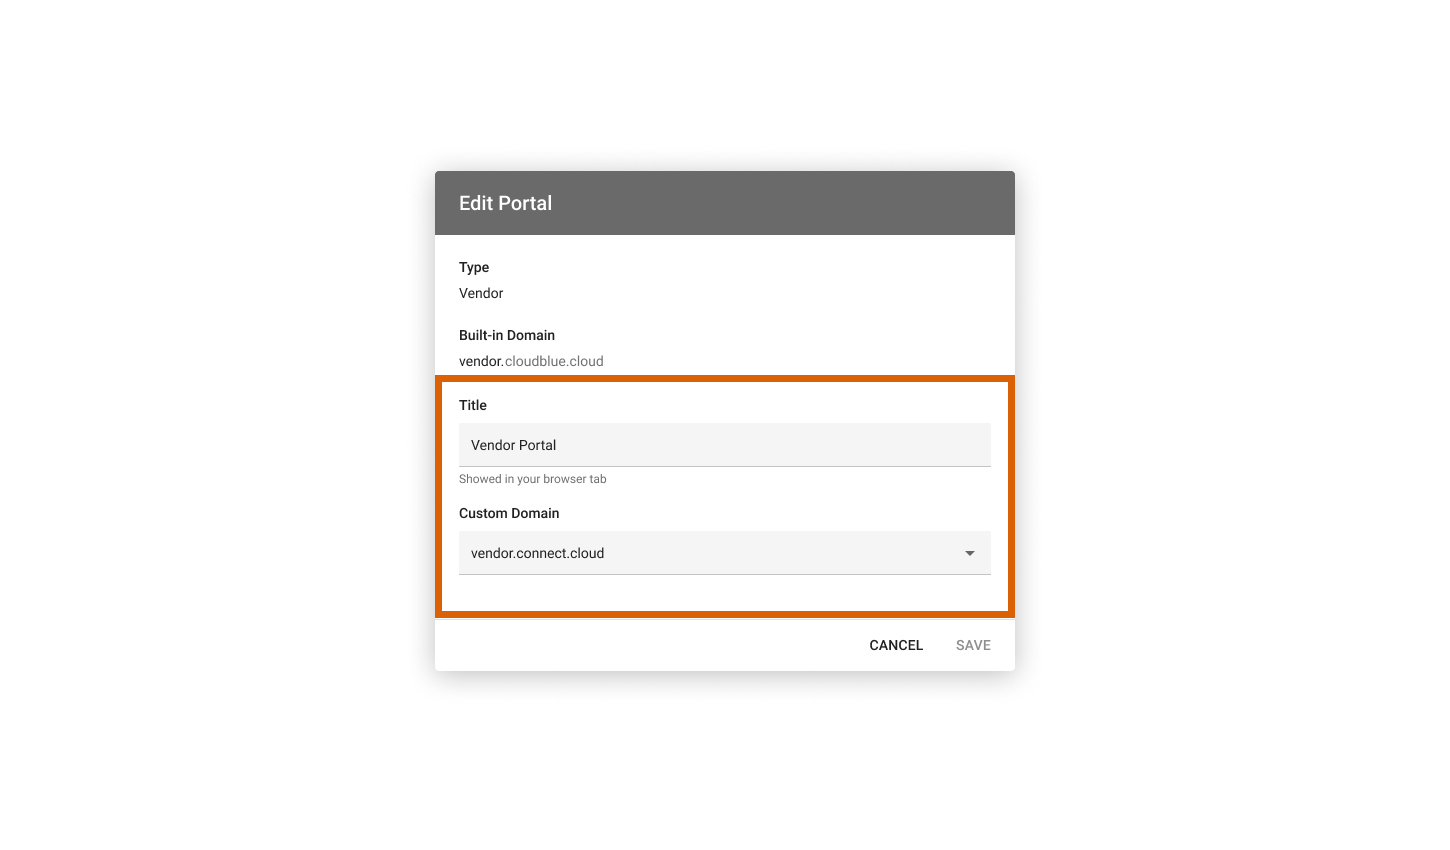
Click the Edit button that is located at the top-right corner of the Portal Details screen. Thereafter, the system provides a form that specifies your portal type and identifier. This form also allows changing your portal title and selecting your custom domain:
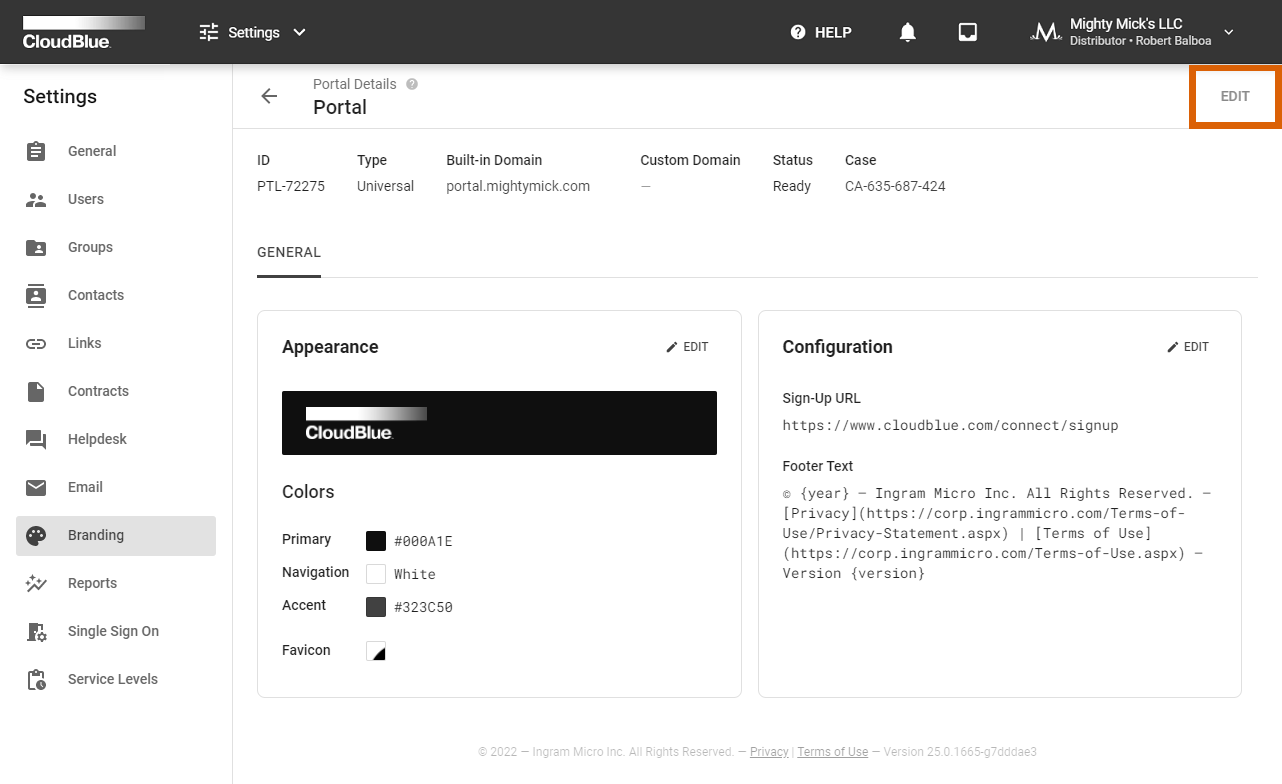
The Portal Details screen also allows customizing your portal appearance as described below.
Change the appearance of your selected portal by clicking the Edit button within the Appearance block. Therefore, the system prompts you to change your selected portal appearance via the following form:
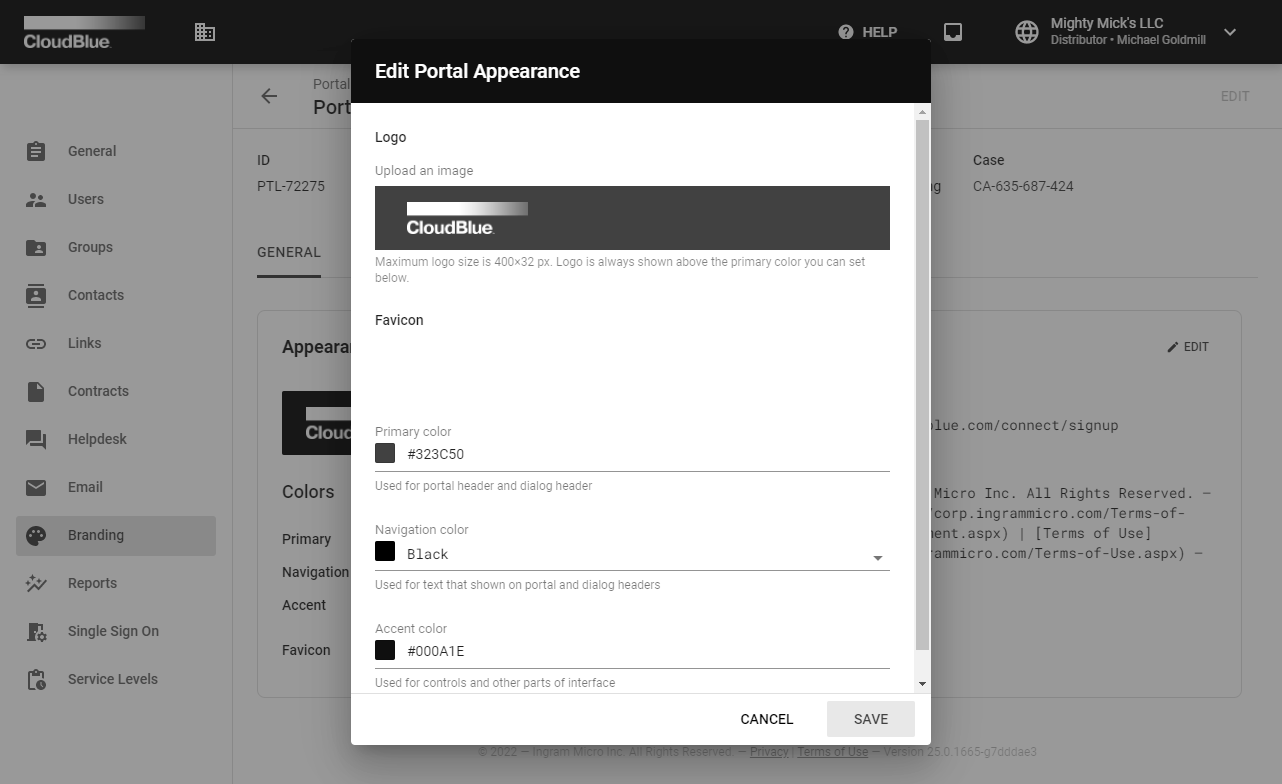
Click the Save button to confirm your changes. As a result, the system will update your specified attributes and allows previewing the result via the Appearance block.
The Portal Details screen also provides additional configuration for your selected portal. Click the Edit button within the Configuration block to access the following options:

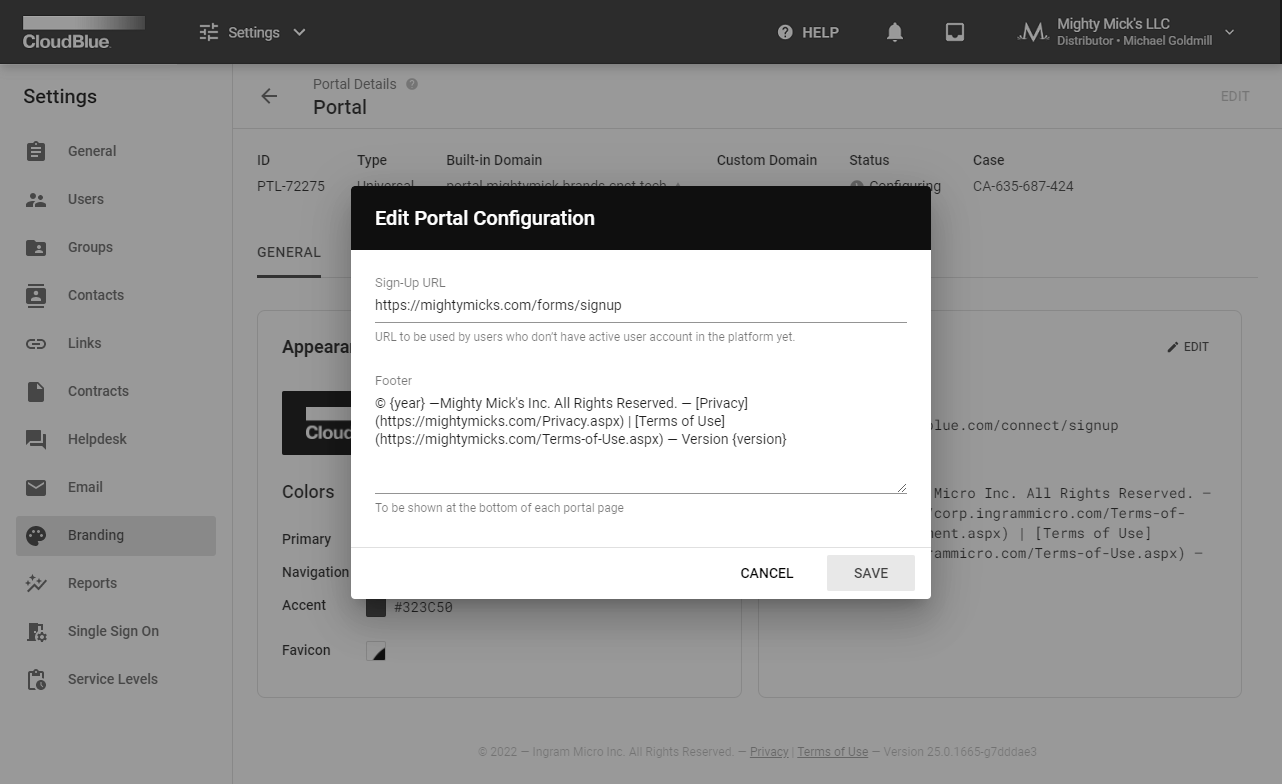
Click the Save button to confirm your changes. Therefore, the system will use your provided data for footer information and sign-up URL.
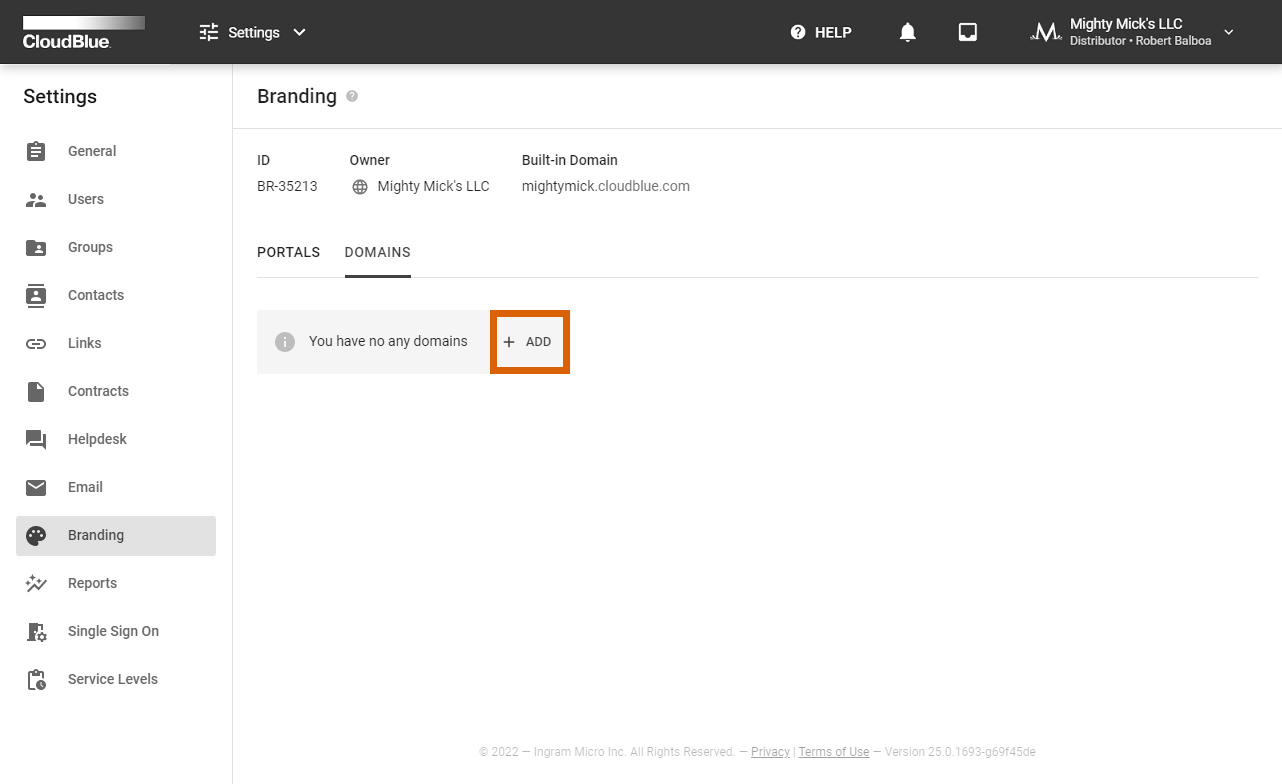
The Domains tab within the Branding menu provides a list of your custom domains for your portals. Define and manage your custom domains as described below:
Click the Add button to specify a new custom domain for one of your portals.
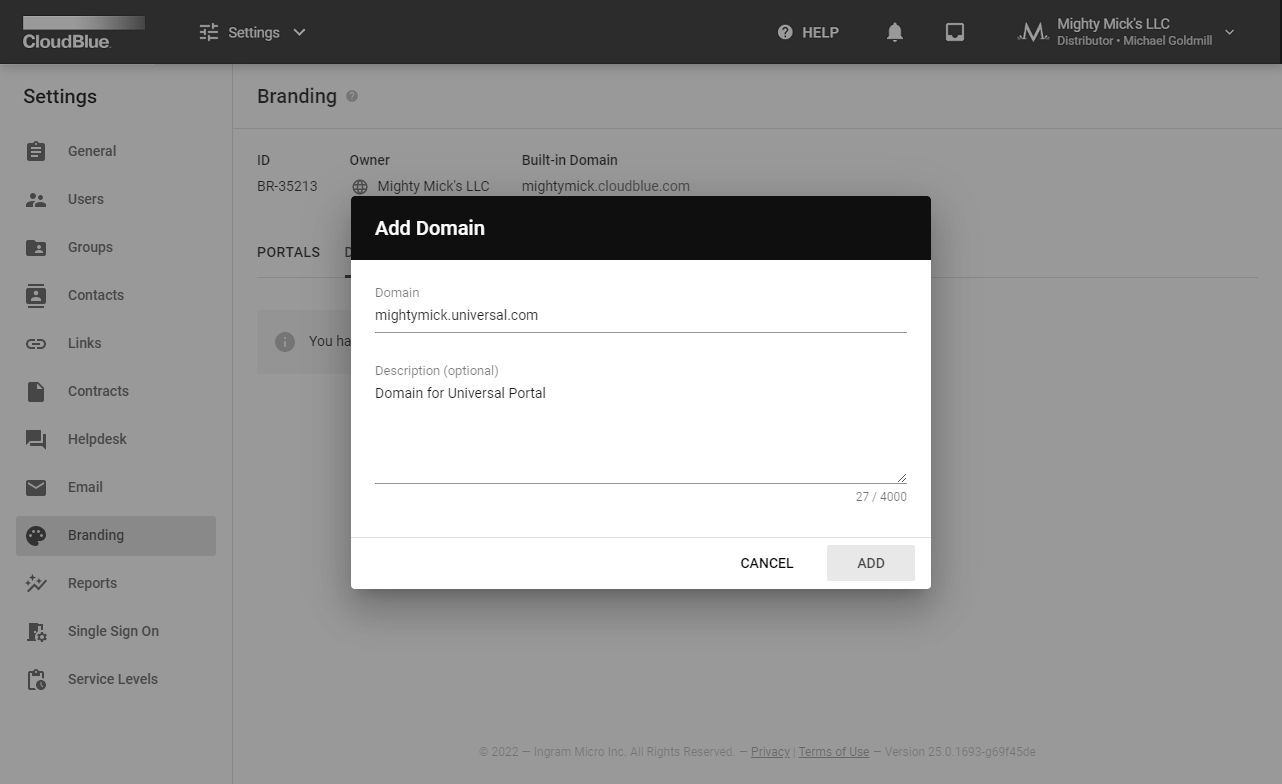
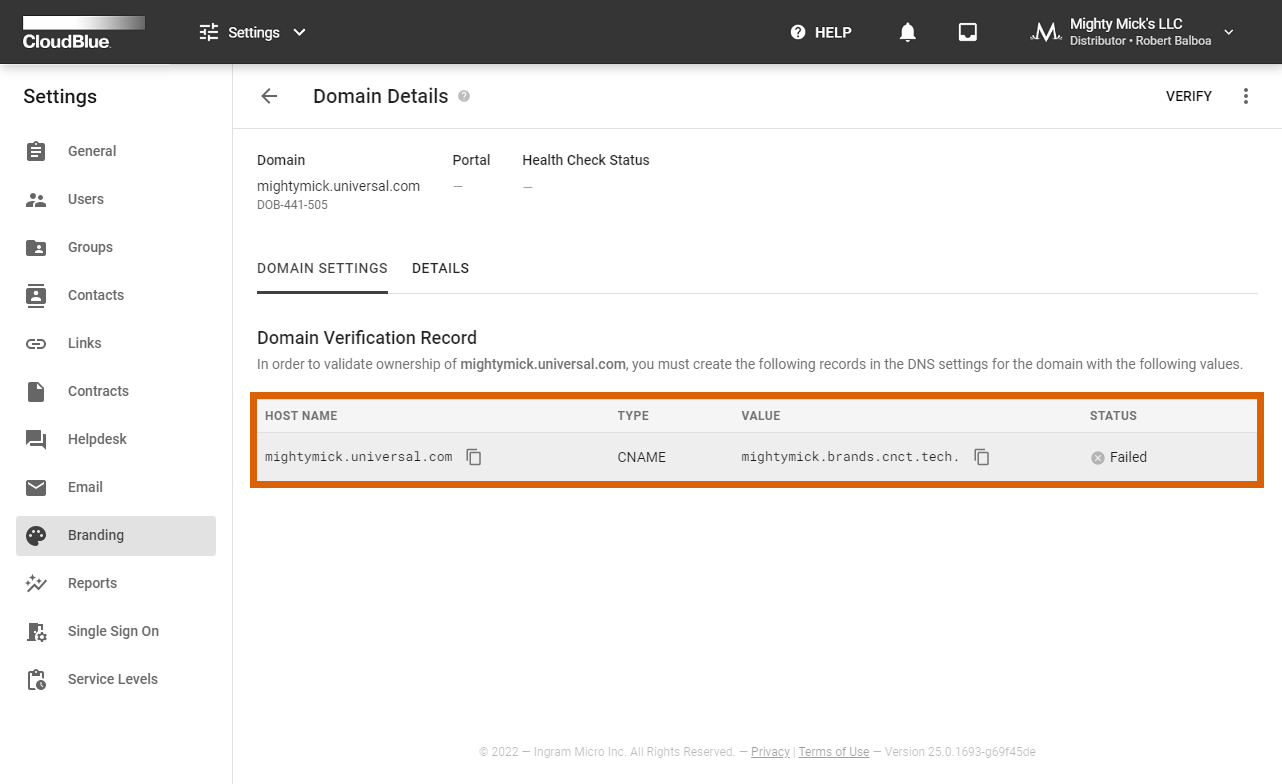
Once your custom domain is added, it is required to validate the ownership of your provided domain. Thus, to successfully complete this operation, the Connect provides domain verification records within the Domain Details screen.
Click on your added domain name to access the Domain Details screen. This screen allows verifying or removing your domain and provides information that is necessary for your domain verification.
The domain verification data is located within the Domain Settings tab. Create DNS records of the provided type and copy-paste the specified values for your records. Once the required records are created, click the Verify button at the top-right corner of the Domain Details screen.
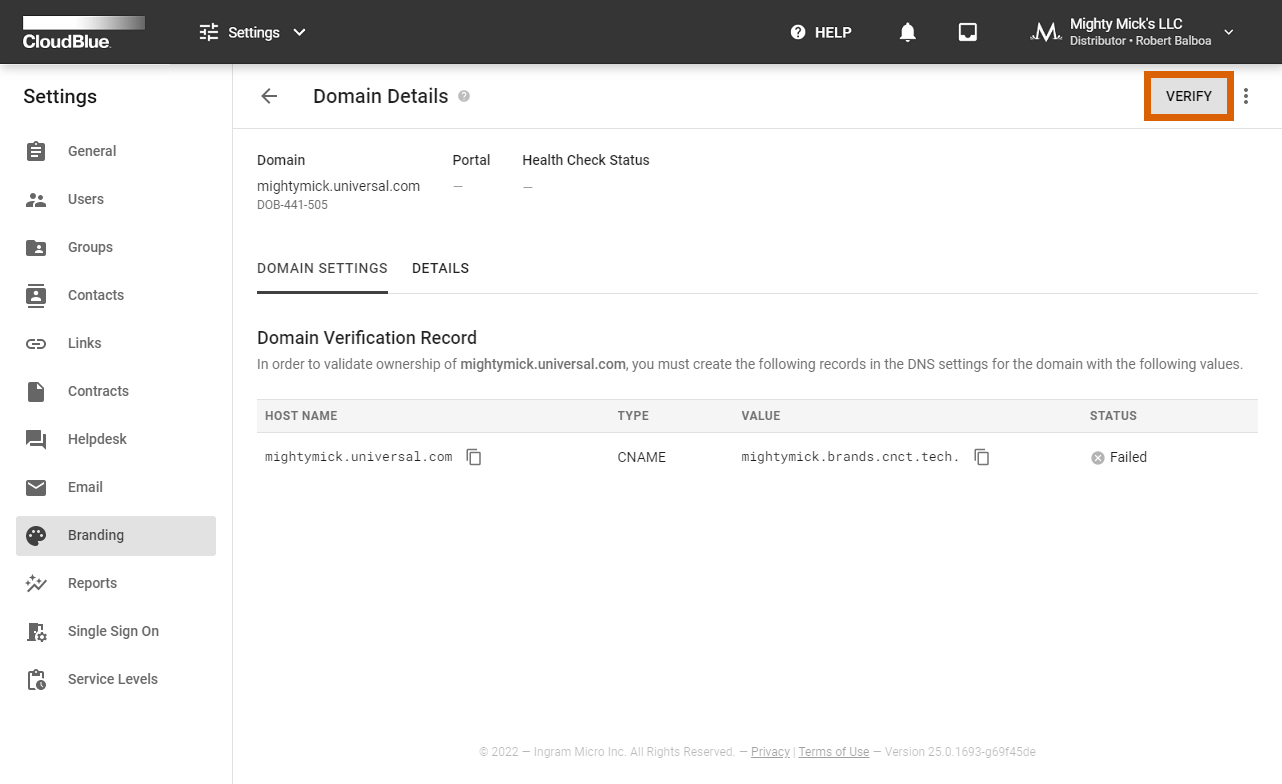
In case the verification operation is finalized successfully, the status of your domain object on the Connect platform will be switched to Verified. Therefore, you can assign your custom domain to a partner or customer portal.