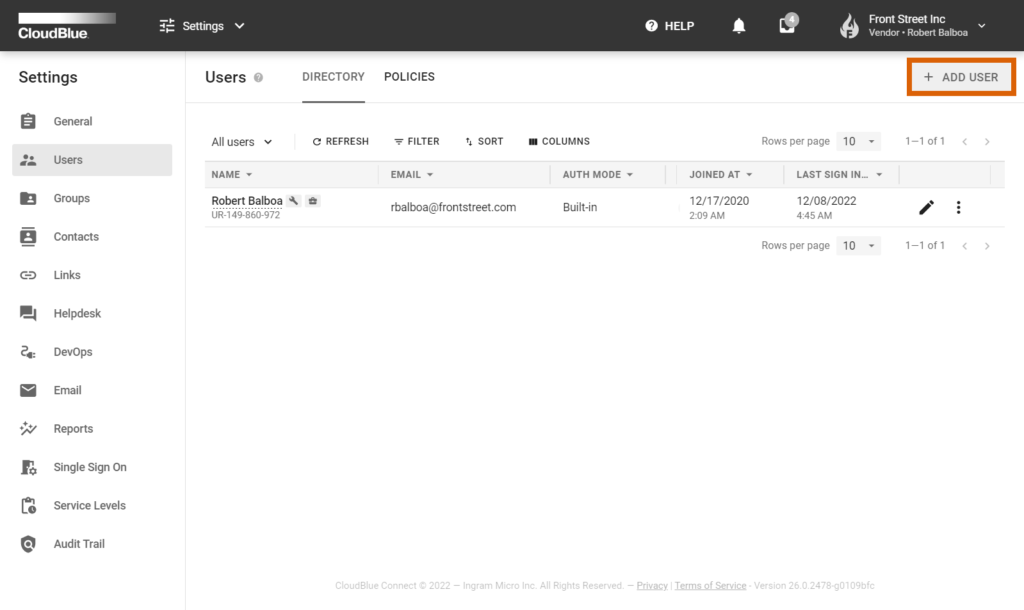
The Users menu allows adding new users, managing existing users or deleting them from your account.
The following provides specifications for the user objects on the Connect platform and contains instructions on how to add new users to your account and how to remove user objects.
Users represent employees and team members at your organization (such as IT specialists, managers, sales representatives, etc.) that can access the CloudBlue Connect® platform. Each Connect account should include at least one user that can generate invites to join their accounts.
Users can belong to multiple groups and multiple Connect accounts (whether they represent Vendor, Distributors, or Reseller accounts). The following diagram schematically illustrates such a scenario:
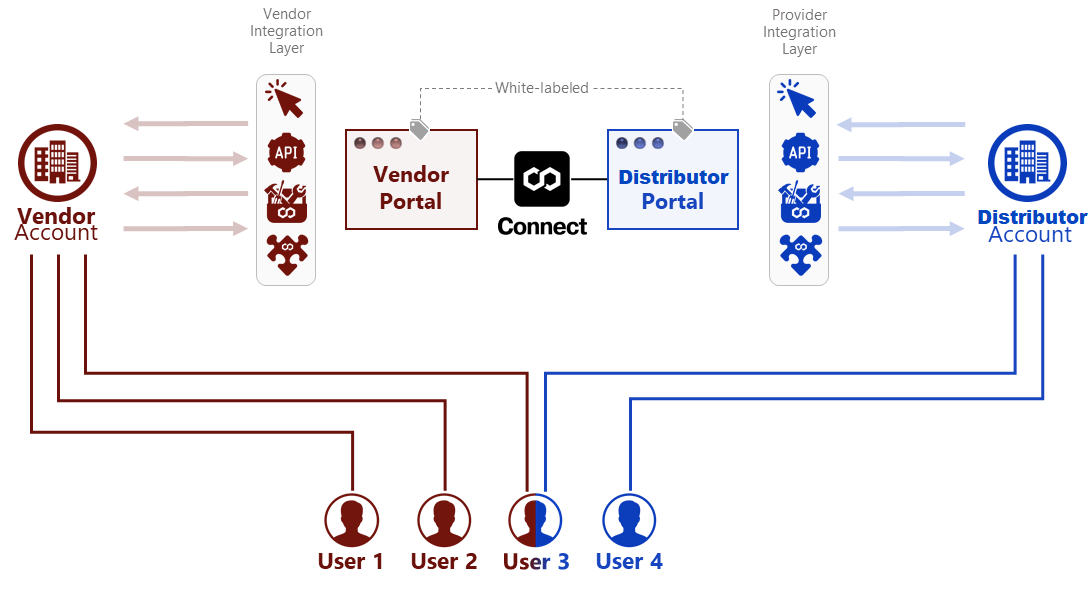
The diagram shows that User 1 and User 2 belong to Vendor account, while User 4 belong to Distributor account. Note that User 3 belongs to both Vendor and Distributor accounts. Therefore, this user can access Vendor and Distributor portal. Connect also allows implementing business cases, in which a user can access a Reseller portal as well as Distributor and Vendor portals.
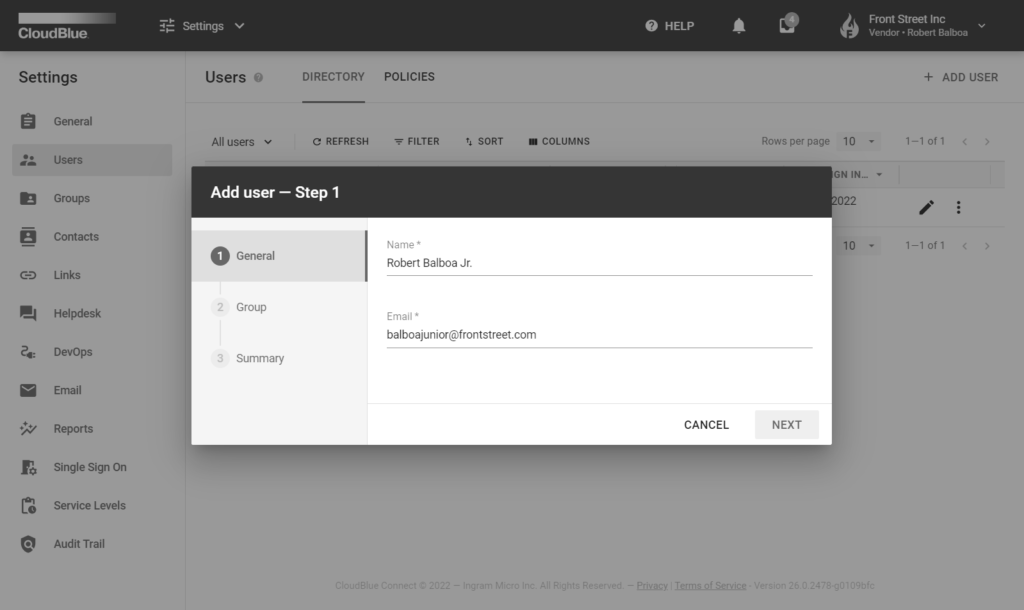
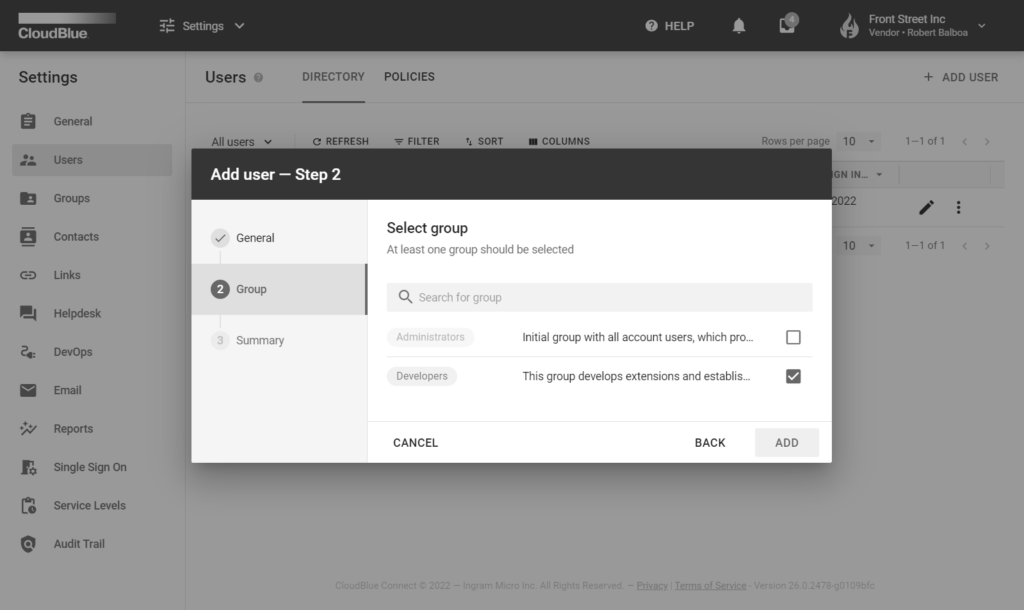
Access the Users menu and click Add User to launch a user creation wizard. The following wizard steps help you successfully configure a new user and send an invitation link to this user:
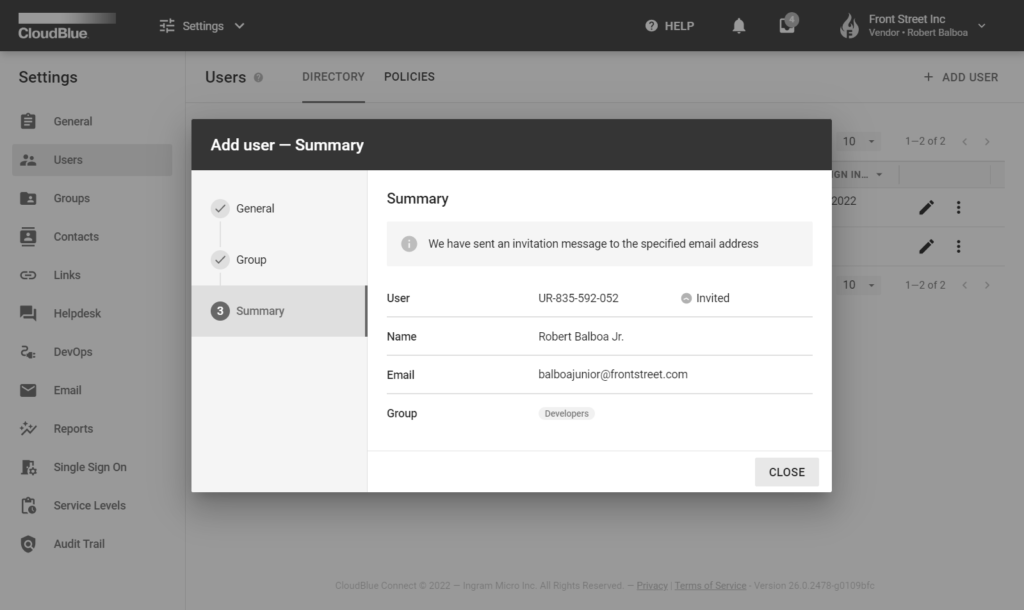
Therefore, the system will send an invitation to your created user. If this user is not registered in Connect, the invitation will contain a link to the registration form. In case this user already exists in Connect, your account will be available for that user at once.
The system allows changing associated groups for each user by using the edit (✎) icon. In case your user is not yet registered in the system, you can also edit email and username for your provided invite.
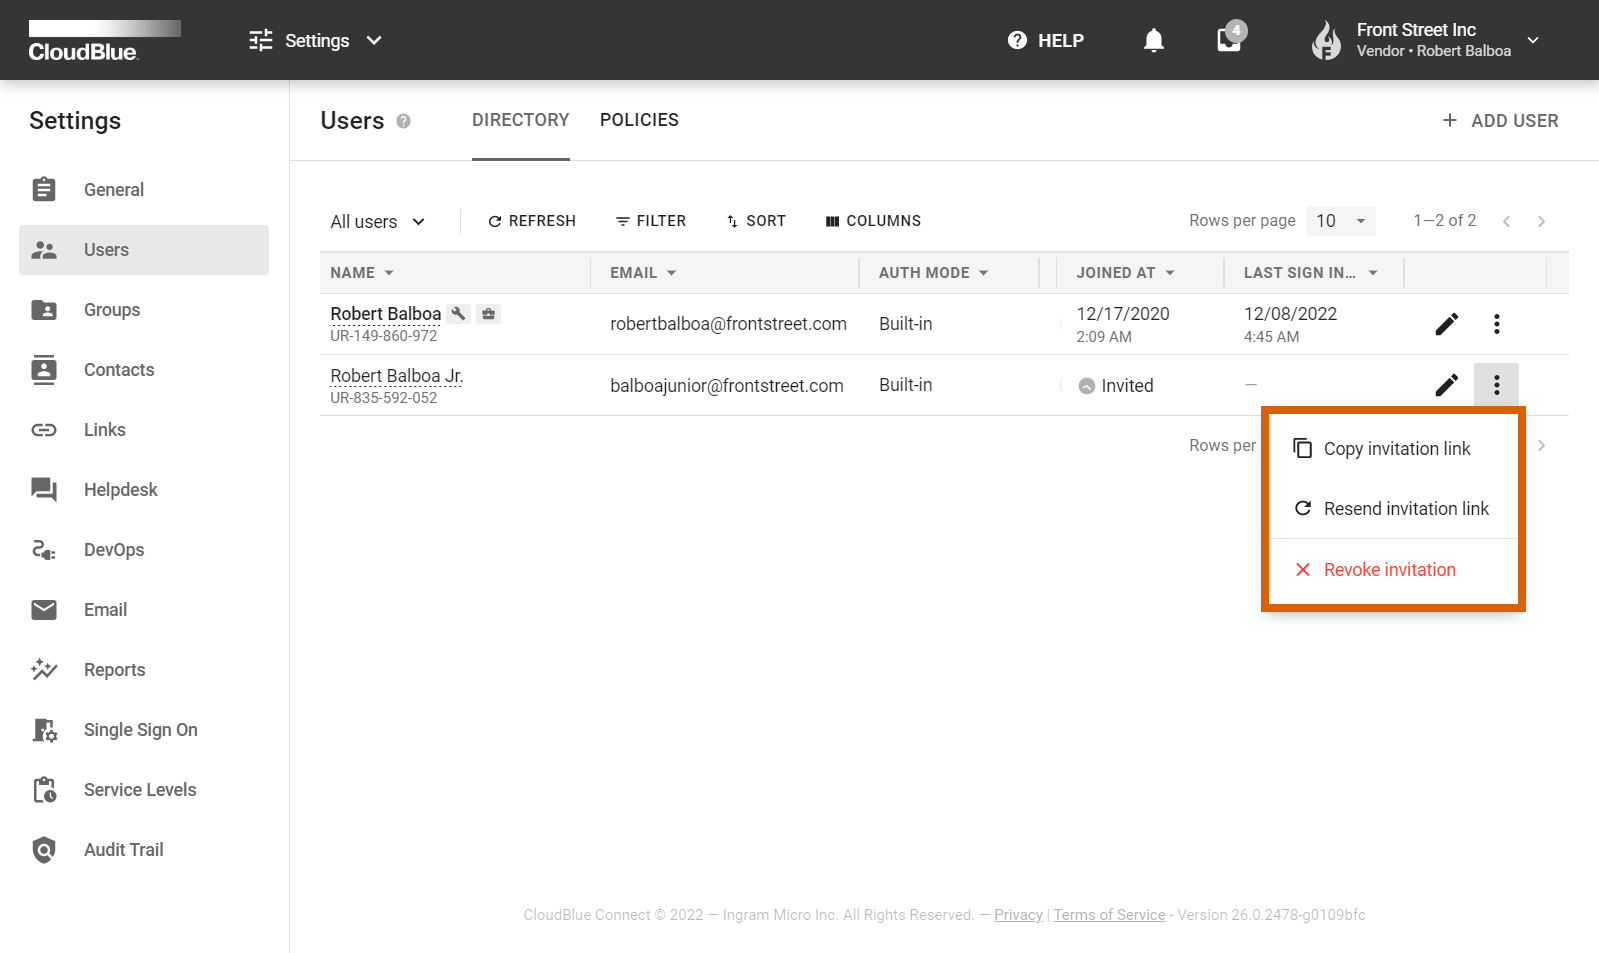
The Connect platform also provides additional operations for your invited users. Click on the vertical ellipsis (⋮) icon next to your invited user to access these operations:
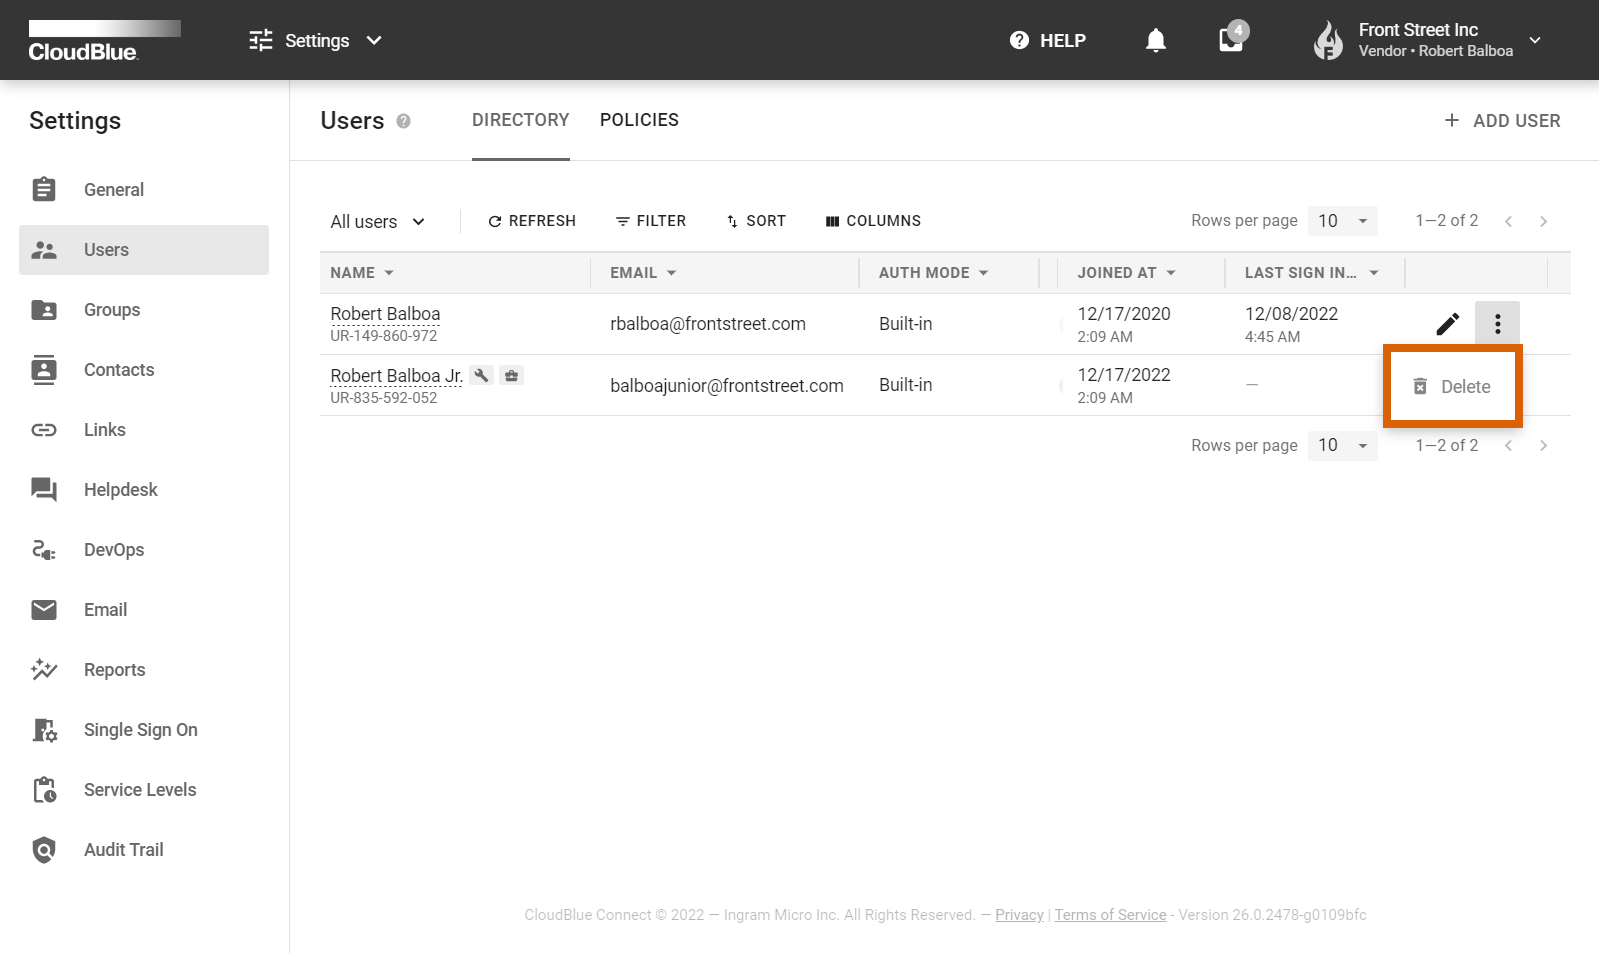
Locate a user that you want to remove from your account and click the vertical ellipsis (⋮) icon on the corresponding row. Thereafter, click the Delete button to remove this user.
Note
After completing this operation you cannot use this user credentials to access and manage your current account.
Click Delete in the pop-up window to confirm your decision.