Service contracts are created by Distributors to invite Resellers into the CloudBlue Connect® platform. Thus, signed service contracts enable Distributors to collaborate with Resellers. Furthermore, by signing a service contract, Resellers can activate their Reseller Portal on Connect. The following contains instructions on how to create a service contract, describes available operations and provided data within the contract details screen, and showcases how to activate the aforementioned Reseller Portal.
Once a service agreement is generated, Distributors can create a service contract by accessing the Partners module and navigating to the Contracts tab.
Click the Create Contract button to launch a contract creation wizard.

Follow the wizard steps to successfully create a new service contract.
Select the Service contract type.
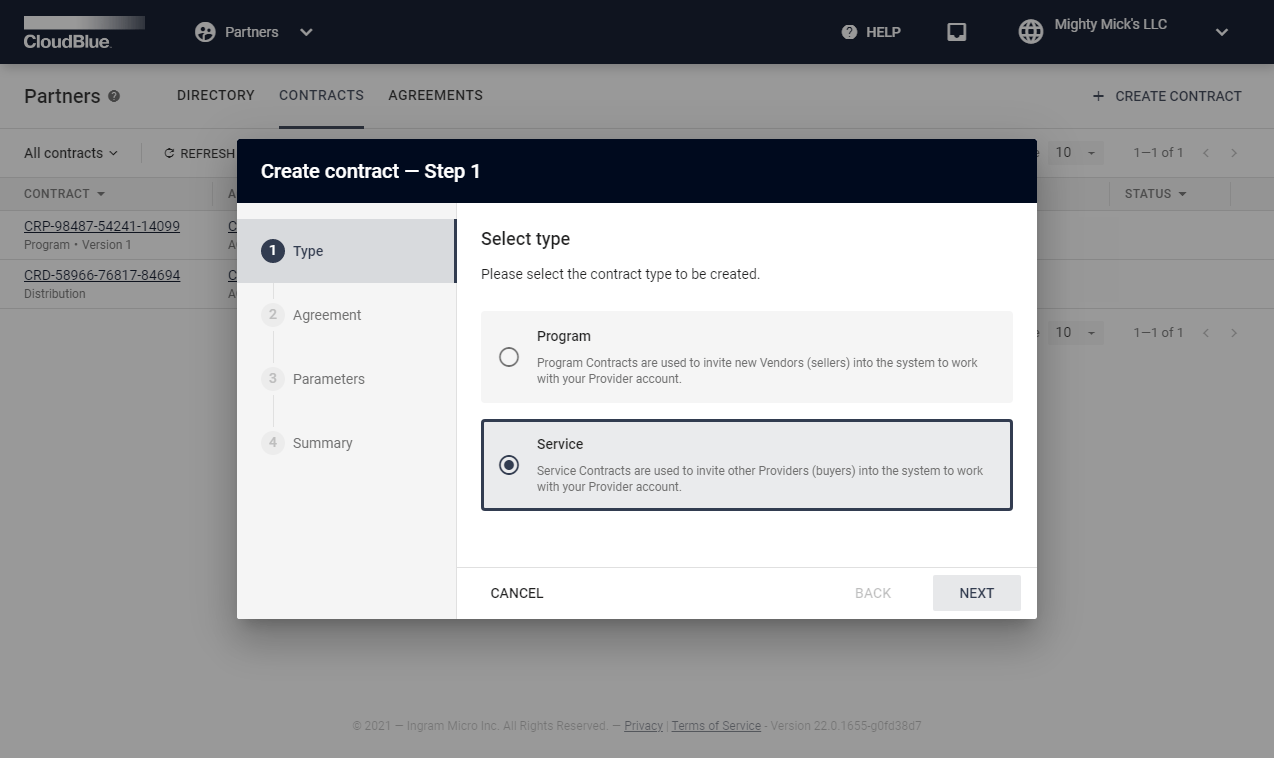
Click Next to continue.
Choose a service agreement from the list.
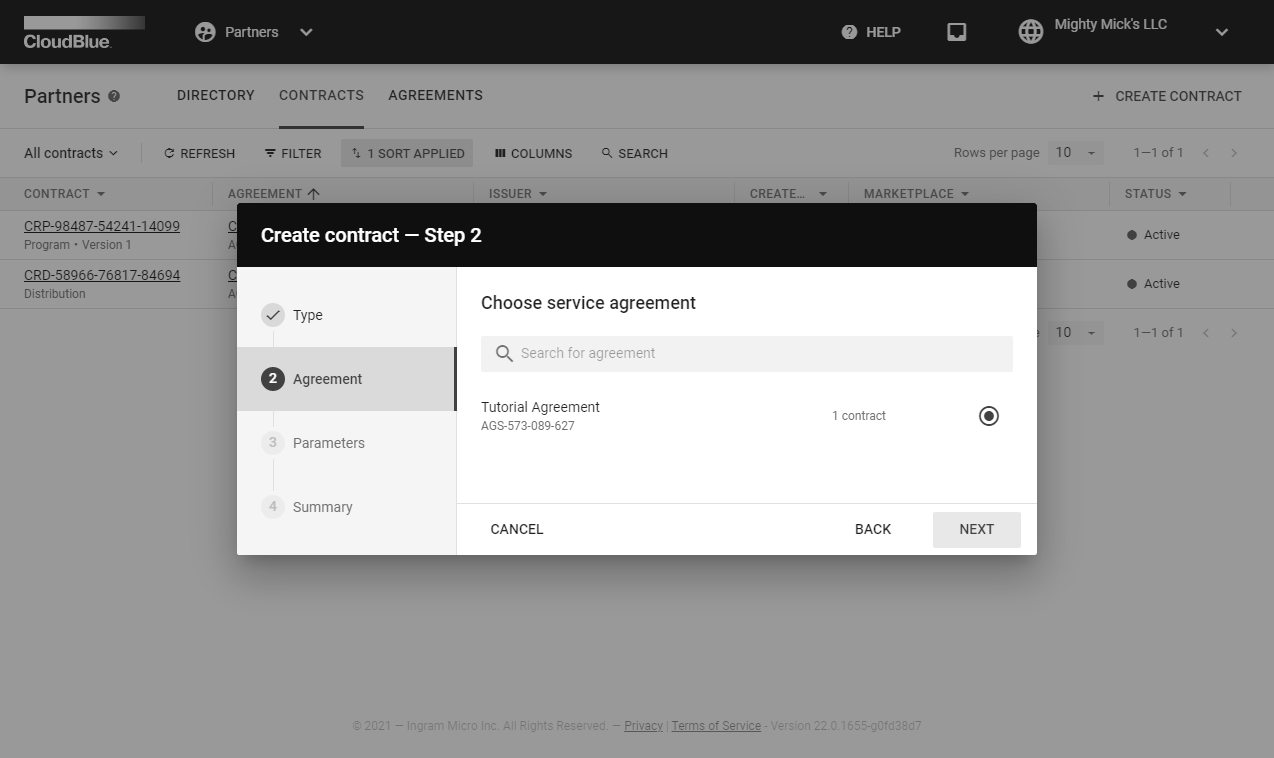
Click the Next button to continue.
Specify the following contract parameters:
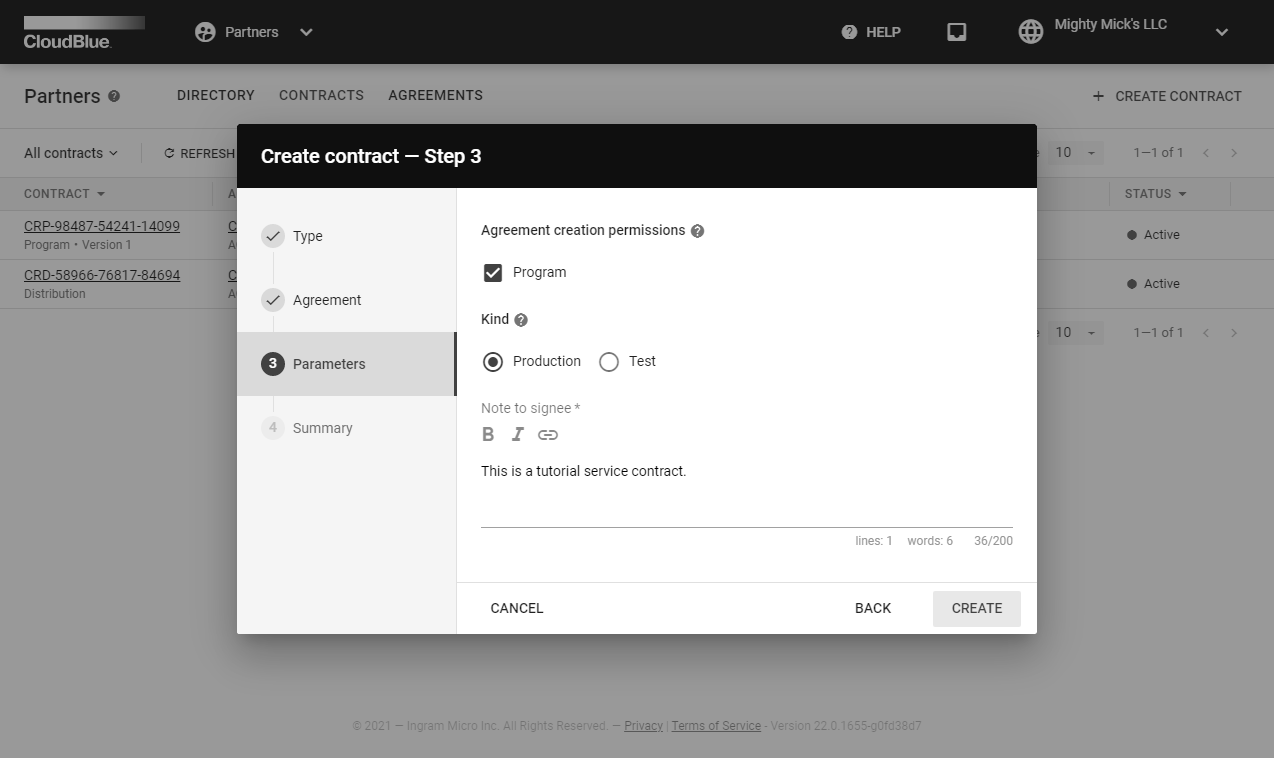
Click Create to finalize your program contract creation.
Once a service contract is successfully configured, the system displays a summary.
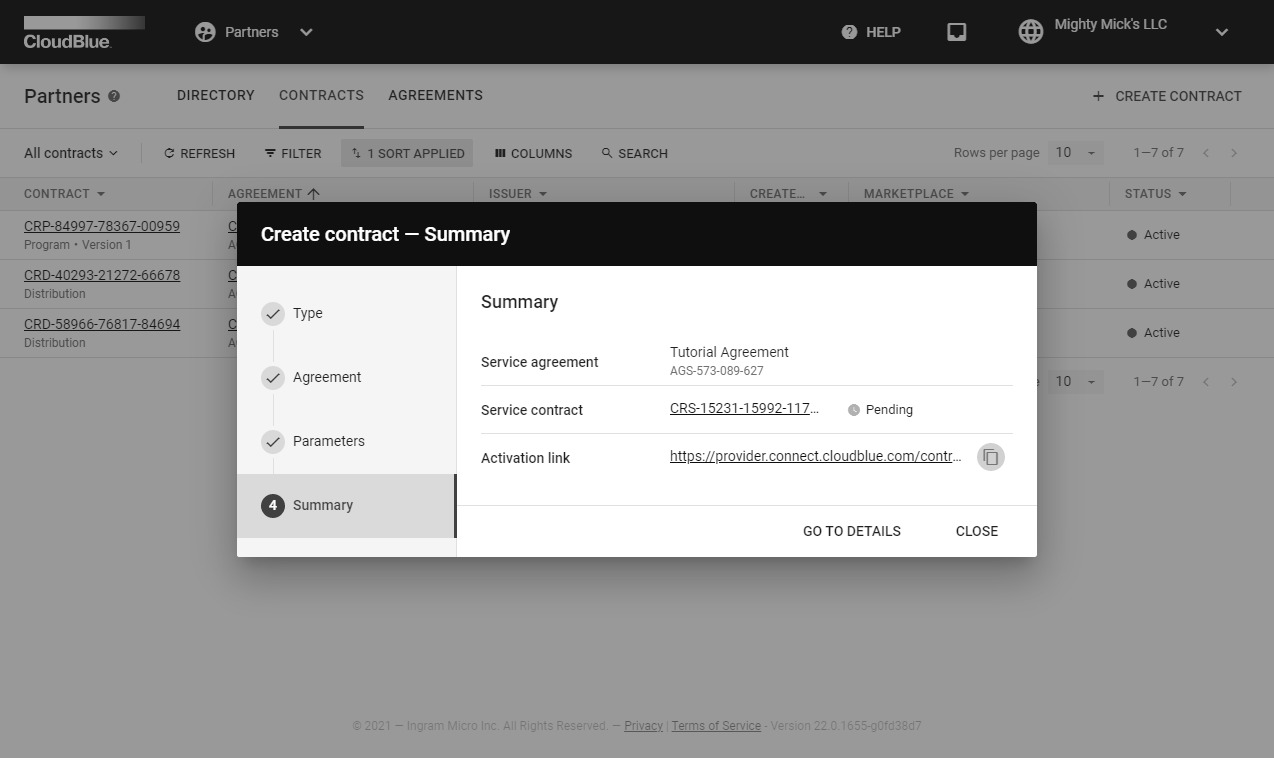
Access the Service contract details screen by clicking the Go to Details button. Otherwise, click Close to close the wizard.
Click on your contract ID to access the Service contract details screen.

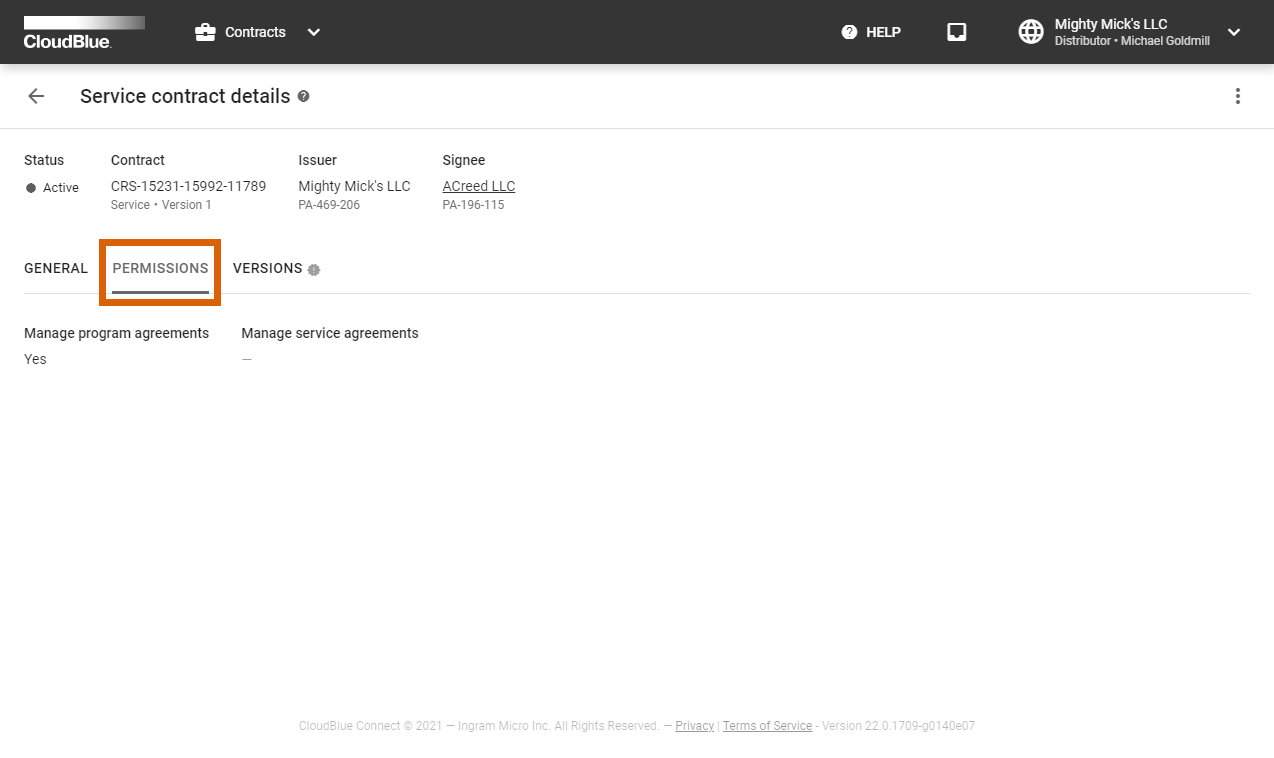
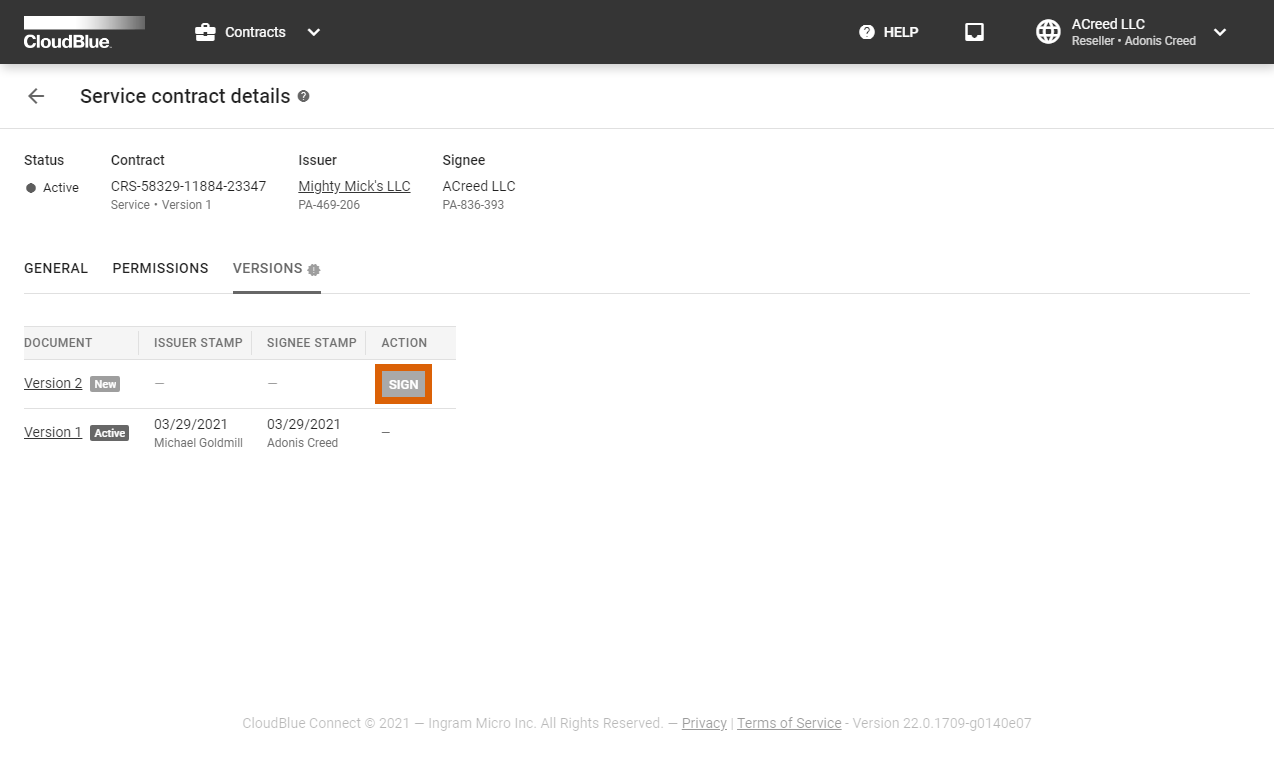
This screen allows reviewing contract Status, its ID, update/expiration/creation date, Issuer, and Signee. Furthermore, this screen provides various data within the following tabs:
Once a Reseller receives an invitation link, this Reseller can sign associated service contract and activate the Reseller Portal. Follow the steps below to successfully activate this portal and your service contract.
Paste your received activation link to access the Contract activation screen.
Review the provided agreement, enter your email and check I have read and accepted the agreement checkbox.
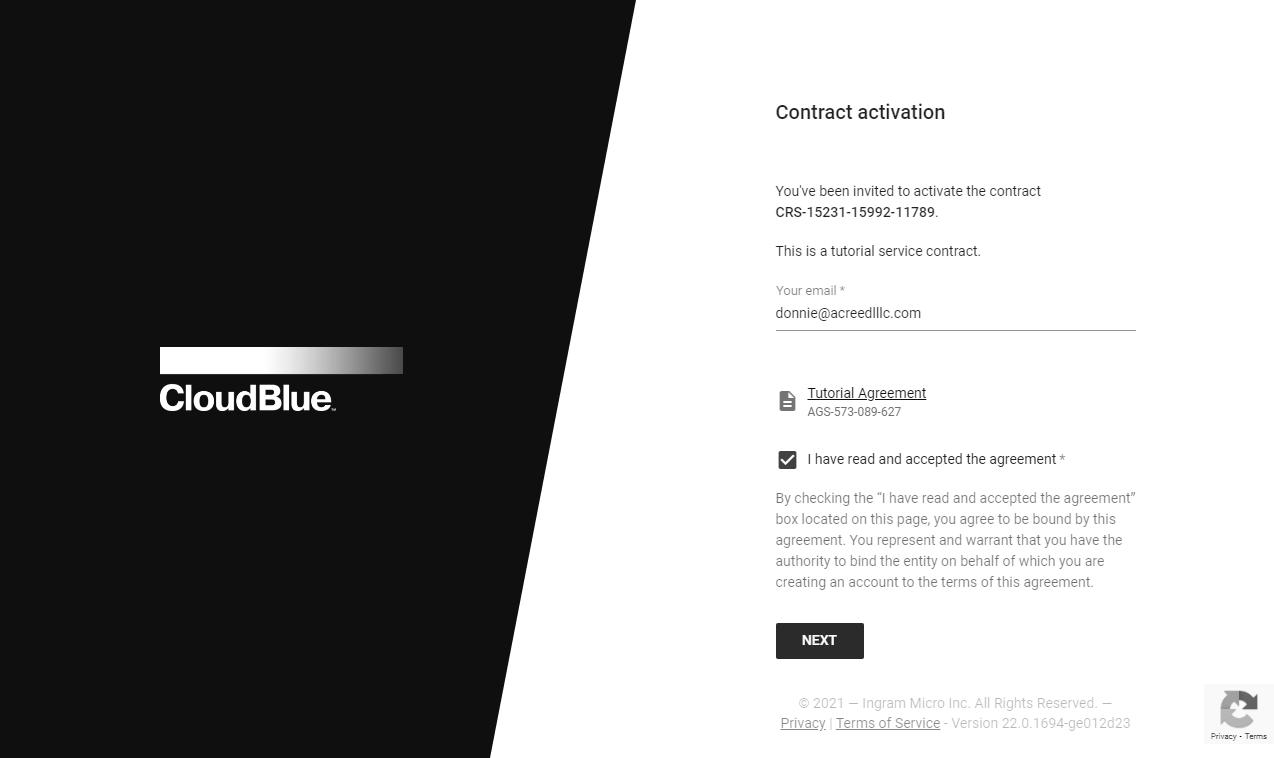
Thereafter, click the Next button to continue.
Enter your full name and specify your password in the following form.
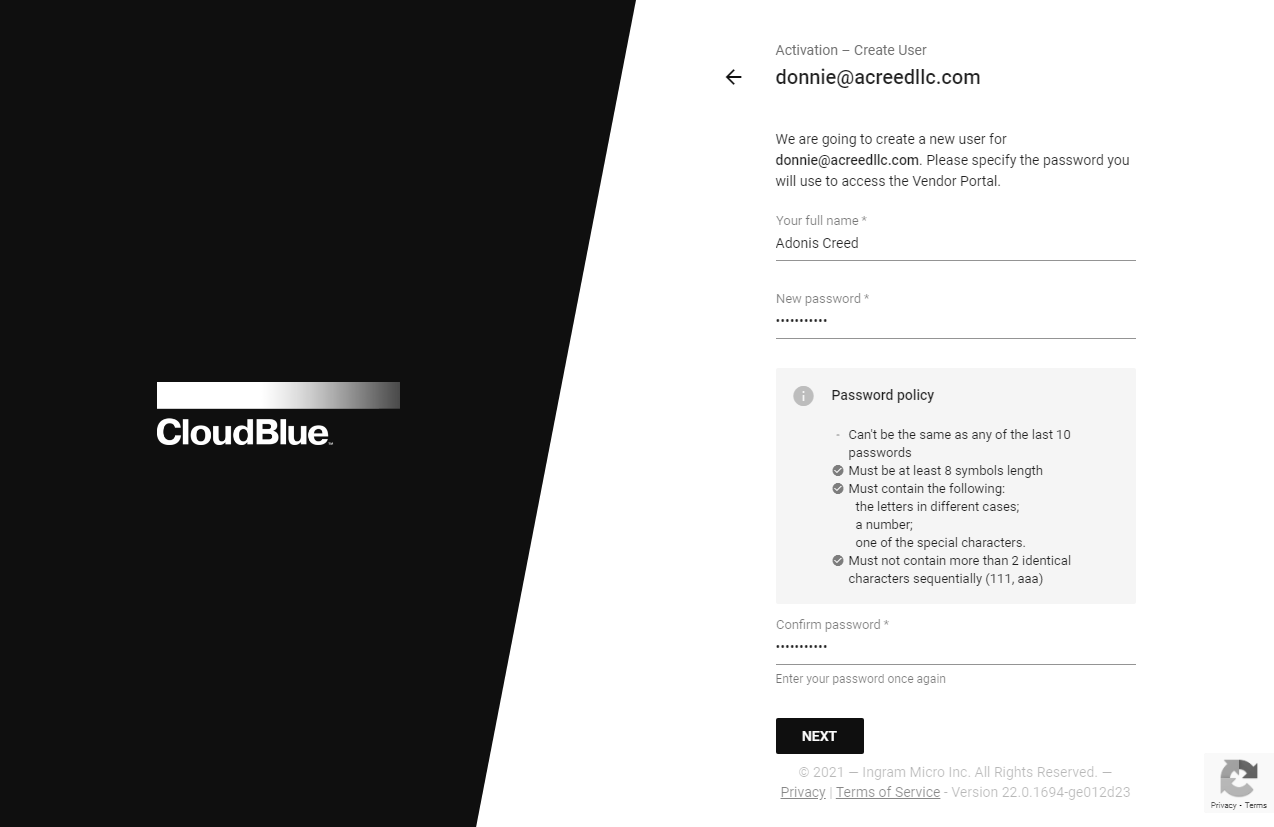
Click Next to continue.
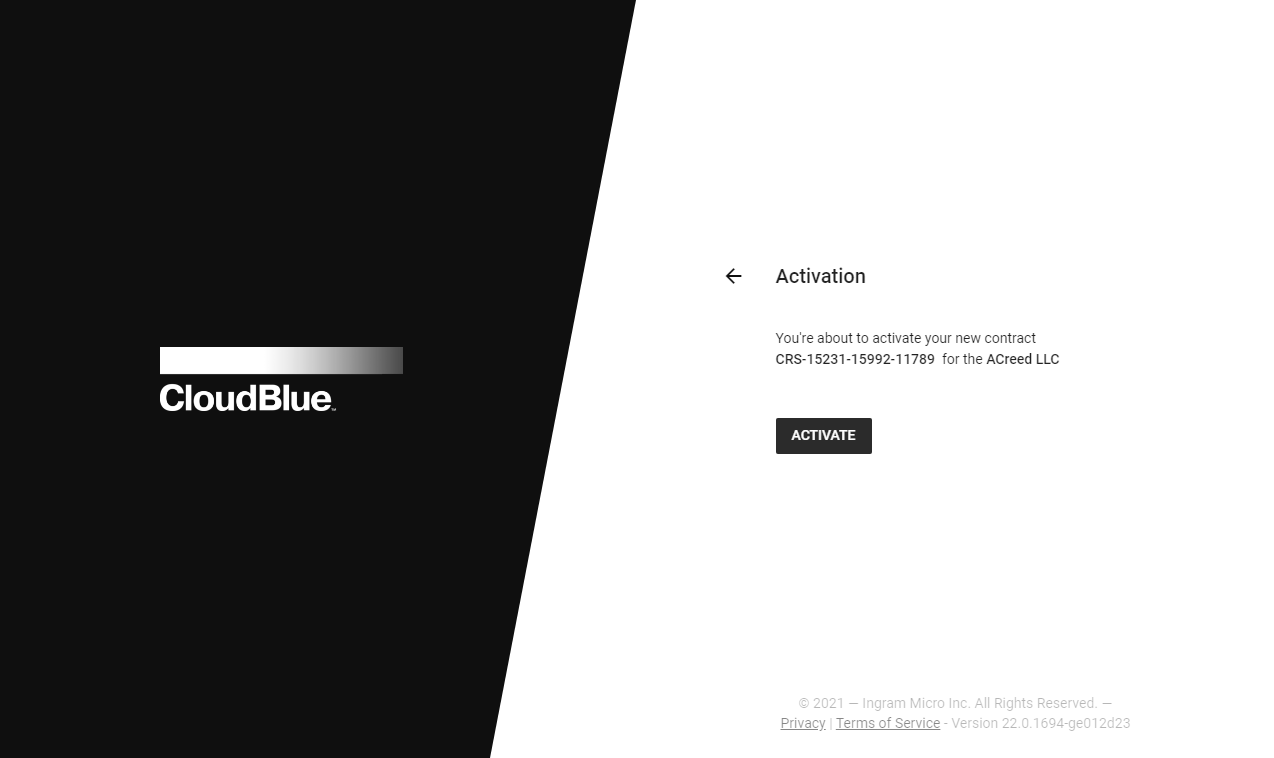
Enter your company name in the following form. It should represent a legal entity name. Include the entity type, such as Inc., LLC, GmbH, etc.

Click the Next button to continue.
Sign up the program contract and activate the portal by clicking the Activate button.
Therefore, it is possible to proceed the activated portal and perform further operations on the CloudBlue Connect® platform.