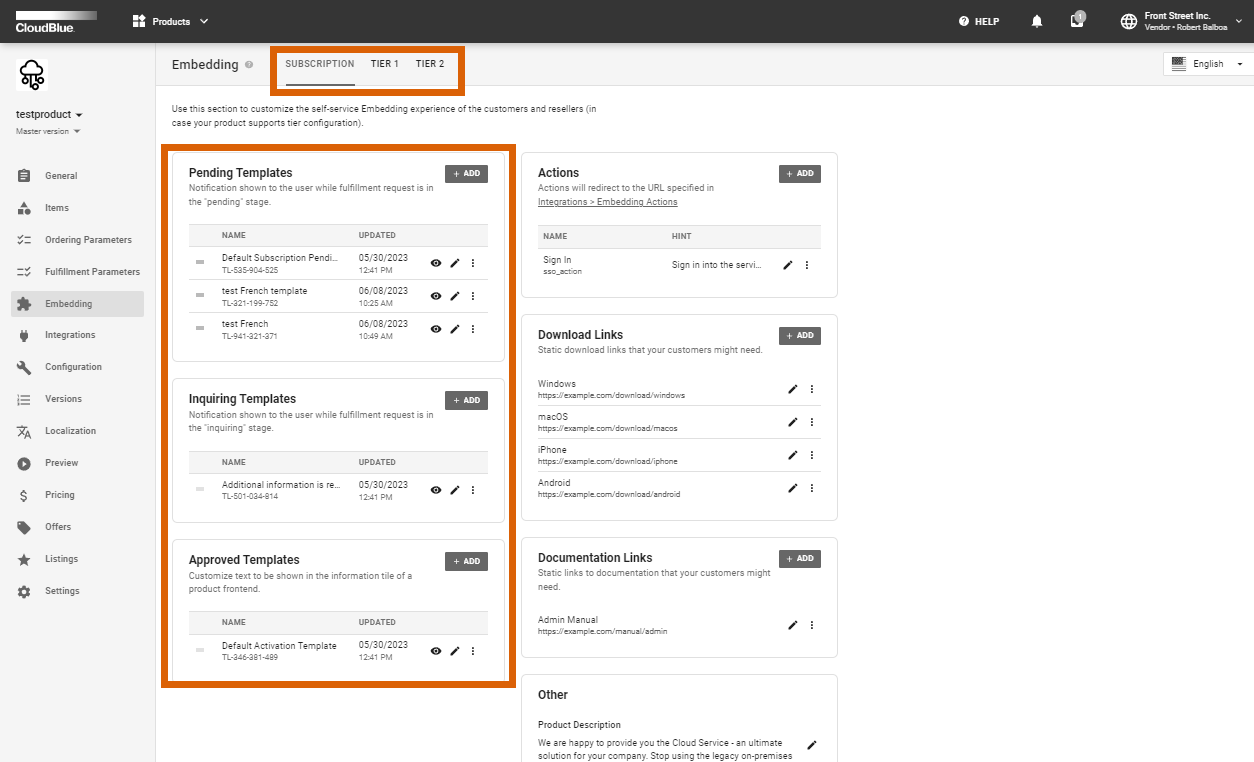
The Embedding section within the product profile page enables Vendors to customize self-service embedding experience of the customers and resellers (in case your product supports tier configuration). Note that the embedding attributes are versioned and localizable.
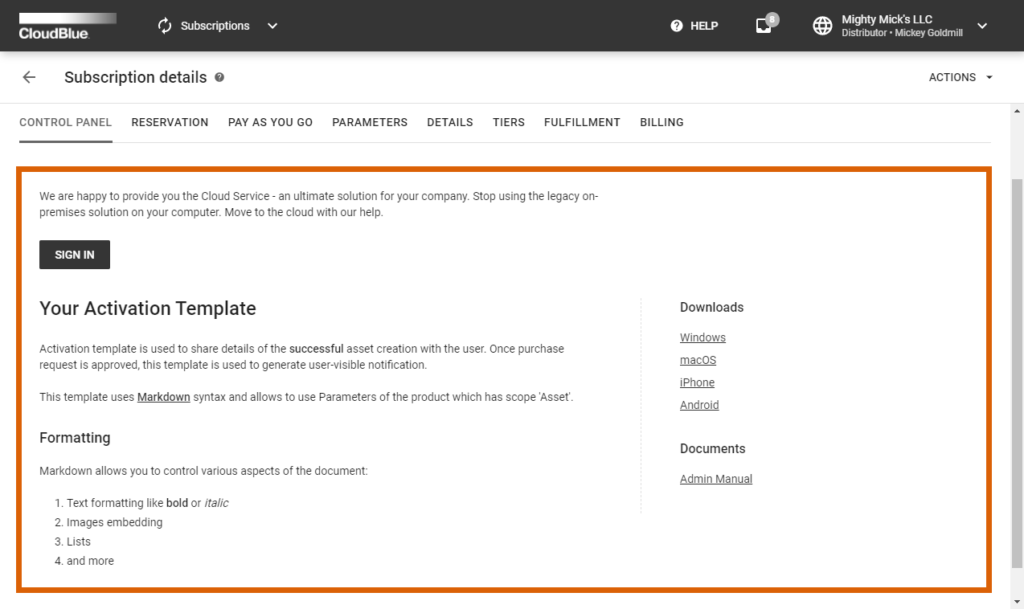
In general, embedding configuration is essential for customizing user experience once a generated subscription is processed successfully. This includes your product description, getting started instructions, download links, message templates, and your configured actions that will be available for your customers. Such attributes are also available for your business partners to preview:
The following introduces and describes all available attributes within the Embedding section.
In the Embedding section you can customize messages that will be shown to users during various states. This includes pending templates, inquiring templates, subscription approved templates, and templates that are associated with your available tier configuration.
The system allows editing such messages by using the Edit button next to your selected template.
Use the following overviews to familiarize yourself with provided templates and their features.
Customize a “pending” state message by editing this template. Namely, this message will be displayed to users that ordered a product and created a fulfillment request.
Provide an “inquiring” state message with this template. Therefore, this message will be displayed to users that are required to provide necessary parameter information and fill out your provided activation form.
Customize a “subscription approved” message with this template. This message will be displayed to users in case a fulfillment request is approved, and its corresponding subscription is activated.
The following templates allow editing messages in case tier configuration is in process or it is completed successfully. Note that these templates will be displayed in case corresponding Tier Config capabilities are enabled for your product. The system also enables to specify different messages for your Tier 1 and Tier 2 configuration operations.
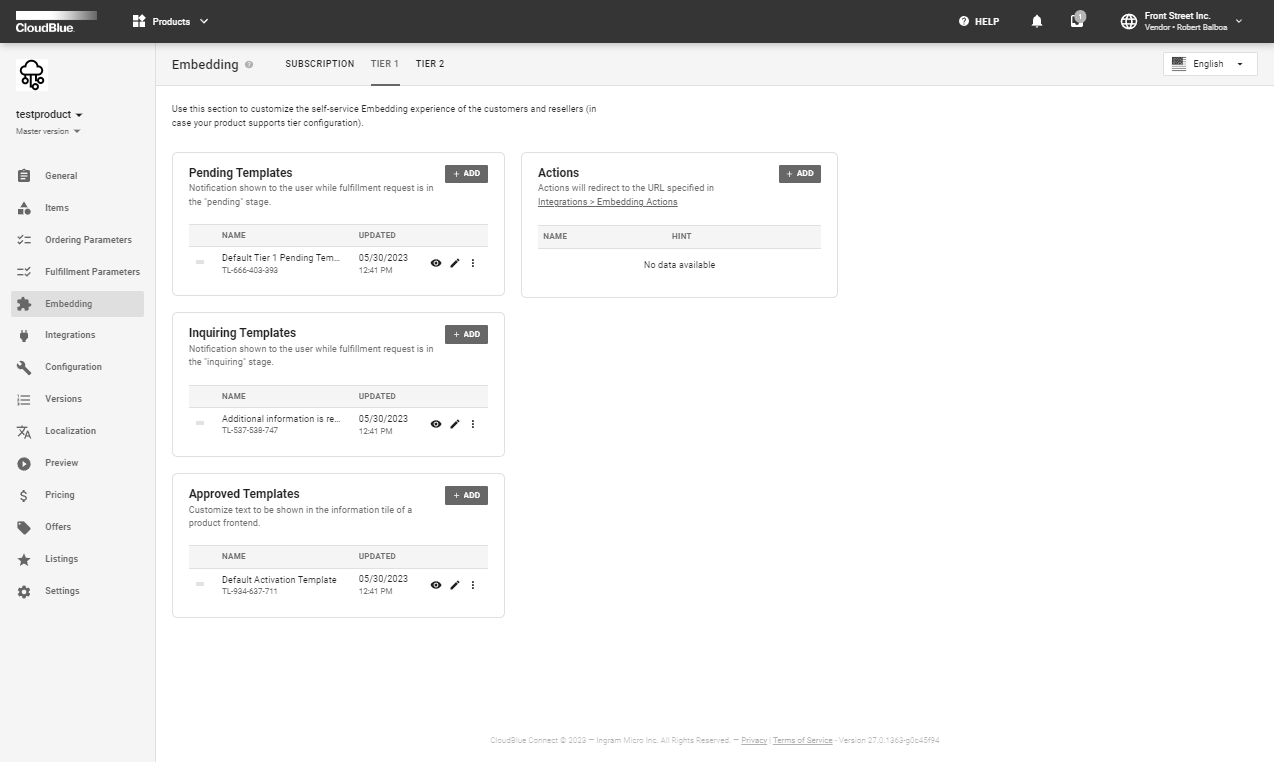
This message will be displayed in case tier configuration for your subscription is in progress. Therefore, the system generates a new tier configuration and its corresponding request in the Tier Config module.
Use this template to show a notification to the user while fulfillment request is in the Inquiring stage.
Use this template to create a message that is displayed once all required specifications for a tier configuration object are provided, and its tier config request is successfully approved.
The system allows adding templates for a specific locale by using the Localization functionality. If a template for a specific locale is required, add a new template and enter your message by using the provided interface:
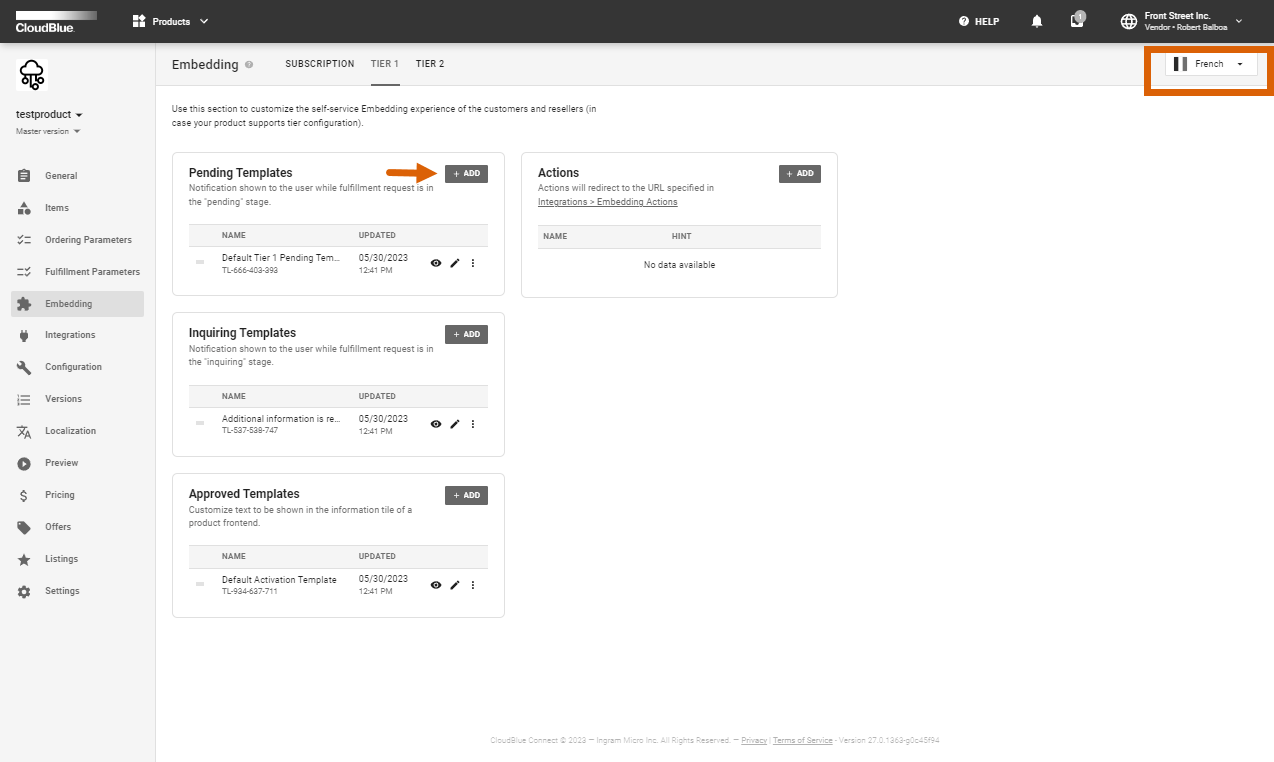
As a result, your template will be associated with the selected locale. The system also allows previewing the provided message and comparing it with the system template by using the locale switch:

The Actions tile enables Vendors to define and customize required actions for the embedding experience and allows accessing endpoint URL and JWT secret that are configured in the Integrations section of a product.
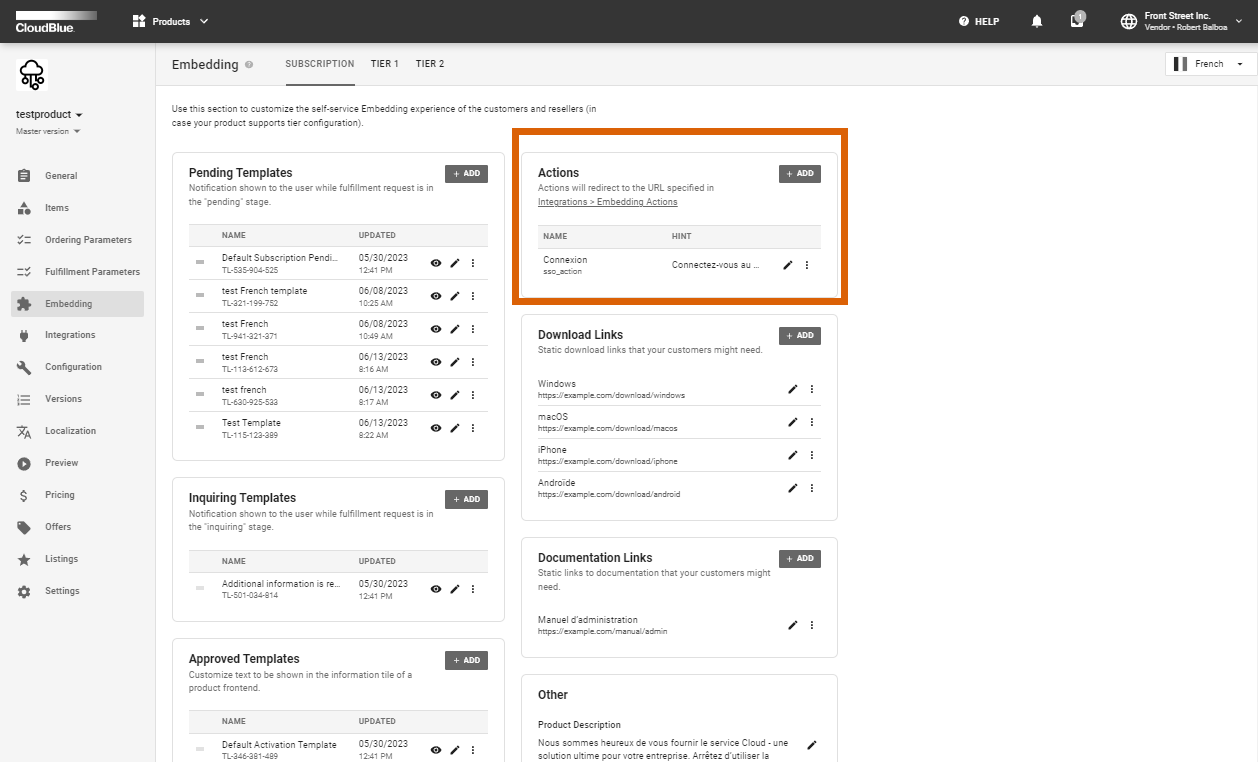
Follow the steps below to successfully create a new action button.
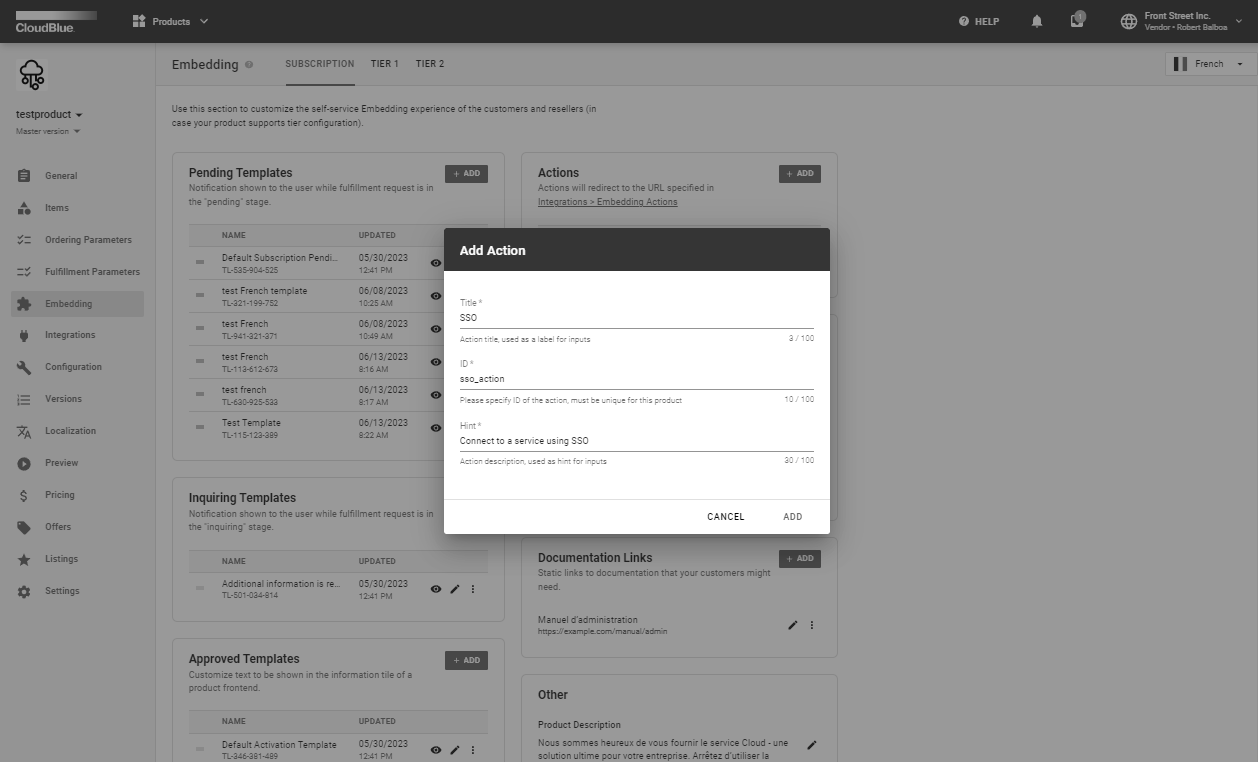
Use this setting to customize redirect URL of the product API.
Click on the Integrations > Embedding actions link and then click Edit to specify your endpoint URL.
Use this setting to view or generate your JSON Web Token secret.
Click on the Show Secret icon to display a JWT secret.
Click on the Refresh icon to generate a new JWT secret.
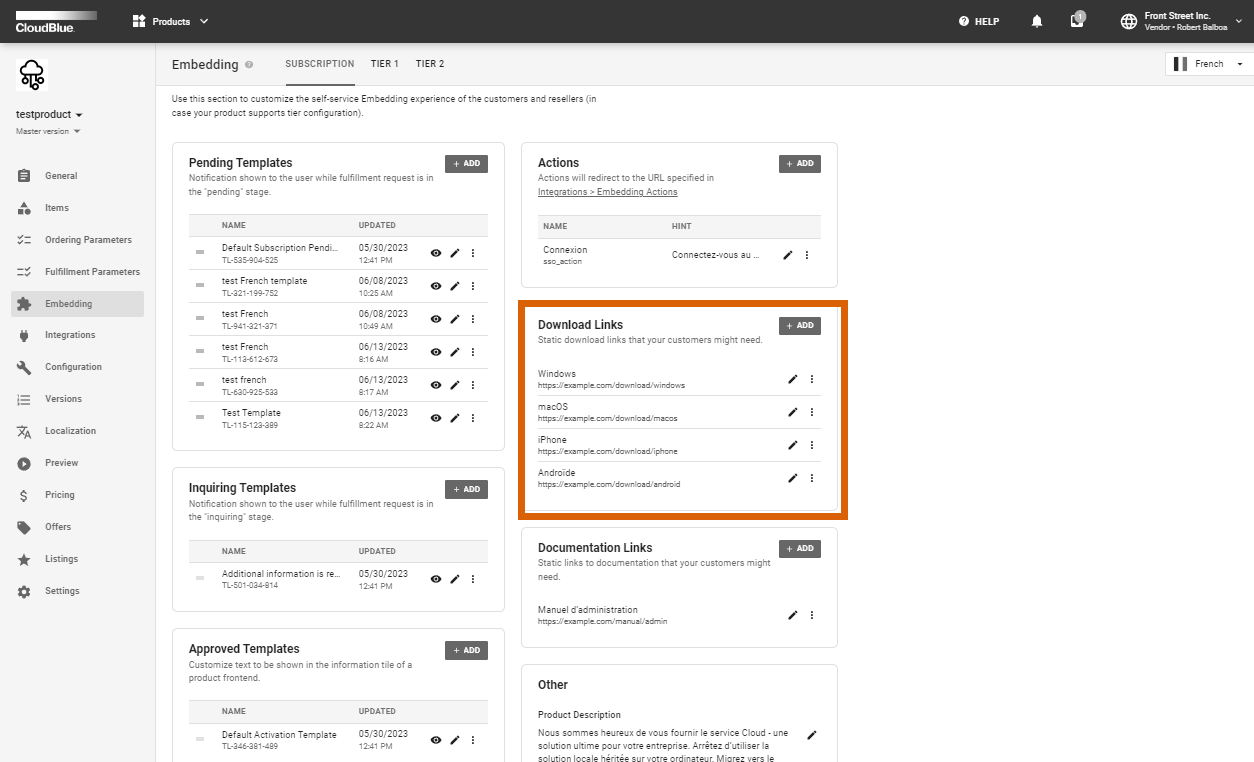
Specify static download links required for your customers:
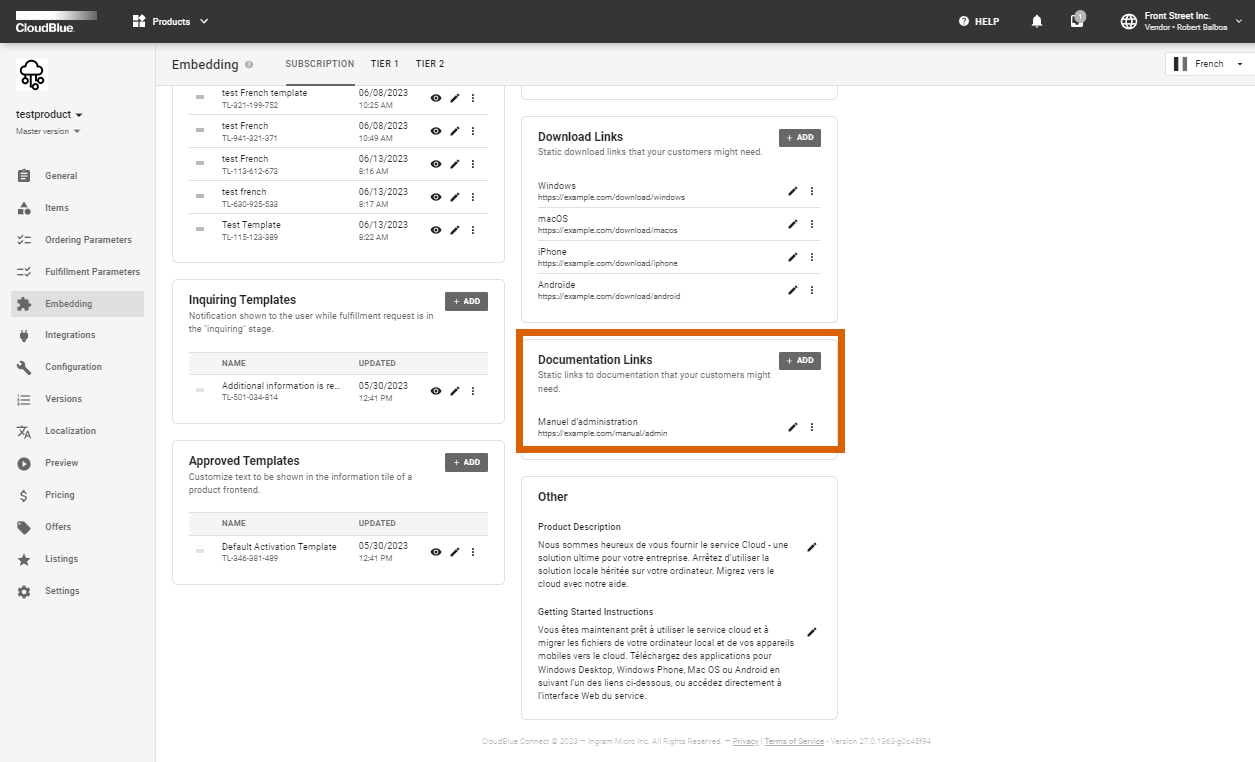
Specify static links to your documentation:
Description: Enter your product description. The description text has to be less than 256 characters long.
Getting Started: Provide your getting started material. This field supports up to 4096 characters.