The following article describes the graphical user interface of the Localization Management module on the CloudBlue Connect® platform. This article also introduces all available operations and functionality of this module.
The Contexts section of the Localization module is used to access a list of all available contexts.

The system displays your contexts for each of your products specified on the Connect platform, the customer portal, and other localization areas.
The provided data grid also displays available translations for your contexts within corresponding columns. Note that you can also hide certain columns with displayed languages by using the provided data grid interface.
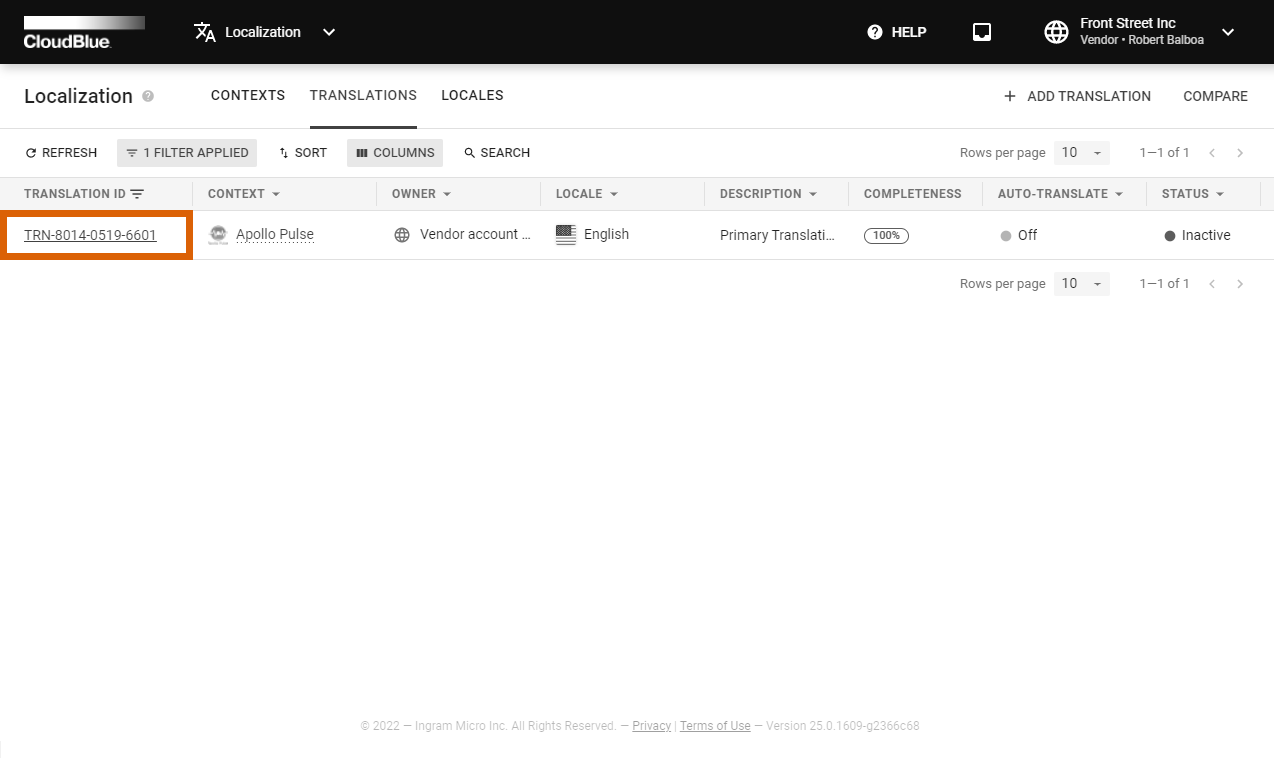
The Translations section of the Localization Management module displays a list of your available translation objects.
In order to start working with a specific context on the Connect platform, the system requires to select and activate primary translation for this context. Thus, for instance, to add an automatically generated translation for a product, its corresponding primary translation should be activated by the Vendor.
Note that the system creates a primary translation for your context, but it is not activated by default. It is possible to activate your generated translation or add a new translation and assign it as primary translation for your context if necessary.
The Connect platform also allows comparing and editing provided translations. The following describes all available operations with the translation objects on the Connect platform:
Click on your selected object identifier from the Translation section of the Localization module. Thereafter, click on the vertical ellipsis (⋮) icon and select Activate to activate your selected translation:
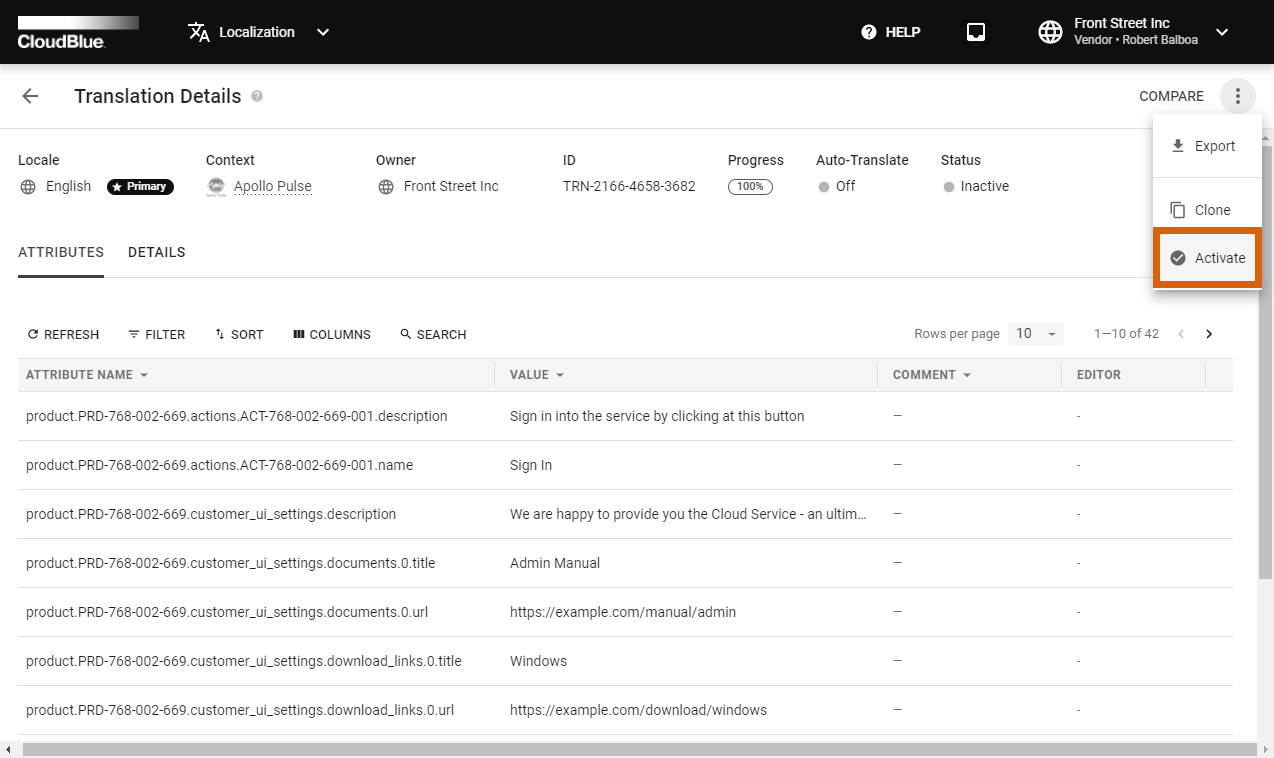
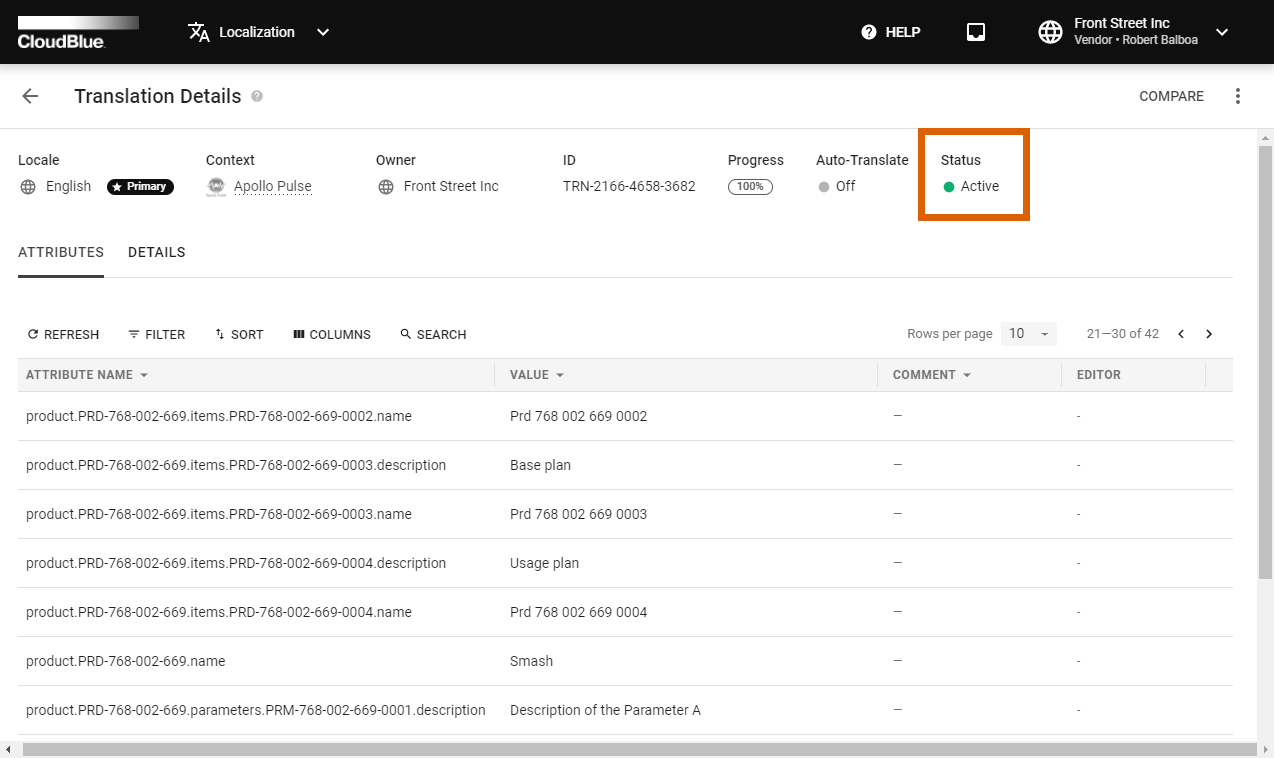
Therefore, you can activate your primary translation as well as your added translations. In case a new translation with the same language is activated, your other translation object is deactivated automatically.
In case some context attributes are not specified, this may cause problems while using the provided translation. Thus, it is recommended to provide missing attributes before activating your translation.
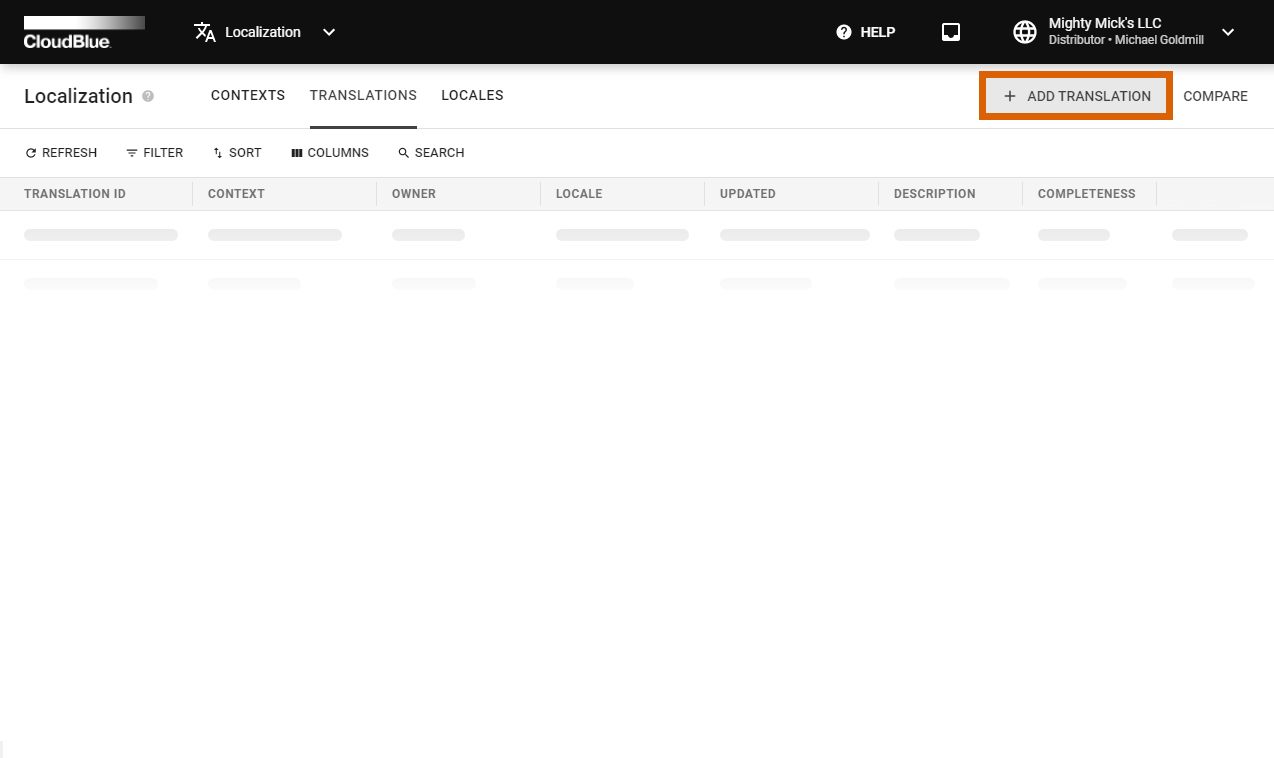
Once the primary translation object is activated for your required context, it is possible to create a translation by using the provided attributes. Add a new translation object as described below:
Click the Add Translation button to create a new translation object.

The system prompts you to fill out the following form:
Once you click the Create button, the system creates a new translation object. The system can automatically translate required context keys in case the corresponding option is selected. Otherwise, it is necessary to manually provide attribute values via the Translation Details screen. The system also allows importing your attribute values by clicking on the vertical ellipsis icon and using the corresponding option.
Access your Translation Details screen by clicking on the identifier of your generated translation object.
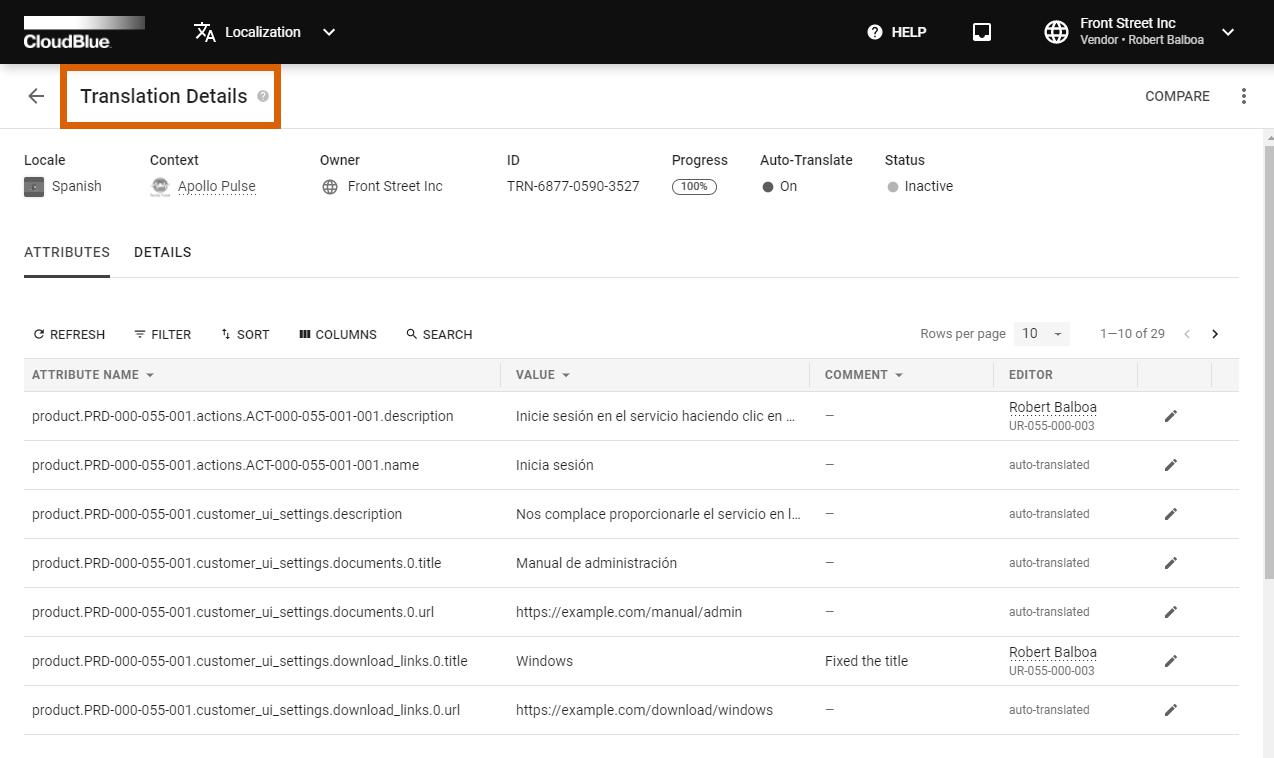
This screen provides various information about your selected translation object. Namely, Translation Details include:
The description of your selected object as well as its update and creation date are displayed within the Details tab.
The Attributes tab displays a data grid with the following information:
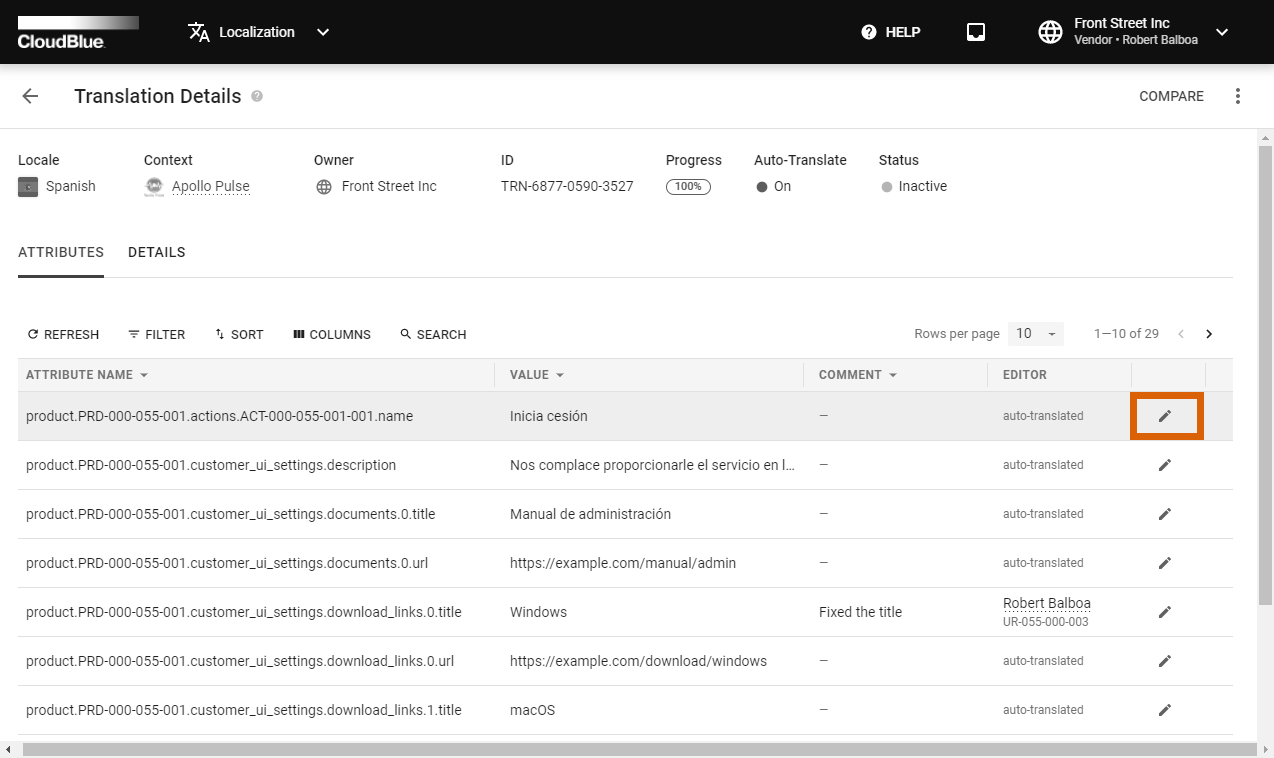
Note that the system also allows updating translation values, submitting comments, comparing translations, or removing your translation objects as described below.
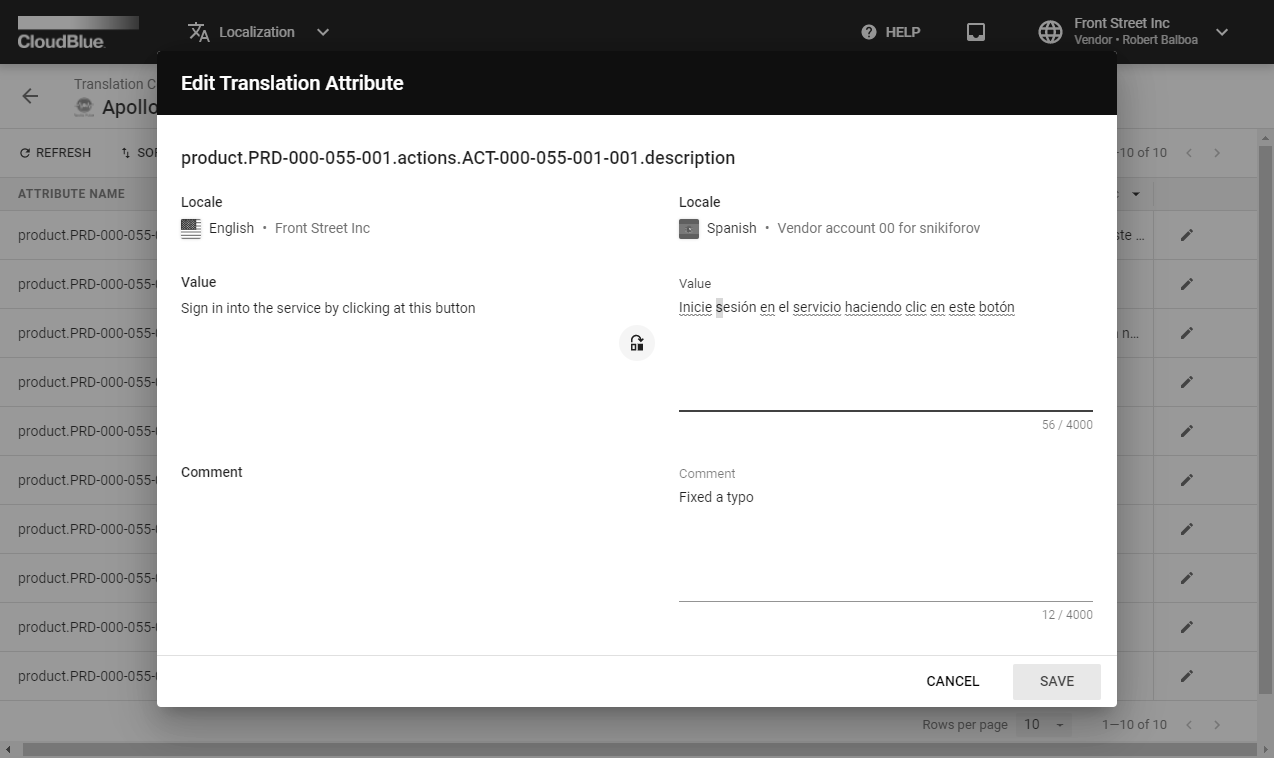
Access the Translation Details section to edit your translation values and provide your comment. Click the edit icon on the provided data grid to open an edit translation attribute form.
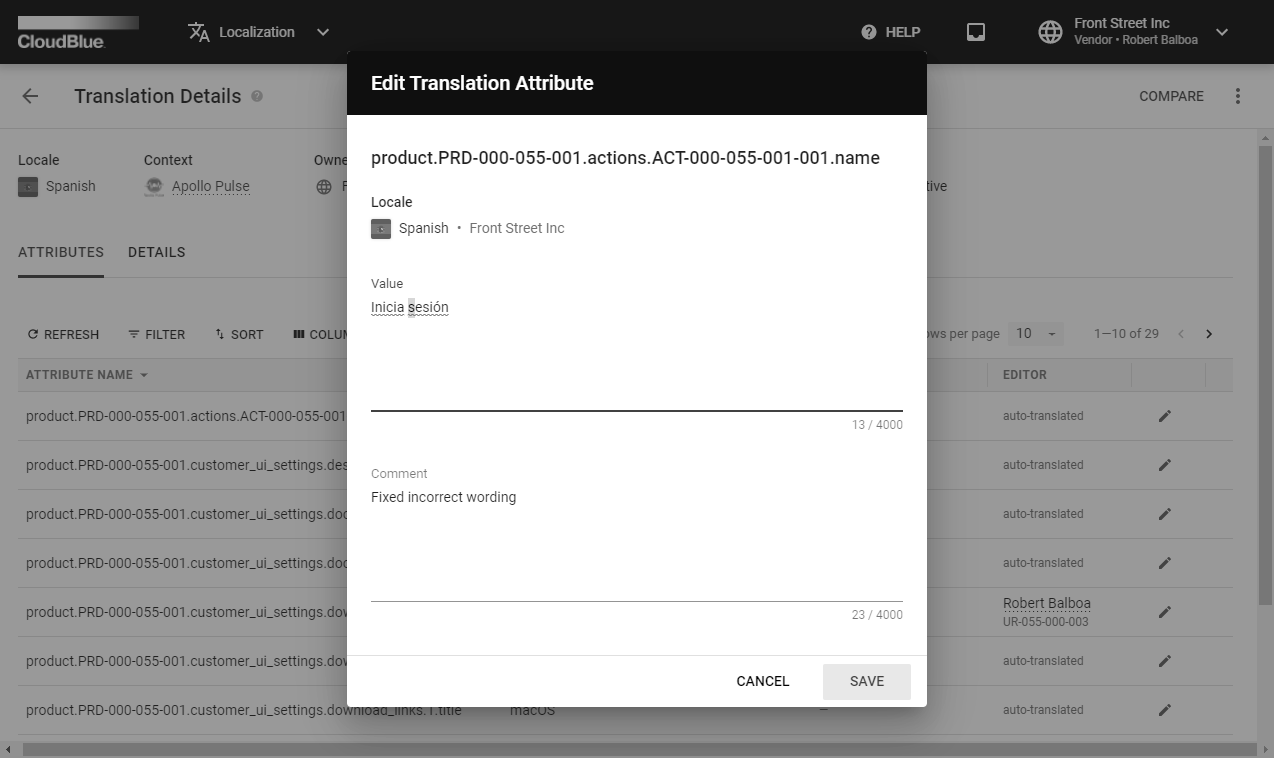
Use the Value field to edit the translation value. Editing translation values is required in case the automatic translation is not correct.
Attach your comment by using the Comment field. Your submitted comments can be helpful in various cases. For example, you can ask your colleagues to review your provided translation value.
Click the Save button to save your changes. Therefore, the system will update your selected translation value and provided comment.
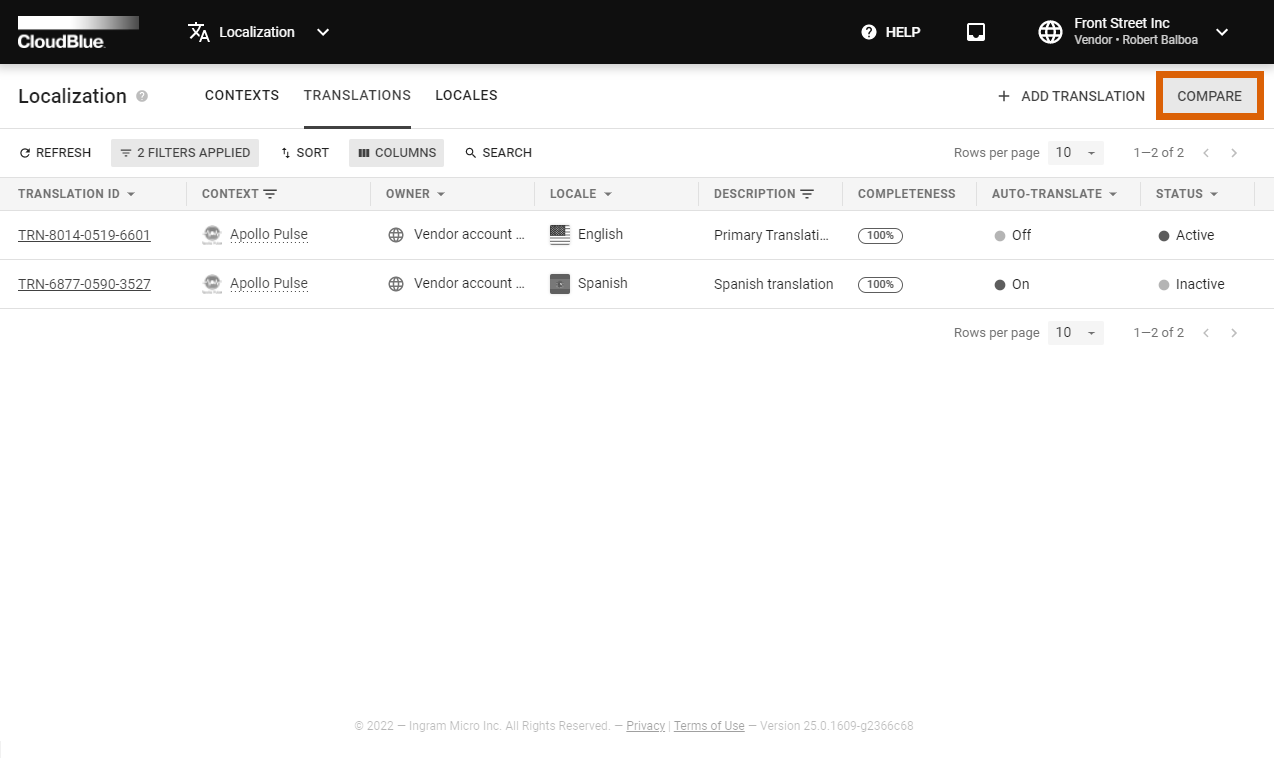
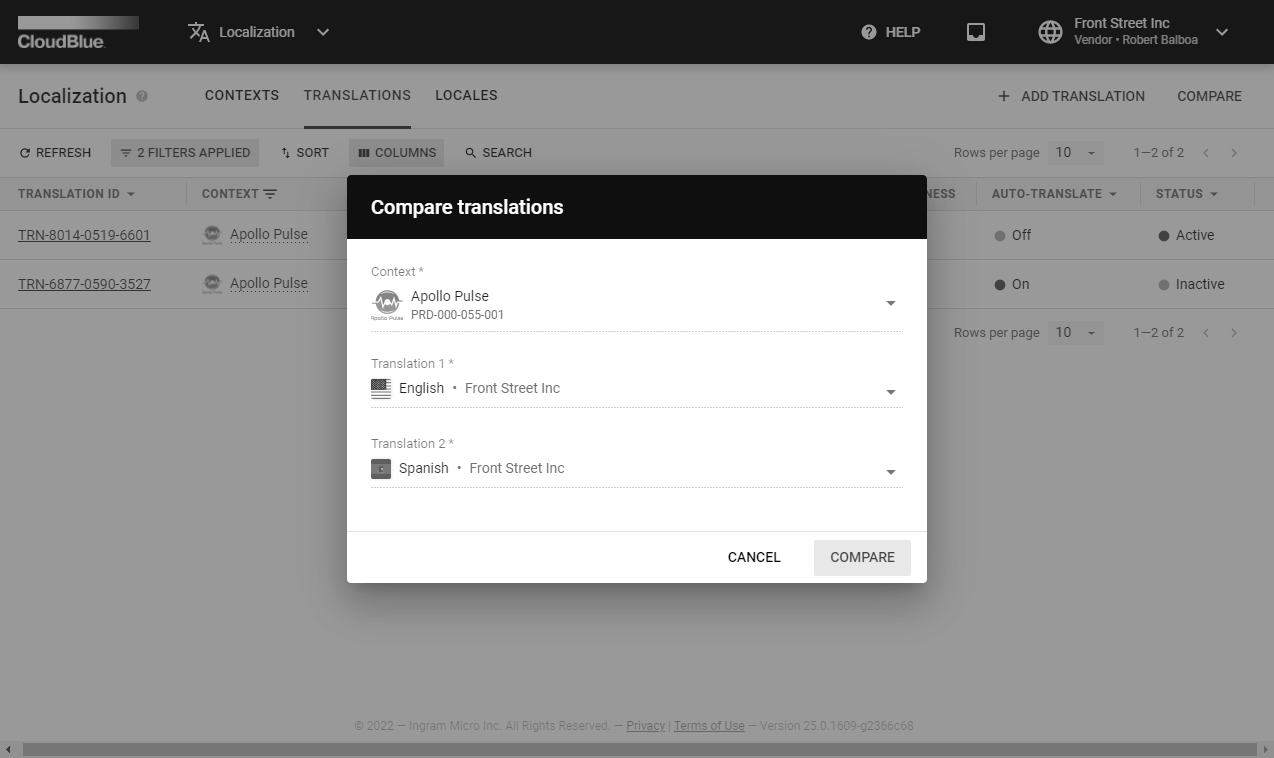
The Localization module features side-by-side comparison of your created translations. Comparing your translations can be especially helpful to get the visual representation of provided values and to easily identify and fix existing translation errors.
Click the Compare button that can be found on the Translation section or the Translation Details screen. Thus, the system prompts you to select the required context and your translation objects for the subsequent comparison operation.
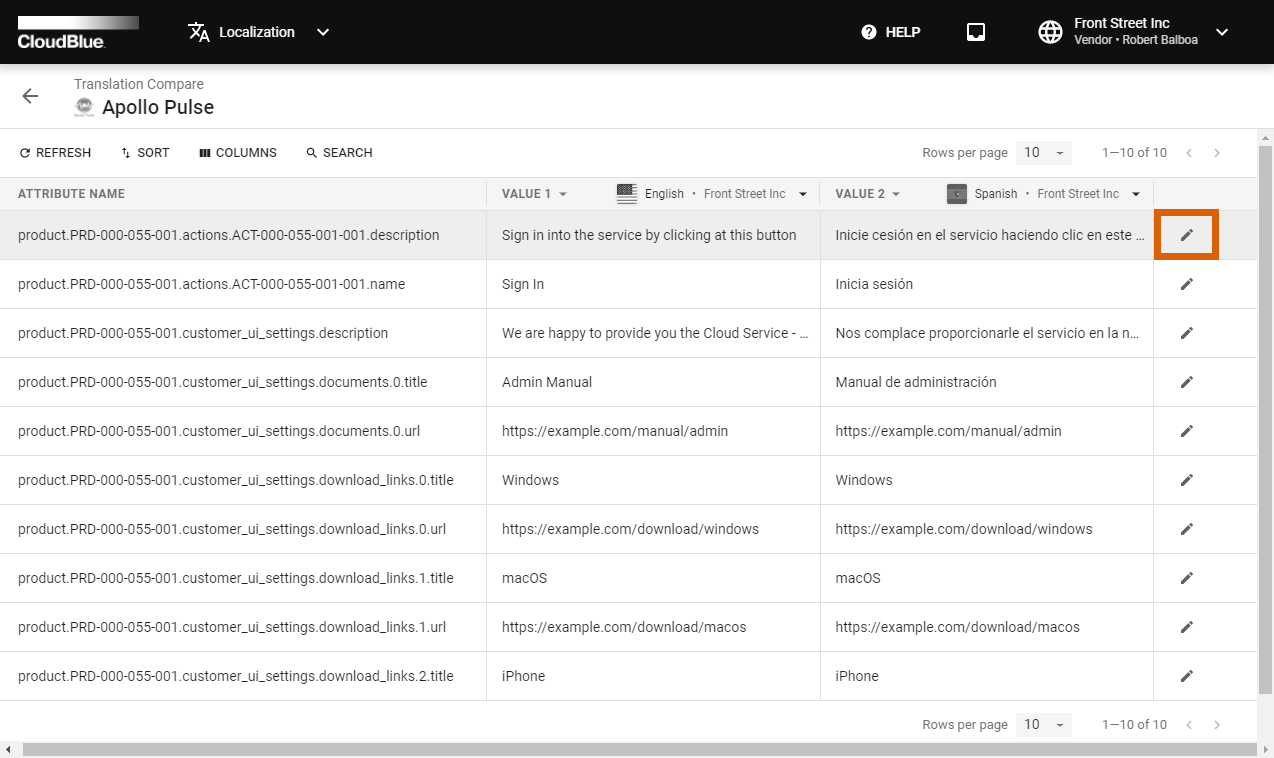
Once your context with your translation objects are specified and you click Compare, the system displays a list of all available product attributes and specified values for both of your selected translation objects.
Click on the edit icon next to any pair of translation values to change a string or update both strings. The system provides a form that showcases your translation keys and the assigned values. Change required translation values and provide your comments. Thereafter, click the Save button to save your changes. Thus, you can easily update your translations and eliminate any located errors or typos.
The system allows exporting/importing, duplicating, publishing/unpublishing, and deleting your translation objects by accessing the Translation Details screen. The following showcases how to initiate the aforementioned operations.
Click on your translation object identifier to access the Translation Details screen. Open the object menu by using the ellipsis (⋮) icon and selecting one of the following options:
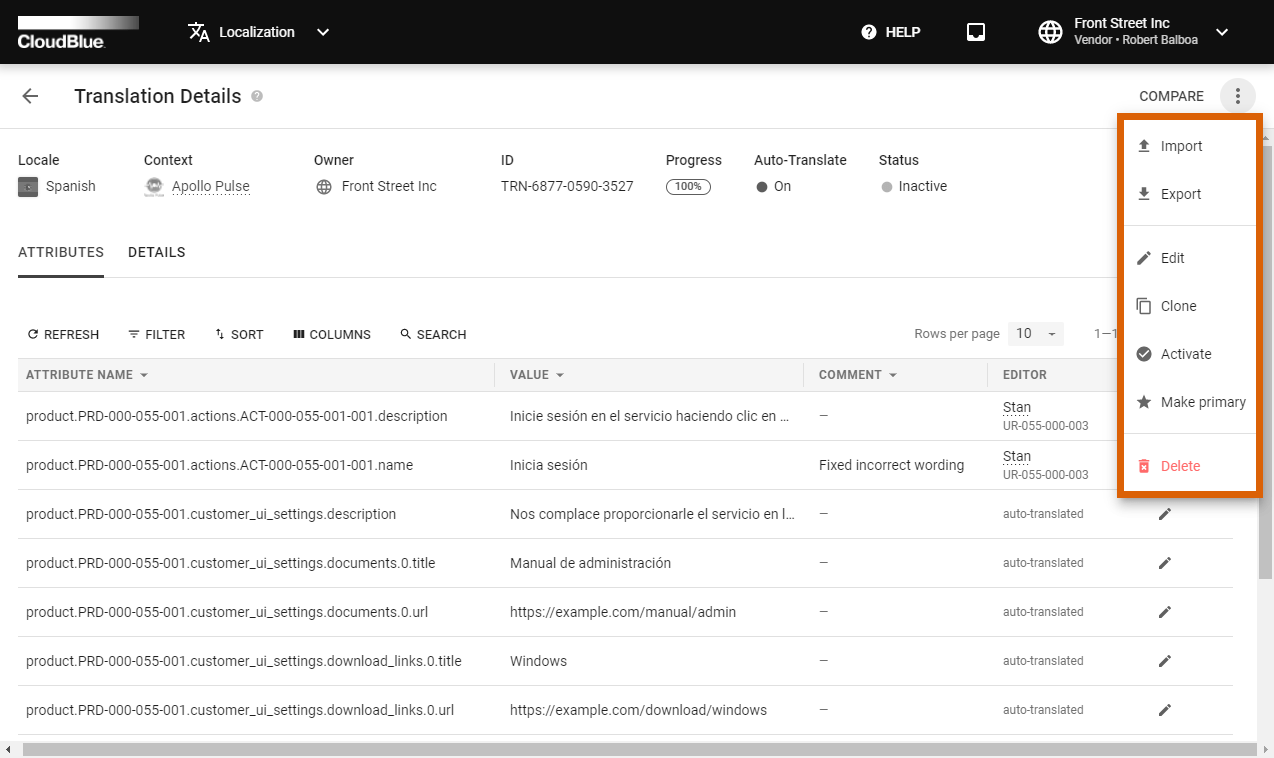
Note that depending on the status of your translation object certain operation are not available. For example, system does not allow activating or removing objects that are already activated.
Navigate to the Locales section to access and review a list of all locales that are available in your marketplaces.
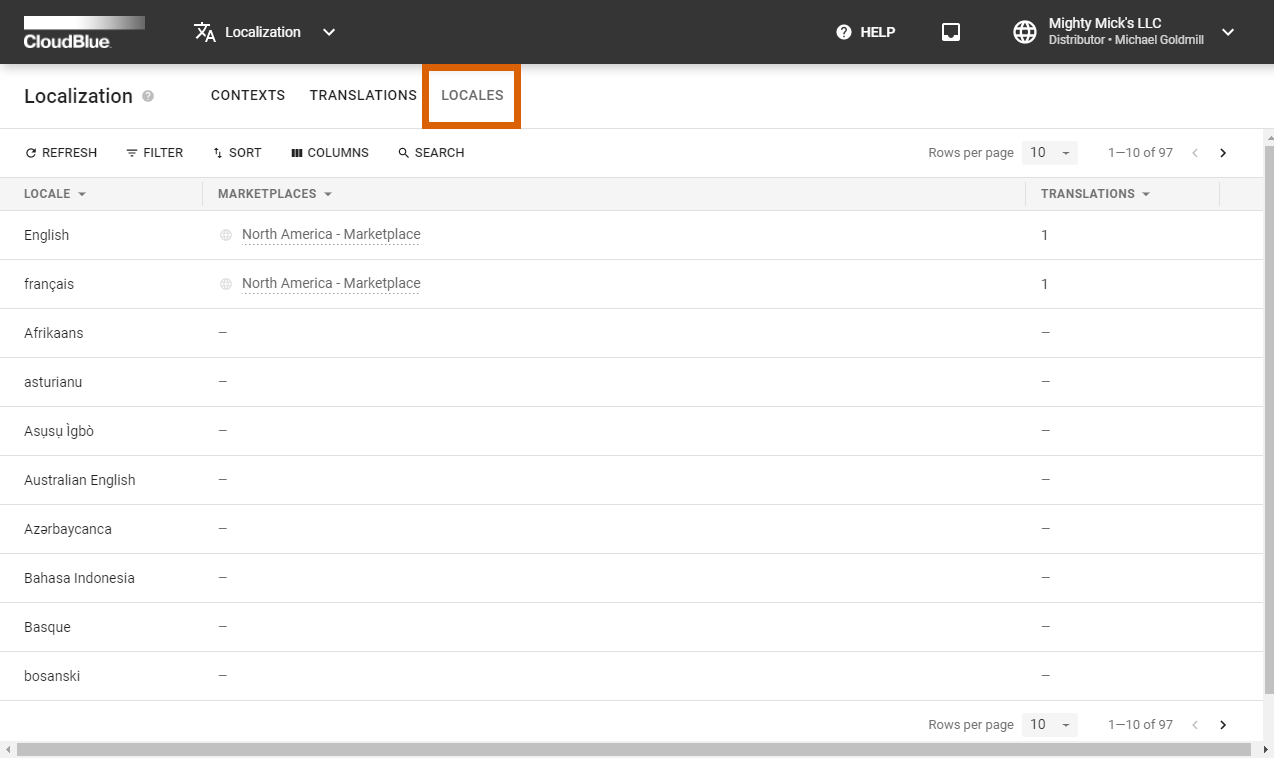
This section displays a number of created translations next to your available locales. It is also possible to quickly access your marketplaces by clicking on their corresponding contextual links.