Access the Single Sign-On (SSO) section of the Account module to implement single sign-on authentication and manage your domains on the CloudBlue Connect® platform. This section provides a comprehensive set of settings that can be increasingly helpful for security departments and Chief Information Security Officers (CISO). The following outlines the SSO concept and provides instructions on how to successfully configure a SSO domain on the Connect platform.
Single Sign-On represents a centralized session and user authentication scheme in which same credentials can be used to login into the CloudBlue Connect® platform along with other services and systems. Thus, the SSO schema can be greatly beneficial for companies. For example, SSO reduces password fatigue and drastically improves security across organizations.
It is important to note that each organization often includes security policies that can be incompatible with the policies of another organization. The following diagrams showcase such examples:
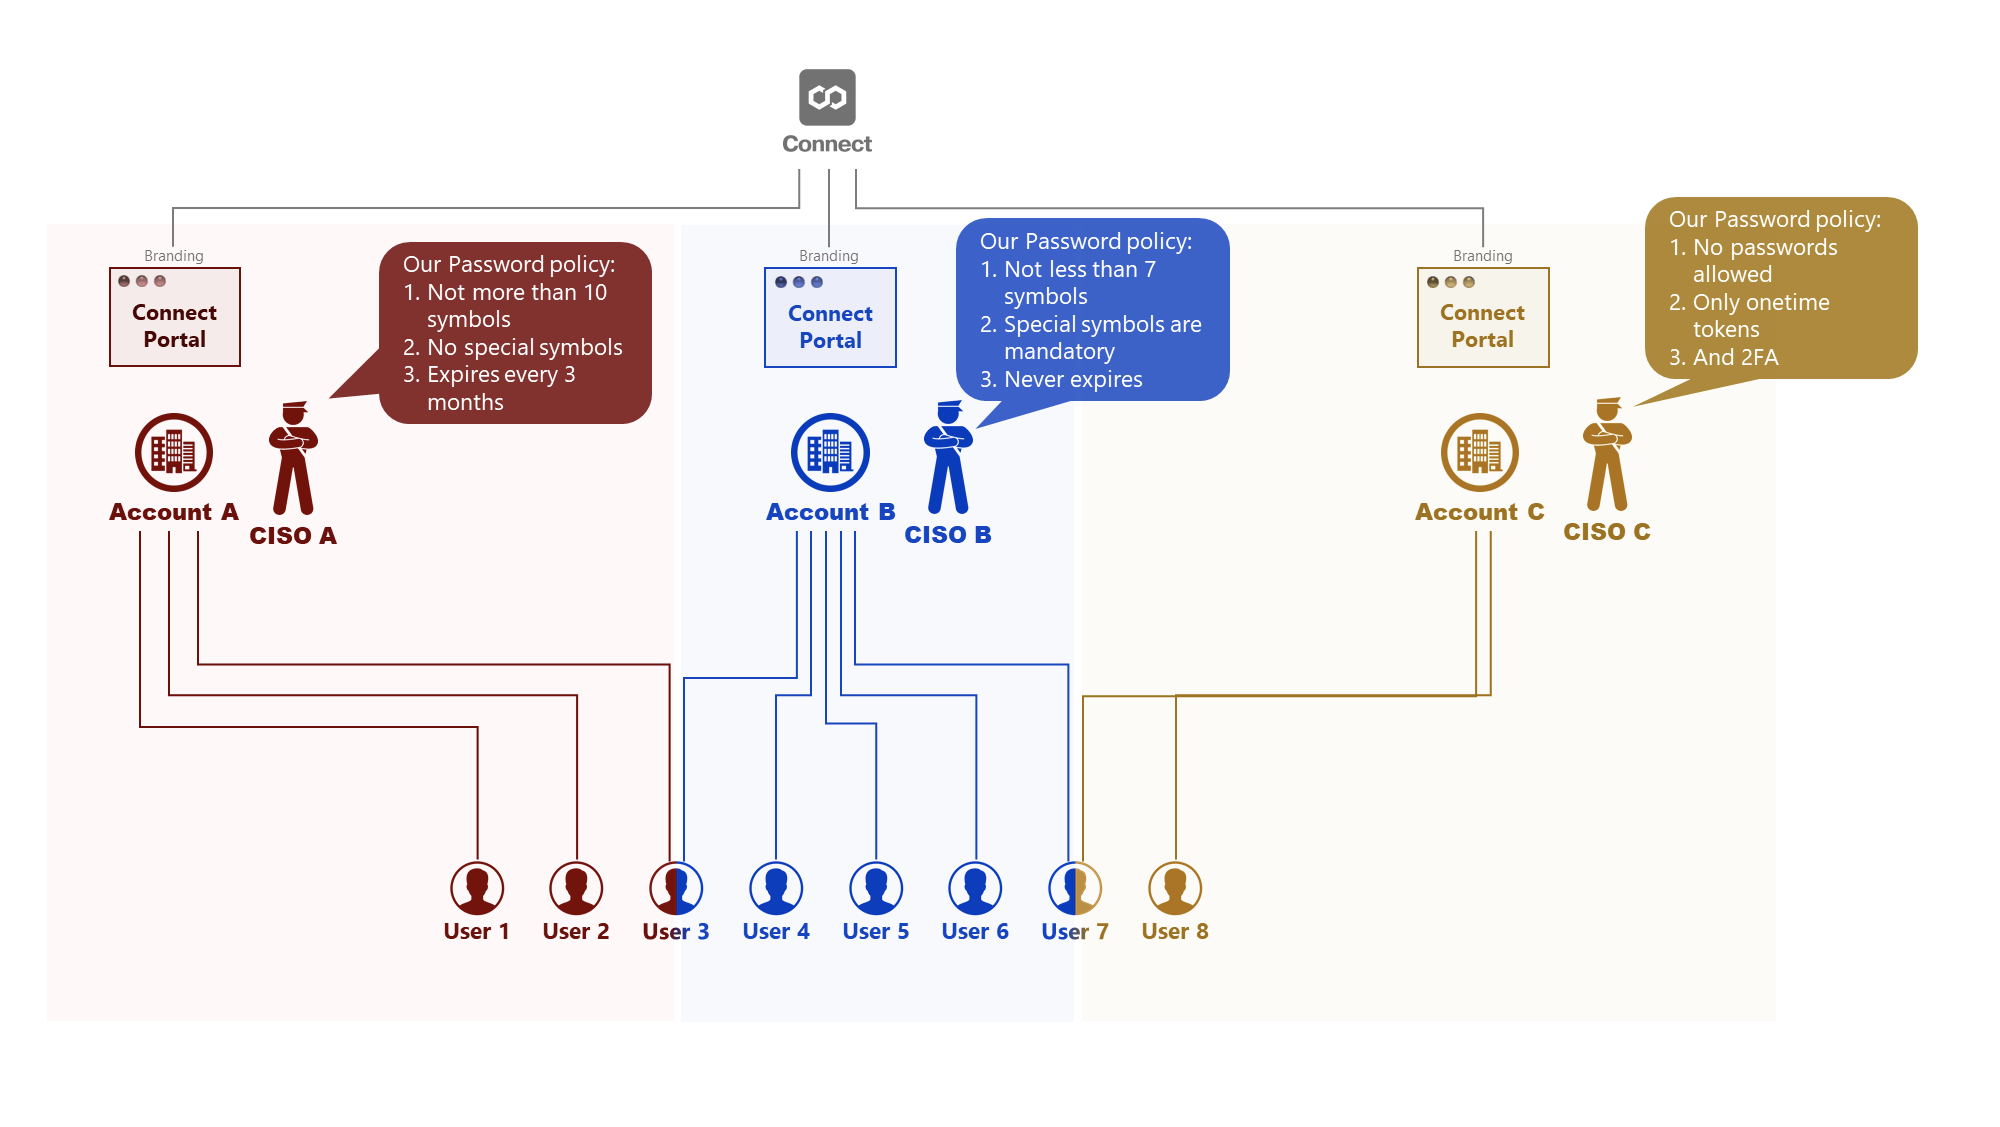

These diagrams introduce Connect accounts (A, B, and C) that collaborate by using the Connect platform. Each account incorporates own password policy that contradicts with the policies of other accounts. For example, CISO A doesn’t allow using special symbols, while CISO B requires to include at least one special symbol to a password. In addition, CISO C doesn’t allow specifying any passwords to begin with. Note that certain users (such as User 3 and User 7) often belong to multiple Connect account. Therefore, deploying the SSO schema can be essential for many business scenarios.
Note that one Connect account can also include several domains. In addition, multiple Connect accounts can also belong to the same domain. Follow the instructions below to configure your domain for SSO authorization.
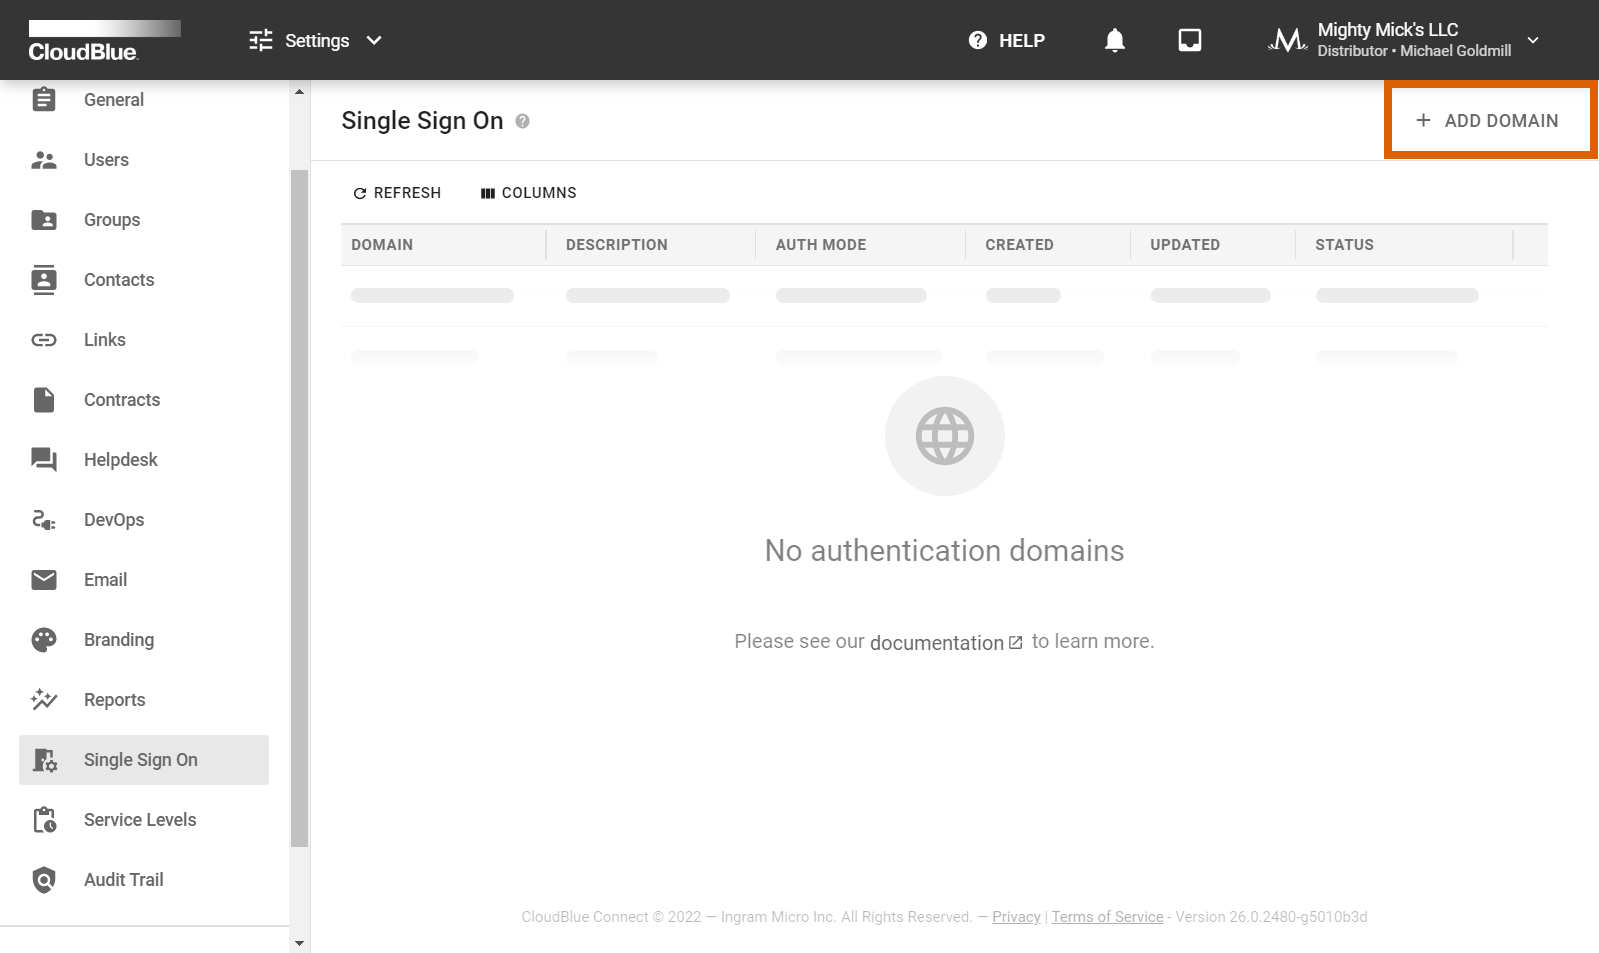
Access the Single Sign-On section from the Accounts module. Thereafter, click Add Domain to specify your authentication domain on the Connect platform.
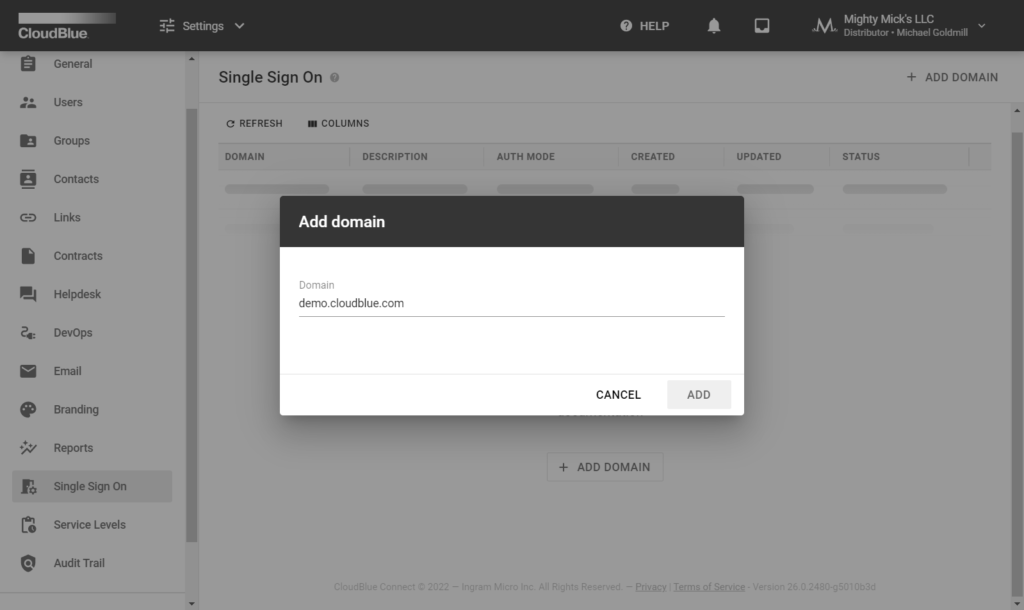
Specify your domain in the following form and click the Add button. Once your domain is successfully added, the system assigns the Verifying status to your domain instance. It is necessary to verify your domain as described below.
Validate the ownership of your added domain by creating a DNS Record. Your DNS record should contain specific values that are provided within the Domain Details screen. The following steps showcase how to access required values and verify your domain:
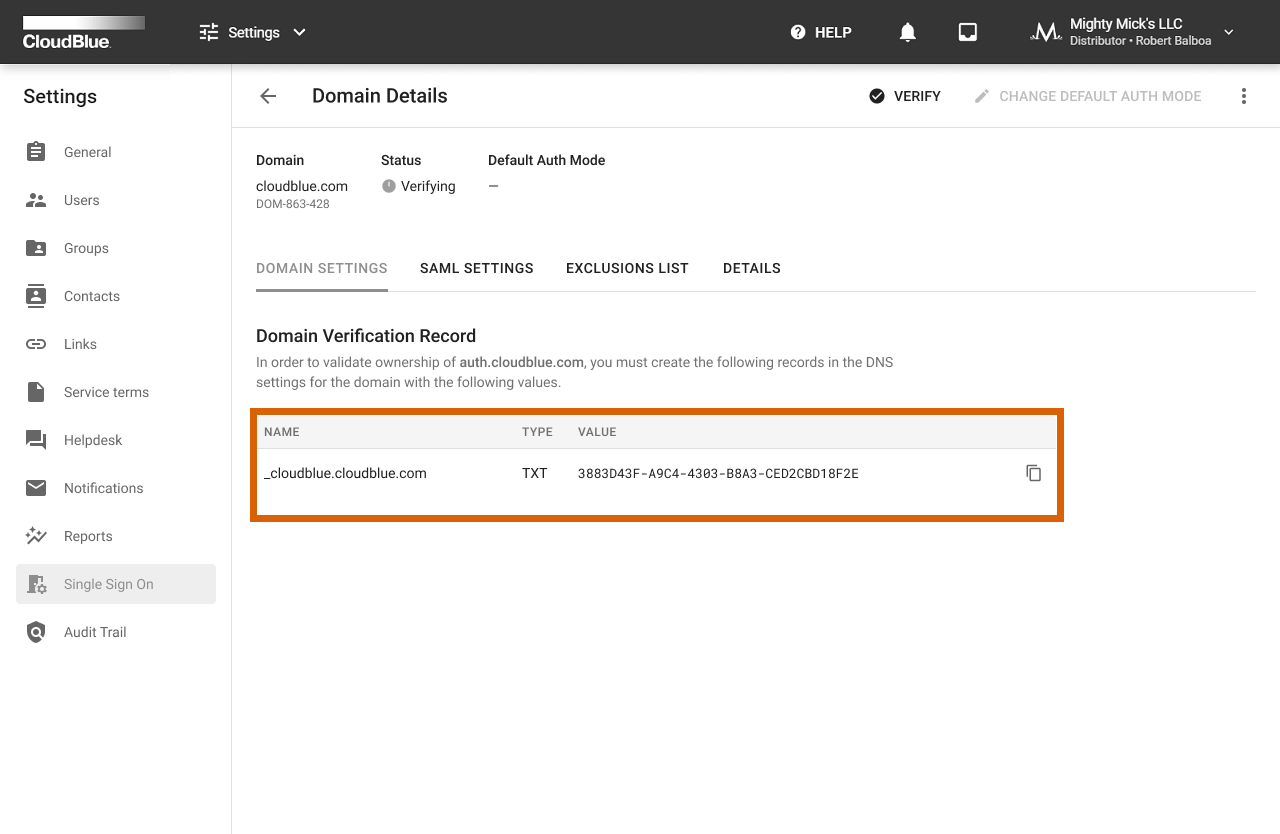
As a result, the system assigns the Verified status to your domain once the verification operation is complete. Otherwise, the system may return an error.
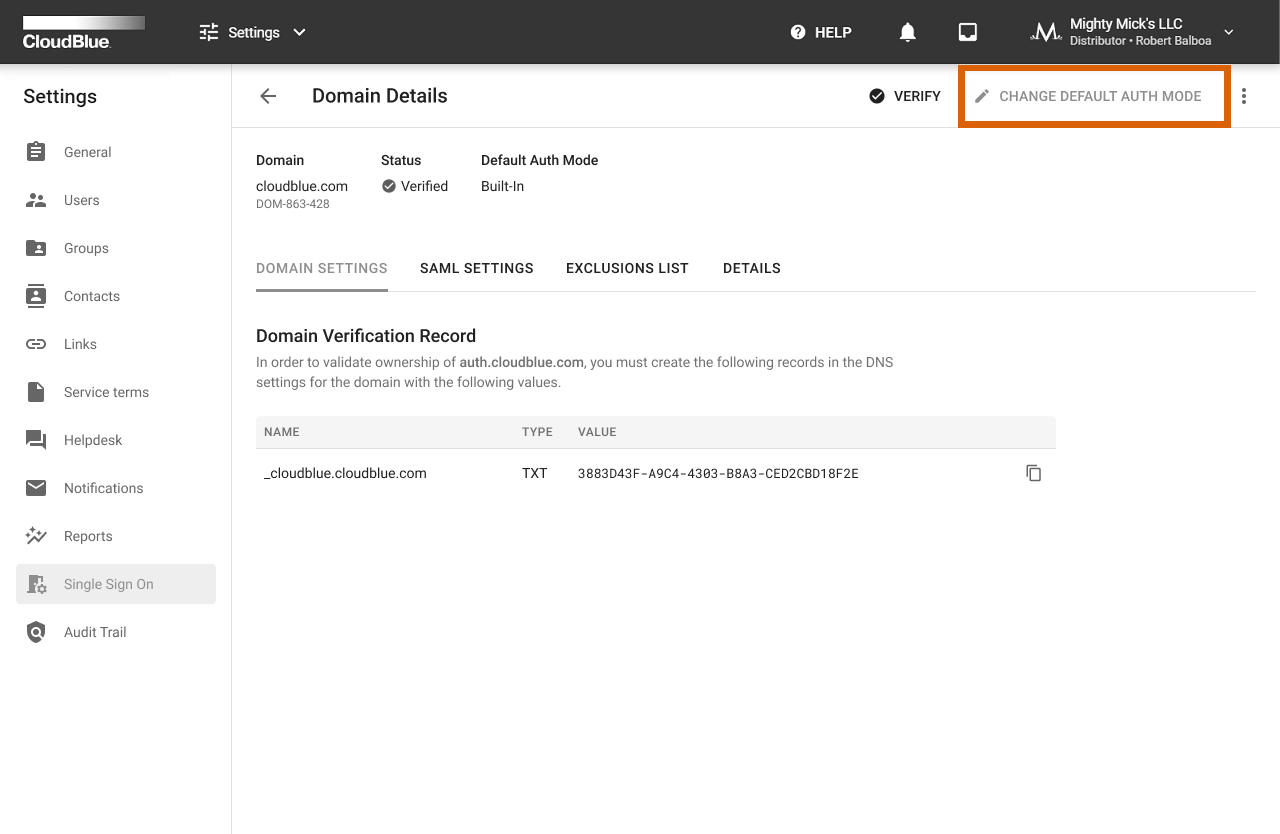
Once your domain is successfully verified, the Connect platform allows changing your default authentication modes. These default authentication modes represent using the Built-In authentication page and using the external SAML-based authentication.
The system requires to provide required configurations within the SAML Settings before switching your default mode. Once all required configurations are presented, switch your authorization mode as follows:

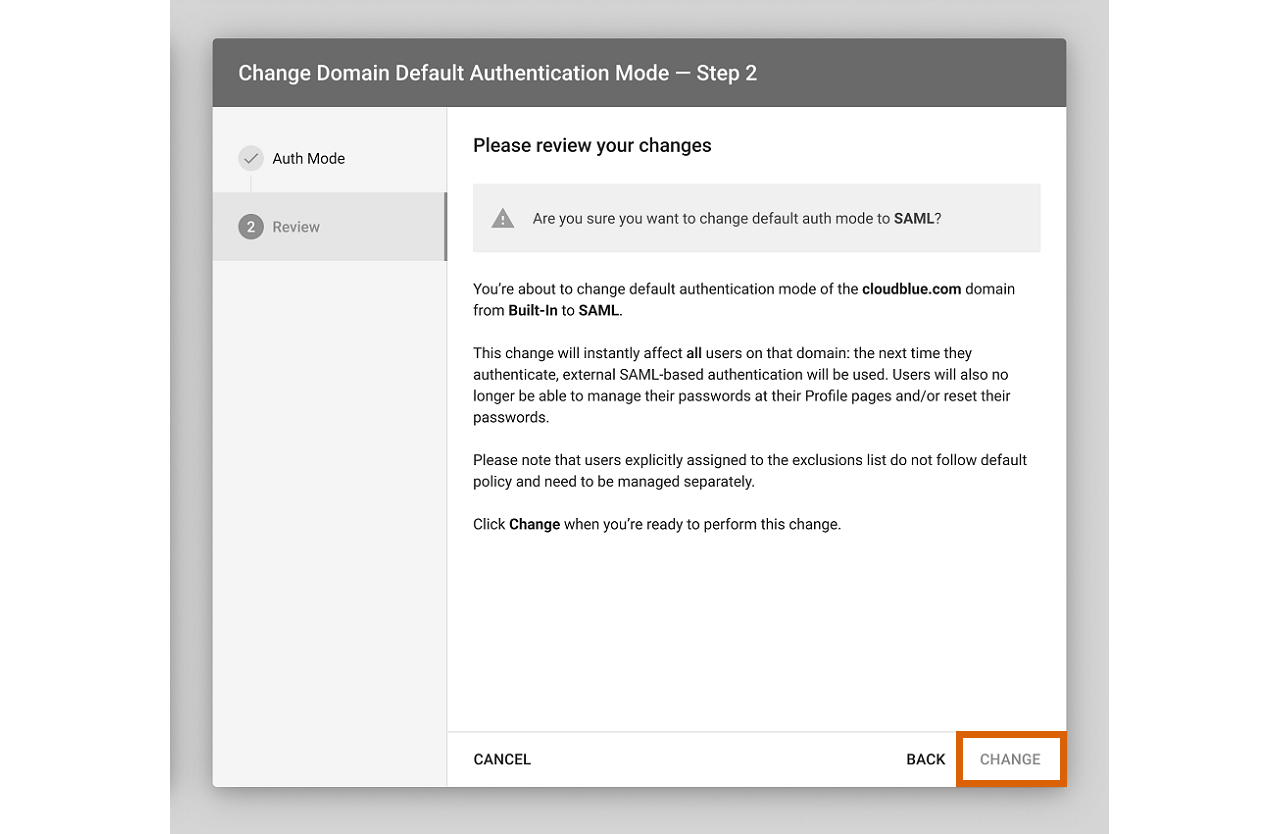
As a result, the system will successfully change your default authentication mode.
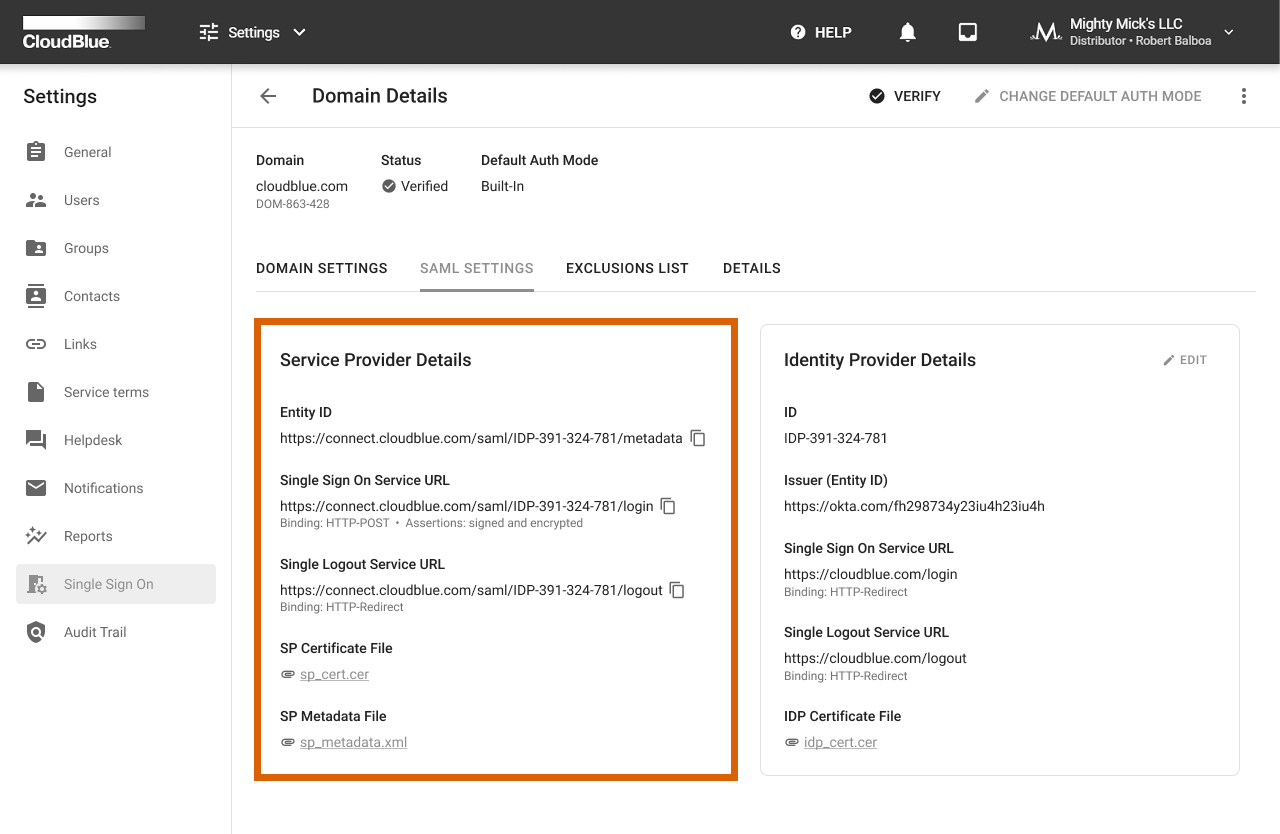
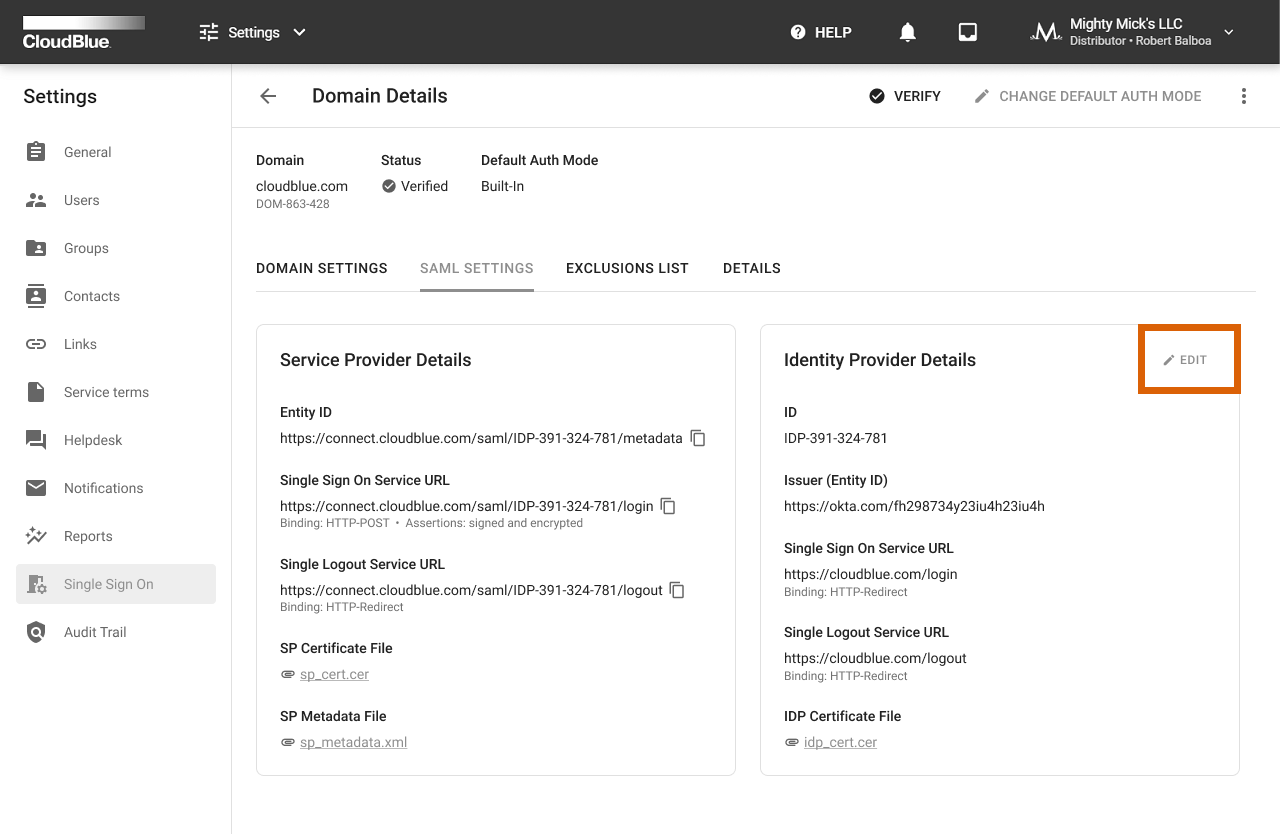
The Security Markup Language (SAML) settings are available once your domain is successfully verified. Navigate to the SAML Settings tab from the Domain Details screen to access the following data and configuration options:
The SAML Settings tab allows you to view the Service Provider details that are used to handle SAML assertions. Service Provider represents the CloudBlue Connect® platform. Thus, the system provides a quick access to the following details:
The SAML Settings tab enables you to access and change the identity provider details. Click the Edit button to launch a wizard and specify your selected identity provider details.

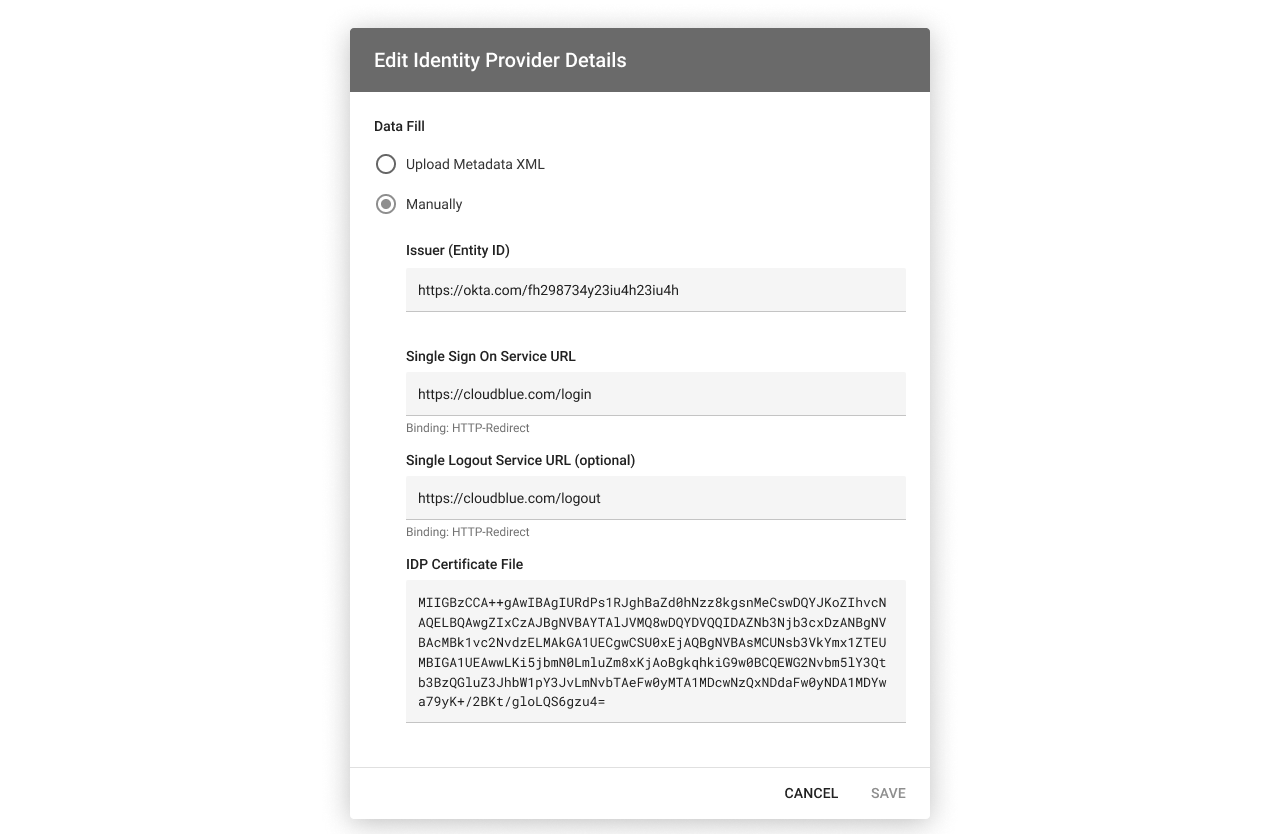
Upload a metadata XML file with your specified identity provider values. Alternatively, select the manual option to specify required details by using the provided form.
Note that the Connect platform supports only the HTTP-Redirect binding for the Identity Provider (IDP) setup. Once your file is uploaded or the provided form is filled out, click the Save button to save your adjustments.
The SAML Settings tab is used to configure mapping between external users via the SAML assertion attributes. Namely, it is required to specify SAML attribute names for External ID and Email. Connect users can also specify Full Name attribute if necessary. Furthermore, this tab allows specifying password recovery links and other password management notifications for the external SAML authentication.

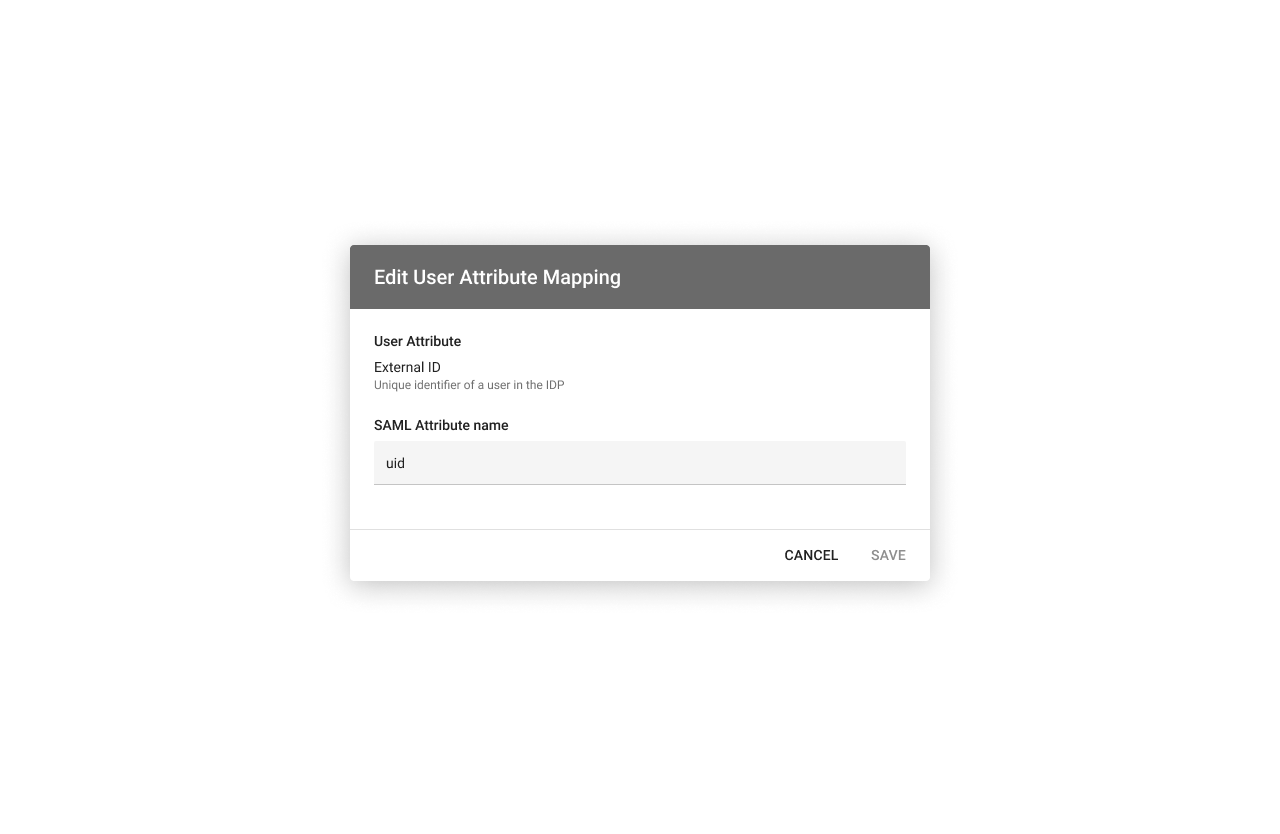
Click on the edit icon next user attribute to change its SAML attribute name. In addition, click on the edit icon under Password Management Notice to provide a required message or password management instructions for the SAML-based authentication.
The SAML Settings tab allows enabling and configuring automated groups assignment for your users. Namely, the groups management feature is especially helpful to automatically map your new users to required groups on Connect. Once your domain is successfully verified, click the Change Status button and switch Enable Groups Mapping on to activate the groups management.
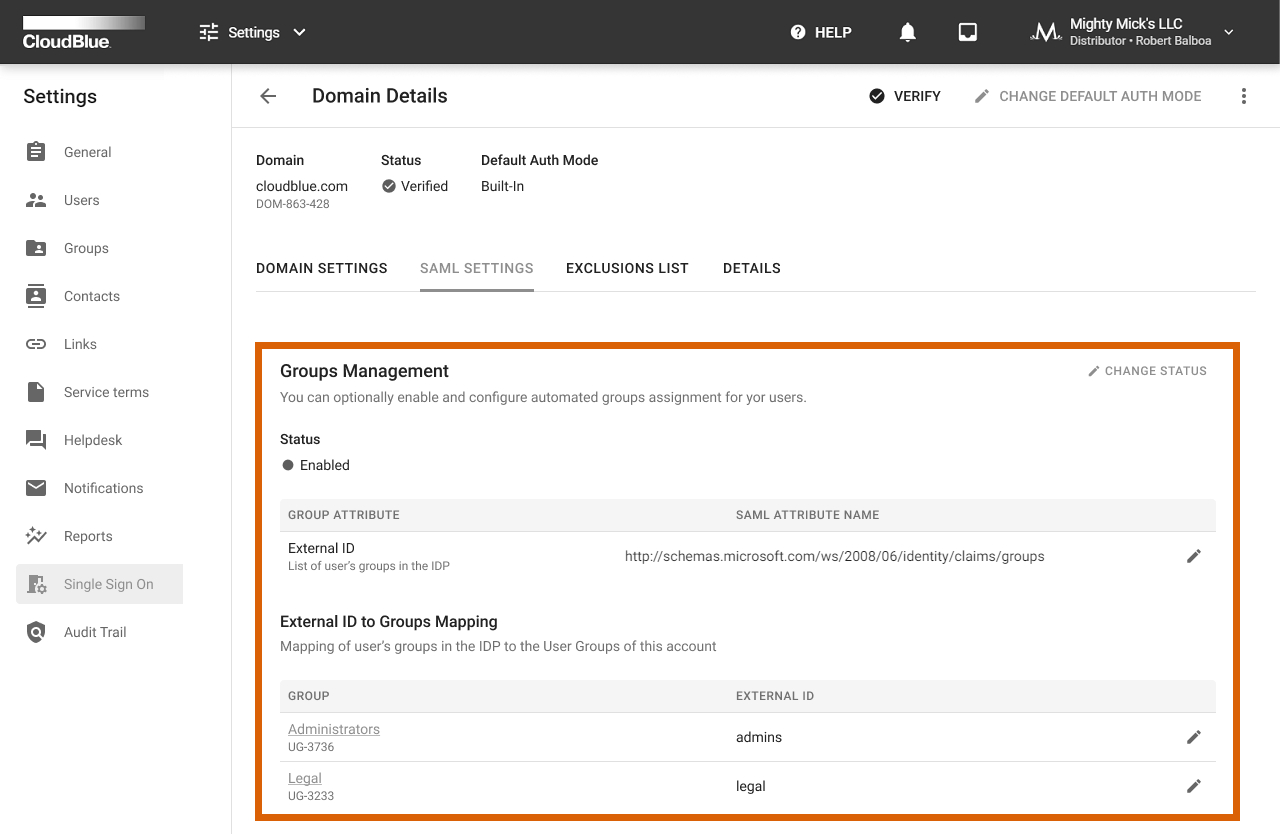
In case the group management is enabled, use the corresponding edit icon to change the SAML Attribute Name for your group attributes. This attribute name is required to define your URI address for SAML assertions. For example, this may include your group claim from Azure Active Directory.
In addition, the provided interface also enables you to map user groups within your IDP to user groups of your Connect account. Namely, you can assign external identifiers to your account groups by using the corresponding edit icons. For instance, your assigned external IDs may represent email addresses of your users.
Access the Exclusions List tab to add users that will use your specified authentication mode, regardless of your default authentication mode. Therefore, the system allows combining both authentication modes and assign specific mode for certain users. Note that using the exclusions list is available only if your domain is successfully verified.
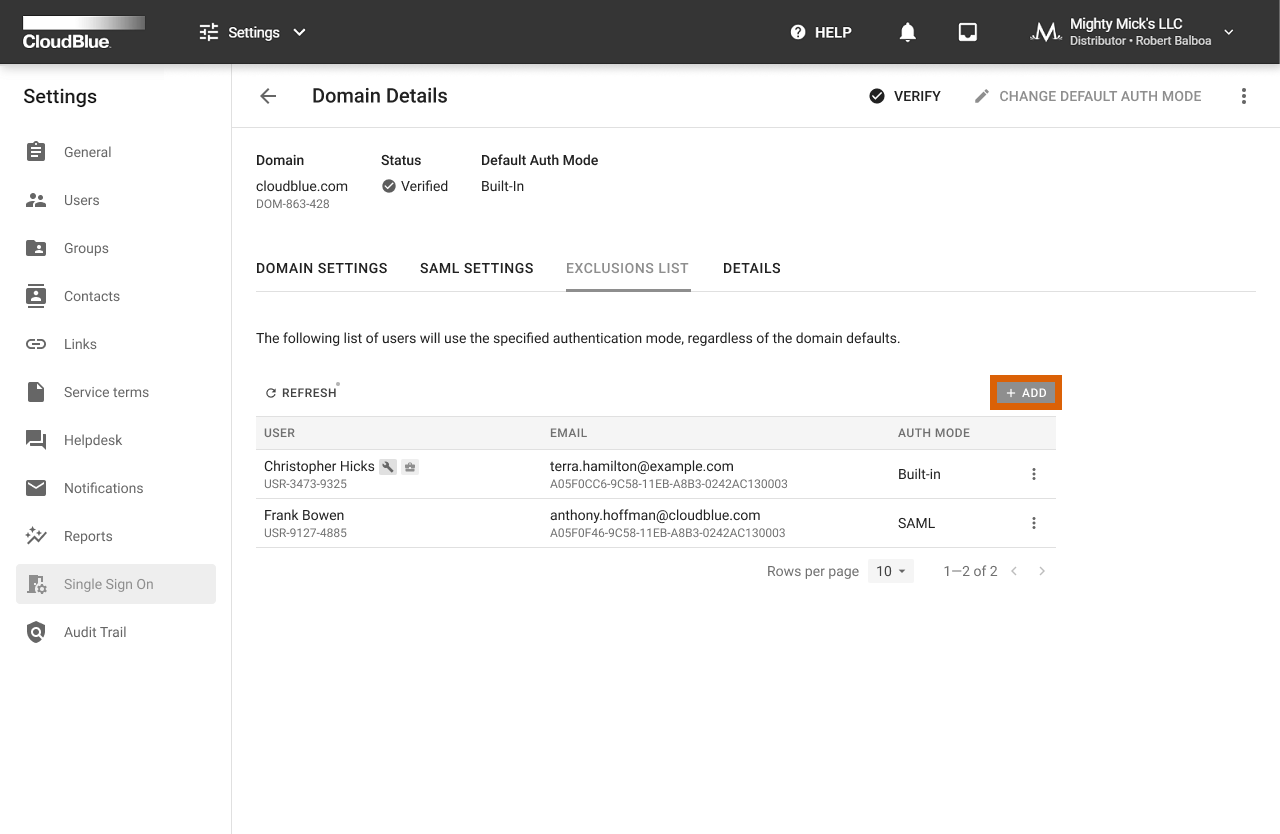
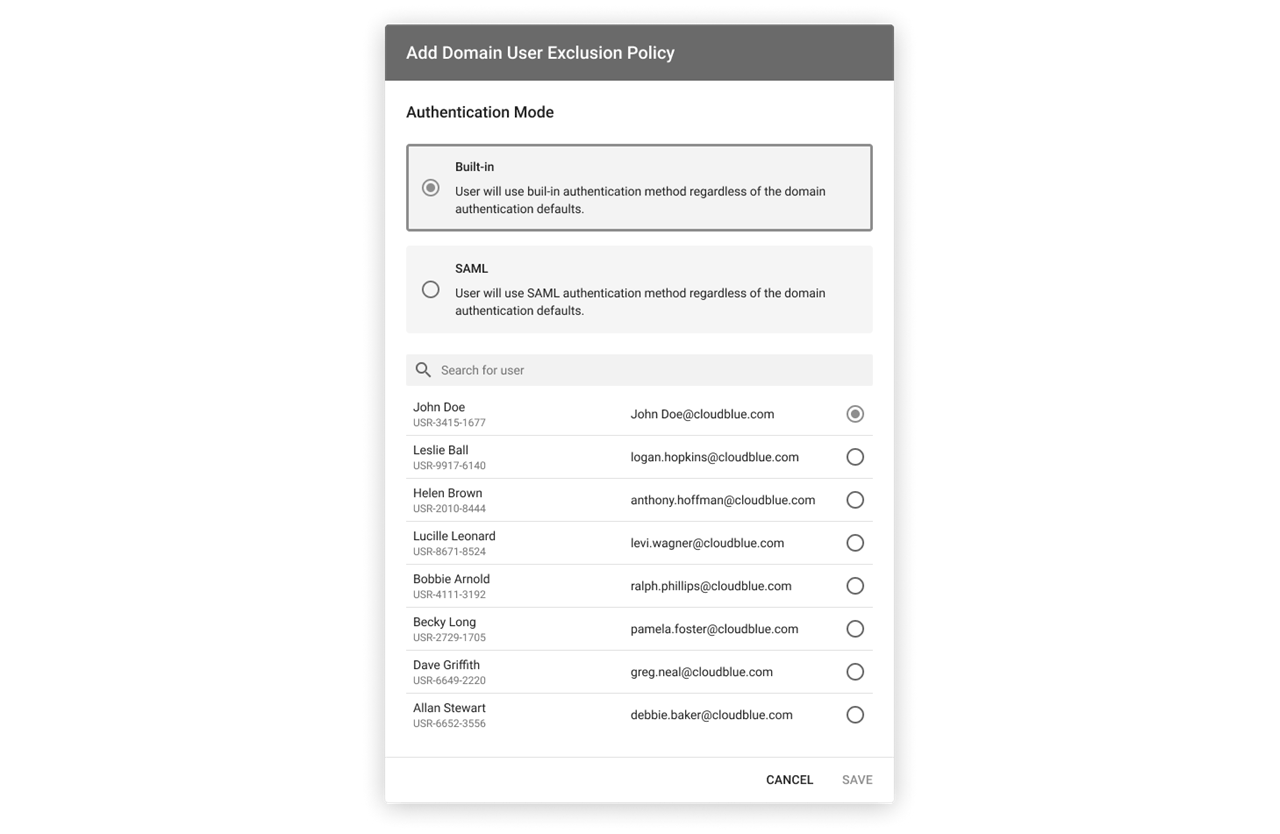
Click the Add button to add new users to the Exclusions List. Specify a required authentication mode and select required users from the list. Thereafter, click the Save button to save your adjustments.
In case you need to remove a user from the Exclusions List. Click on the vertical ellipsis (⋮) icon next to your selected user from the Exclusions List tab. Thereafter, click the Remove button to remove this user from the list.
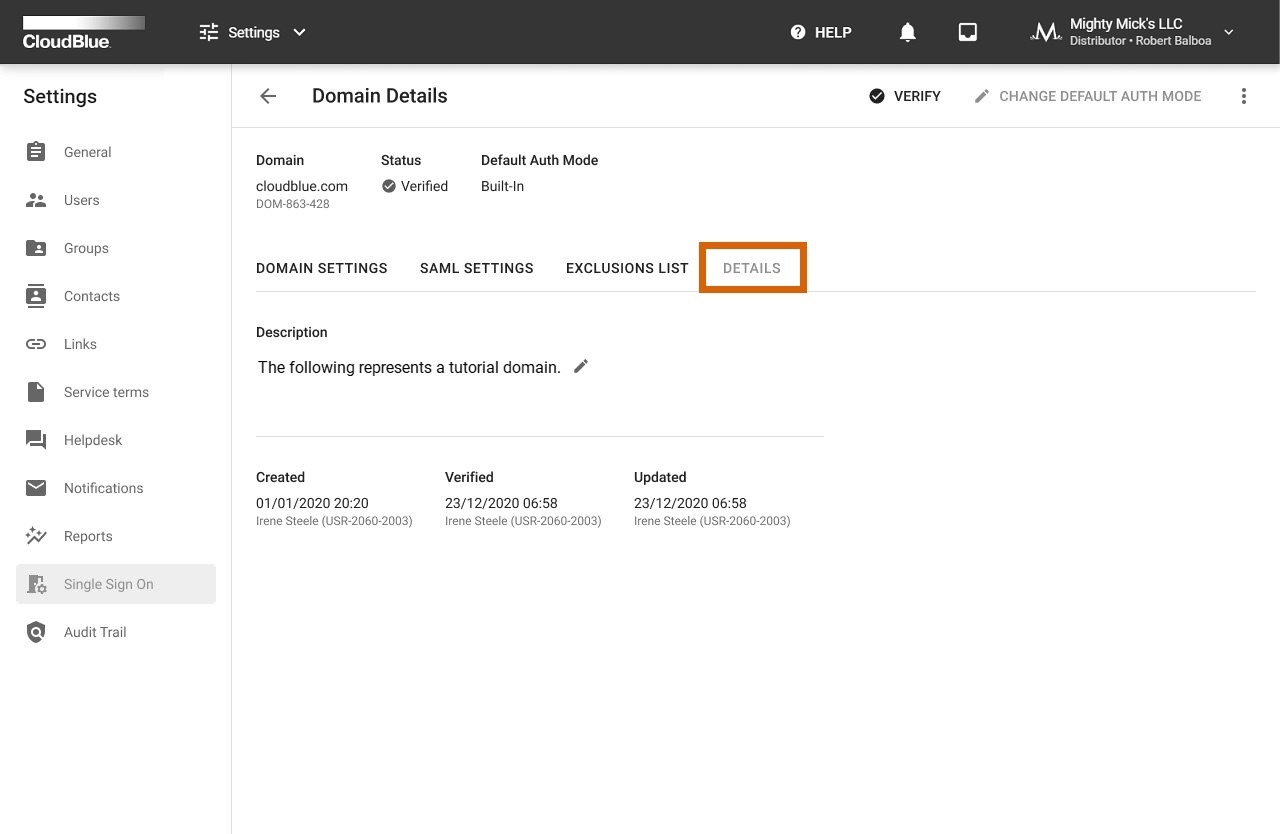
The Details tab displays your domain description. Edit the domain description by clicking on the corresponding edit icon. In addition, use this tab to review your domain creation, update and verification operation time and date.