Azure Active Directory represents an Identity and Access Management as a service (IDaaS) solution that can be used as your Single Sign-On domain on the CloudBlue Connect® platform.
The following provides instructions on how to deploy your configured Azure Active Directory on the Connect platform. The guidelines below also showcase how to create a new Active Directory on the Microsoft Azure portal, how to successfully configure your Azure enterprise application, and more.
Active Directory Creation
Create your Azure Active Directory via the Microsoft Azure Portal as described below. Skip to Connect Domain Verification in case your Active Directory and custom domain are already configured on the Microsoft Azure portal.
By creating an Active Directory, the Microsoft Azure portal requires you to specify your tenant details. A tenant represents an organization and dedicated instance of Azure AD. The following steps showcase how to successfully create a new Azure Active Directory and configure your new tenant:
Step 1Step 2Step 3Step 4Step 5Step 6
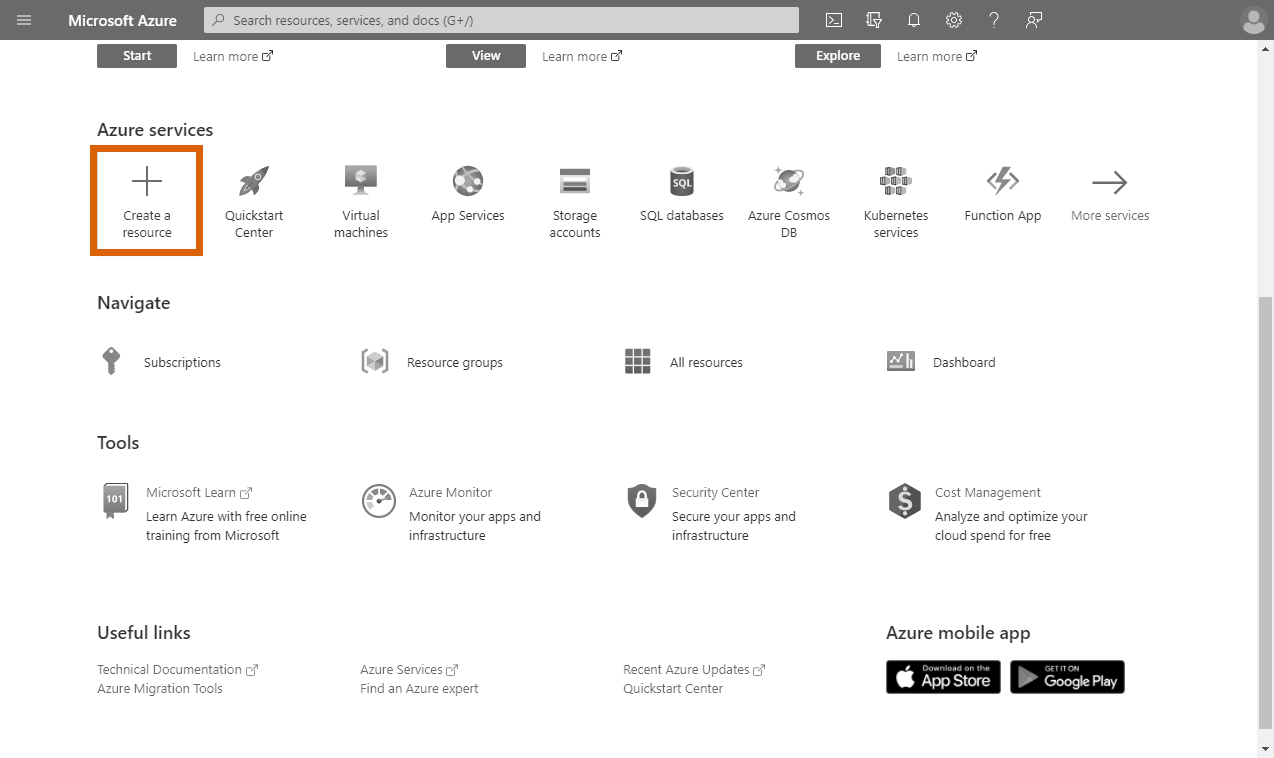
Click the Create New Resource button from the Microsoft Azure portal.
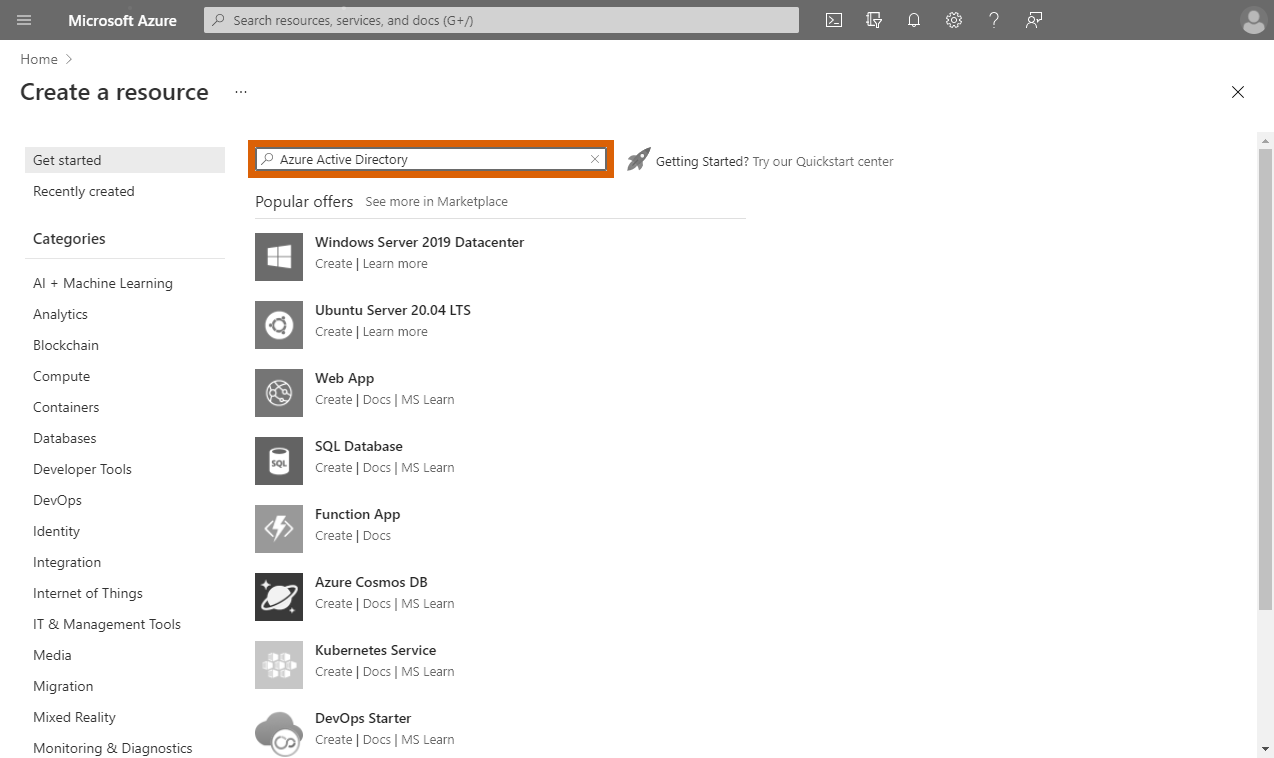
Locate Azure Active Directory from the provided list.
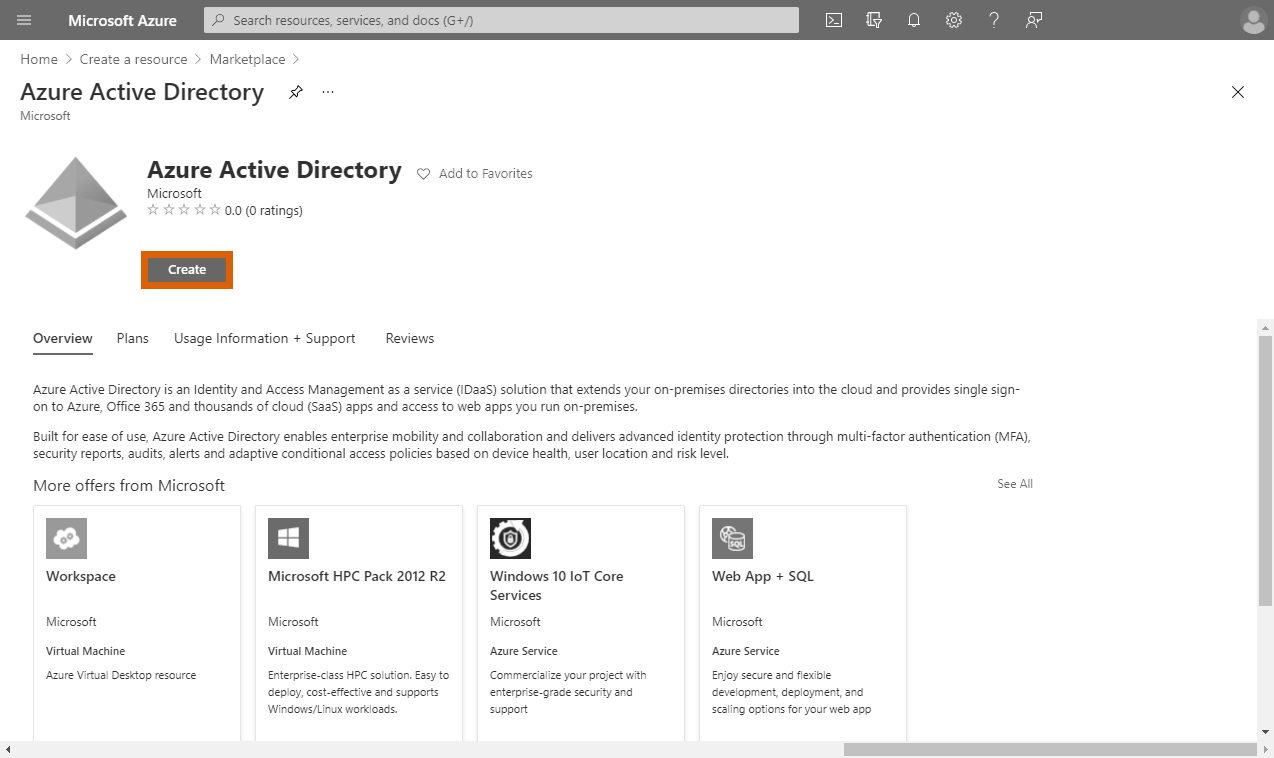
Click the Create button once Azure Active Directory is located successfully.
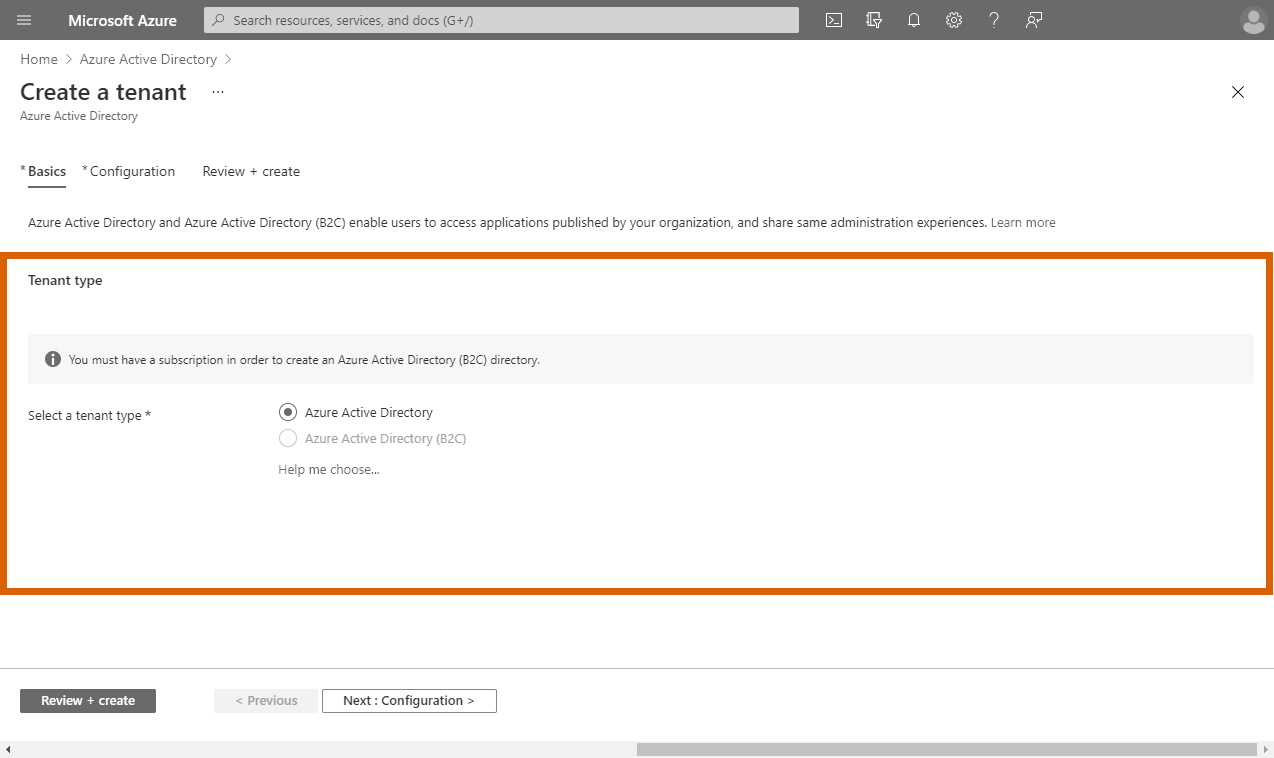
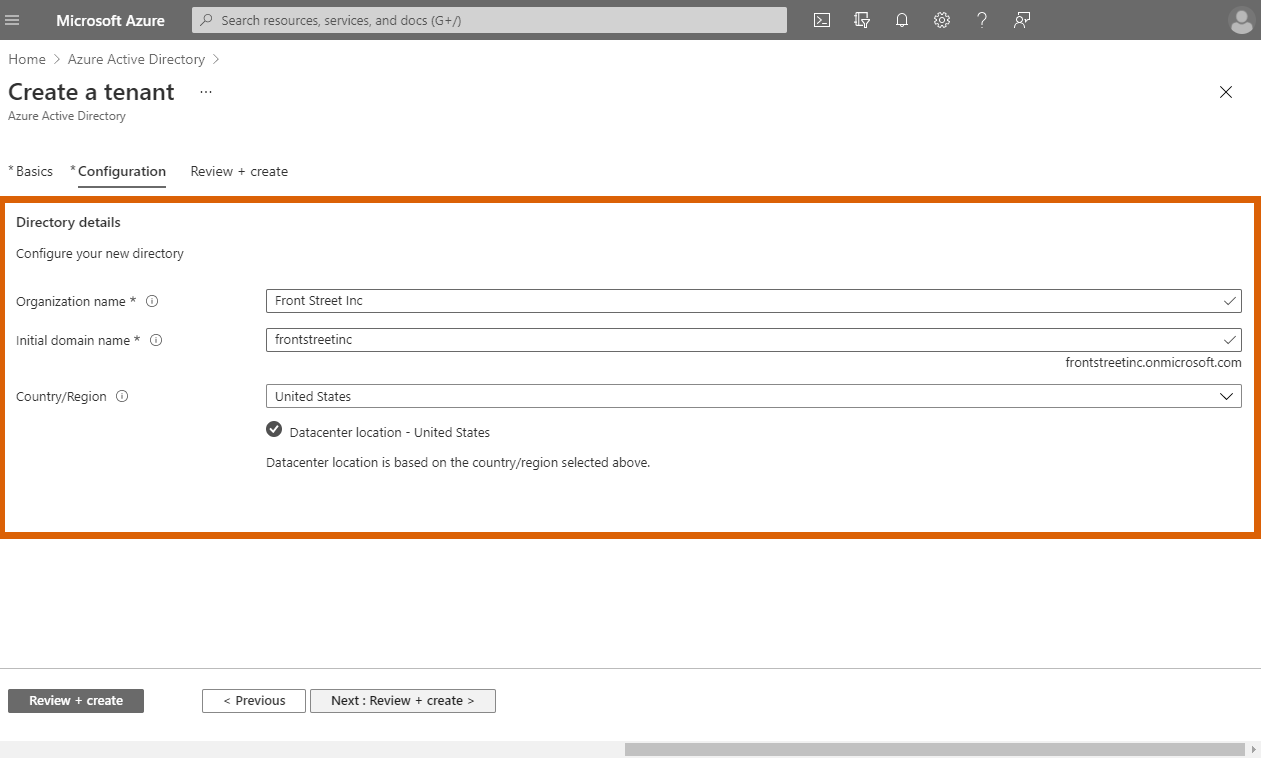
The portal prompts you to select a tenant type. Specify your required type and click Next: Configuration to continue.
Specify your organization name, initial domain name, and country/region in the following Configuration form. Click Next: Review + create to continue.
Once your configured tenant validation is passed, click the Create button to finalize your Active Directory creation.
Therefore, the Azure portal starts to process your tenant configuration. In case this processing is successfully complete, the Azure portal allows you to access your created Active Directory.
Azure Custom Domain
Verify your domain name within your Azure Active Directory. Skip to Connect Domain Verification in case your custom domain is already configured on the Microsoft Azure portal.
Follow the steps below to add your custom domain to your Azure Active Directory and successfully verify it.
Step 1Step 2Step 3 & 4
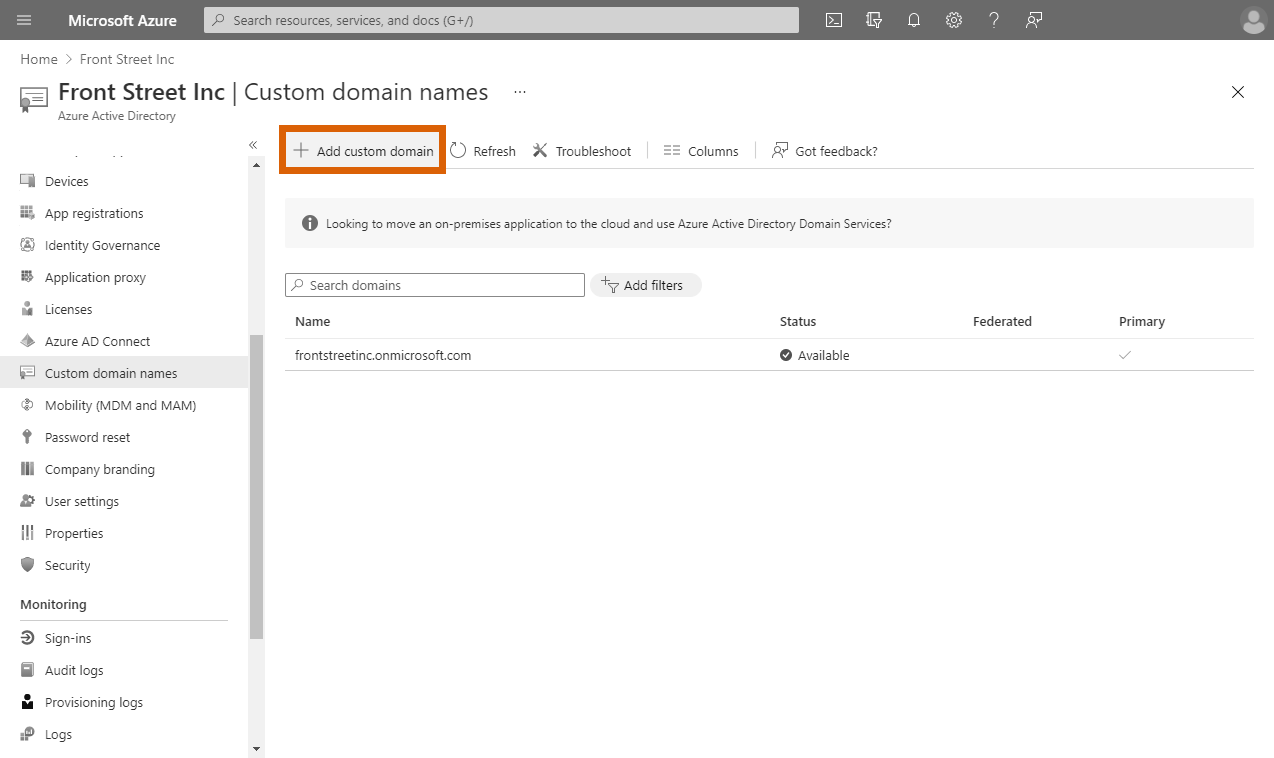
Access the Custom Domain Names section from the left-hand panel of your created Azure Active Domain.
Click the Add custom domain button to specify your domain name.
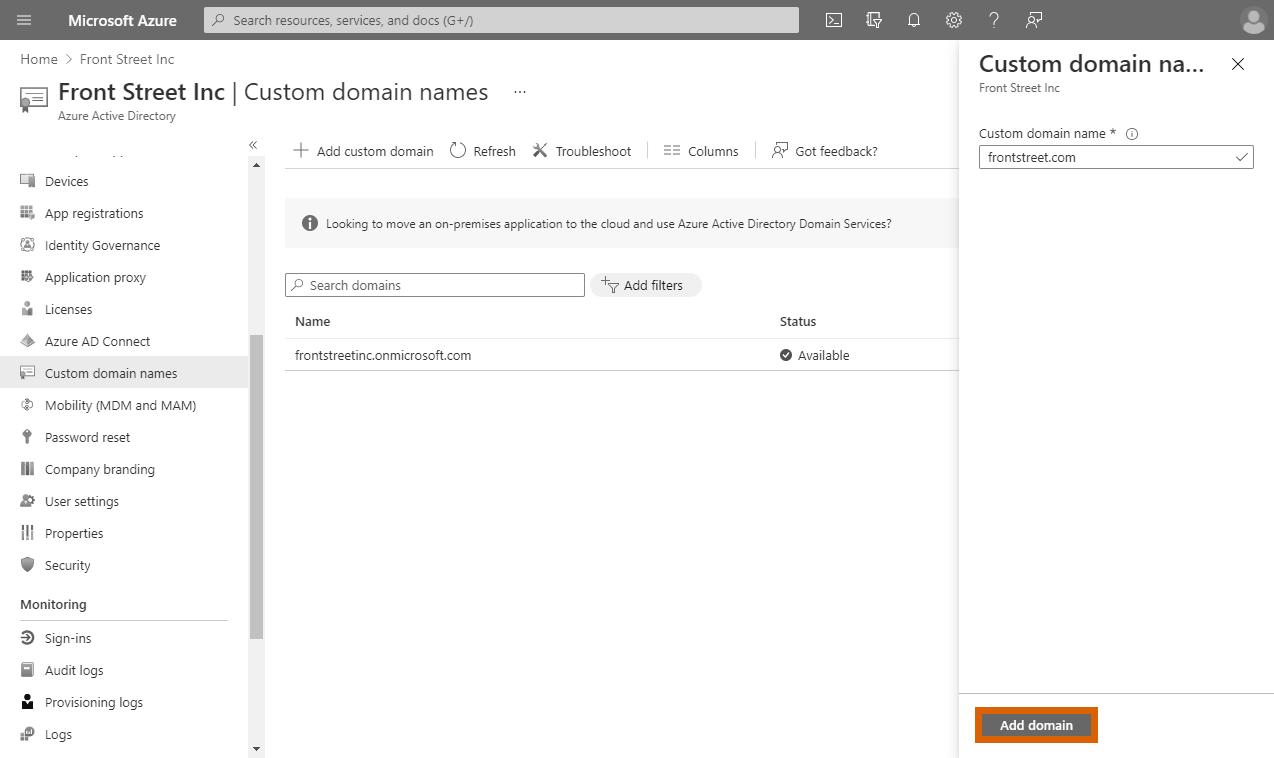
Enter your domain to the appeared form and click the Add domain button.
The Azure portal prompts you to specify create a new TXT record with your domain name registrar using the provided information. Click Verify once your TXT with required information is successfully created.
As a result, the Azure portal starts to process your domain configuration. If this processing is complete, the Azure portal will successfully verify your added domain.
Connect Domain Verification
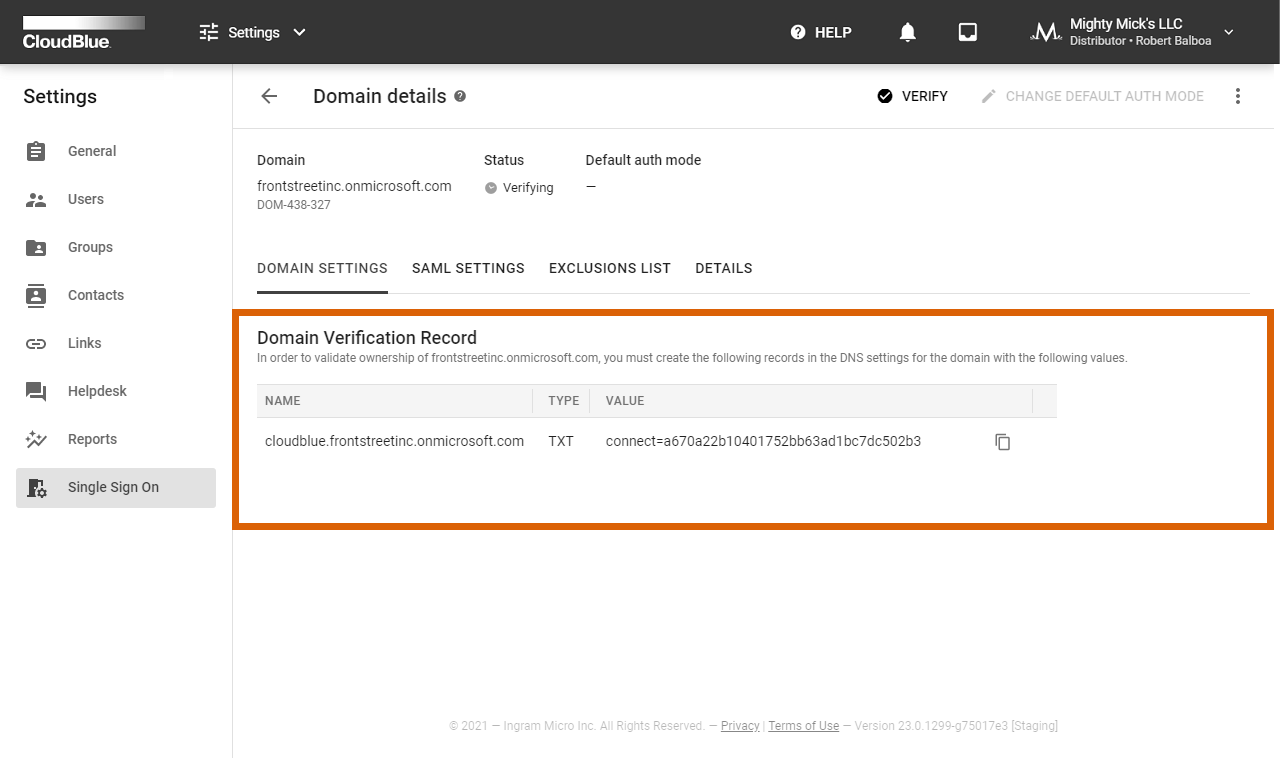
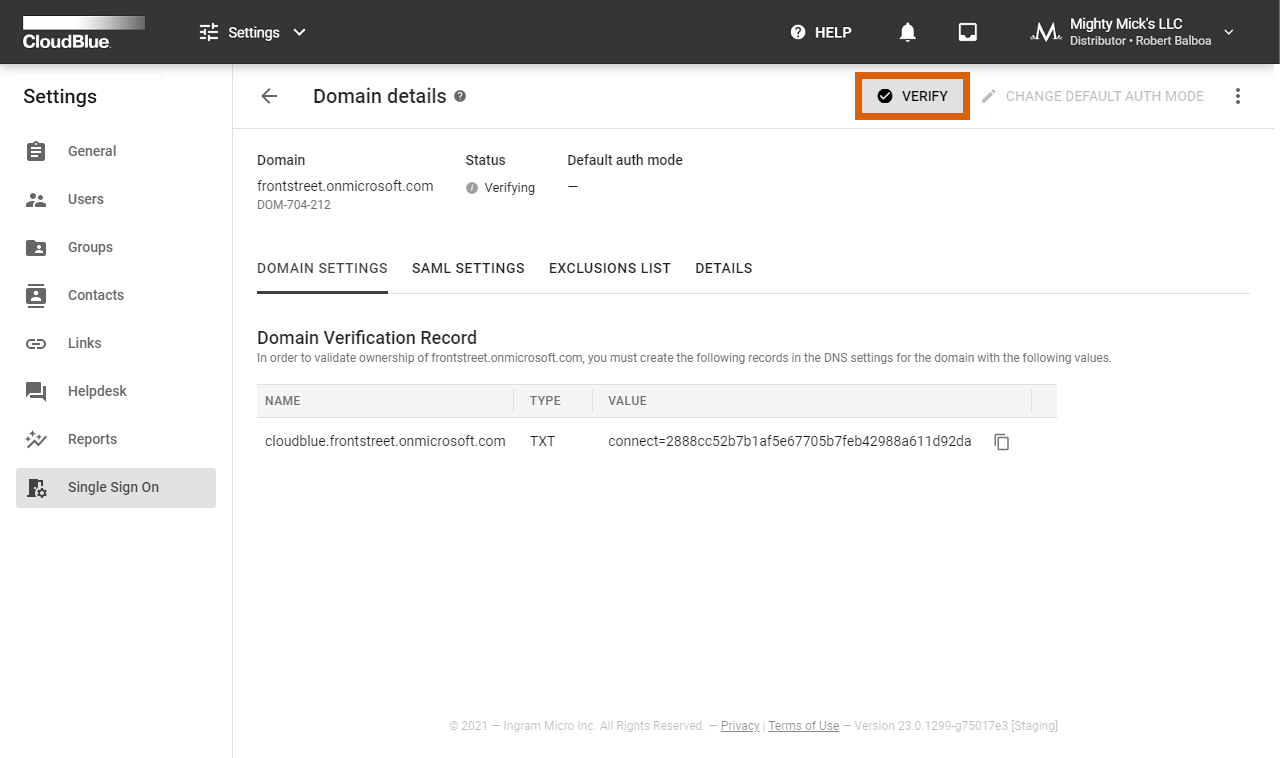
Create a domain on the CloudBlue Connect® platform. Once your domain instance is created, Connect prompts users to create a domain verification record via the domain details screen.
Create an Azure Active Directory record set with required data as follows:
Step 1Step 2Step 3 & 4Step 5
Copy your provided domain and value from the Domain Settings tab on Connect.
Create a new Record Set within the DNS zone section on the Microsoft Azure portal.
Paste your copied domain and value to the appeared form. Note that it is also necessary to specify a record type as displayed within Domain Settings on Connect.
Click OK to save your record configurations.
Verify your domain on the Connect platform by clicking the Verify button at the top right corner of your domain details screen.
Thus, the system should successfully verify your domain instance on the Connect platform. Note, however, that sometimes DNS changes can take a while to appear. Please wait a few hours, then reopen your domain instance and try to verify it again. In case the verification operation keeps failing, try to add a different DNS TXT record and make sure that all provided values are correct.
One Domain & Multiple Accounts
In case you have the same domain for two different Connect accounts (e.g., one domain for Vendors and Distributors), it is required to add two DNS records for each domain instance on the Connect platform.
Enterprise Application
In case your Active Directory is successfully configured and your domain is successfully on the Connect platform , it is necessary to define your single sign-on system via the Enterprise applications section on the Microsoft Azure portal and upload your Connect Service Provider metadata and certificate files to the Azure portal. The following instructions showcase how to perform the aforementioned operations:
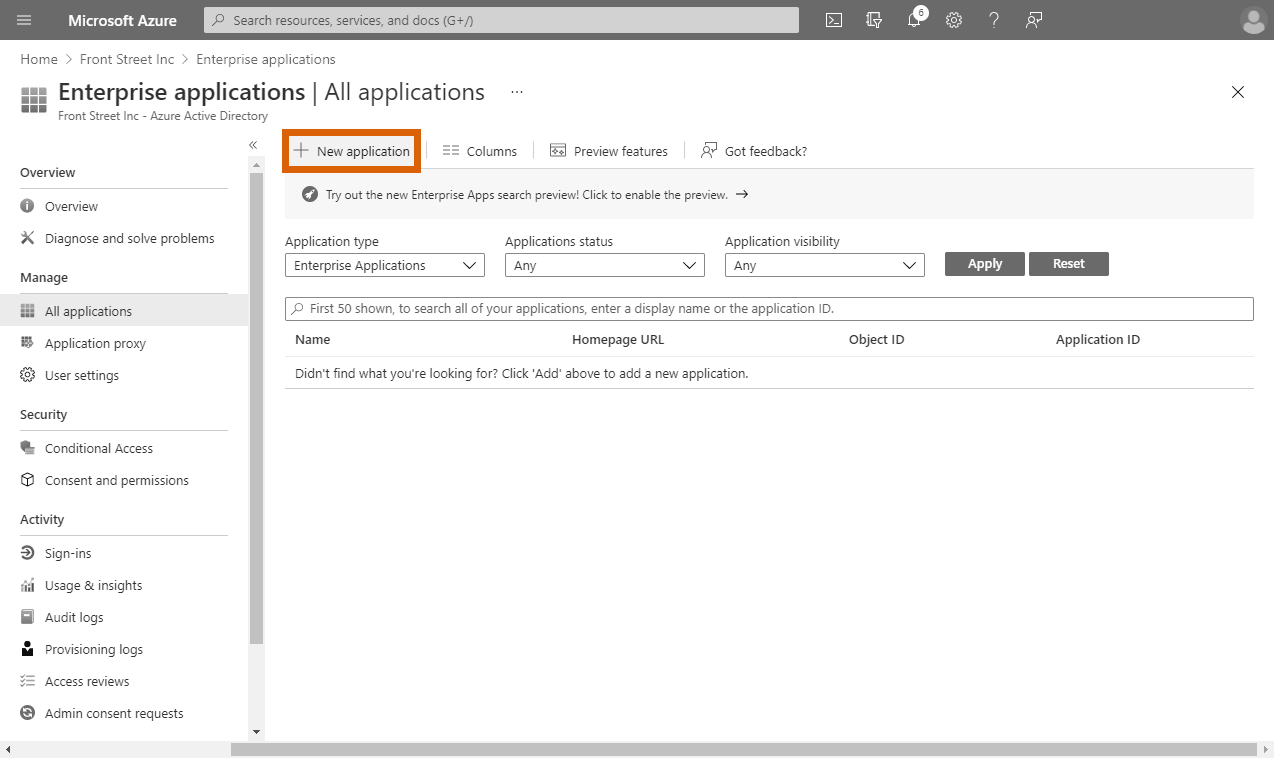
Access the Enterprise applications section from your created Azure Active Directory.
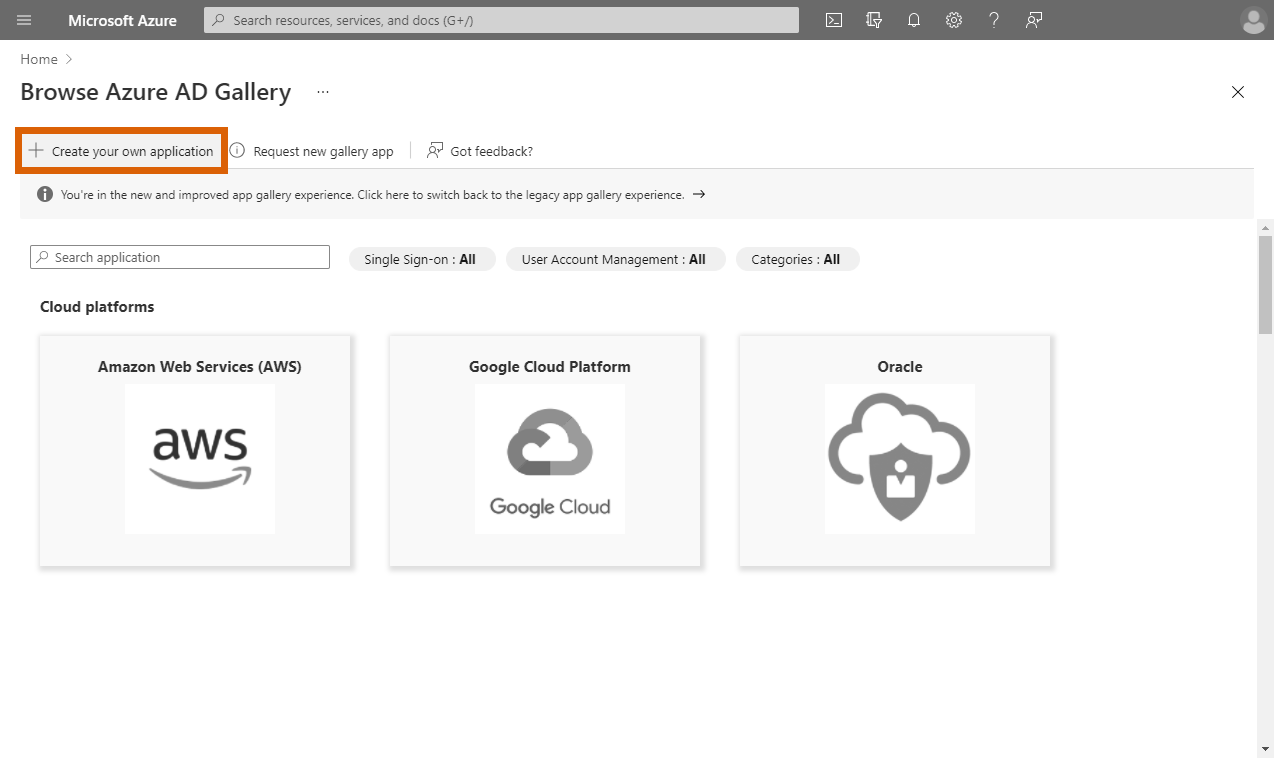
Click the Create your own application button under Browse Azure AD Gallery.
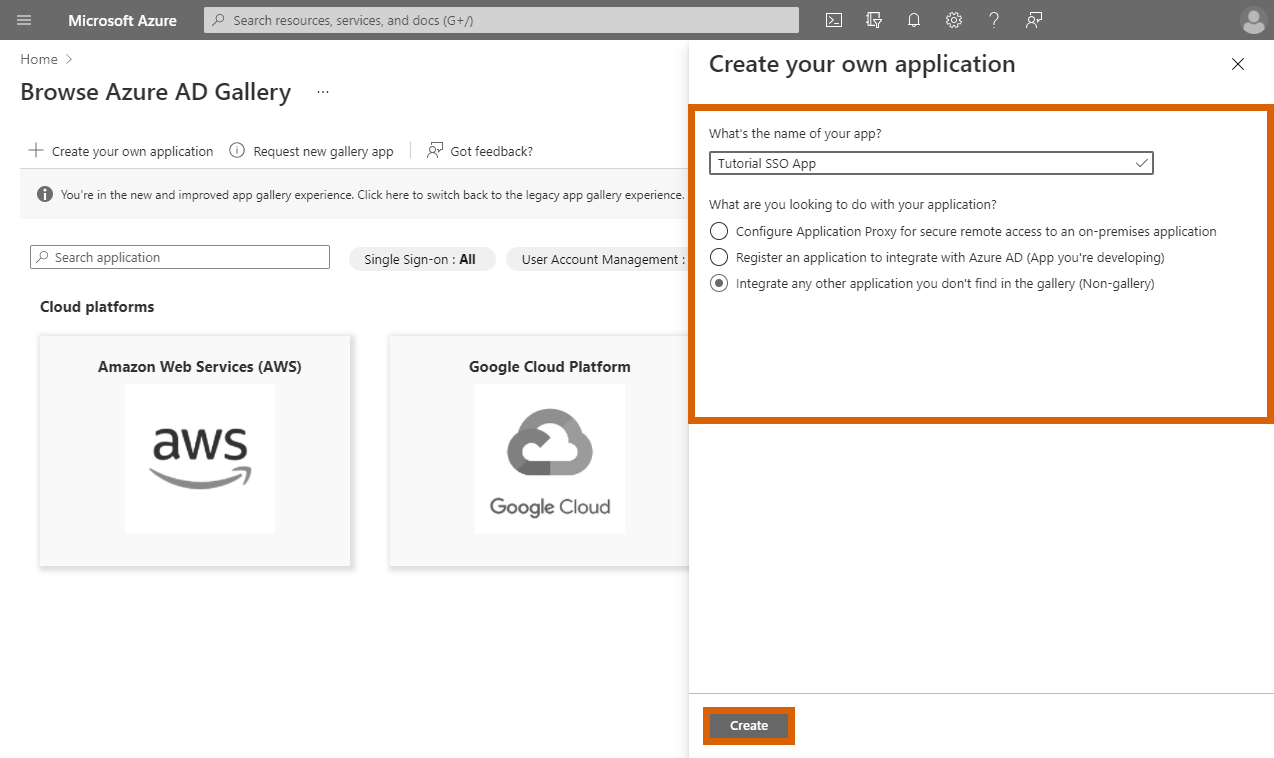
Enter your application name and select the Integrate any other application you don’t find in the gallery (Non-gallery) radio option. Thereafter, click Create to create your enterprise application.
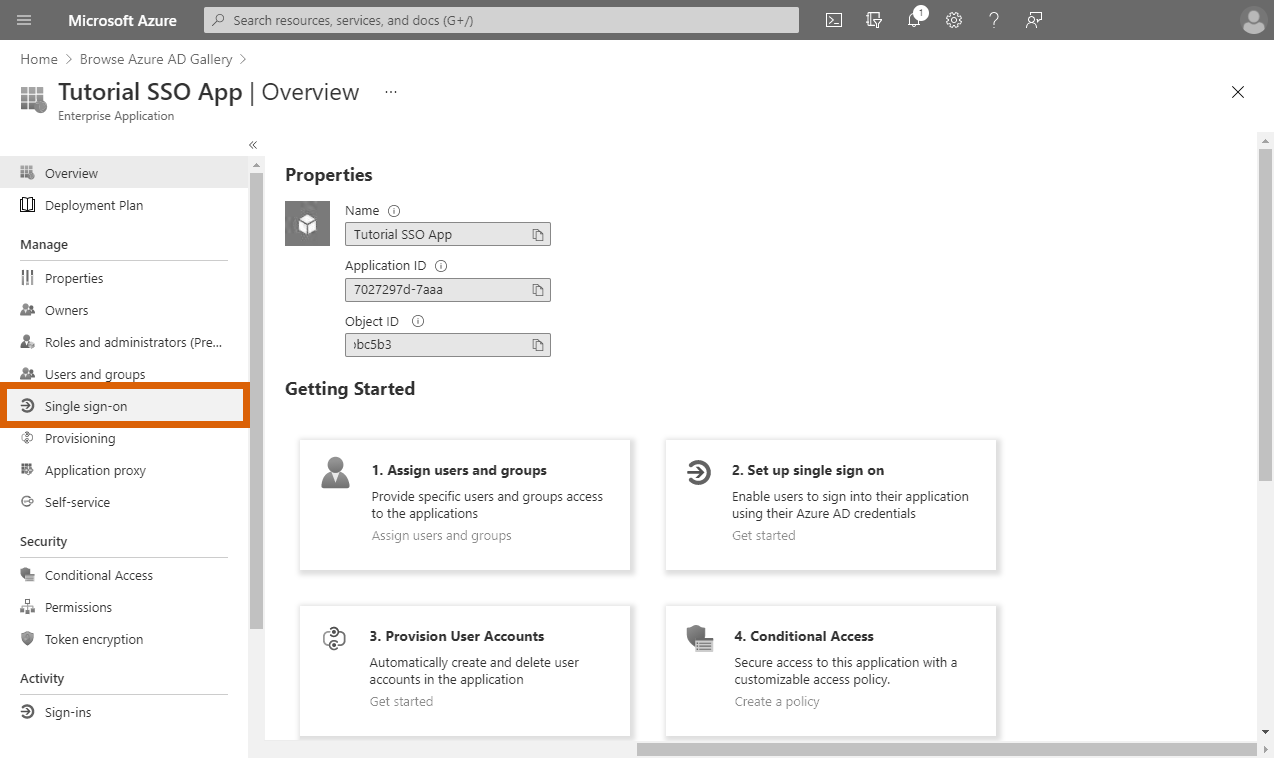
Access the Single Sign-on section of your created enterprise application once the system successfully processes your app.
Select the SAML option as your Single Sign-On method.
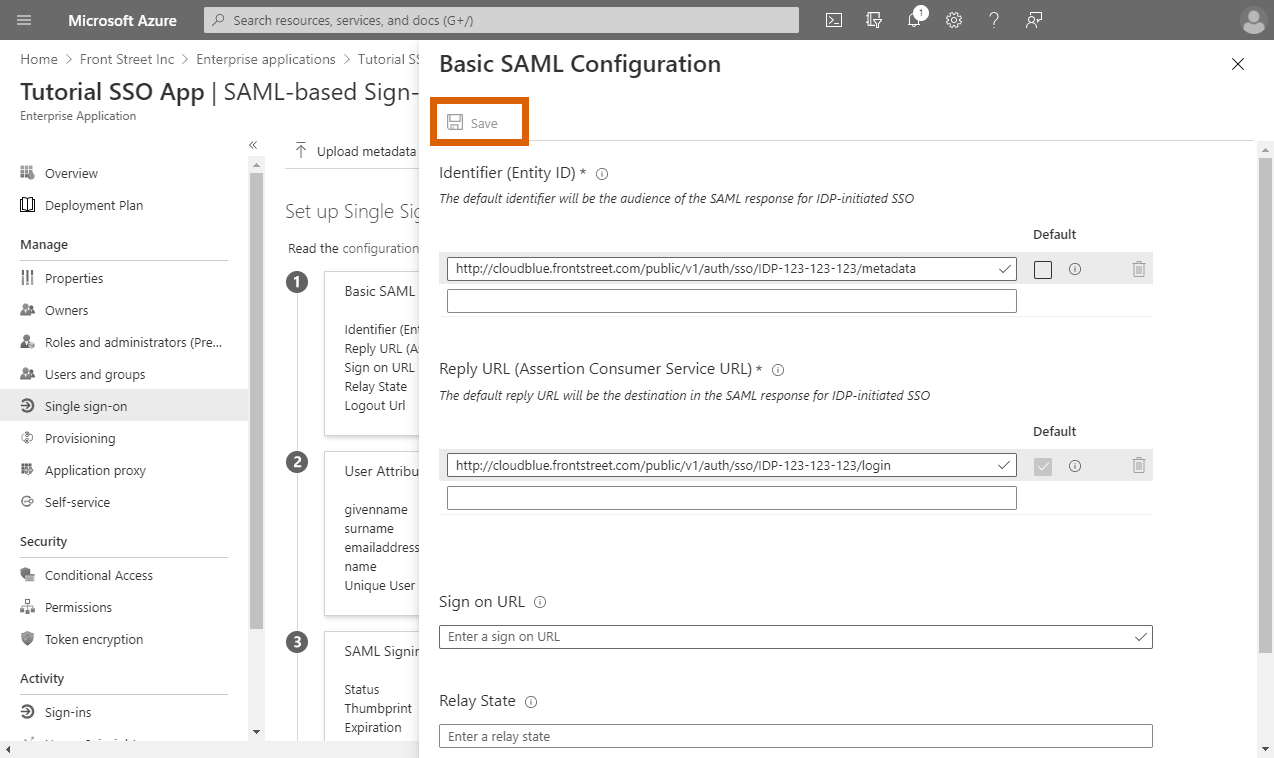
Click the Upload metadata file button to upload your Service Provider metadata file. Access the SP metadata file via the SAML settings tab from your verified domain on the Connect platform.
Once your metadata file is uploaded to the Microsoft Azure portal, click the Save button to save your provided metadata.
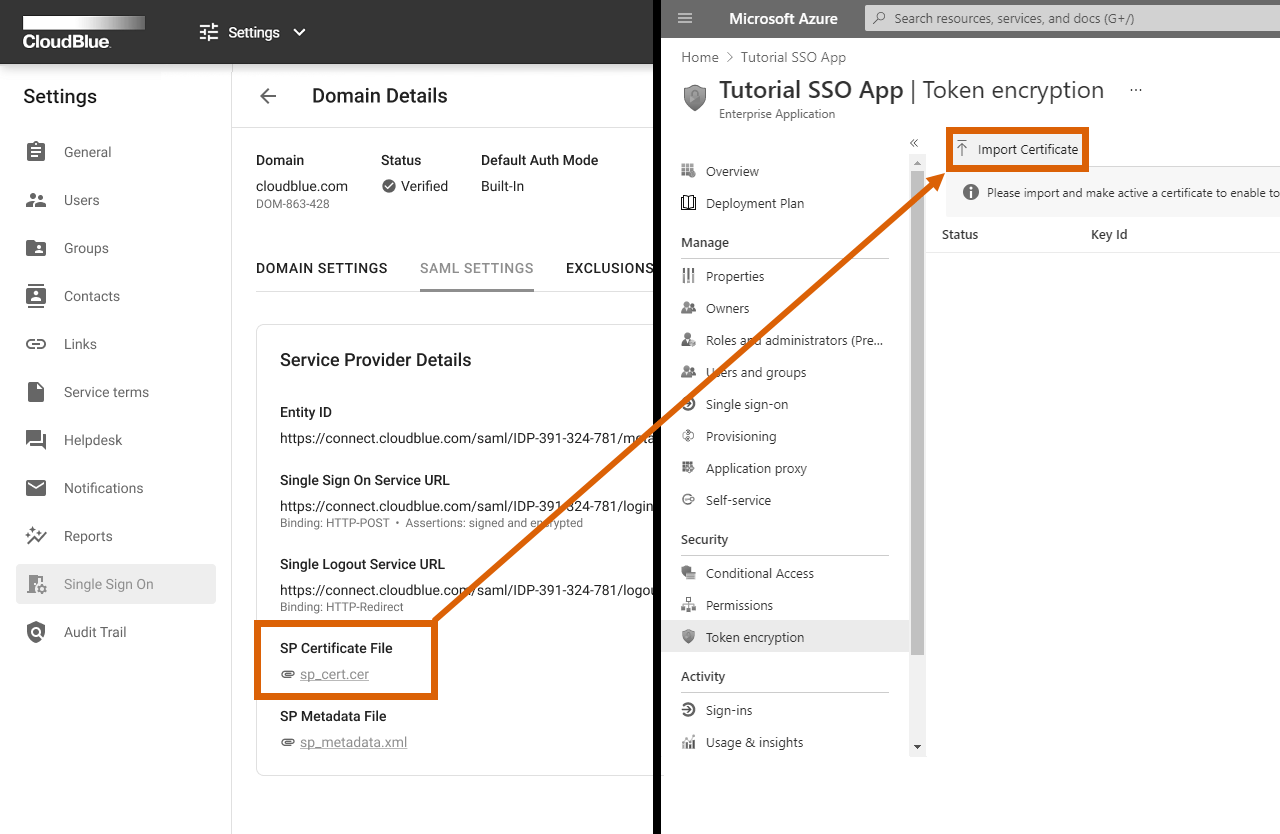
Access the Token Encryption section and click Import Certificate to upload your Connect certificate. Download this certificate via the SAML settings tab from your verified domain on the Connect platform. Note that Microsoft Azure requires you to get a Azure AD Premium P2 license in order to access this section.
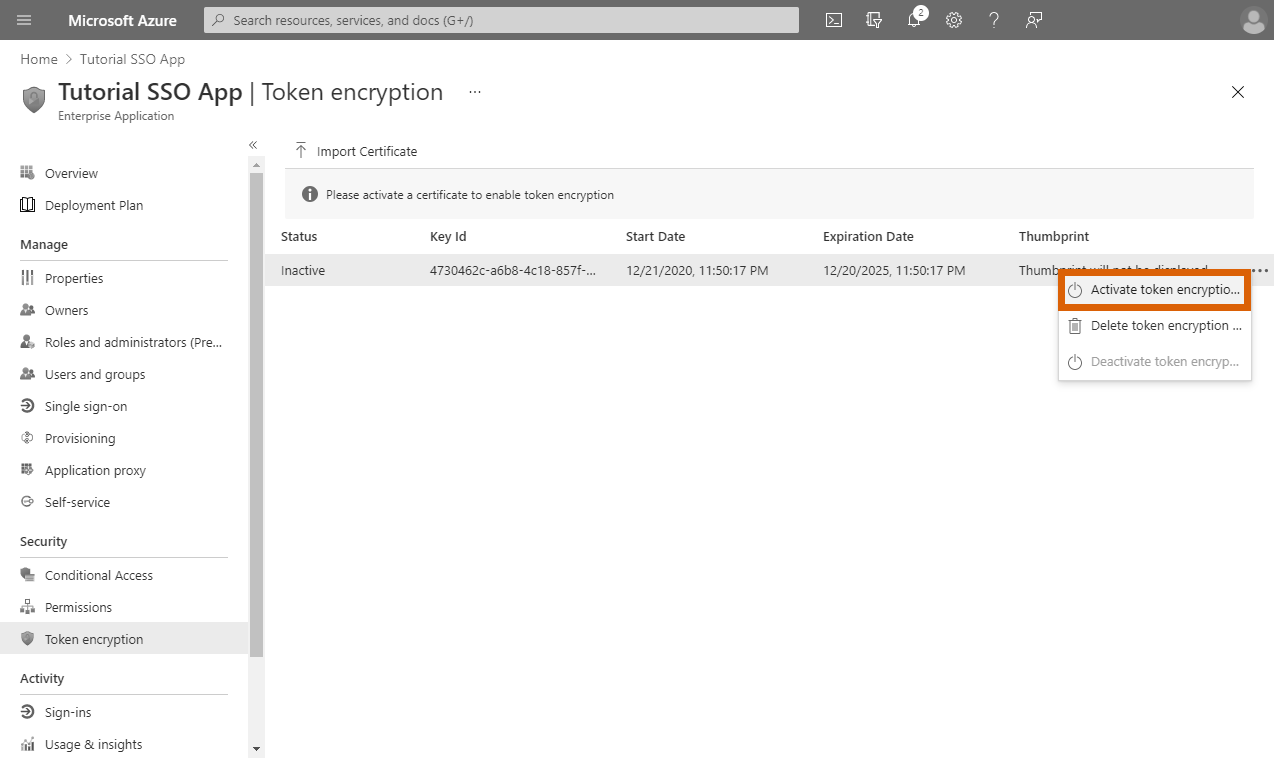
Once your certificate is uploaded, activate this certificate by accessing the ellipsis (⋯) menu and clicking Activate token encryption within the Token Encryption section.
Therefore, your SSO system and the assertion encryption will be successfully configured on the Microsoft Azure portal. Note, however, that Azure’s token encryption usually takes from 5 to 10 minutes to start working. Don’t close your created Azure application just yet. It is required for the Connect SAML configuration as described below.
Connect SAML Configuration
If your created application and the assertion encryption is successfully configured on the Azure portal, it is necessary to configure Identity Provider Details and User Management attributes within your verified domain on the CloudBlue Connect® platform. In addition, you can switch the SAML authentication mode of your domain to test out your configured single sign-on system. Note that in order to enable this mode at least one user should be added to the Exclusions list. The following steps showcase how to successfully perform all of the aforementioned operations:
Step 1Step 2Step 3Step 4Step 5Step 6Step 7
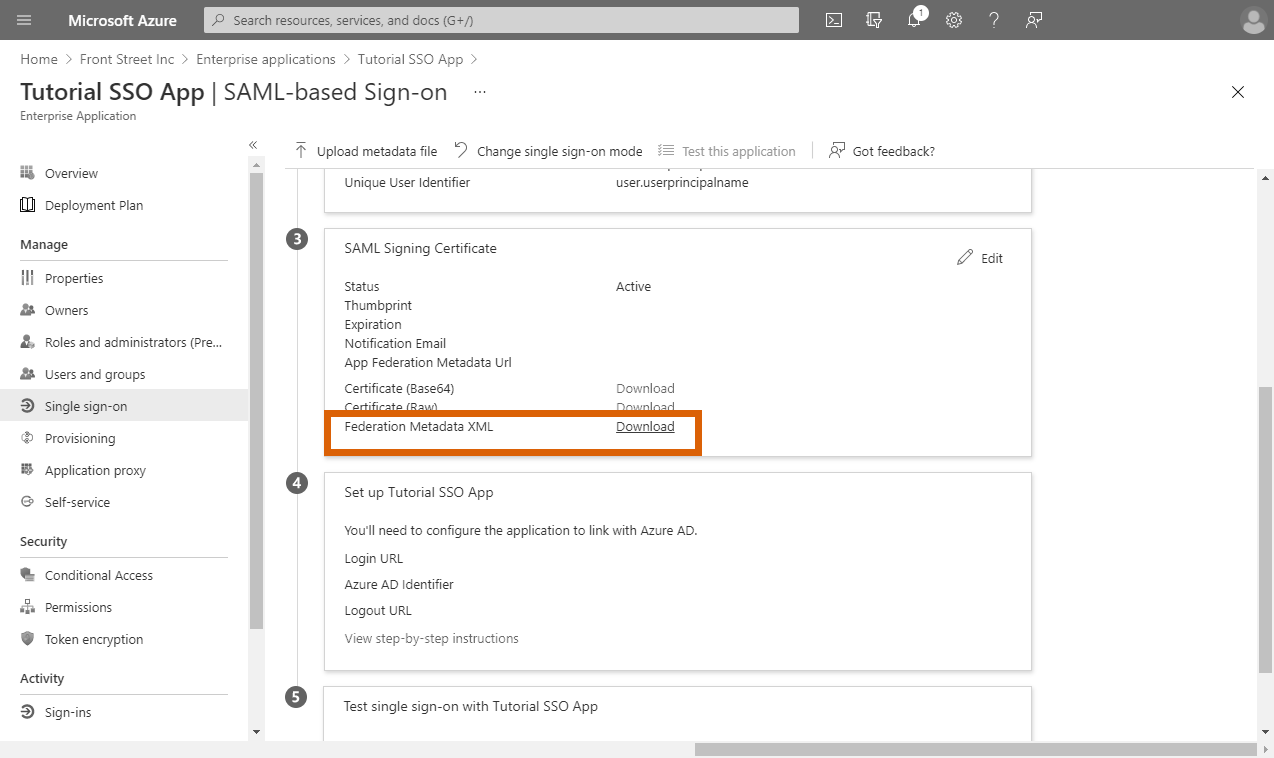
Access the Single Sign-on section from your configured Azure application. Thereafter, download the Federation Metadata XML under SAML Signing Certificate.
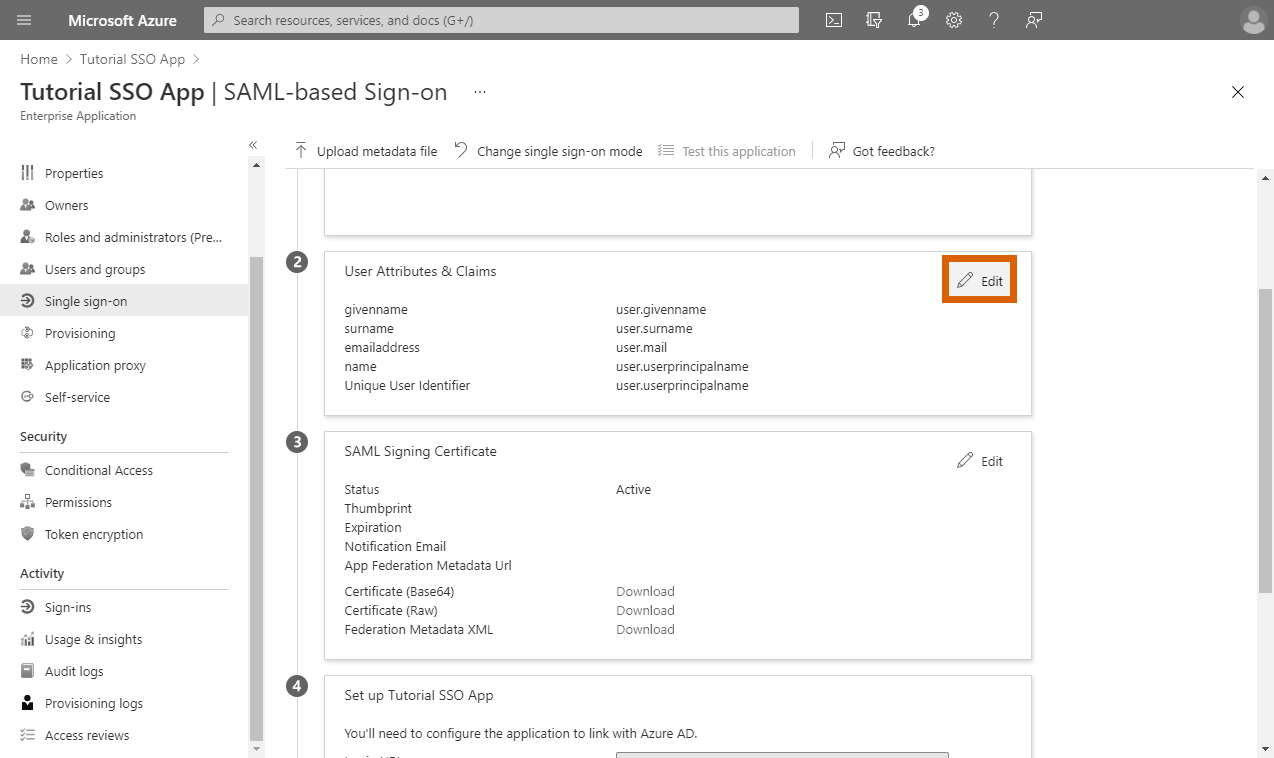
Scroll up to the User Attributes & Claims section and click the Edit button to access required user management attributes.
Copy the Azure claim names under Additional Claims. Namely, it is required to copy the following claim names: Email: http://schemas.xmlsoap.org/ws/2005/05/identity/claims/emailaddress External ID: http://schemas.xmlsoap.org/ws/2005/05/identity/claims/givenname Full Name: http://schemas.xmlsoap.org/ws/2005/05/identity/claims/name
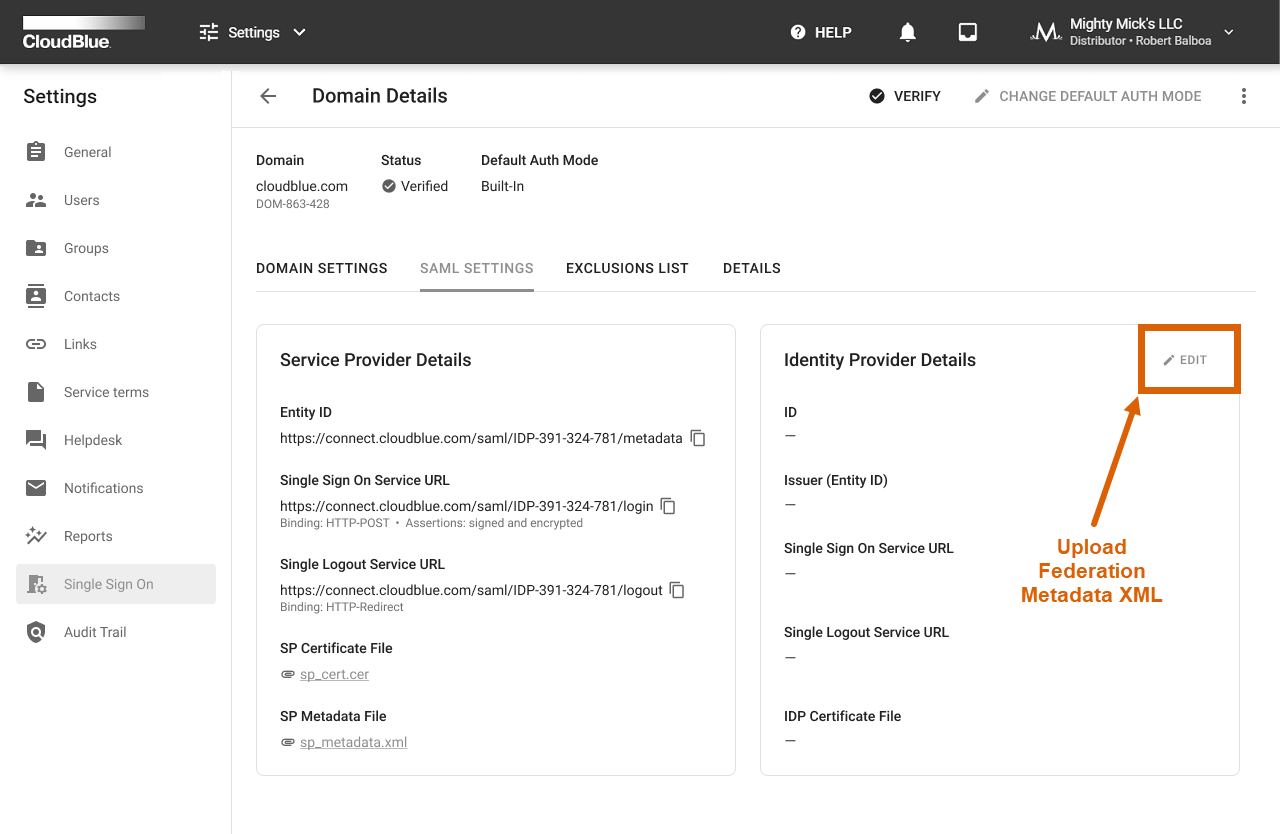
Access the SALM Settings tab from your verified domain on Connect. Click the Edit button next to Identity Provider Details and upload your exported Federation Metadata XML to the corresponding form.
Locate the User Management section of the SAML Settings tab and provide the copied claim names as SAML Attribute Names.
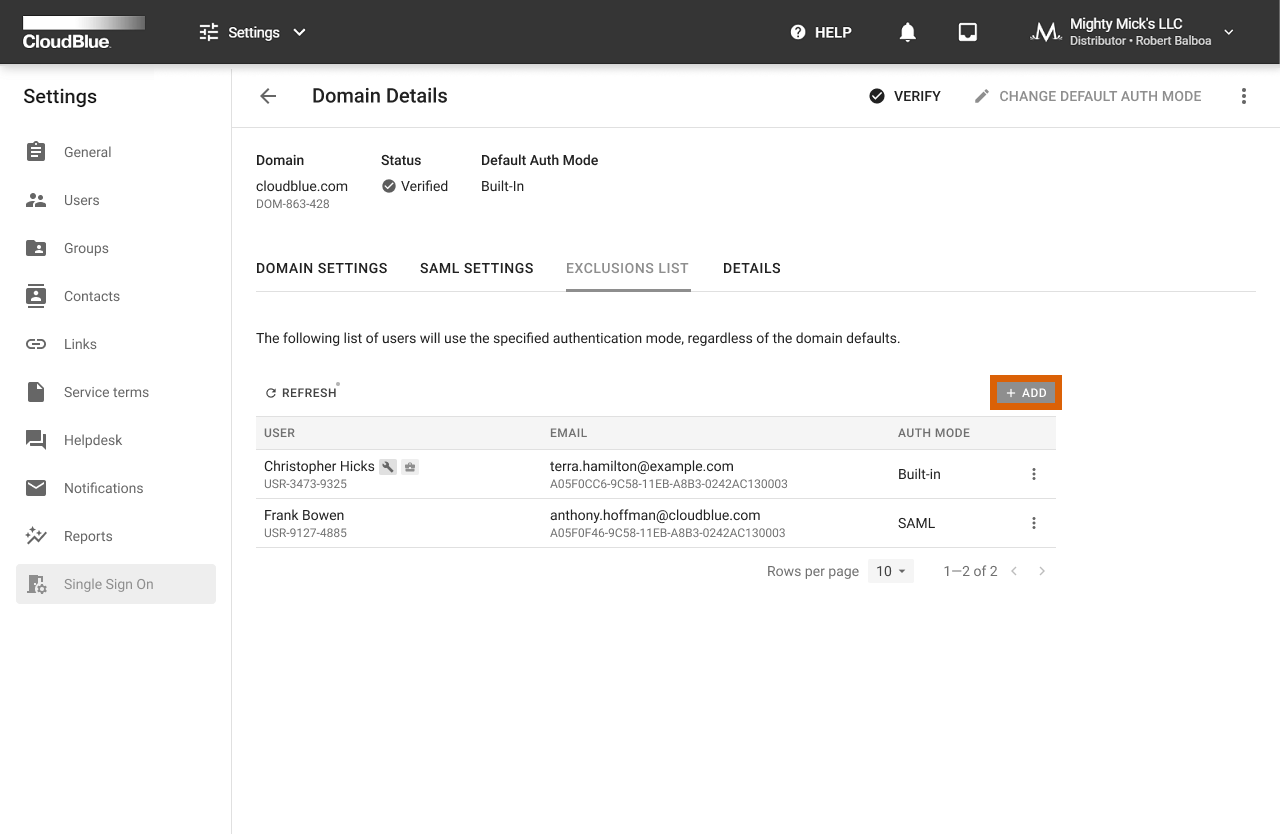
Access the Exclusions List tab of your Connect domain. Click the Add button to specify at least one user with the built-in authentication mode.
Click Change Default Auth Mode at the top-right corner of your domain details screen. The appeared wizard will help you switch the default mode to the SAML authorization mode.
By completing the provided instruction, your Connect domain will be successfully configured for single sign-on authorization via the Azure Active Directory. Therefore, you can add users to your authorization system and test out as described below.
Adding Users and Test Authorization
Once your single sign-on system will be successfully configured, you can create a new user on Connect and add this user to your Azure Active Directory as well as your to your configured application. Therefore, you can test out your configured SAML authorization. Follow the steps below to add a new user and test your single sign-on system:
Access the Users section of the Account module on the Connect platform. Click Add User to launch the wizard and create your test user on Connect.
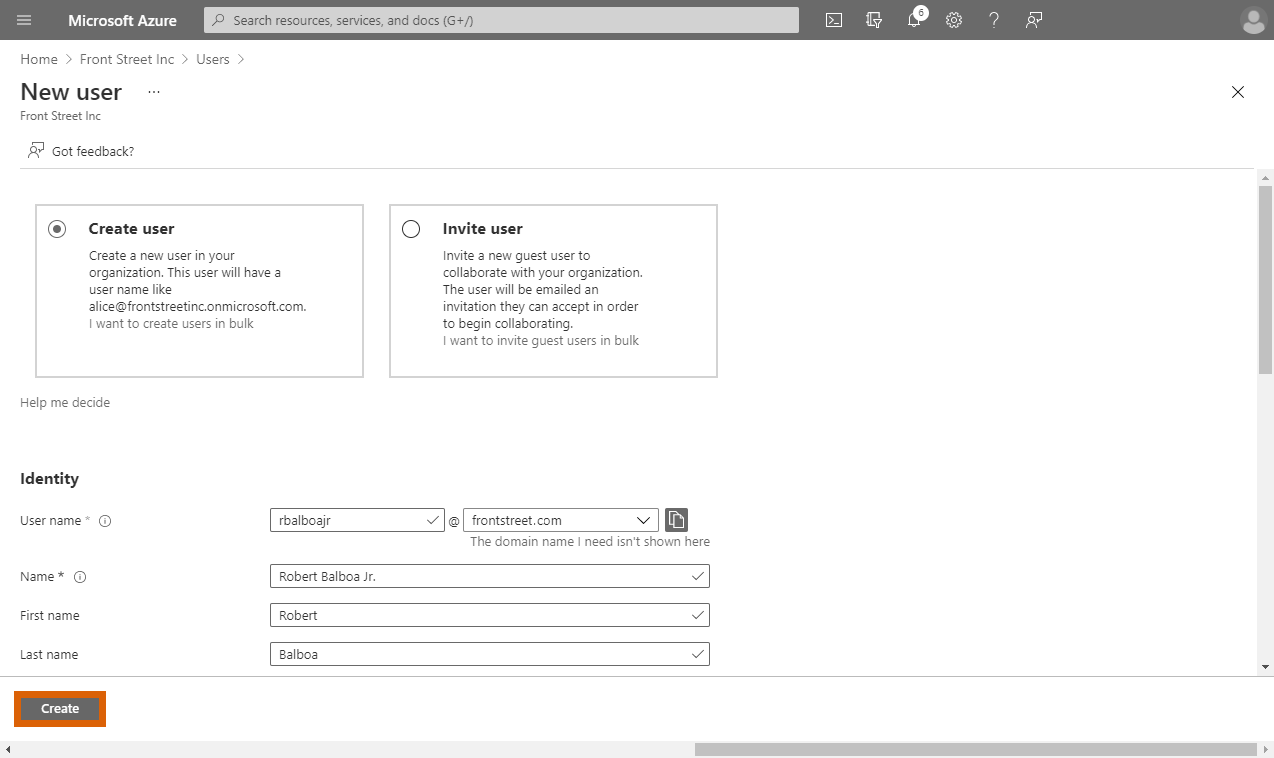
Proceed to the Users section from your configured Azure Active Directory. Click the New User button to add your test user with same credentials.
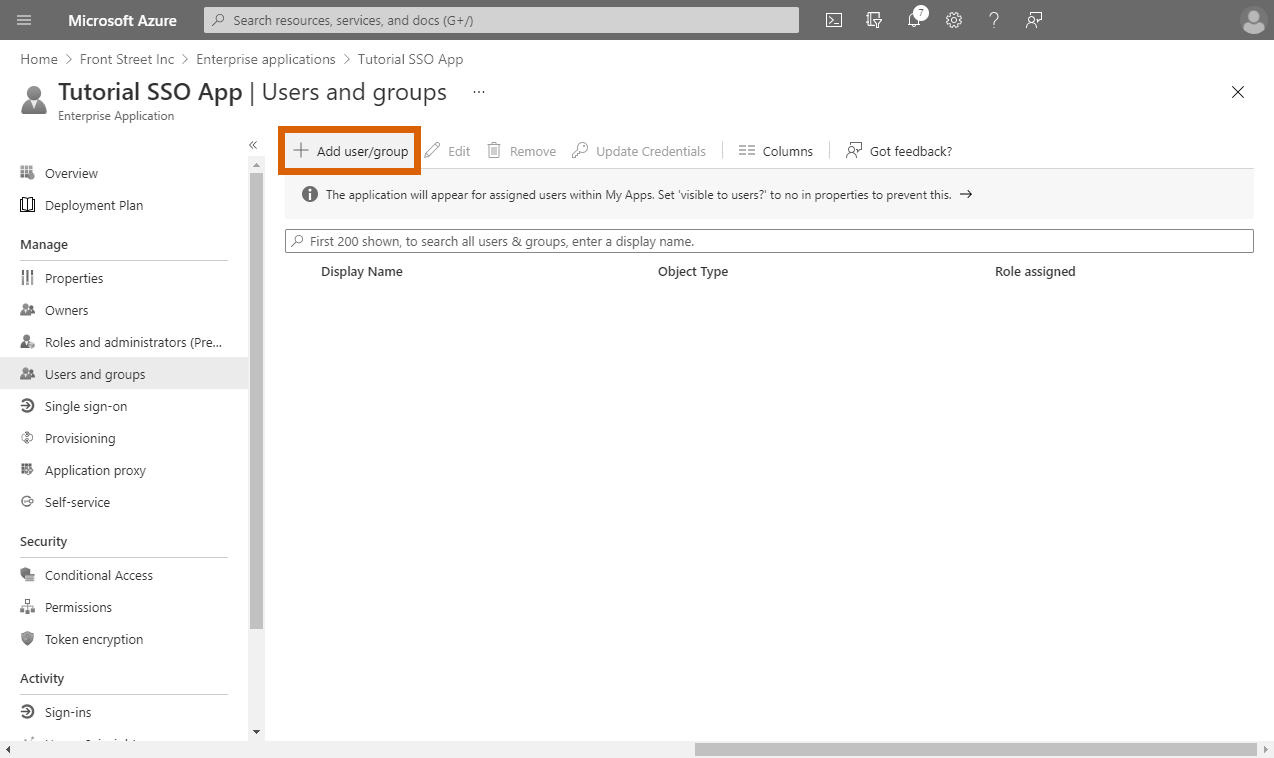
Navigate to the Users and Groups section from your configured Enterprise Application. Click the Add user/group to add your configured user.
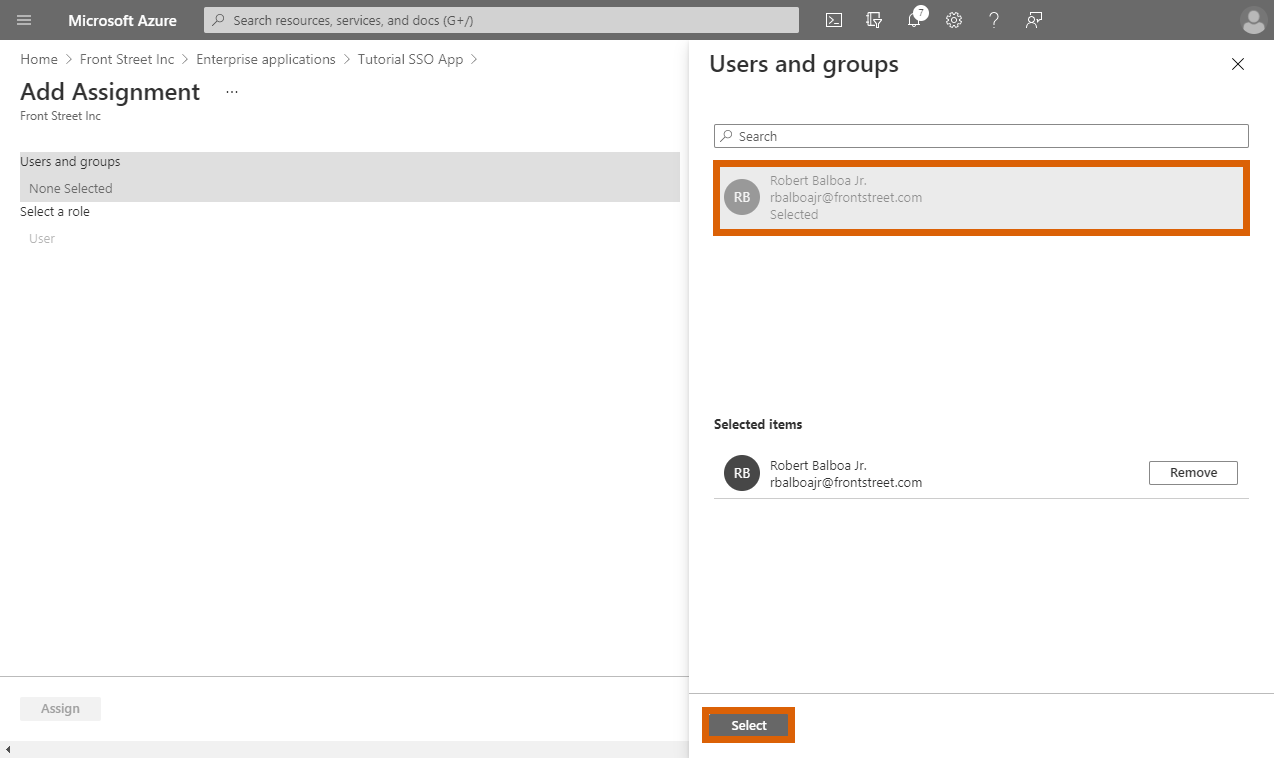
Click on Users and Groups from the provided form. Thereafter, choose your user from the list and click the Select button.
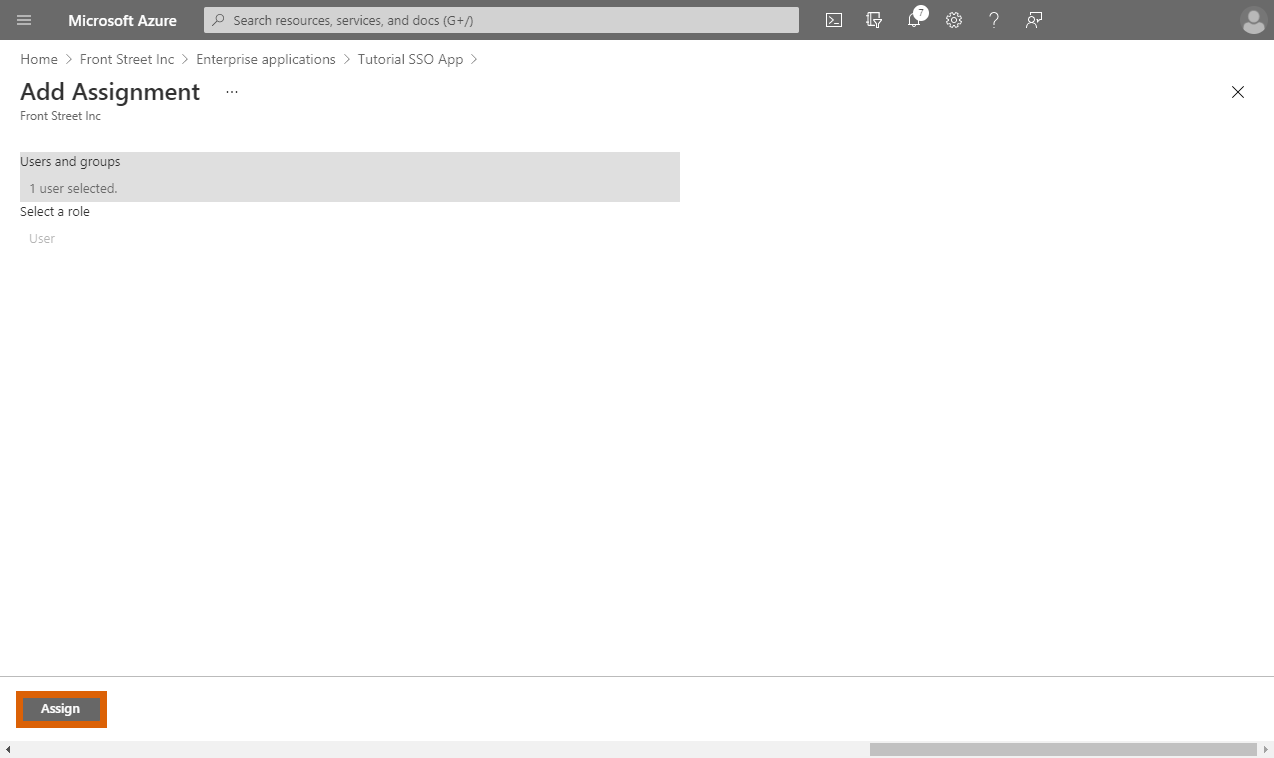
Click Assign to successfully assign your selected user to your application.
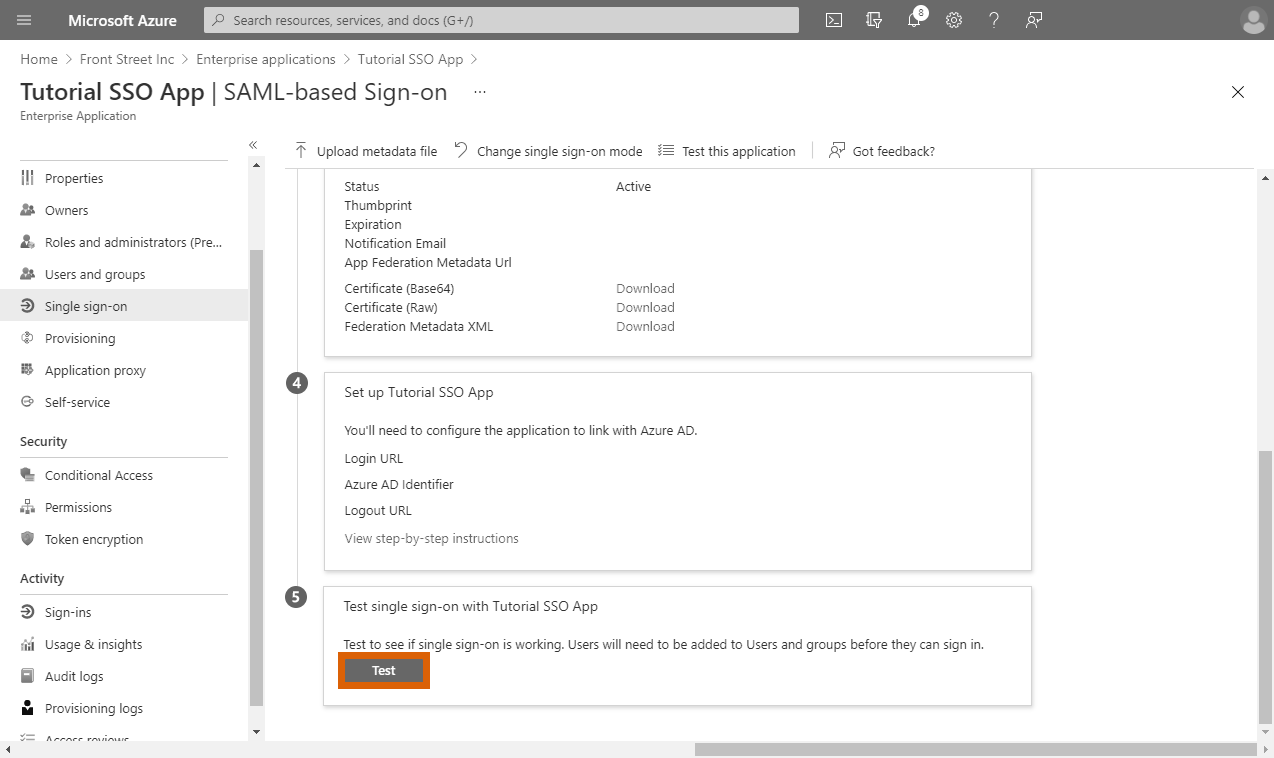
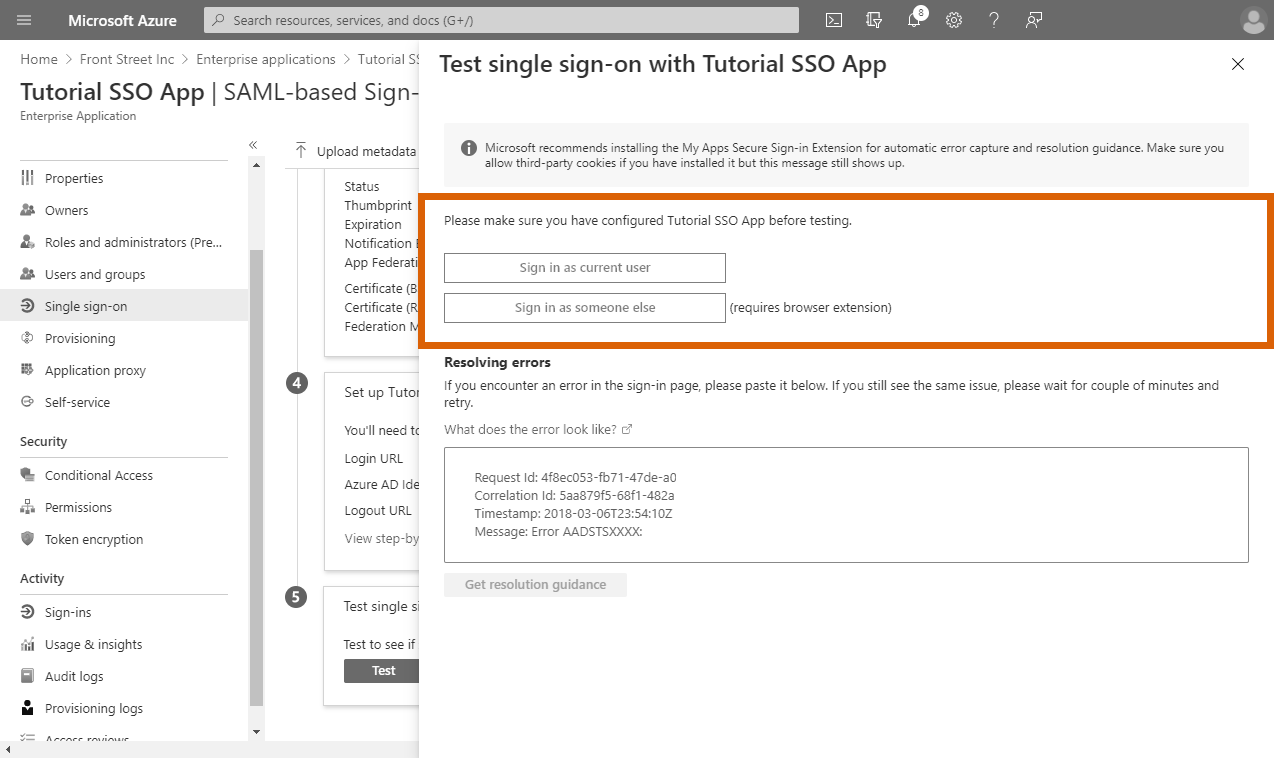
Access the Single Sign-on section and click the Test button in case you want to test your SAML configuration. Sign in as your current user or test your application as someone else.
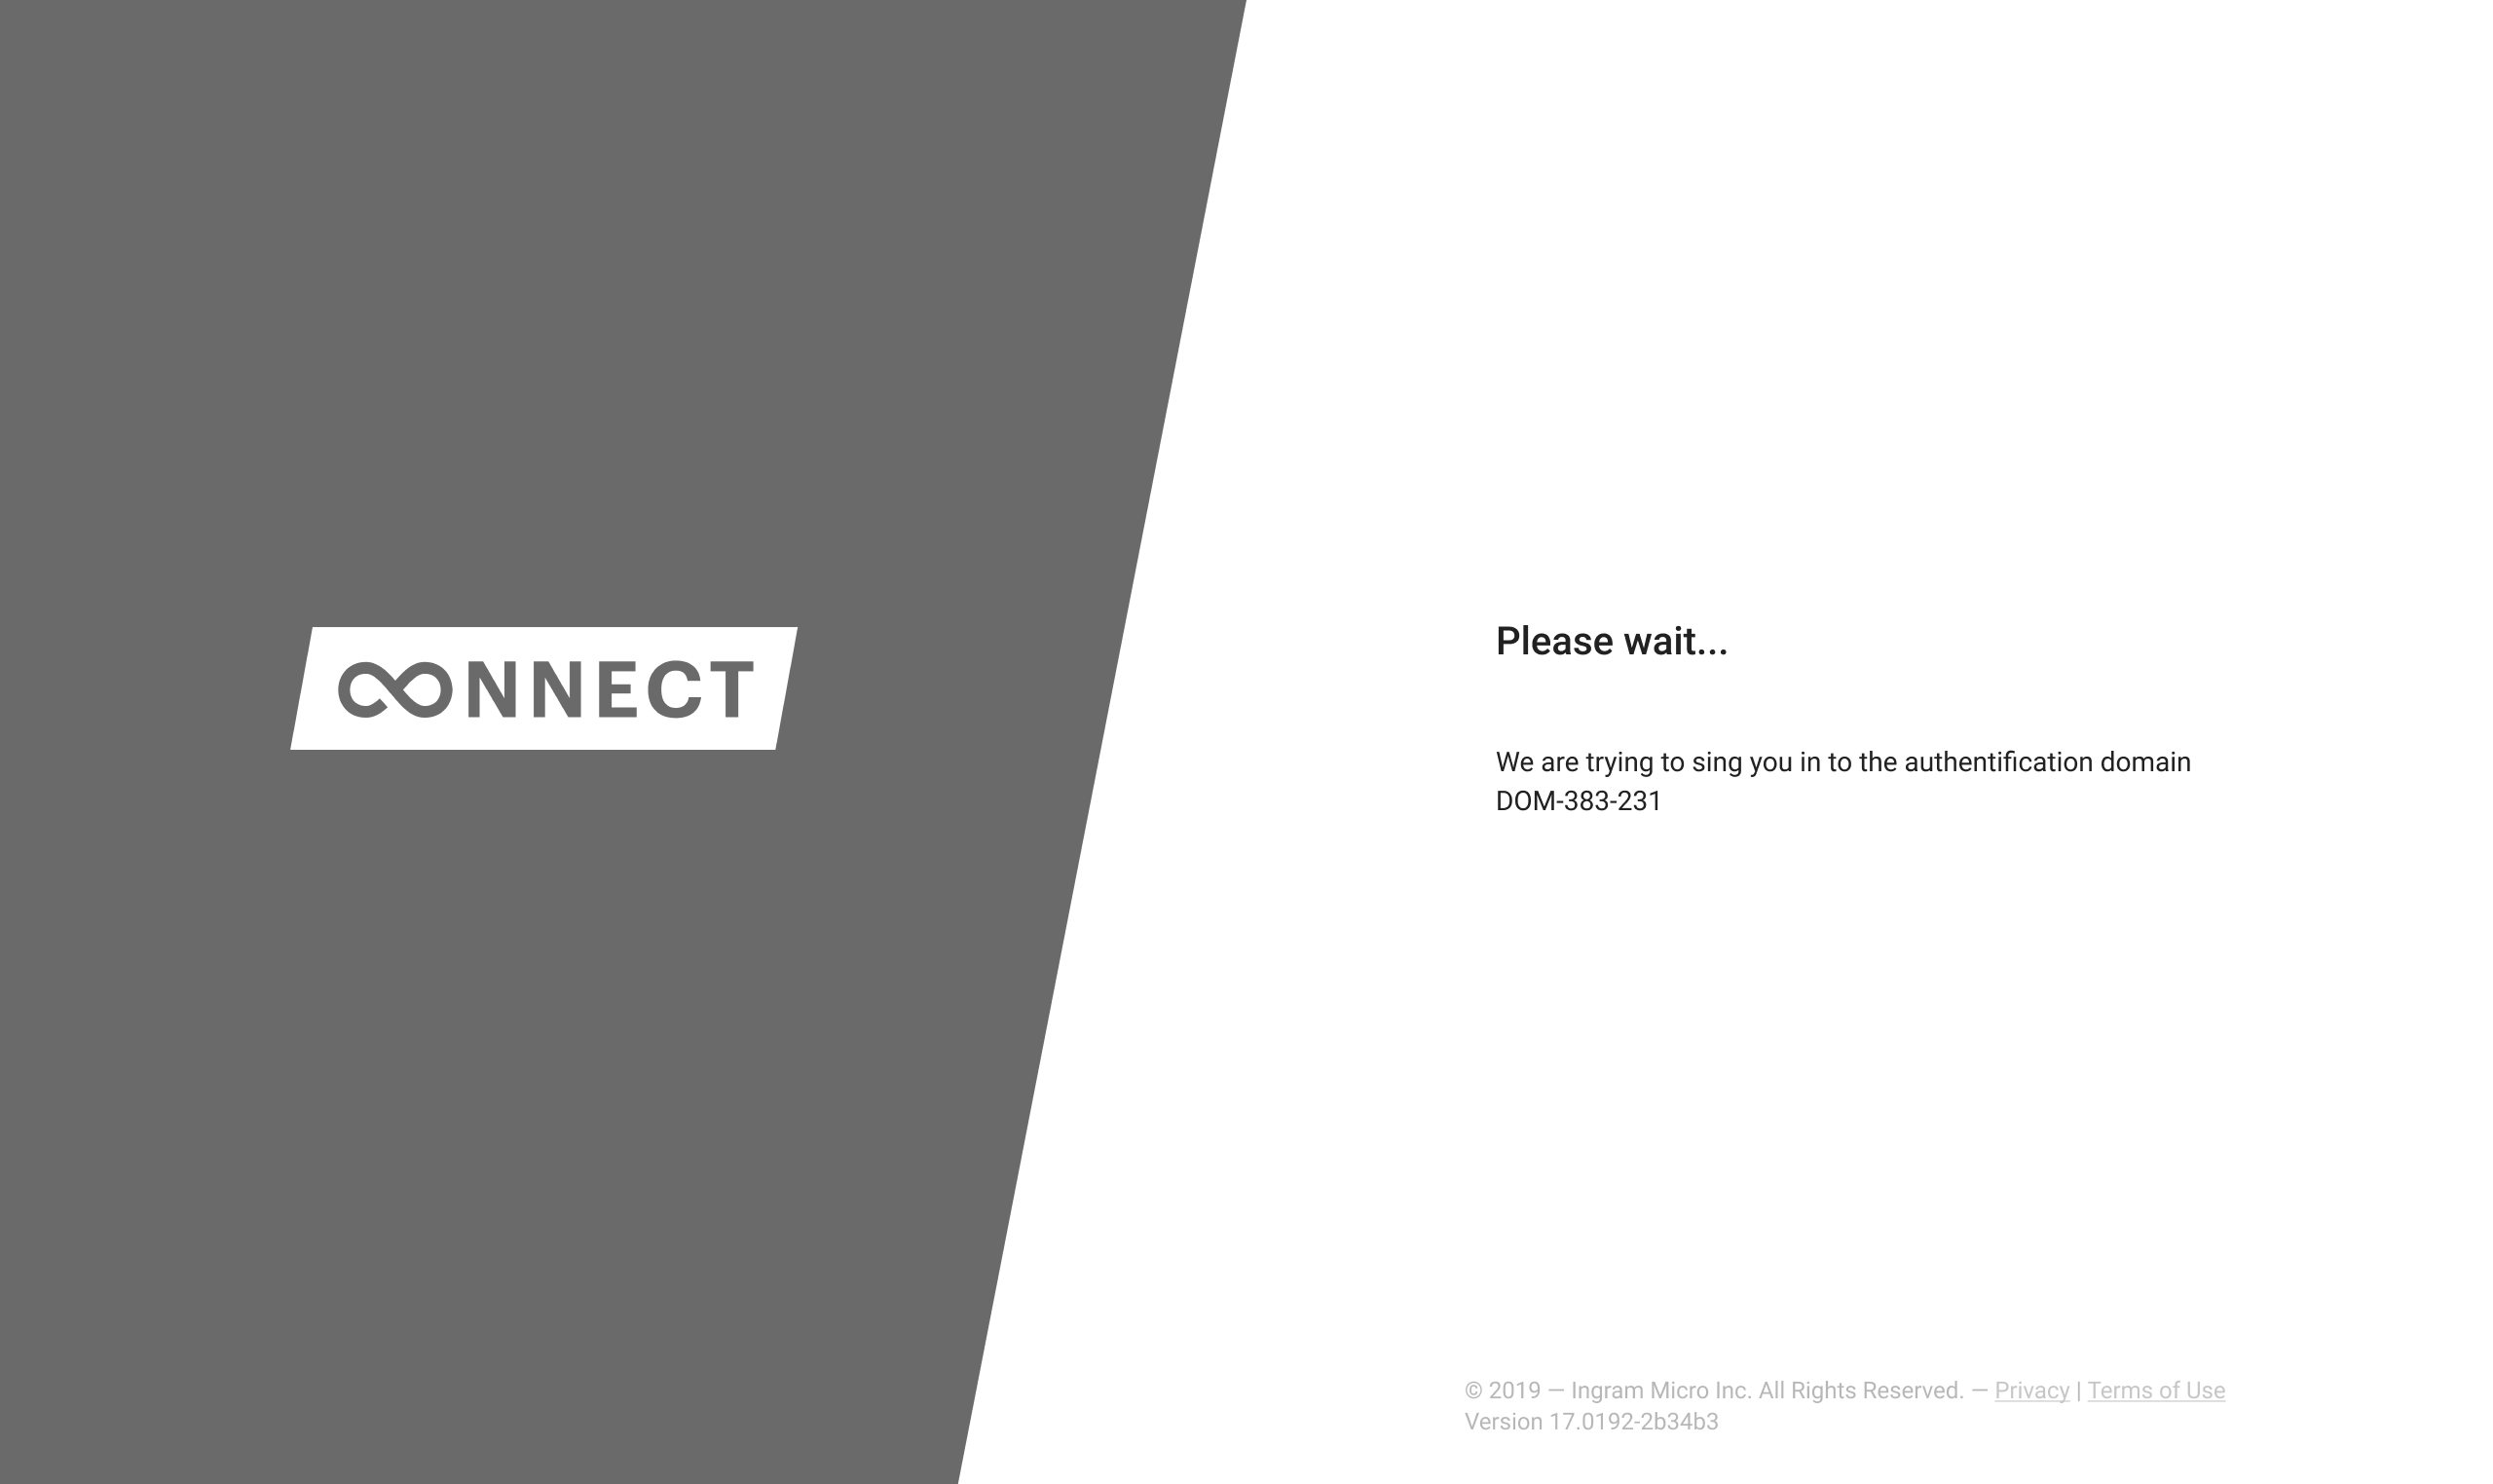
Finally, use your created user’s credentials to sign into your Connect domain.
In case your single-sign on authorization system is configured correctly, the Connect platform will allow you to sign into your domain by using your specified credentials.