There are three primary Portal types that are implemented by Connect:
Connect Portals are implemented using the same UI/UX framework. However, note that Connect supports end-to-end branding of its contents like color schema, domain names, logos, etc.
Portal layout consists of three primary areas:
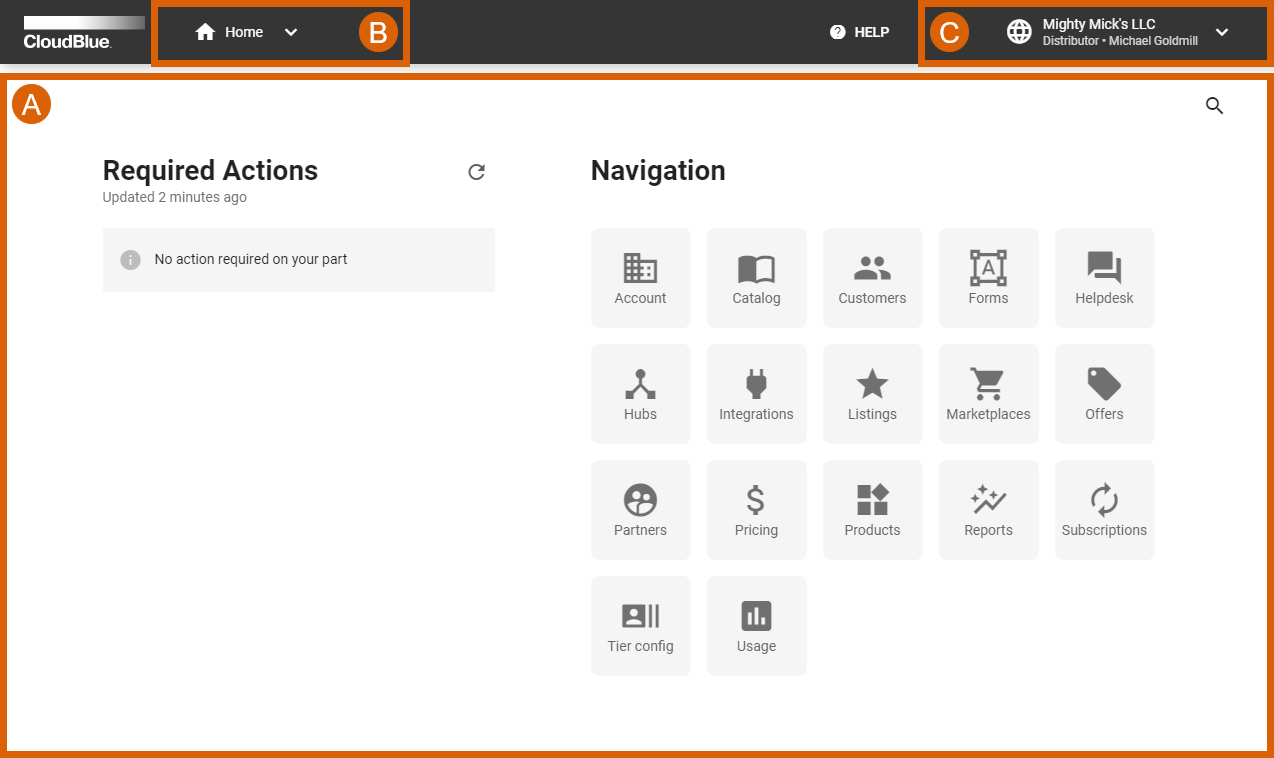
Ⓐ. Main work area: This is where most of the operations are performed. The actual layout depends on the navigation context.
Ⓑ. Navigation menu: This menu is used to switch between different modules of the Connect Portal.
Ⓒ. Account selector & User profile: A navigation element that enables users to access account selection menu and user profile settings.
Main navigation menu allows users to quickly switch between different sections within your Connect Portal. These sections are called modules on the CloudBlue Connect platform and they represent components that provide various functionalities and features. Refer to the Modules article for more information on available Connect modules.
Open the navigation menu to access your selected module, view your recently visited modules and tabs within modules. Pin required modules or tabs by using the corresponding pin icon:
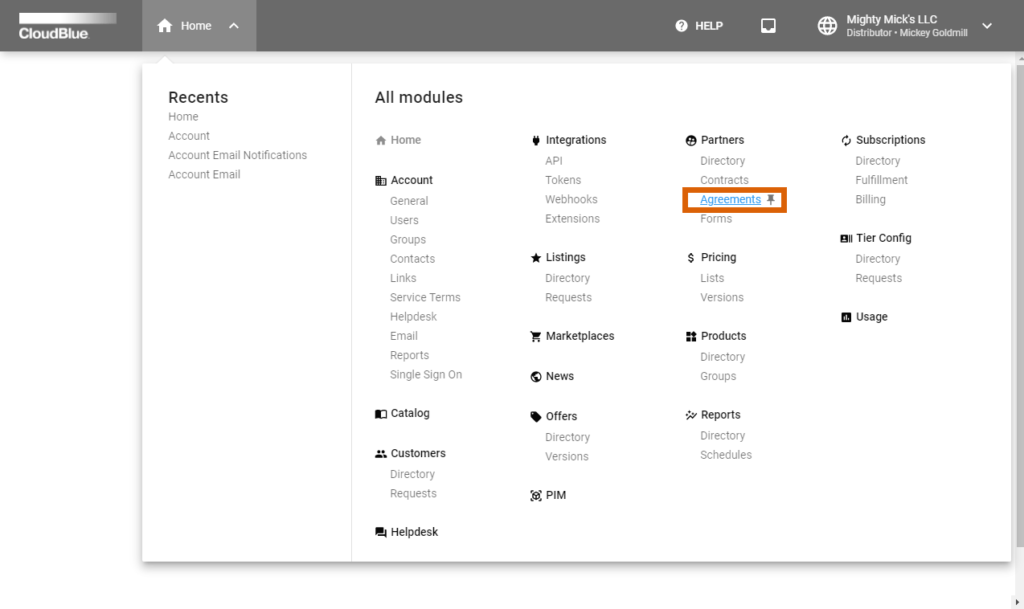

Once your module or tab is pinned successfully, the system will display your pinned module or tab in the Favorites field. The system also enables you to unpin your module or tab and remove them from the Favorites field by clicking on the pin icon once again.
This navigation element allows users to access their profile information and switch between multiple accounts in case they belong to more than one:
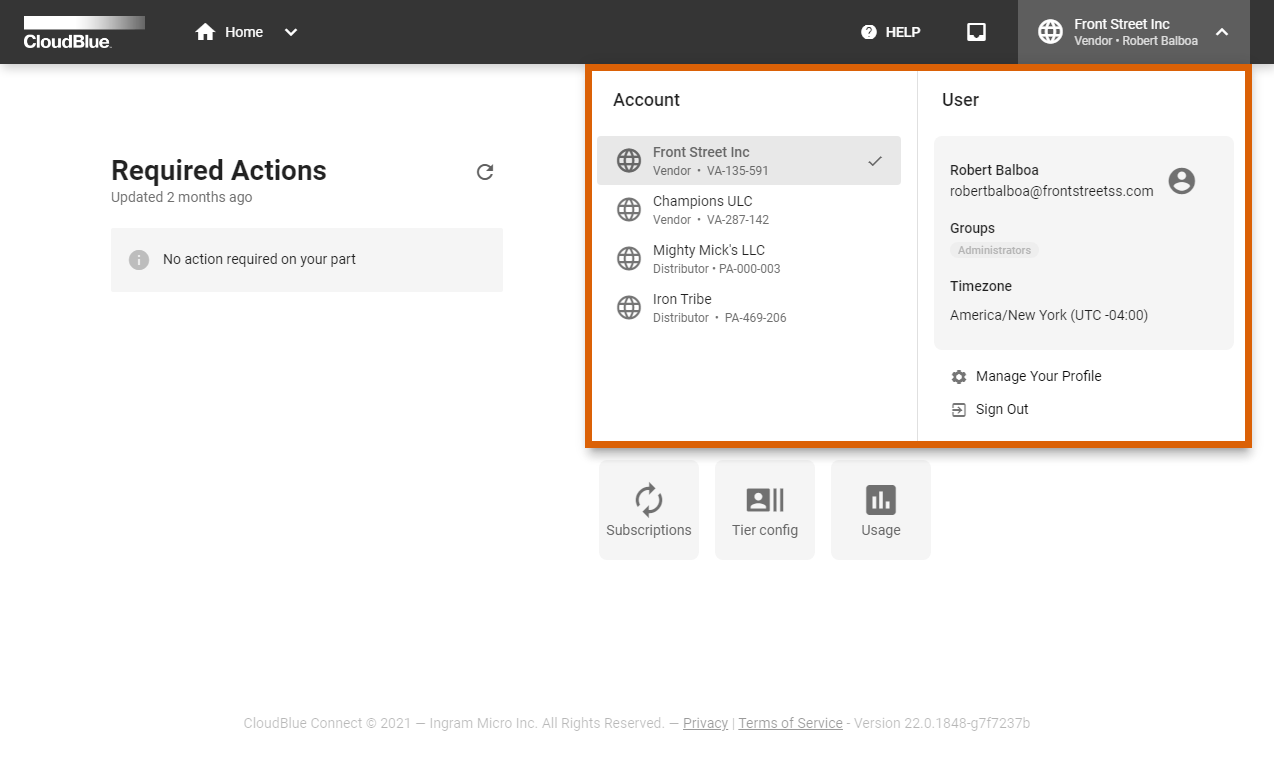
Account Selector displays your available accounts on the CloudBlue Connect platform. Note that the system marks your current selected account with a check mark.
User Profile data includes your specified name, email address, your groups, image, and time-zone. The system also allows managing your profile or signing out by using the corresponding buttons on the interface.
The system also helps Connect users to keep track of required actions on the platform from any module. Click on the corresponding icon on the user interface to display a list of your required actions:
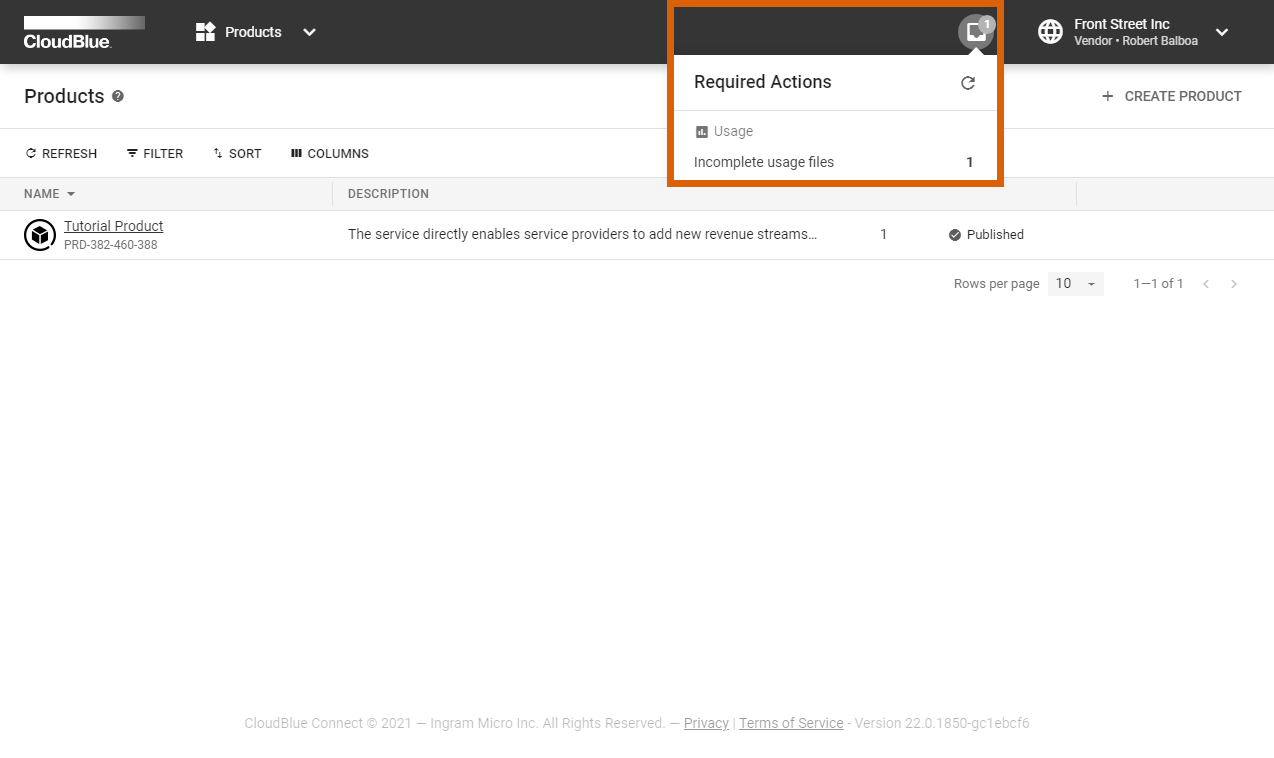
Thereafter, select your required action from the list to access the module and object on the platform that require your attention. Note that the system also displays your required actions on the Home screen.
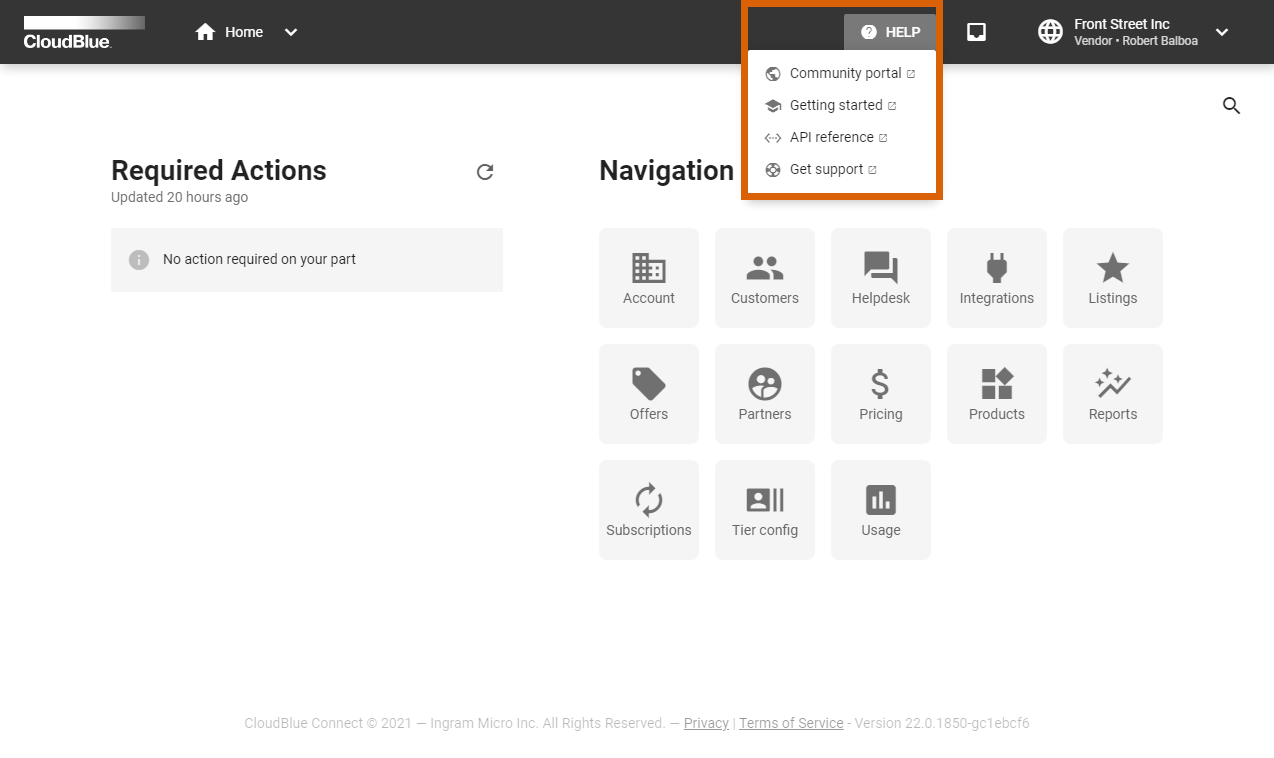
The system also enables users to quickly access the links to the Connect Community page, Getting Started articles and API reference. Furthermore, you can a new Helpdesk case by selecting the Get support option.
Access the Contact Support article to learn how to create a new case. Note that Connect users can also report an issue or submit a request to their partners as described in the Helpdesk module documentation.