The CloudBlue Connect Helpdesk module allows utilizing helpdesk ticketing system and establishing communication model between Partners to resolve issues or incidents. Although the Connect platform provides an intuitive and easy-to-use interface, Partners might not always monitor their corresponding portals to check for case updates and new messages.
Thereby, the CloudBlue Connect platform offers a range of integration possibilities with third-party messaging systems (e.g., messengers or email services). By integrating the helpdesk module to such systems, Connect users can get notifications about Case updates and directly receive new messages that were generated within a Case as schematically illustrated below:

The Helpdesk module integrations can be implemented by using:
The following examples showcase how to integrate the Helpdesk module to the aforementioned third-party messaging systems by using the CloudBlue Connect application on the Zapier platform. Therefore, Connect users can receive:
Make sure that the Connect application is included within the My Apps section of the Zapier platform. In case this application is not included, create a new Zapier token by accessing the Integrations module on Connect. Thereafter, use your API Key/Handle to include the Connect application on Zapier.
Refer to the Extensions documentation to learn more about the Zapier platform.
This integration example demonstrates how to keep notifying corresponding agents about new generated Cases via emails. The Microsoft Outlook email delivery service will be selected for this integration. Create a new Zap on the Zapier platform and follow the guidelines below to create an email notification mechanism for new generated Cases.
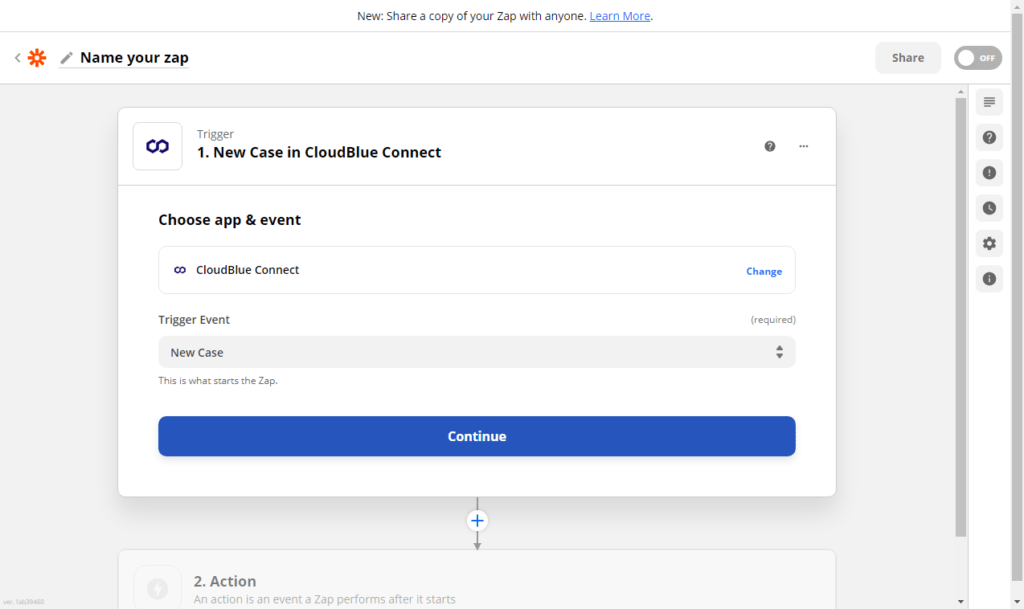
1. Fill out the app and event form as follows:
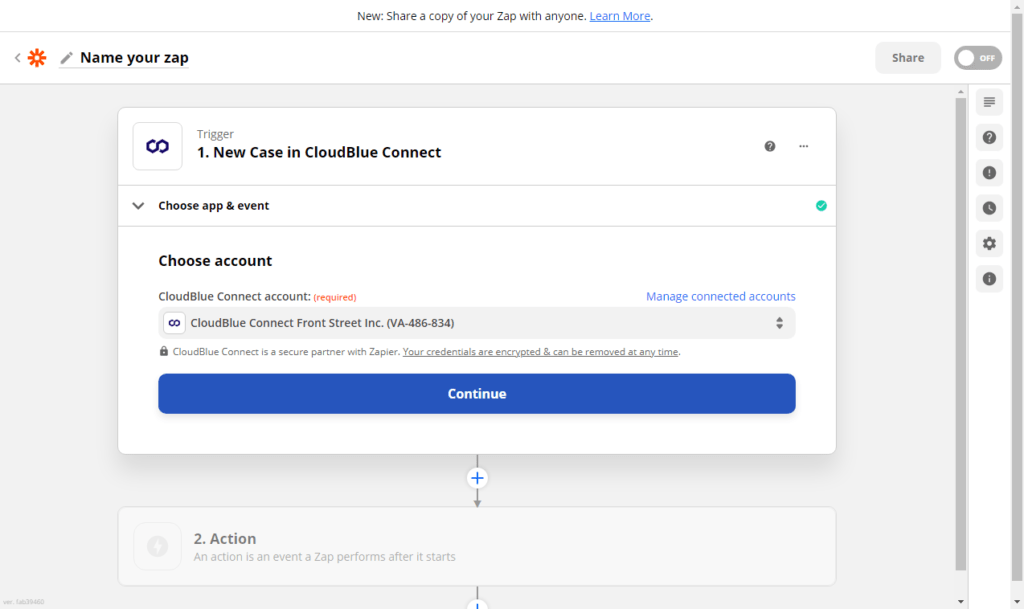
2. Next, the system asks you to choose your Connect account. Ensure that a correct account is selected and click Continue.
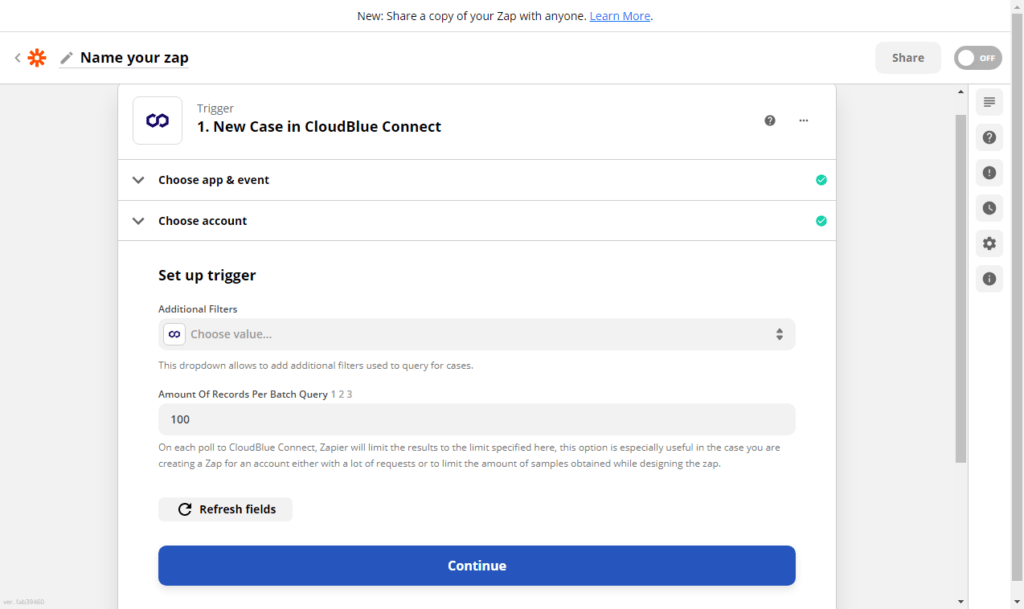
3. System asks you to specufy additional filters. Use these filters at your discretion to create a subset of cases.
Note that you can also test your created trigger after specifying your filters.
Select a messaging system and specify required actions within the following forms. For this integration example, the MS Outlook email delivery service will be selected and configured.
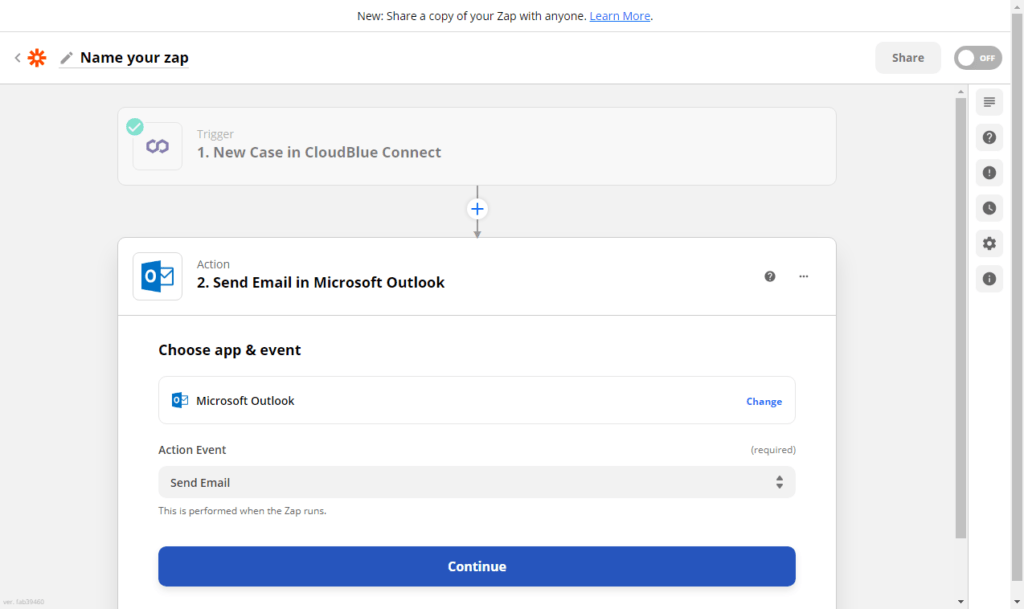
1. Fill out your app and event as follows:
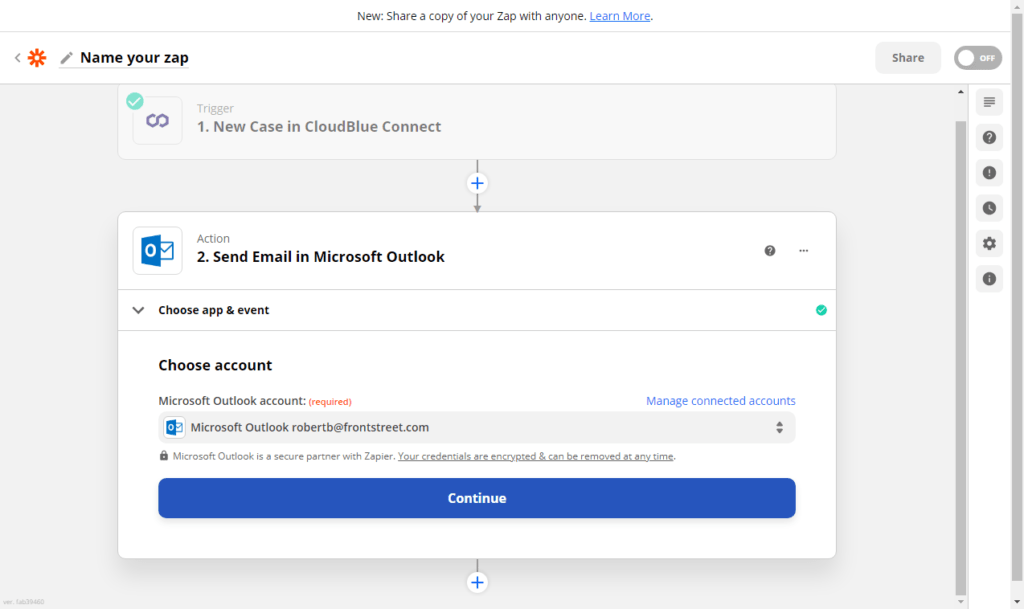
2. The system asks you to choose your application account. Make sure that a correct account is selected and click Continue.
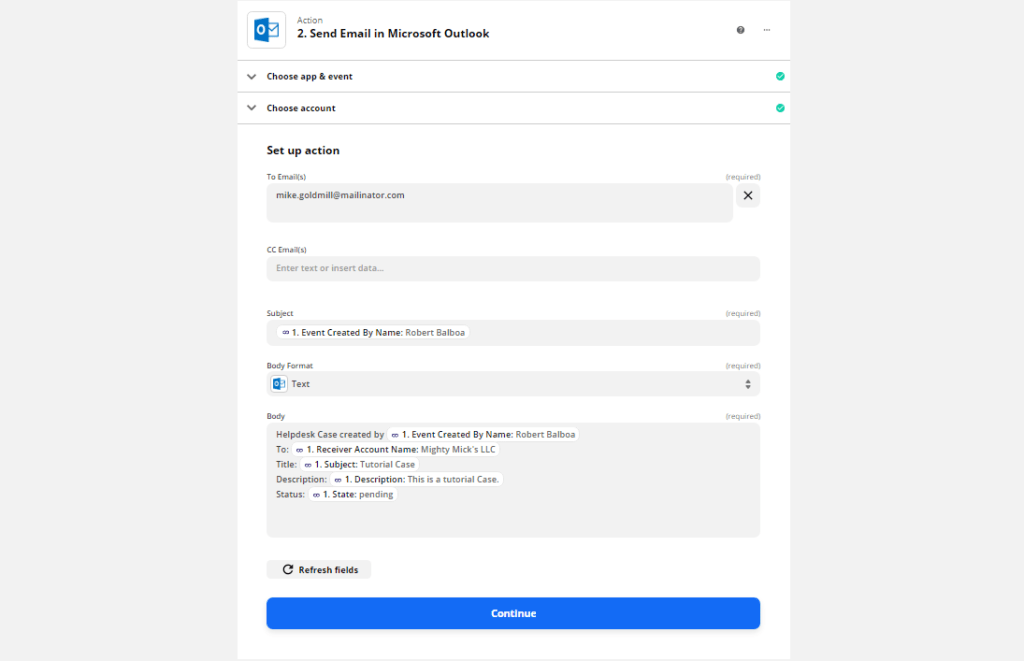
3. Specify required and additional fields within the Set up action form. Insert required data by using corresponding tags from the list. For example, use the Event Created by Name tag to place a Case creator name, use the Subject tag to place your Case name, and so on.
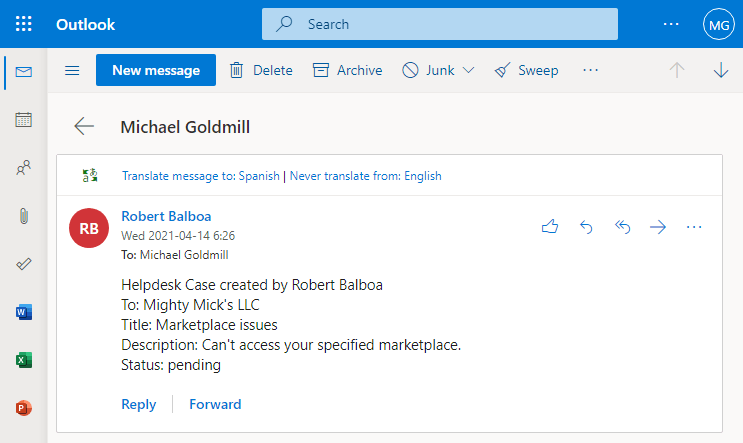
4. Test your specified action to finalize your Zap creation. As a result, an email should be successfully sent to your specified email address.
Therefore, the helpdesk module will be integrated to your selected email delivery service. Once a new Case is generated, your specified recipients receive an email notification.
The following example demonstrate how to integrate the helpdesk module to instant message systems and receive comments via messengers. Before configuring triggers and actions on the Zapier platform, it is necessary to create a messenger bot. The Telegram instant messaging service will be selected for this integration example. Use the guidelines below to create a Telegram bot and successfully configure the Helpdesk module integration on Zapier.
Create a new bot on the Telegram messaging service as follows:
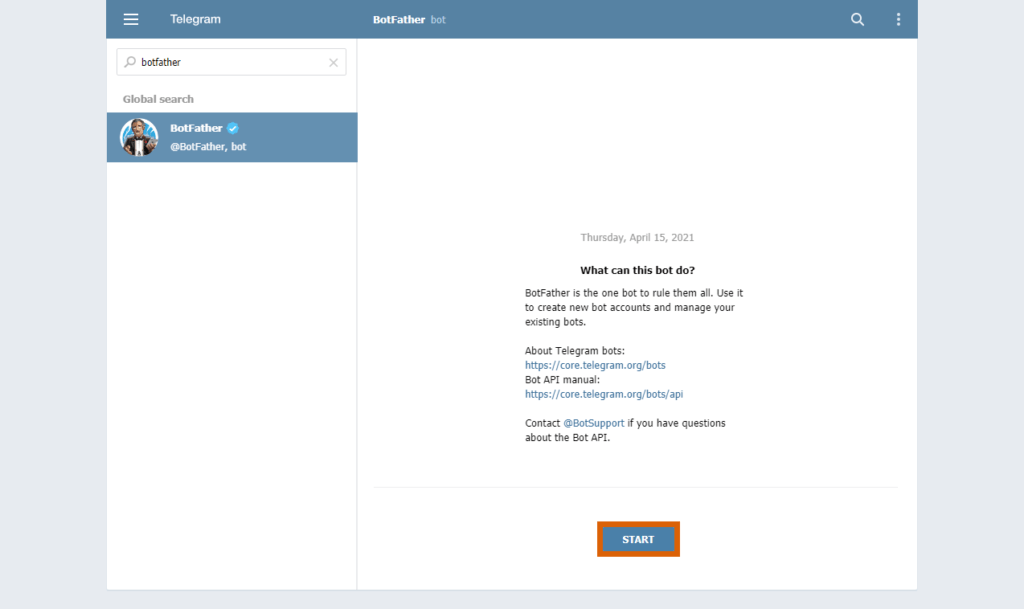
1. Access @BotFather from your created Telegram account.
2. Click the Start button to initiate your bot creation.
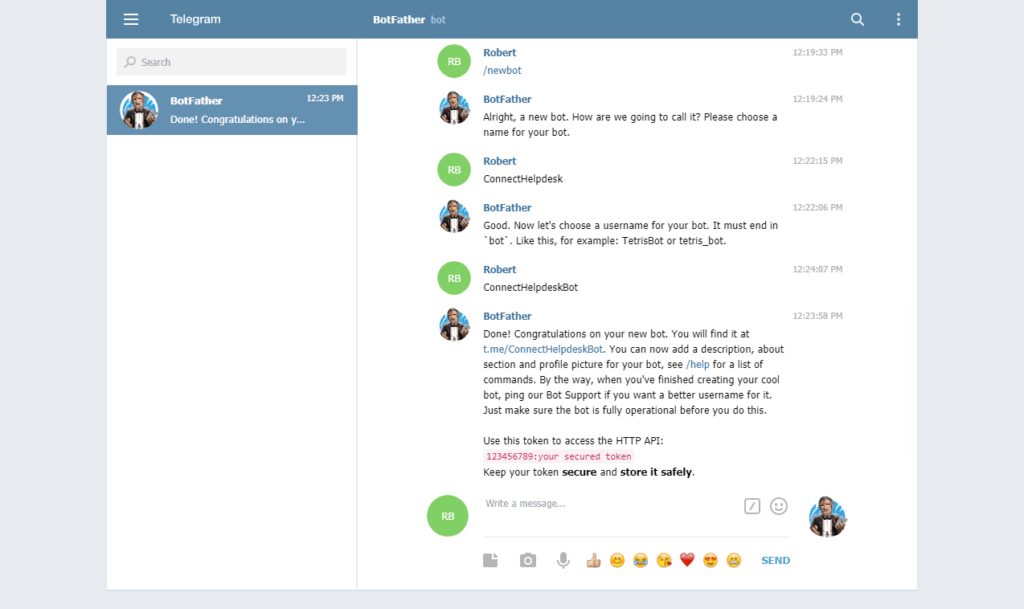
3. Use the /newbot command to create your new bot:
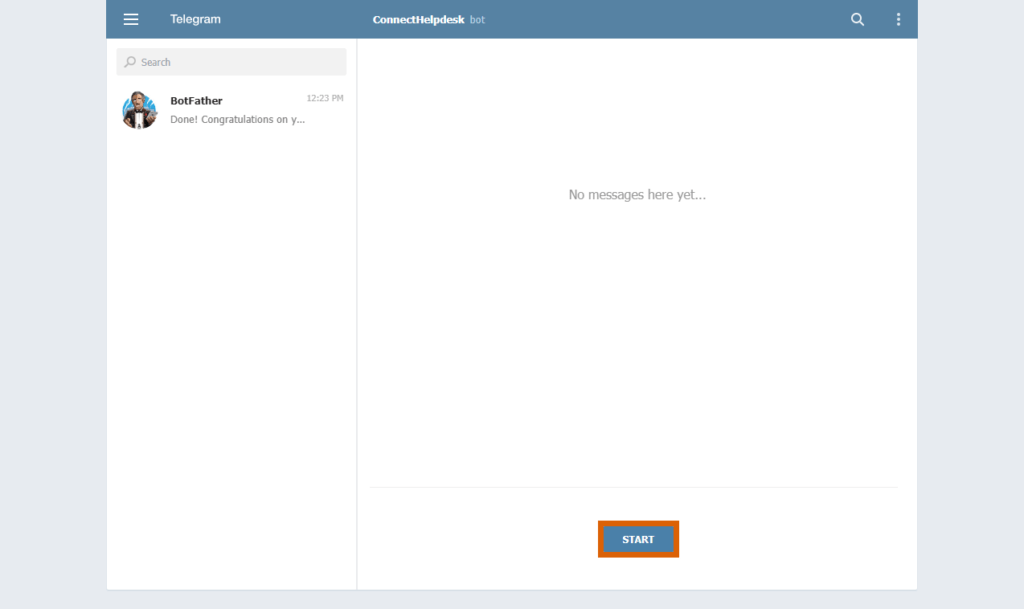
4. When @BotFather provides a link to your bot, launch your bot by accessing the provided link and clicking the Start button.
Therefore, your bot will be successfully created and launched. Note that @BotFather also sends an access token (API Key) of your created bot. Since this token is crucial for the following operations, make sure to copy this token and keep it secured.
Configure your created Telegram bot so that it can provide generated Case comments to your selected recipients. Furthermore, it is necessary to create a group and add there required recipients. Follow the steps below to configure your created bot.
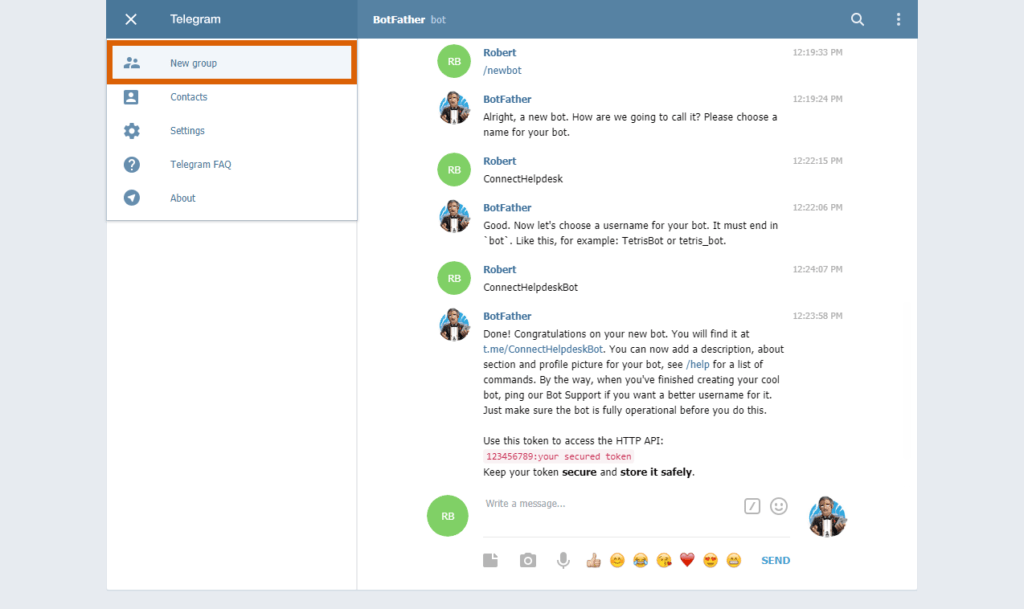
1. Create a group on Telegram. Add your bot and required recipients as group members.
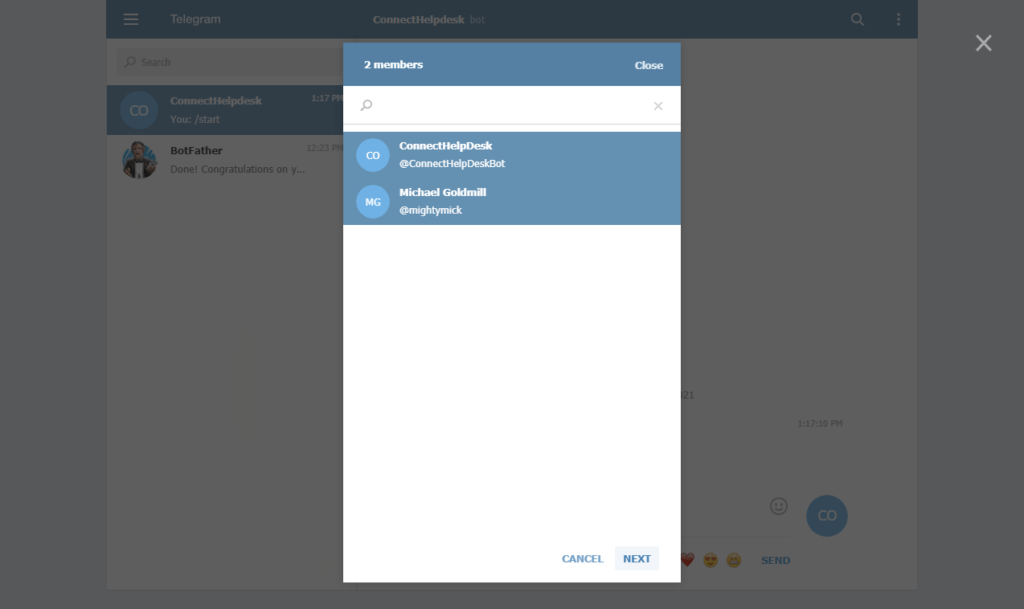
2. Access your telegram chat ID via the following GET request:
https://api.telegram.org/bot<api_key>/getUpdatesUse your bot API key that is received from @BotFather.
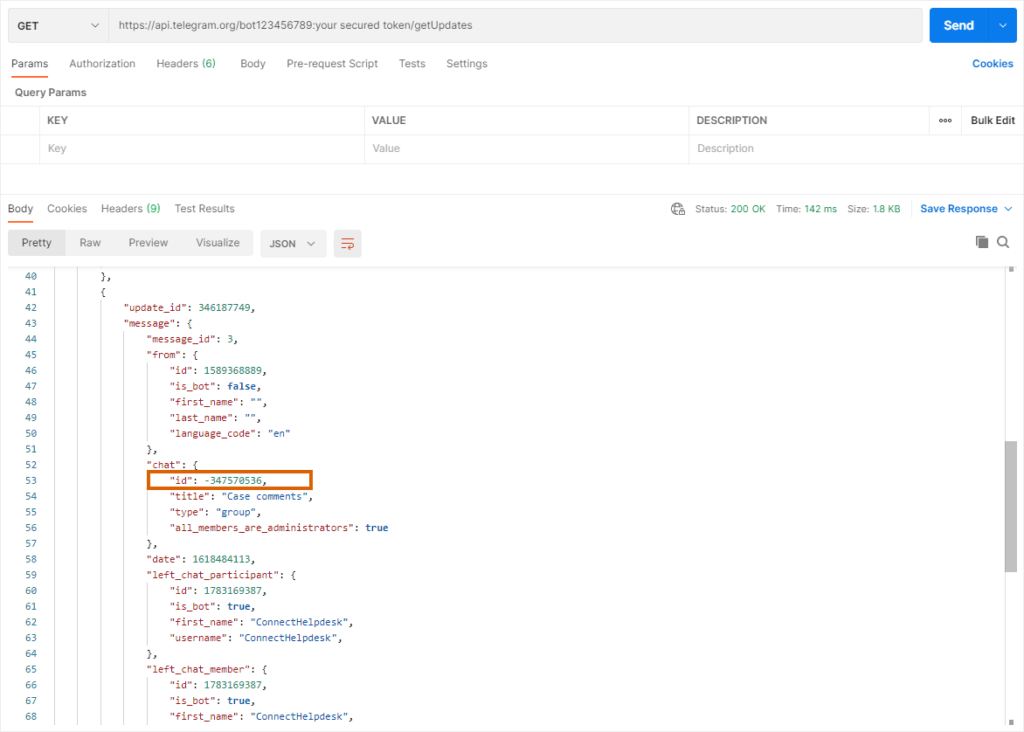
It is possible to use a web browser for this call. However, it is recommended to use Postman or other REST Clients to locate your chat ID faster. Make sure to copy your chat ID and keep it secured.
Create a new Zap on the Zapier platform and integrate the Helpdesk module to the Telegram message system. Therefore, your created bot will provide new Case comments to your created chat and added recipients. Follow guidelines below to successfully integrate the Helpdesk module to Telegram.
Configure your Zap trigger as follows:
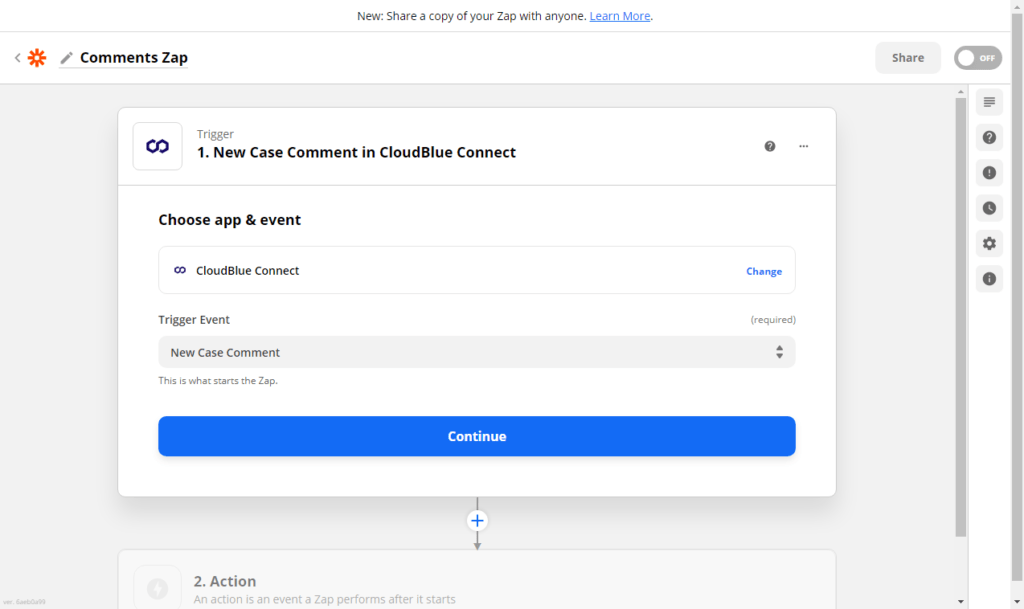
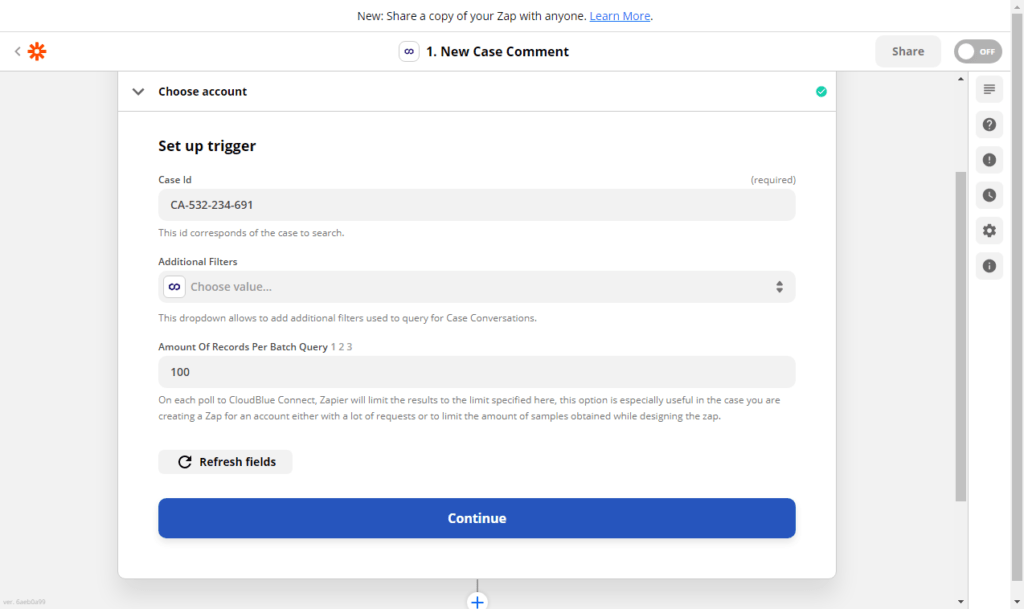
1. Fill out app and event trigger form:
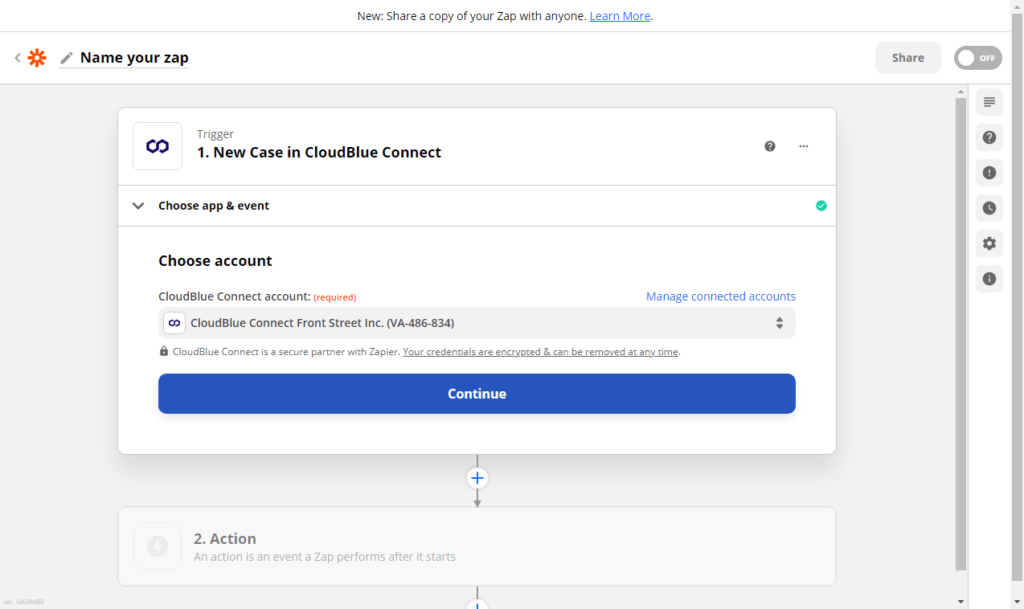
2. The system asks you to specify your Connect account. Ensure that a correct account is selected and click Continue.
3. Paste your Connect Case ID to the Set up trigger form. Click Continue to test out your trigger and proceed to the Action configuration.
Configure your Zap action as follows:
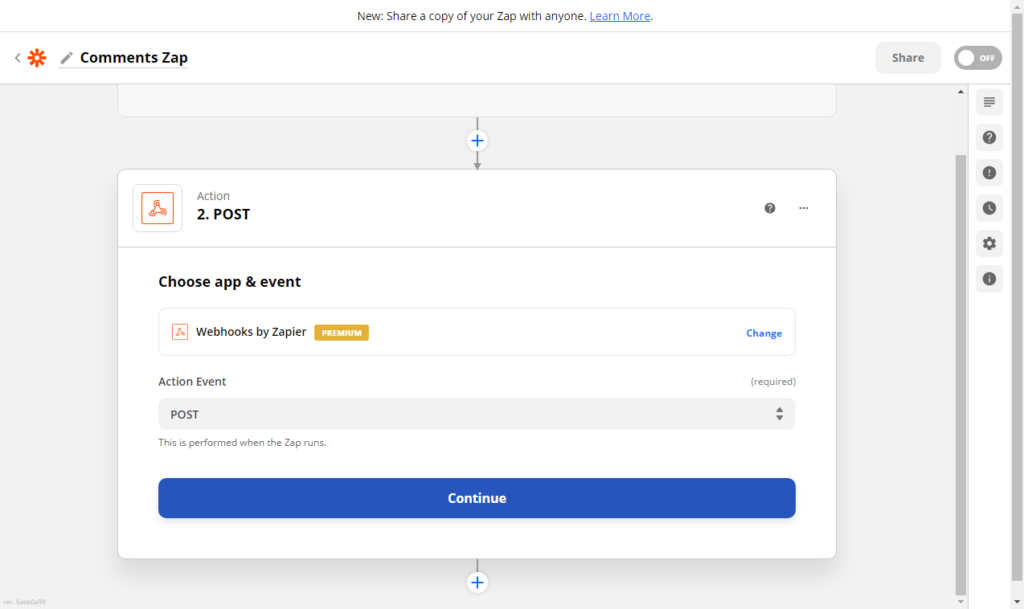
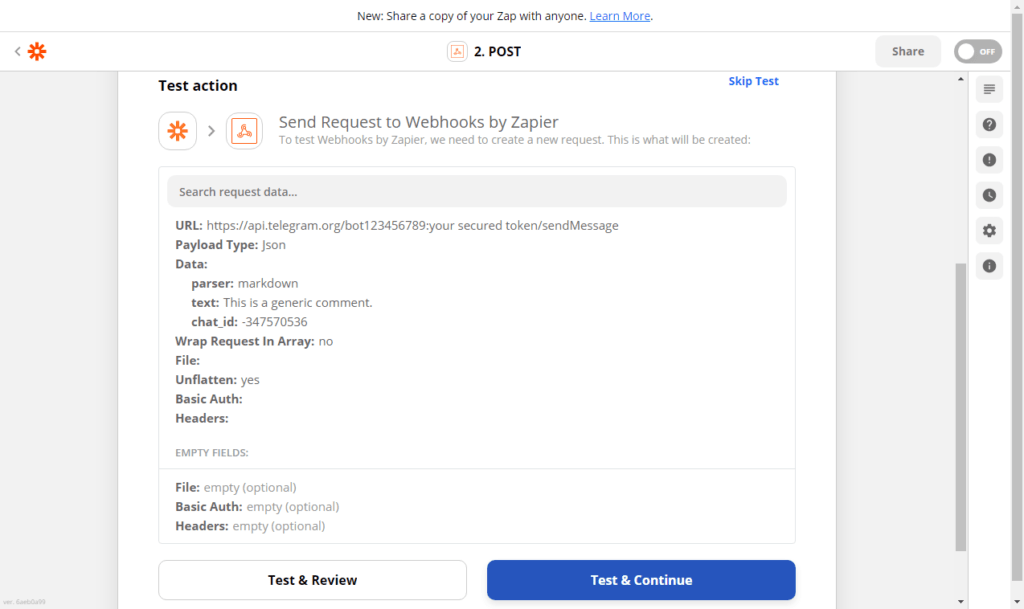
1. Fill out app and event action form:
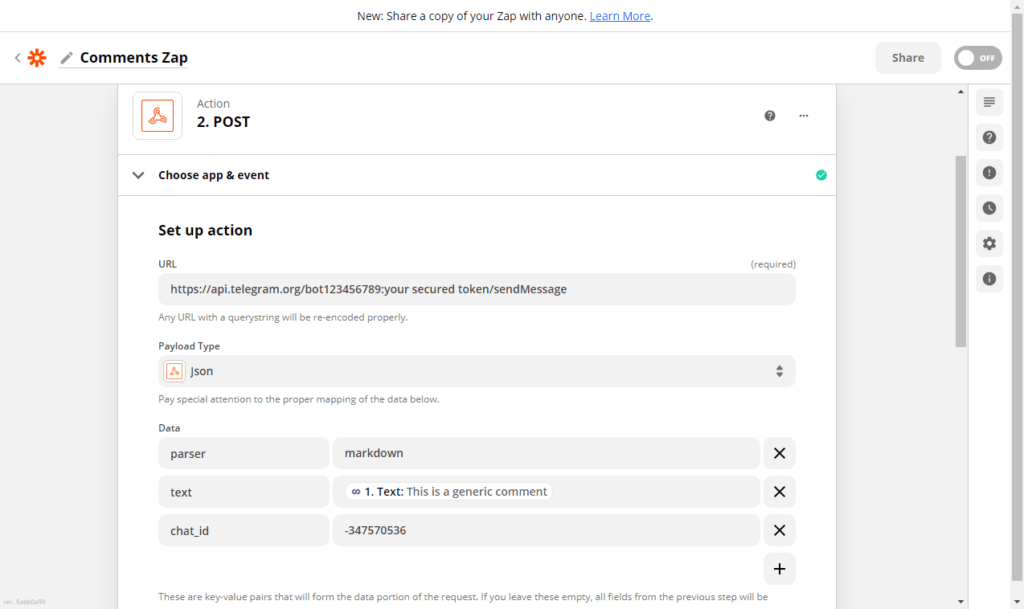
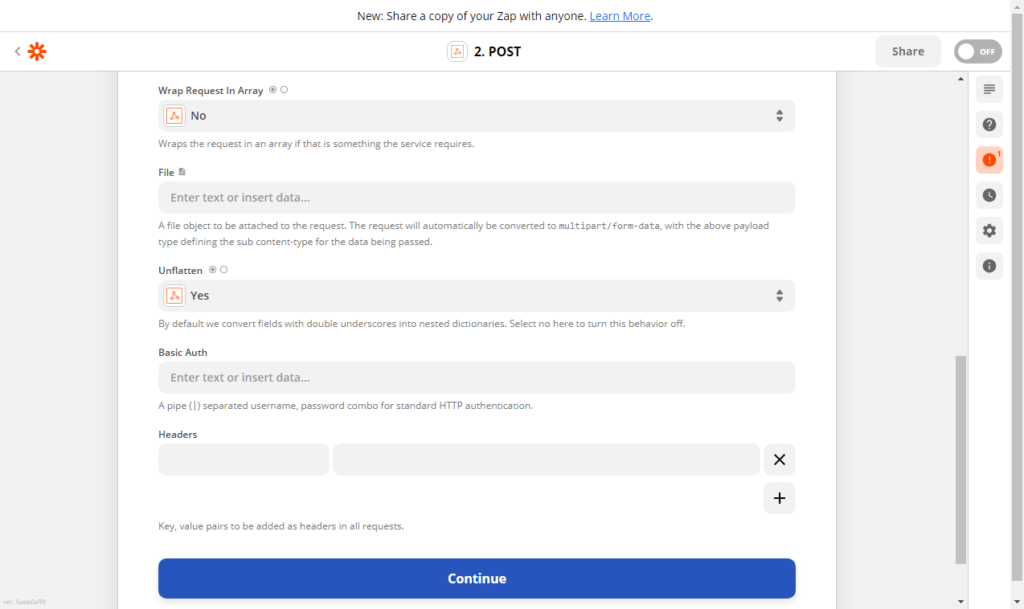
2. Set up your Zap action via the following form:
https://api.telegram.org/bot<api_key>/sendMessage: Select JSON payload type.markdown3. Test your specified action to finalize your Zap creation. As a result, your created bot should send a Case comment to your Telegram group.
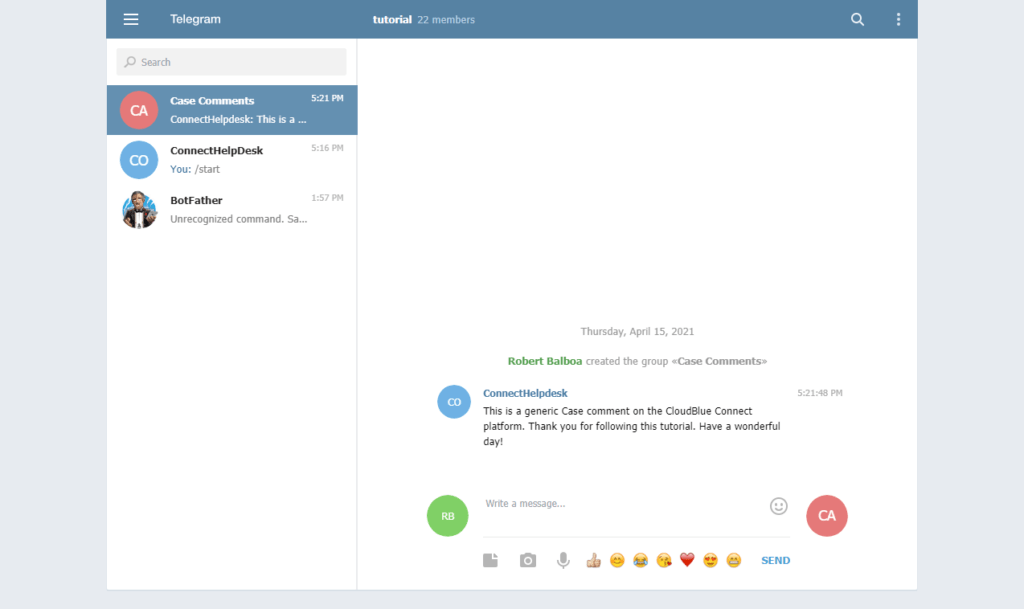
Therefore, the Helpdesk module integration to an instant message service will be successfully completed. Your created bot will provide your Telegram group with new generated Case comments.
