This walks you through the shortest path from nothing to a working connection: turning on MCP access, creating a token, and getting your agent to list its first tools.
MCP access in CloudBlue Connect® is off by default for every account. You (or an admin on your account) need to explicitly grant it before any agent can connect. You’ll need two things granted to the token you create:
If you don’t see an MCP option within your account, it most likely doesn’t have MCP access enabled yet — reach out to your Connect account team.
In the CloudBlue Connect® portal, go to Integrations → MCP Settings. This page shows all your relevant MCP information and lets you create a token scoped for MCP access.
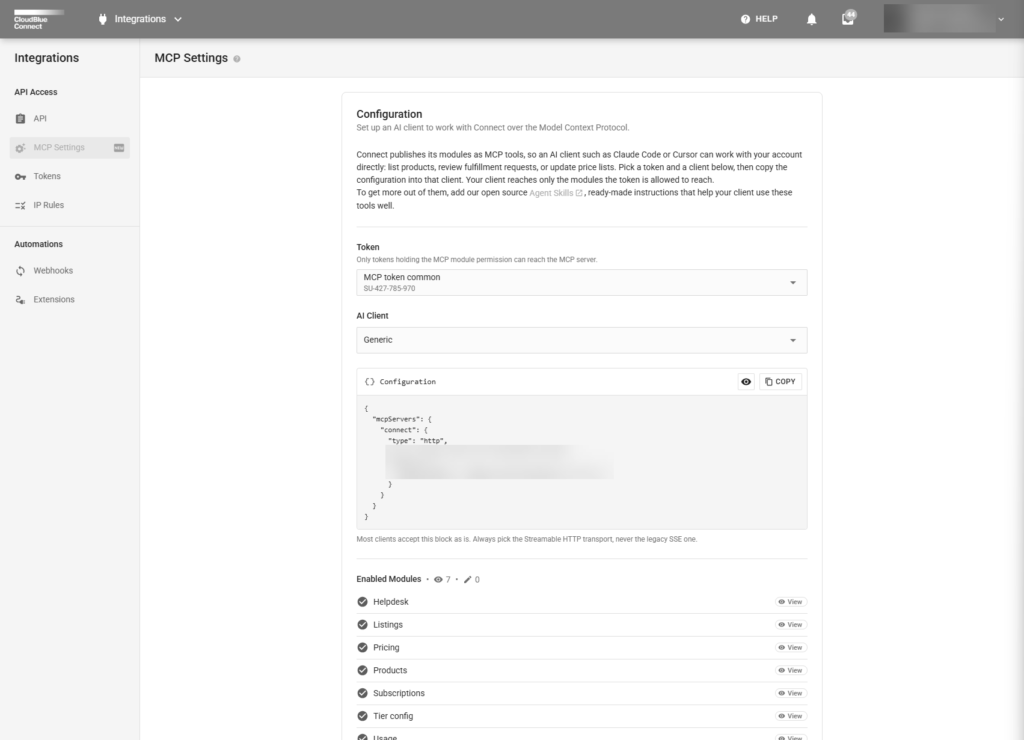
Copy the key now. You will need it in order to configure the connection from your client to CloudBlue Connect® MCP.
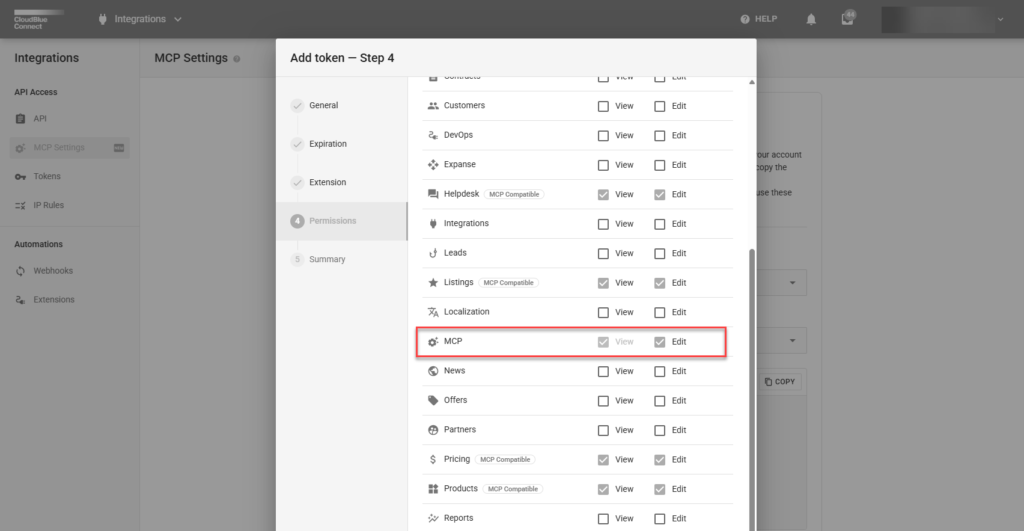
Once you’ve selected an AI Client (Claude Code, VS Code, Cursor, Codex, Zed, Cline, opencode, pi, Antigravity, or Generic), the MCP Settings page renders a ready-to-paste block for your token. It looks similar to this (depending on your AI Client):
{
  "mcpServers": {
    "cloudblue-connect": {
      "type": "http",
      "url": "https://api.connect.cloudblue.com/public/v1/mcp/",
      "headers": { "Authorization": "ApiKey <your-token>" }
    }
  }
}
Every CloudBlue Connect® MCP tool (across every module your token can reach) is served from this single address. You don’t need a different URL per module or per service. Copy and paste this configuration into a text editor and name the JSON file to something that can be referenced later (e.g. connect_mcp_config.json)
Where this block goes depends on your client. As one example, for Claude Code:
connect_mcp_config.json, replacing <your-token> with the key you copied in Step 2.Ask your agent something simple that just exercises discovery, for example:
“What Connect tools do you have access to?”
Your agent should list the tools available for the modules your token was granted—and nothing else. If the list is empty, or missing a module you expected, double check Step 2: the token needs both the MCP module and that specific business module.
Now ask for something your token can actually do. If you granted Helpdesk access, for example:
“List my open Helpdesk cases with High priority.”
If that comes back with results, you’re connected and working.
api.connect.cloudblue.com.