What this covers: Getting a catalog file into the Onboarding Assistant and understanding the AI-generated mapping plan it produces. Please review the Preparing the Catalog documentation if you have not yet.
Steps:
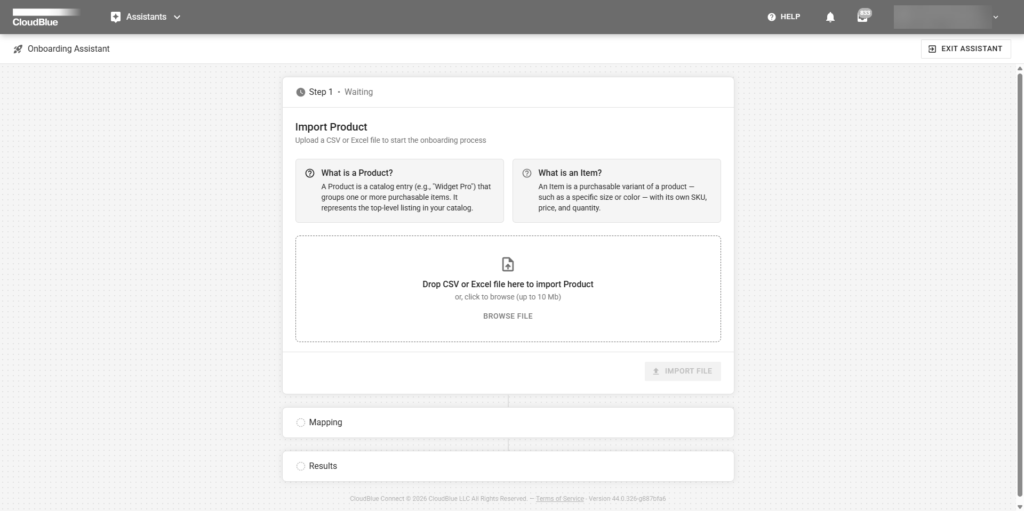
From the Onboarding Assistant home screen, select New Run and choose your catalog file (Excel or CSV).
The Assistant parses the file and displays a preview of the detected columns and sample rows so you can confirm the right file was uploaded.
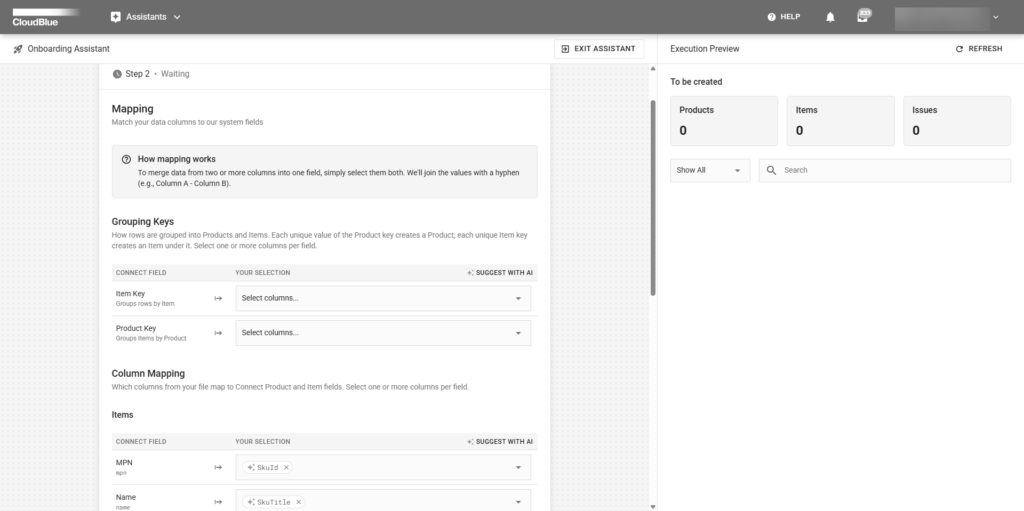
The Assistant uses AI (indicated by a orange stars label) to infer how each column in your file corresponds to a CloudBlue Connect field (e.g., matching a column named “Item SKU” to the platform’s Vendor Part Number field).
Columns the Assistant couldn’t confidently map will not have suggestion and will rely on the user to select the appropriate mapping column.
Review the mapping plan summary before moving to the detailed review screen (covered in the next walkthrough).
Tips:
Column headers that closely match Connect field names (e.g., “SKU,” “Product Name,” “Price”) map with higher confidence than abbreviated or custom labels.
If most columns come back as unmapped, it’s usually faster to adjust your source file’s headers and re-upload than to correct each mapping manually.
2. Reviewing, Adjusting, and Submitting Mappings
What this covers: How to check the Assistant’s proposed mappings, fix incorrect ones, and handle columns it couldn’t map on its own.
Steps:
Open the Mapping Review screen (Step 2), which lists every source column alongside its proposed Connect field.
For each row, you can:
Approve and leave the suggested mapping as-is.
Change the mapping by selecting a different target field from a dropdown of valid Connect fields.
Exclude the column if it shouldn’t be imported at all (e.g., an internal notes column).
For Unmapped columns, you must manually assign a target field or explicitly exclude the column — the Assistant will not guess on your behalf.
Required fields that have no mapping yet are highlighted so they’re easy to spot before you proceed.
Once every column is either mapped or explicitly excluded, and all required fields are covered, click Submit Mapping.
Tips:
Nothing is written to your catalog at this stage — you can leave and resume the review later without losing your changes.
3. After Mapping Submission: Product & Item Creation
What this covers: What the Assistant actually creates once validation passes, and what to do next.
Steps:
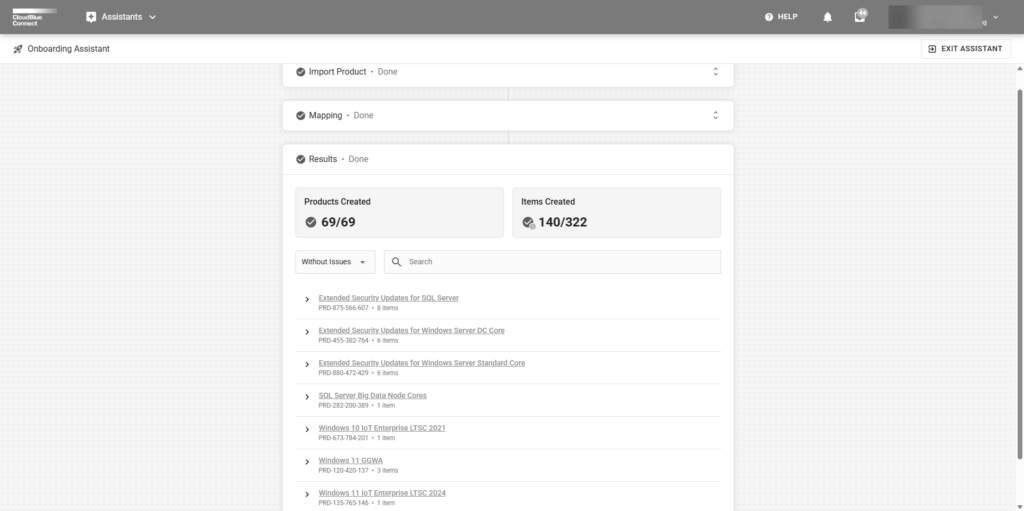
After clicking Submit Mapping, the Assistant creates the corresponding Products and Items in Connect in draft status, not published/live.
The completed run — including the original mapping snapshot, validation report, and creation outcomes — is saved within the Assistants module for future reference or audit purposes.
Tips:
Because records land in draft status, it’s safe to run the Assistant on a subset of your catalog first as a test before importing the full file.
Keep the results report; it’s the fastest way to answer “did this SKU get imported and what did it map to” without digging back through the mapping screen.