The Onboarding Assistant guides you through turning a catalog spreadsheet into live Products and Items in CloudBlue Connect®. This walkthrough follows the five stages of the wizard: Source → Mapping → Validation → Create → Results — so you know exactly what to expect and what to check at each step.
Before you begin: Have your catalog file ready as a single Excel or CSV file. See Preparing The Catalog File for formatting guidance that will make the AI’s mapping more accurate on the first pass.
.xlsx, .xls, and .csv.At this point the Assistant reads your file and begins generating a mapping plan. This typically takes a few moments — you don’t need to keep the tab open; the run continues in the background and you can return to it from Run History.
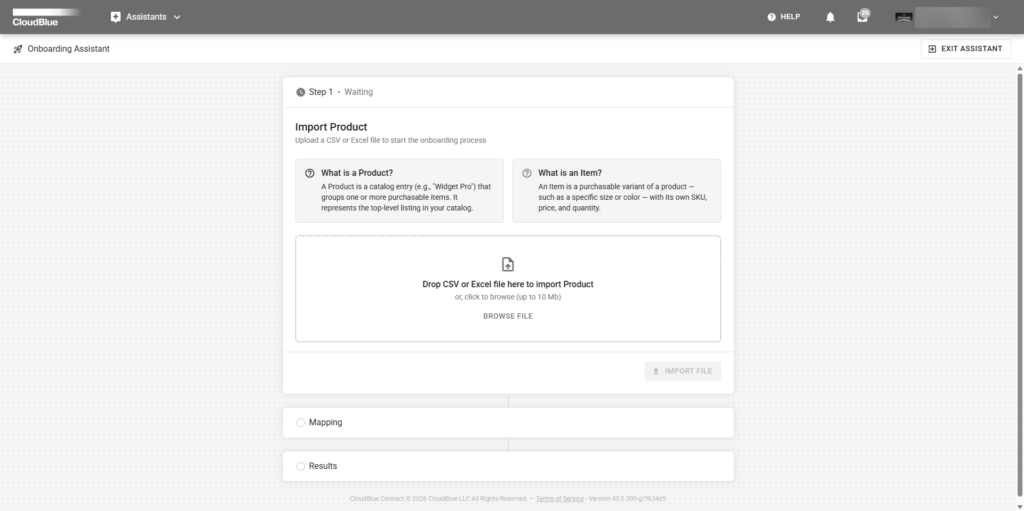
Note: Starting a run does not create anything in your catalog yet. Nothing is written to CloudBlue Connect® until you explicitly confirm in the Create step.
Once the plan is ready, you’ll land on the Mapping screen. This is the most important step to review carefully, since it determines how your spreadsheet rows become Products and Items.
What you’ll see:
SkuTitle mapped to the Item’s name field).What to do:
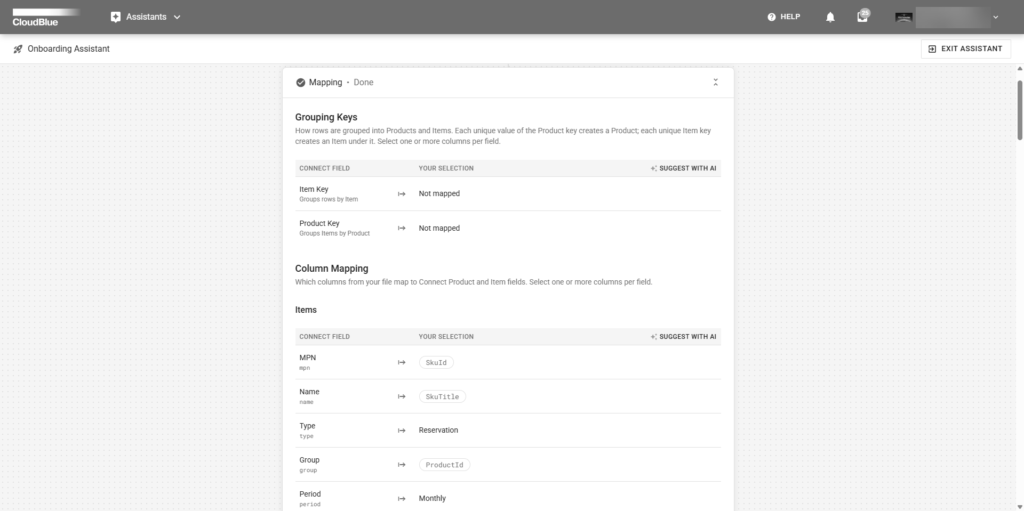
Tip: You can go back and adjust mappings later if validation surfaces an issue that traces back to a mapping choice.
The Assistant checks your mapped data against Connect’s requirements and flags anything that would prevent a successful Product or Item creation.
Common validation categories:
| Category | What it means | What to do |
|---|---|---|
| Missing required data | A required field has no value for one or more rows | Fill in the missing values in your source file and re-upload, or map a different column |
| Type mismatch | A field expects a specific format (for example, a number or a fixed set of values) and the source data doesn’t match | Correct the data type in your source file, or adjust the mapping |
| Possible duplicates | Two or more rows appear to describe the same Product or Item | Confirm whether this is intentional, or remove/merge the duplicate rows |
Where possible, you can fix simple issues directly on the Validation screen without leaving the run. For larger data-quality problems, it’s usually faster to correct the source file and start a new run.
Click Continue to Create once all required issues are resolved. (Warnings that don’t block creation are shown but won’t stop you from proceeding.)
Before anything is written to your catalog, the Assistant shows a confirmation screen summarizing:
Review this summary carefully — it’s your last chance to catch something before records are created. When you’re ready, click Confirm and Create. You can also Cancel to return to Mapping or Validation without creating anything.
After the run completes, the Results screen shows:
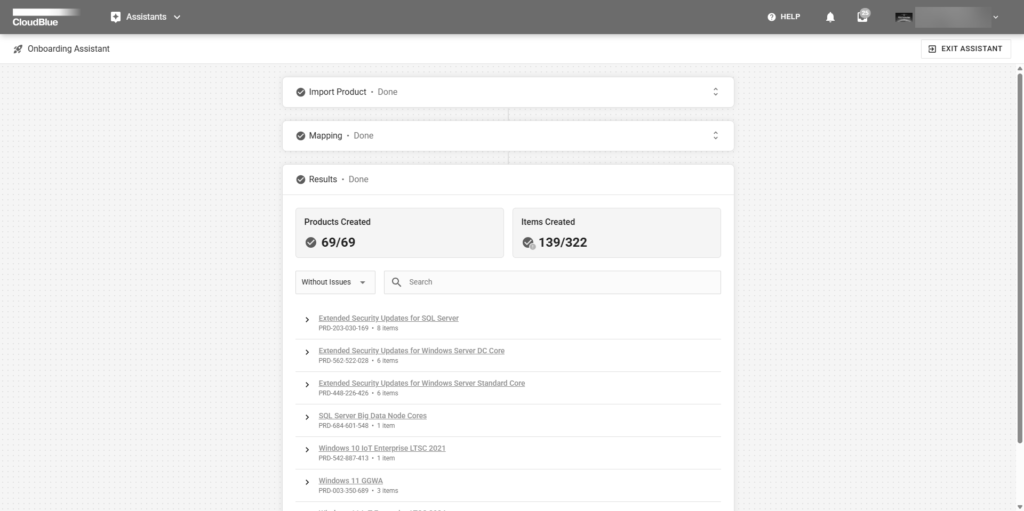
You can download the full run report for your records at any time. Every run — successful or not — is saved to Run History, where you can revisit the mapping, validation results, and outcome later, or use a past run as a reference when onboarding an updated catalog.